Once the OWDs have been established, you can use a role hierarchy to ensure that managers can view and edit the same records as their line reports (or subordinates). Users at any given role level are always able to view, edit, and report on all data owned by or shared with users below them in the hierarchy unless the OWD settings specify that you can ignore the hierarchies.
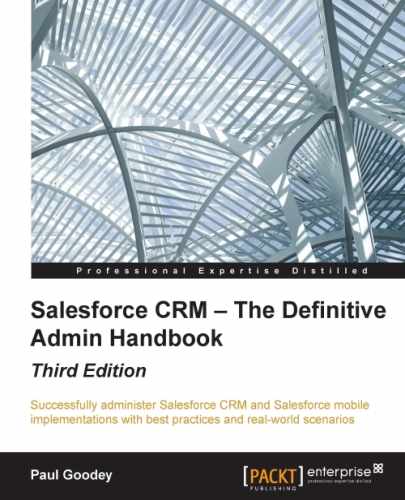
To view and manage your organization's role hierarchy, navigate to Setup | Manage Users | Roles, as shown in the following screenshot:
Here, you can choose to view the hierarchy in one of the following options.
The Show in tree view option displays a visual representation of the parent-child relationships between your roles. Click on Expand All to see all roles or on Collapse All to see only top-level roles. To expand or collapse an individual role node, you can click on the plus [+] or minus [-] icon, as shown in the preceding screenshot.
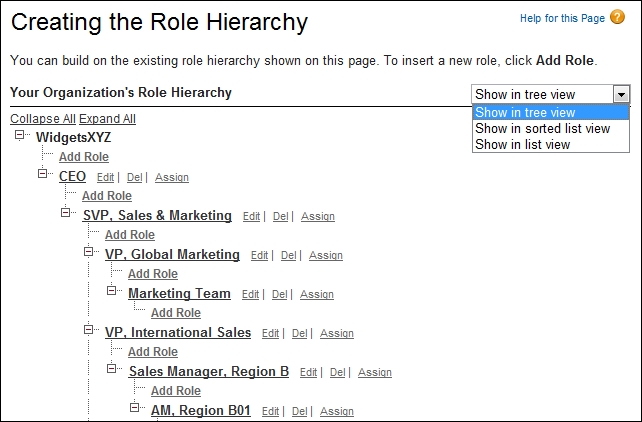
The Show in sorted list view option displays the roles as a list that you can sort alphabetically by role name, parent role (Reports to), or Report Display Name. If your organization has a large number of roles, this view provides a far easier way to navigate the hierarchy, as shown in the following screenshot:
To show a filtered list of roles, select a predefined list from the View drop-down list, or click on Create New View to define your own custom view of roles. To edit or delete any view you have created, select it from the View drop-down list and click on the Edit link. Once you're on the Edit View page, you can click on the Delete button to delete the list view.
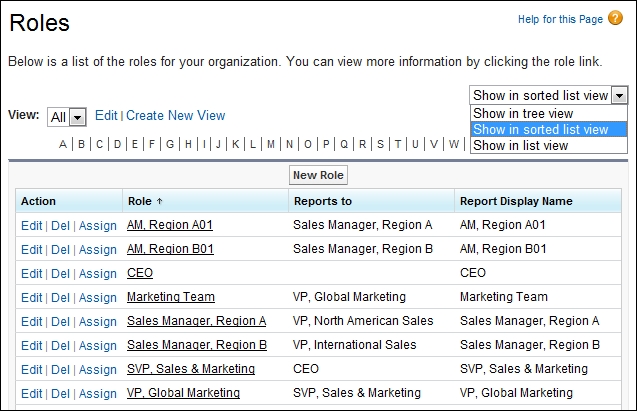
The Show in list view option displays the roles as an indented list of roles and their child nodes, grouped alphabetically by the name of the top-level role as follows:
To create a role, click on New Role or Add Role, depending on whether your view of roles is using the list view or tree view, and enter the role fields as required.
To edit a role, click on Edit next to a role name, and then update the role fields as required. You can delete a role by clicking on Del next to the role name.
To assign other users to a role, click on Assign next to the role name and to view detailed information about a role, click on the role name.
Role hierarchies do not need to represent your company's organization chart; instead, each role in the hierarchy should be considered as a level of data access that your users or groups in Salesforce require.
Depending on your sharing settings, roles can control the level of visibility that users have into your organization's data. Users at a particular role level can view, edit, and report on all data that is owned by, or has been shared with, users below them in the hierarchy. This is assuming your organization's sharing mechanism for that object type does not specify otherwise.
Specifically, in the OWDs related list, if the Grant Access Using Hierarchies option is disabled for, say, a custom object, only then can the record owner and users who are granted access by the OWDs access that custom object's records.
Although it is possible to create a user record without a role, users would need to be assigned to a role so that their records will appear in opportunity reports, forecast roll-ups, and any other displays based on roles.
Users who are to have access to all records in Salesforce CRM should be set at the top-most position of the role hierarchy.
When you change a user's role, any relevant sharing rules are reevaluated to add or remove access to records as required.
To view detailed information about a role, navigate to Setup | Manage Users | Roles. Clicking on the role name will present the role details page, as shown in the following screenshot:
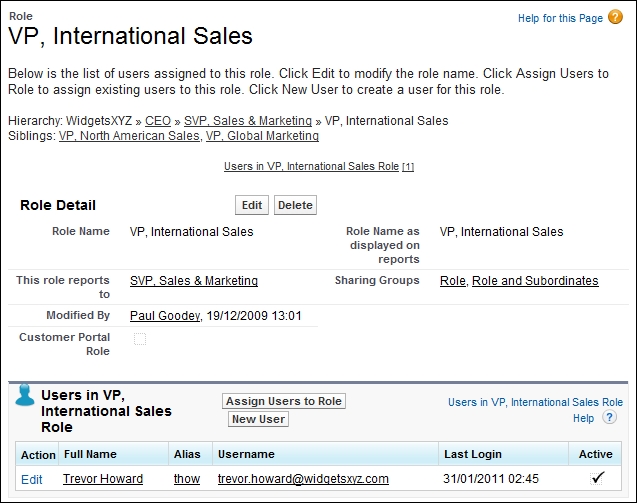
To view the Role Detail page for a parent or sibling role, click on the role name in the hierarchy or siblings list.
To edit the role details, click on Edit.
To remove the role from the hierarchy, click on Delete.
Within the Users, in Role related list, you have the following options:
- Assign a user to the role by clicking on Assign Users to Role
- Add a user to your organization by clicking on New User
- Modify the user information by clicking on Edit next to a user's name
- View a user's details by clicking on the user's Full Name, Alias, or Username
Note
When you edit roles, sharing rules are usually automatically reevaluated to add or remove access to records as required. If these changes result in too many records changing at once, a message appears, warning that the sharing rules will not be automatically reevaluated and that you have to manually recalculate them (as shown further). Sharing rules should be used when a user or group of users needs access to records not already granted to it with either the role hierarchy setup or the OWD settings.
When you modify users in a role, any sharing rules are also reevaluated to add or remove access as required.