In the previous chapter, we looked at how we can set the required field and auto number field properties on custom fields to help improve the quality and maintain the data integrity of records in the system.
Salesforce also provides other data validation mechanisms, such as the following:
- Data validation rules
- Dependent picklists
Data validation rules can be applied to both custom and standard fields and are used to verify that the data entered in a record meets the criteria you have specified before the record can be saved.
Validation rules contain a formula or expression that evaluates the data in one or more fields and returns a value of either true or false.
The logic that is used for validation rules is to seek an error condition, upon which a preconfigured error message is shown to the user whenever the formula or expression returns a value of true.
When validation rules are defined for a field or set of fields, the following actions are fired when the user creates a new record or edits an existing record and then clicks on the Save button:
- Salesforce executes the validation rules, and only if all data is valid is the record then saved.
- For any invalid data, Salesforce displays the associated error message without saving the record.
You can specify the error message to be displayed when a validation rule gets fired with the option to show the error message inline next to a field firing the validation rule. You can also specify where to display it. For example, your error message can be The close date must occur after today's date. You can choose to display it near a field or at the top of the page. Like all other Salesforce error messages, validation rule errors are displayed in red text and are preceded by the word Error.
Validation rules apply to all new and updated records for an object.
If your organization has multiple page layouts for the object on which you create a validation rule, you should verify that the validation rule operates as expected on each layout. Also, if you have any data integrations that affect the object, then you should also verify that the validation rule operates as intended.
To begin using validation rules, navigate to Setup | Customize.
For standard objects, go to the appropriate activity, standard object, or the user's link from the menu, and click on Validation Rules.
For custom objects, navigate to Setup | Create | Objects. Now, go to the custom object.
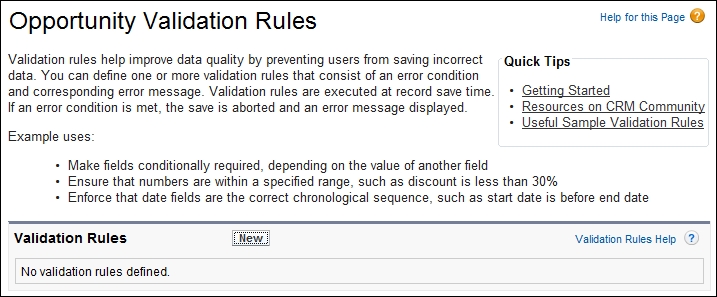
As shown, to begin adding a new validation rule, click on the New button in the Validation Rules section, as shown in the following screenshot:
Now, enter the properties of your validation rule that should include the properties detailed in the upcoming sections.
Add a Rule Name, which is a unique identifier of up to 80 characters with no spaces or special characters such as extended characters.
The Active checkbox that is used to set that the rule is enabled.
Fill in the Description field ,which is an optional 255 character or less textbox that you can set to describe the purpose of the validation rule.
The Error Message field is the text to be displayed to the user when a record update fails the validation rule.
Error Location is used to determine where on the page the error is displayed to the user. The options that are available are:
- Top of Page
- Field
The Top of Page option sets the error message to be displayed at the top of the page. To display the error next to a field, choose the Field option and then select the appropriate field.
If the error location is a field, the validation rule is also listed on the Detail page of that field.
You can click on Check Syntax to check your formula for errors and finally, click on Save to finish or Save & New to create additional validation rules.
As an example, the following formula text shows you an opportunity validation rule to ensure that users cannot enter a date in the past into the Close Date field.
The formula would be CloseDate < TODAY()
An example error message for this validation rule is Close Date Must Be a Future Date.
Dependent picklists help make data more accurate and consistent by applying filters.
A dependent field works in conjunction with a controlling field to filter its values. The value chosen in the controlling field affects the values in the dependent field.
In the following screenshot, we see the Speaker Status field being controlled by the Speaker Event Status field:
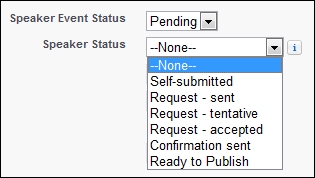
Dependent and controlling picklists work in conjunction where the value chosen in the controlling picklist dynamically changes the values that are available in the dependent picklist.
Both controlling and dependent picklists are indicated on the edit pages by an icon. By hovering the mouse over these icons, users can see the name of the controlling or dependent picklist.
To define a dependent picklist, navigate to the field's area of the appropriate object.
For standard objects, navigate to Setup | Customize. Now, select the appropriate object from the Customize menu and click on Fields.
For custom objects, navigate to Setup | Create | Objects. Now, select one of the custom objects in the list.
For custom task and event fields, navigate to Setup | Customize | Activities | Activity Custom Fields.
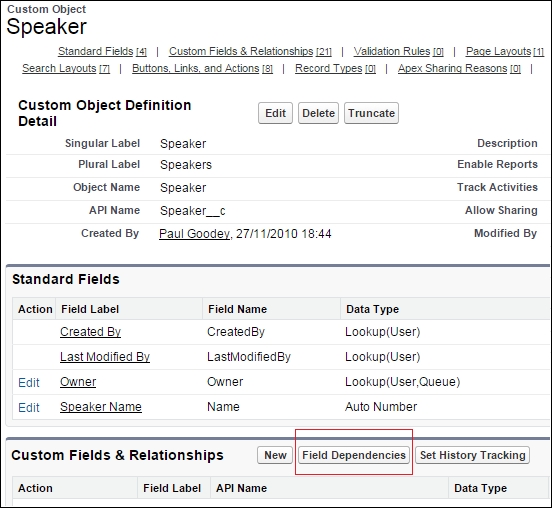
Now, click on Field Dependencies in the Custom Fields & Relationships section, as shown in the following screenshot:
Now, click on New to navigate to the New Field Dependency screen and then choose Controlling Field and Dependent Field, as shown in the following screenshot:
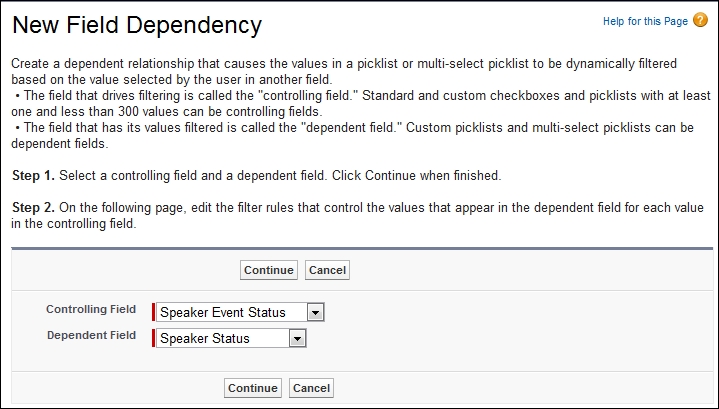
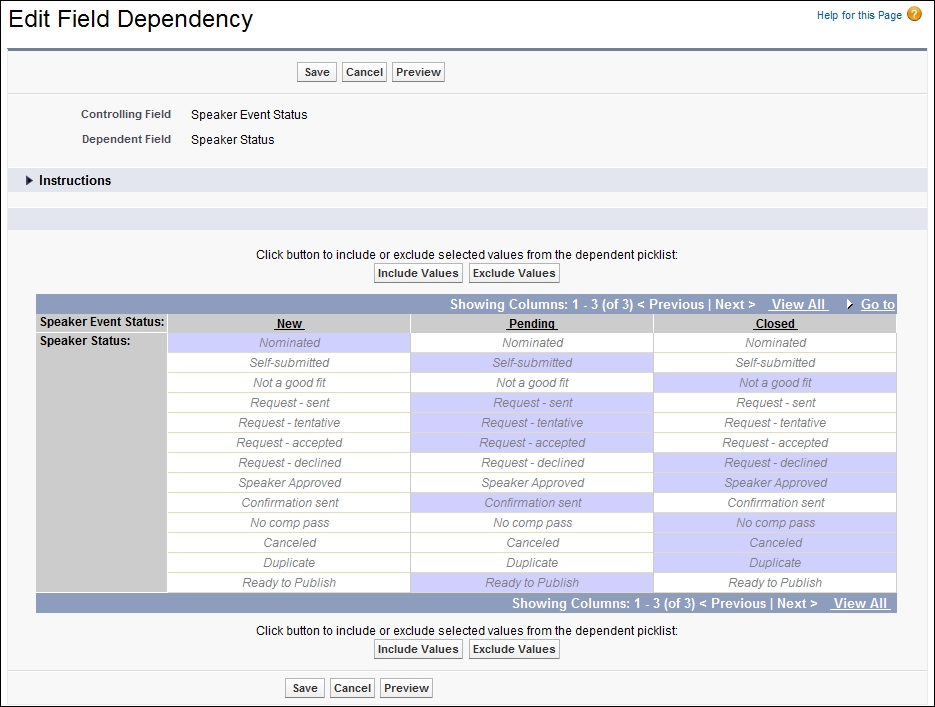
Click on Continue to display the next screen where you are presented with a field dependency matrix to specify the dependent picklist values that are available when a user selects each controlling field value.
The field dependency matrix lets you specify the dependent picklist values that are available when a user selects each controlling field value. The top row of the matrix shows you the controlling field values while the columns show you the dependent field values.
Using this matrix, you can include or exclude values. Included values are available in the dependent picklist when a value in the controlling field is selected and excluded fields are not available.
Here, you can include or exclude values by performing the following steps:
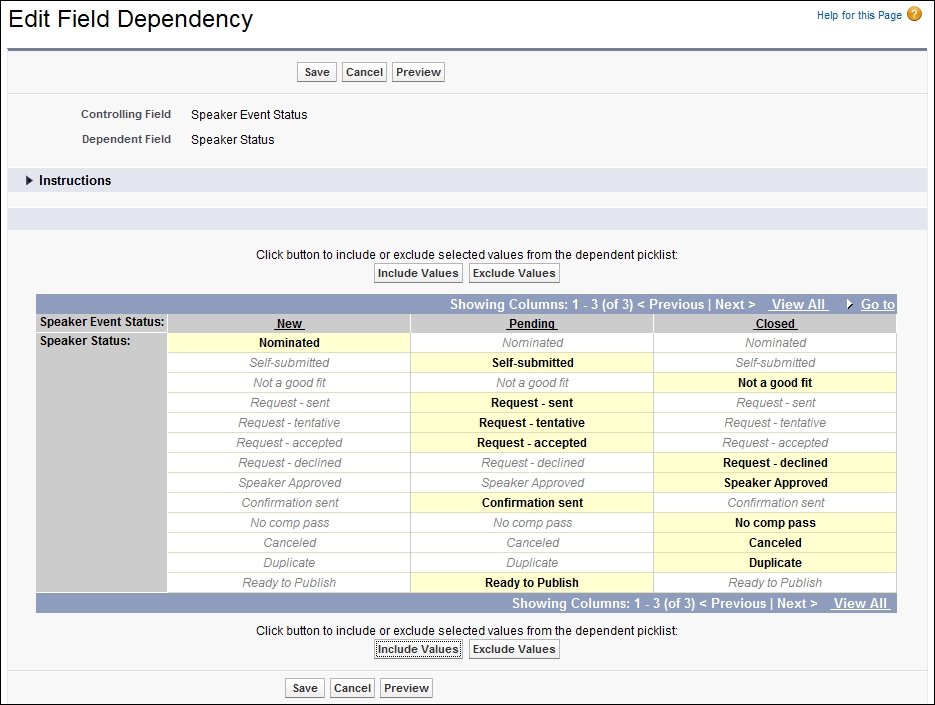
- Double-click on values to include them. The included values are then indicated with a highlight. (Double-clicking again on any highlighted values will exclude them).
- To work with more than one value, you should use the Shift key and click on each value to select the required range of values, as shown in the following screenshot:
- After selecting the values, click on Include Values to make the values available, or click on Exclude Values to remove them from the list of available values.
You can also use the Ctrl key and then click on the individual values to select multiple values. Again, clicking on Include Values makes the values available, or clicking on Exclude Values removes them from the list of available values. By clicking on a column header, you can select all the values in that column as follows:
To change the values in your view, you can:
- Click on View All to view all available values at once
- Click on Go To and choose a controlling value to view all the dependent values in that column
- Click on Previous or Next to view the values in columns that are on the previous or next page
- Click on View sets of 5 to view five columns at a time
Now, optionally, click on Preview to test your selections and then click on Save.
There are various restrictions associated with the creation and configuration of dependent and controlling picklist fields that should be considered.
The following are the dependent picklist considerations:
The following restrictions should be considered for controlling fields:
The following restrictions should be considered for dependent fields:
Standard picklist fields cannot be defined as a dependent list. They can only be set up as a controlling field.
When converting existing fields to dependent picklists or controlling fields, this can be done without affecting the existing values in records. Only for changes going forward are the dependency rules applied to the updates to existing records or new records.
Field-level security settings for a controlling field and the dependent picklist are completely independent. Therefore, you must manually hide a controlling field whenever its related dependent picklist is hidden.
For best practice and improved user visibility, make sure the dependent picklist is lower on the page layout than its controlling field.
If a dependent picklist is required and no values are available for it based on the controlling field value, users can save the record without entering a value. In this scenario, the record is saved with no value for that field.
The values in controlling fields are determined by the preselected record type and the values in dependent picklists are determined by both the record type and the selected controlling field value.
The values available in dependent picklists are, therefore, an intersection of the preselected record type and the subsequent controlling field selection.