
Hour 2. Installing the Development Tools
What You’ll Learn in This Hour
• Installing the Java Development Kit
• Installing the Development Environment
• Using the Android SDK Manager
If you are an experienced developer, you may want to skip this hour because it is designed to assist a beginner with the development tools. This hour explains what is needed for Android development using either Eclipse or NetBeans (though we focus more on Eclipse in this book).
The Android SDK can be challenging to set up for someone who is not familiar with these development tools. We go over the steps in this hour to get your development environment installed configured for the Android SDK. This might seem like a no-brainer task, but the Android SDK is famously difficult to set up for the first time! We’re going to take it one step at a time, with plenty of figures to show each step, so that over the next two short hours you will be up and running with a working Android project. From there, we will dig into game programming on this great platform!
This hour will show you how to install the Java Development Kit (JDK) and the Android Software Development Kit (SDK). Experienced developers tend to dislike tutorials like this. But I think the JDK was designed with ease of use in mind, and even a complete beginner should be able to follow the directions in this hour to get the development tools installed. Although this might be very easy to an experienced developer, we are going to cover each step in these first few hours. If you have already installed the software, you may skip to the next hour. We take it extremely slow at first but then ramp up very quickly to subjects like 3D rendering with OpenGL ES 2.0 in no time!
Please understand that “complete beginner” here is used to refer to Java development and does not at all imply that one is not skilled with other tools and languages! Even a highly experienced programmer may find the install and configuration of the Android tools problematic.
Installing the JDK
The quickest way to get set up if you have never before installed the Java Development Kit (JDK) on your PC is to download the prepackaged combination of Java with NetBeans. The version we’re using in this book is Java SE 7, short for Java Standard Edition 7 (there is also an Enterprise Edition for developing server applications). If you prefer Eclipse, just get the JDK alone. I recommend Eclipse for Android development, mainly because this is the environment recommended by Google and used by the Android team.
There is a Java Development Kit (JDK) and a Java Runtime Environment (JRE). It is possible to install just the JRE for running Java applications and web-based applets on an end-user PC. But installing the JDK automatically includes the JRE, so if you have the JDK, you do not need to also install the JRE.
If you are using Java SE 6 or earlier, I recommend updating to Java SE 7 before doing any Android development. It will still work with SE 6, so if you’re committed to that version, that’s fine. I just find it helpful to use the latest version of software when it comes to development (including game programming).
You can install the JDK separately if you prefer. Perhaps you are an experienced programmer who has already installed the JDK? If that is the case, the steps will be slightly different, but the Android tools and settings should be similar in either IDE. If you are using NetBeans, be sure to also download the JDK plug-in for NetBeans. Again, Eclipse is the preferred IDE for Android development, officially supported by Google and the Android team. But, if you are a NetBeans user, you can use NetBeans with the Android SDK.
There are so many acronyms to remember! An integrated development environment, or IDE, is productivity software used to manage software projects, edit source code files, and build, debug, and run programs. An IDE is an all-in-one solution for software development.
The latest version of NetBeans at the time of this writing is 7.1. Eclipse is also free, and the latest version at the time of this writing is Helios Service Release 1. In either case, I recommend updating to the latest version of the IDE for best results.
Downloading the NetBeans Package
The download package is currently called Java SE 7 with NetBeans 7.1. A list of JDK versions is found at http://www.oracle.com/technetwork/java/javase. If you want to skip directly to the download page, it is located here: http://www.oracle.com/technetwork/java/javase/downloads.
On the download page, you should see the tab called Downloads shown in Figure 2.1. Click the NetBeans image to download the JDK with NetBeans. That’s perfect—exactly what you need!

Figure 2.1. Locating the NetBeans download link.
Websites are constantly in a state of change! If you are reading this long after the book’s publishing date, odds are the page will look quite different or may no longer even be online at the same location. Google is usually helpful at finding the “jdk with netbeans download” page for you.
Installing the Package
The installer begins with Figure 2.2. The versions (especially the update number) will likely have changed by the time you read this.

Figure 2.2. Preparing to install the JDK 7 Update 2 and NetBeans IDE 7.1.
The next dialog screen that comes up shows the license agreement, shown in Figure 2.3. If you accept the license agreement, highlight that option and proceed to the next step.

Figure 2.3. Accepting the license agreement.
The next dialog screen, shown in Figure 2.4, allows you to change the default install location for the JDK on the hard drive. I recommend leaving it at the default.

Figure 2.4. Choosing the install location for the JDK.
The next dialog screen, shown in Figure 2.5, enables you to change the default install location for NetBeans, including the JDK plug-in. Again, I recommend leaving these at their default values.

Figure 2.5. Choosing the install location for NetBeans.
Installing the Android SDK
Now that the JDK has been installed, you will be able to install the Android SDK. In actual practice, these do not need to be installed in this order. You could install the Android SDK first without incident. We have to manually configure NetBeans to use the Android SDK anyway, so the install order is not important. We also cover the brief install process for Eclipse later in this hour.
Downloading the SDK
First, if you haven’t already, you need to download the Android SDK. Browse to this URL to find the developer tools: http://developer.android.com. On this page are resources for Android developers. If you choose the SDK tab at the top, it will take you to the Android SDK download page located here: http://developer.android.com/sdk.
You might have noticed that Android SDK is not packaged for a specific OS version, such as 4.0 (Ice Cream Sandwich) or 4.1 (Jelly Bean). The Android SDK includes targets for all the versions of the Android OS. At the time of this writing, the latest SDK is version 1.6, and the Windows version is about 30MB. Not too bad for an SDK—they do tend to get pretty big. The DirectX SDK, for instance, weighs in at over 500MB, although a lot of that size is due to the examples. If you are using Mac OS X or Linux, versions of the SDK are also available for those platforms.
After downloading the Android SDK, we can begin going over the installer, starting with Figure 2.6.

Figure 2.6. Preparing to install the Android SDK.
Installing the SDK
The next dialog screen, shown in Figure 2.7, verifies the version of the JDK detected by the Android SDK installer. If you do not have the JDK installed, the Android SDK won’t be able to add itself to the classpath (the list of folders where Java libraries are found), among other things. So, it’s important to do this in the right order. If the JDK was not found, I recommend aborting this install and installing the JDK first.

Figure 2.7. Identifying the JDK before proceeding with the install.
The next dialog screen, shown in Figure 2.8, shows the default install folder for the Android SDK. You may change the folder if you like, but I recommend leaving it at the default.
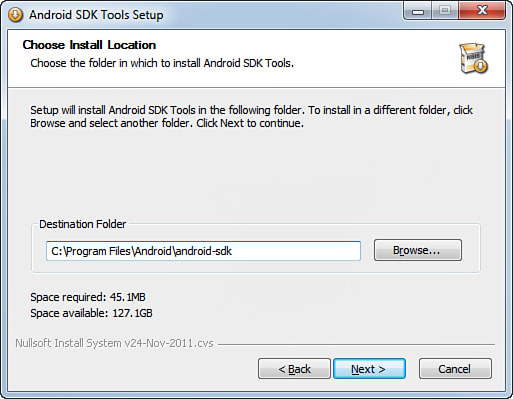
Figure 2.8. Choosing the install location.
Next, the install of the Android SDK begins. After a few minutes, if the install completed successfully, the dialog shown in Figure 2.9 comes up.

Figure 2.9. The Android SDK installation has completed.
Before closing, we want to recognize an option on the final dialog screen (see Figure 2.10). You do want to start the SDK Manager after the install finishes, so keep this option checked. This is an essential step—the Android SDK is not actually installed yet! All we have installed so far is the SDK Manager. If you miss this step, that’s okay--the SDK Manager can be found in the Start menu under Program Files (or All Programs if using a newer version of Windows).

Figure 2.10. Completing the install—starting the SDK Manager.
Running the Android SDK Manager
The Android SDK is a rather small install package because it just installs core files and the SDK Manager, which we will be using next to download and install specific SDK packages. Figure 2.11 shows the Android SDK Manager. Near the bottom of the dialog are two check boxes labeled Updates/New and Installed; they should both be checked.

Figure 2.11. Installing the Android SDK using the Android SDK Manager.
Some of the choices shown checked in this screen are optional, but it doesn’t hurt to include such options. At minimum, select Android 4.0.3 (API15). If you have installed a newer version (which is very possible), it may be a higher API number. Just focus on Android 4.0.x and check all items under it.
If you choose Android 4.1 (API 16), it’s possible you might not be able to run that code on a 4.0 device (unless it has the 4.1 update applied). Just something to keep in mind if you plan to test your code on a device using a USB connection—which is highly recommended for seeing actual performance of your game. The emulator can run 4.1 fine, but it should really only be used to verify that code runs on different devices; it is not a good choice for testing high-performance code.
Next, you might want to select all the Extras, which include Android Support package and others. Though not strictly required, some extra packages may be needed to deploy your game to the Android Market.
You do not need any earlier version of Android unless you plan to support older models. It’s very possible that you will need to do just that. If that is the case, you can always run the Android SDK Manager again to install additional SDKs.
Down at the lower right of the Android SDK Manager dialog is a button that should say something like Install 14 packages.... Click this button to continue. This will bring up the verification dialog shown in Figure 2.12: Choose Packages to Install.

Figure 2.12. Verifying the chosen packages to be installed.
The list shows all the packages to be installed. Check the Accept All option if it isn’t already checked, and then click the Install button to proceed. The Android SDK Manager screen will come up again and begin downloading and installing the chosen packages. If you opt to install 4.1 (SDK 16), then the list will appear as shown in Figure 2.13.

Figure 2.13. Perusing the list of SDKs including 4.1 Jelly Bean.
Installing the ADT Plug-in for Eclipse
Eclipse is the official IDE for Android development, supported by the Android development team. Although NetBeans is also supported via a third-party plug-in, it will not be as up to date as Eclipse because this is the tool of choice for the developers.
Let’s go over the steps to install the Eclipse plug-in for Android development, although it’s likely an experienced developer may have already done so. This is a lot easier to set up than NetBeans.
If you haven’t already downloaded and installed Eclipse, the web location for downloading the Eclipse IDE is here: http://www.eclipse.org/downloads.
Among the many versions of Eclipse listed, you will most likely want to download and install the one titled Eclipse IDE for Java Developers. The Eclipse Classic version also works but will need additional updates after installing. Be sure to get the Eclipse Helios release (version 3.6.2 or later).
ADT is short for Android Development Tools. This is the package you want to add Android support to Eclipse (in addition to the Android SDK). This is equivalent to NBAndroid for NetBeans.
Next, you need the ADT Plug-in for Eclipse. Open the Help menu and choose Install New Software.
A dialog for adding new updates and add-ons to Eclipse appears, as shown in Figure 2.14. Click the Add button at the upper right.

Figure 2.14. The Eclipse Software Install dialog.
A mini dialog with two text fields will come up, titled Add Repository. In the Name field, enter this: ADT Plugin. In the Location field, enter this: https://dl-ssl.google.com/android/eclipse/. The Add Repository dialog is shown in Figure 2.15.

Figure 2.15. The Add Repository dialog.
Eclipse uses the URL entered into the Add Repository dialog to search for any packages. The Install New Software dialog will now show the Developer Tools for Android, as shown in Figure 2.16.

Figure 2.16. Installing the Developer Tools for Android in Eclipse.
After these steps, the Android plug-in will be installed, along with any additional packages needed by Eclipse. Some of these packages might look familiar if you also installed NetBeans, but the packages are also needed separately by Eclipse because it has a different configuration from NetBeans.
Summary
I recommend you try both NetBeans and Eclipse with the full Android SDK working in both IDEs before ultimately deciding which one to use. Each has strengths and weaknesses, and it’s likely one or the other will appeal to you. It’s helpful to make this determination early on so you will be more productive as you delve into the inner workings of the Android’s game and graphics libraries! NetBeans is easier to use, in my opinion, but Eclipse has better features and official support from the Android development team. For a beginner, NetBeans is a better choice because it’s easier to use. NetBeans can open a folder as a project, whereas Eclipse has to import a workspace and tends to write workspace settings files without confirmation (leading to confusion for a beginner).
Q&A
Q. Eclipse and NetBeans have a comparable toolset for Java development. If you have spent any time with either IDE, what are your impressions? If you are new to both, what are your first impressions after using either IDE for the first time?
A. Answers will vary.
Q. There are a lot of steps required to get started doing Android development for the first time. But someone who is already programming in Java using either NetBeans or Eclipse might see the Android tools as a mere add-on. How do these open-source tools compare to comparable commercial software such as Visual Studio?
A. Answer will vary.
Workshop
Quiz
1. What is the name of the software that enables you to compile Java programs?
2. What is the name of the Android development library?
3. What is the official IDE for Android development?
Answers
1. Java Development Kit (JDK)
2. Android SDK
3. Eclipse
Activities
• After installing your preferred IDE, go through the steps to update the software to the latest versions (either Eclipse or NetBeans, as the case may be). This will prepare you for the serious development work coming up in future hours.