
Hour 4. Creating Your First Android Program
What You’ll Learn in This Hour
• Creating a new Android project
• Configuring the NBAndroid plug-in for NetBeans
• Compiling and running programs in the emulator
• Writing a “Hello, Android!” program
• Comparing the Emulator to an Android Device
In this hour you will write your first Android program. The previous hours should have helped you get your NetBeans and Eclipse development environments up and running with the Android SDK. You should have also used the Android Virtual Device Manager to create an Android emulator device. Now it’s time to write some code. Finally! In this hour, you learn how to build and run an Android program, targeting both the emulator and a physical Android device. Because NetBeans is more difficult to use than Eclipse, this hour spends a little extra time on that IDE, whereas Eclipse is already configured (as per the previous hour) and requires no extra steps.
Creating a New Android Project
Open the File menu in NetBeans and choose New Project or use the New Project icon on the toolbar as shown in Figure 4.1.

Figure 4.1. Preparing to create a new project in NetBeans.
The New Project dialog appears, as shown in Figure 4.2. In the Categories list, you should see Android as one of the options. Select it. On the right pane you should see the Android projects available via the NBAndroid plug-in that you installed in Hour 3, “Configuring NetBeans and Eclipse with the Android SDK.” Choose Android Project and click Next.

Figure 4.2. The New Project dialog with the Android category selected.
The New Android Application dialog, shown in Figure 4.3, is rather complex with a lot of fields. First, enter a new name using the Project Name field. Next, choose the Project Location using the Browse button. Then, if it isn’t checked already, check Set as Main Project.

Figure 4.3. The New Android Application dialog.
Before continuing with the new project, we have to configure the NBAndroid plug-in. This is very easy and we’ll do it next.
Configuring the NBAndroid Plug-in
Click the Manage Android SDK button to bring up the Options dialog (Figure 4.4). If the SDK location is not already filled in, you will need to tell the NBAndroid plug-in where the Android SDK is located on your hard drive. The default location under Windows is shown in the figure: C:Program FilesAndroidandroid-sdk. It will look a bit different if you are using the Mac OS X or Linux version of NetBeans. After browsing for the Android SDK location, click OK to close this dialog and save the setting. This returns you to the New Android Application dialog.

Figure 4.4. The NBAndroid plug-in option is found under the Android tab.
When you return to the New Android Application dialog, shown in Figure 4.5, note that the Target Platform table has two entries, one of which is the all-important Android 4.0.3 item. The NBAndroid plug-in found and added these SDKs to its list. If you see more than just the few items shown here, which is very likely on some development PCs, be sure to look for the Android item and not one of the others (such as one of the Google APIs).

Figure 4.5. The SDKs have been added to the Target Platform table.
Completing the New Project Settings
If desired, change the name of the project to something other than AndroidApplication1.
If you haven’t already, select the Android 4.0.x target in the Target Platform table. This tells the plug-in which SDK to use when compiling your Android code.
Enter a value into both the Package Name and Activity Name fields. MainActivity is usually filled in to the Activity Name field for you, so you need to choose only a package name.
The package name must contain at least two words separated by a period. For example: john.doe. But it’s better to use the program name along with another word that identifies you as the developer. For example, I entered jharbour.android.HelloAndroid.
The package name does not need to be complicated—just unique. If you will never be deploying your program to the Android Market, then the name isn’t important at all, and you can use any name that fits the format. Just note, however, that you can have only one app installed on your Android device using that unique name (including the emulator), and the package name is the internal app name. For example, if you use the same name for all your test projects (while working through this book), that is the only app you will see on the device (or emulator), which will be replaced each time you build and deploy the project.
When complete, your project properties might resemble that shown in Figure 4.6, for example.

Figure 4.6. Entering values into the new project’s property fields.
The process for creating a new project in Eclipse is so similar to the process in NetBeans that we’ll forgo a duplicate tutorial. Eclipse tends to be easier to use. The tutorials in these first four hours should help you get up to speed in whichever IDE you are using. In later hours, we will be using Eclipse exclusively. Our early emphasis on NetBeans (the more difficult to use IDE) is for the benefit of a reader using either one.
Building the New Project
We’re going to do a quick test build and run the new project to see if the Android SDK is working in NetBeans. You can use the hammer icon on the toolbar to compile the project or use Run, Build Project, shown in Figure 4.7.

Figure 4.7. Using the Run, Build Project menu option for a quick test build.
Opening the Output Window
It’s hard to tell whether the code compiled successfully without seeing the progress of the compiler. At the bottom of NetBeans, a progress bar and status message will display the progress of the compile, but I find this inadequate. I prefer to see what the compiler is doing. To view the output window, open the Window menu and choose Output, Output, as shown in Figure 4.8.

Figure 4.8. Opening the Output window to see the build progress.
The Output window appears. At the bottom in green text is the message BUILD SUCCESSFUL. That’s what I like to see—details! Also, at this time, if you want to see the source code, look in the Project Manager (upper left), and expand Source Packages, your package name, MainActivity.java. Double-click the file to open it in the editor, as shown in Figure 4.9.

Figure 4.9. The Output window shows the steps taken by the compiler to build the project.
Running the Program in the Emulator
You do not absolutely have to build first before running the program. You can just press the little green arrow icon on the toolbar to run the program. If it needs to be compiled first (based on file save time), it will compile first. Another way to run the program is by opening the Run menu and choosing Run Project, as shown in Figure 4.10.

Figure 4.10. Using the Run, Run Project menu option to run the program.
You should have created an emulator device using the AVD Manager back in Hour 3, “Configuring NetBeans and Eclipse with the Android SDK.” If you skipped that step, now might be a good time to return to that hour to learn about the options available in the Android emulator.
If the emulator is not already running, the dialog shown in Figure 4.11 appears, showing no running devices and one device in the bottom list.

Figure 4.11. Choosing the emulator target for the program.
The emulator takes a very long time to start up! You will want to keep the emulator running while working on your Android code. After the emulator is running, you don’t need to wait for it to start up every time you compile and run your programs. If the emulator is already running, you can select it from the upper list, shown in Figure 4.12.

Figure 4.12. Selecting an emulator device that is already running.
When running a new instance of the emulator, the OS is loaded, which takes an unpleasantly long time (Figure 4.13). For this reason, you should be sure to keep the emulator window running while doing your programming. After it is loaded, the emulator responds quickly to the Run command.

Figure 4.13. New instances of the emulator start up rather slowly.
The OS also starts up just like a physical Android 4.0 device, including the startup lock (Figure 4.14). Slide the lock to the right to unlock the device before attempting to run your program, or the emulator won’t run it (because it’s locked!).

Figure 4.14. The Android screen starts in locked mode.
Although we asked NetBeans to run the project and then waited for the emulator to start up, it does not proceed to run after the startup process is over some time later (see Figure 4.15). This happens because NetBeans launches the run command and does not wait for a response—it just goes back into normal editing mode.

Figure 4.15. The Android home screen.
After reaching the Android home screen, you will need to rerun the project again. The result is shown in Figure 4.16. This program doesn’t have any functional code yet, so all we see is the blank program screen come up with the title at the top.

Figure 4.16. This program doesn’t do anything yet, but it does run!
Editing the “Hello, Android!” Program
Modify the source code for the program so that it looks like Figure 4.17. Do you see the new import line? It imports the android.widget library, which contains user interface controls like TextView. This isn’t game programming with a pixel buffer by any means, but we have to start somewhere, and this is an easy way to test the tools and SDKs.

Figure 4.17. The newly modified “Hello, Android!” program.
package jharbour.android.HelloAndroid;
import android.app.Activity;
import android.os.Bundle;
import android.widget.*;
public class MainActivity extends Activity
{
/** Called when the activity is first created. */
@Override
public void onCreate(Bundle savedInstanceState)
{
super.onCreate(savedInstanceState);
TextView tv = new TextView(this);
tv.setText("Hello, Android!");
setContentView(tv);
}
}
Now, go ahead and build the project again (hammer icon). You can just run it without building if you prefer, but it would be helpful to get familiar with both the build and run options in NetBeans. The build icon on the toolbar looks like a hammer. The run icon on the toolbar looks like a green arrow. It is helpful to build first while getting familiar with a new editor and compiler.
Try clicking the hammer icon to build the project.
If you see the message “BUILD SUCCESSFUL” at the bottom of the Output window, you will know the program compiled and is ready to run.
Press the run icon (green arrow) to launch the program. But, before doing this, open the emulator to make sure it is ready to run. The Android OS will go to sleep if you leave it alone too long. Running the program produces the result shown in Figure 4.18. It’s not too different from the previous run, except for this change:

Figure 4.18. The program will print a text message using a TextView widget.
Hello World, MainActivity
has been replaced with
Hello, Android!
The difference between the two lines of output is not important. What matters is that our program runs! It has taken quite a few steps to get the Android SDK set up with NetBeans correctly, so this is verification. What’s next? Now we can begin pursuing game programming topics like graphics and user input.
To close a program without shutting down the emulator, click the small Return soft button at the bottom of the Android screen (the one that looks like a curved arrow).
Comparing the Emulator to an Android Device
The emulator allows you to test your programs on different variations of the Android OS and different screen resolutions, but limitations exist to the emulator (formally known as Android Virtual Device, or AVD). The emulator is sluggish even on high-end development PCs. At this time, a high-end machine will have something like a 6-core processor (or two such processors on a server motherboard) and 8GB or more of RAM. An AVD is usually configured with 512MB or 1GB of RAM. Figure 4.19 shows the AVD configuration dialog (note the Device RAM Size field at the bottom of the Hardware list). By the way, 512MB is not enough RAM for an AVD using WSVGA mode (1024×600). With this much RAM, the emulator will be unstable and pop up error messages; 1GB of RAM is a better choice when using HD resolutions.

Figure 4.19. Changing the device RAM size setting for an AVD.
AVD Limitations
The Android SDK documentation makes this suggestion: “When building a mobile application, it’s important that you always test your application on a real device before releasing it to users.” This is self-evident after using the emulator for a while. Figure 4.20 shows an AVD simulating a WSVGA (1024×600) device—a low-resolution Android Tablet device. The HD tablet screen is called WXGA800 (1280×800).

Figure 4.20. This AVD emulator simulates the WSVGA screen (1024×600) of a tablet.
It’s interesting that 1280×800 is a multiple of 320×200, a very old MS-DOS video game resolution that was commonly used in games back in the 1990s.
An AVD is helpful for quick tests of appearance but woefully slow for serious long-term application or game development. In short, it will be very frustrating to use for very long if you haven’t noticed already. If you are an indie developer, one Android device will serve you well for debugging and testing your code. If your project has some good funding, it will be useful to test your builds on several target devices. In other words, the AVD emulator is a limited support tool, not intended to be used full-time for serious development.
Installing the Android Debug Bridge Device Driver
To run your code on a physical Android device, you will need to install a device driver called Android Debug Bridge, or ADB. This driver is more than just a USB device driver—by plugging your Android device into your system, it should come up as a generic memory device, where you can peruse the file system. The special ADB driver allows your system to support code debugging on the device.
By plugging the device into your system via USB, you expose the file system. This is one way that some Android users are able to gain administrator access to their devices, which is one step toward replacing the core Android OS with a new version. By rooting your Android, you usually lose support from the manufacturer for software updates and may not be able to access the Google Play (Android Market) system.
You can choose from many Android devices in the market for development. But be aware of the version of the Android OS some devices use because some cannot be upgraded. It is possible to “root” most Android devices, but by doing so you lose access to the manufacturer’s support updates and possibly the Android Market as well (apps, games, and media available for sale). Rooting is fun for experimentation, but I prefer to have an unmodified Android device that more closely mirrors the experience the end user will have with my games.
If you are using Mac OS X or Linux for your Android development, go to this web page for instructions on configuring the system: http://developer.android.com/guide/developing/device.html.
First, to run code on a physical Android device (not the emulator), you must enable USB debugging on the device. This is done in the Settings on your Android Device. Go into Settings, Developer options. From here, enable the USB debugging option, shown in Figure 4.21. When you do this, your development system should detect the new device and attempt to install a driver.

Figure 4.21. Enabling USB debugging on the Android device.
Usually, on the PC side, the driver install will fail, so you will need to download a driver for it to work. Go to this web page to download the USB debug device driver: http://developer.android.com/sdk/oem-usb.html. Here are the steps for installing the USB driver for debugging under Windows 7.
1. Connect your Android device to the PC using a USB cable.
2. Right-click Computer on the desktop and select Manage.
3. Select Device Manager in the left pane.
4. Locate and expand Other Devices in the right pane.
5. Right-click the device name, such as AT1S0 (for a Toshiba) or Nexus S (for a Samsung), and select Update Driver Software, as shown in Figure 4.22.

Figure 4.22. Updating the USB device driver for Android device debugging.
6. The Update Driver Software dialog will come up.
7. Select Browse my computer for driver software and click Next.
8. Click Browse and locate the USB driver folder. The Google USB Driver is located in <sdk>extrasgoogleusb_driver. From here, choose either amd64 or i386, as needed.
9. Click OK and then Next to install the driver.
If these steps fail, you will want to locate the USB “ADB” driver for your specific Android device, and Google search will likely help. After completing the device driver install, the Android device will show up in the Device Manager, as shown in Figure 4.23.

Figure 4.23. The Android device ADB driver has been installed.
Running Code on an Android Device
After you have your Android device connected to your development system, you can run code on the ADB. We’ll use the example created earlier in the hour.
To run a program on your Android device, it must be built with the same version of the Android OS. Some devices support Android 4.0 or 4.1, and some do not. Some devices can be upgraded, and some cannot. The majority of the game code you are learning about in this book will also run on older Android OS devices, so it’s not absolutely essential to create projects targeting SDK 4 (ICS or Jelly Bean or later). To maximize sales potential, you really do want to support older devices whenever possible. Although the OS features have improved since 3.2, the core SDK features we’re concerned about for a video game have not undergone significant changes. So, you should be able to target 3.2, 4.0, 4,1, or later—although it may not be realistic to try to support versions prior to 3.2.
For the example in this hour, I have a Toshiba Thrive 7″ tablet running OS 4.0.4. If you refer back to Hour 1 and the section titled “History of the Platform,” you will find that this version was known by the name of Ice Cream Sandwich. The previous version was called Honeycomb. It is a good idea to support these older OSs! Fortunately, the larger Android device manufacturers are releasing updates to their older models fairly consistently now. So, for instance, while the Toshiba Thrive used for testing this book’s examples originally shipped with 3.2 Honeycomb, it was updated to 4.0 Ice Cream Sandwich with a Toshiba update.
The very popular Amazon Kindle Fire runs Android 2.1 Eclair. That’s pretty dated for a device launched in the fourth quarter of 2011. But Amazon has sold millions of these Kindle Fire devices, and those are millions of potential customers for your games. And just to show how quickly this platform is evolving, the newer Kindle Fire HD already ships with 4.0 ICS—not even a year after the first Kindle Fire hit the market. It is because of this rapid evolution that developers tend to use the code names rather than version numbers (Honeycomb, Ice Cream Sandwich, and so on).
So, let’s test this “Hello, Android!” example on the Toshiba Thrive running 4.0 ICS. To change the target for a project in Eclipse, right-click the project name in Package Explorer and choose Properties. This brings up the dialog shown in Figure 4.24.

Figure 4.24. Changing the target Android OS version for a project in Eclipse.
Select the Android option from the list of property groups on the left to show the Android options. Here you can see that 3.2 Honeycomb and 4.0 Ice Cream Sandwich are available. You can install these two and more if you want to target additional devices. If your code uses new features in a later version of the OS, be prepared to deal with any changes to get your code to compile on older versions. Fortunately, Android is only a scant three years old at the time of this writing, so compatibility is not a big issue (yet).
If you want to target multiple Android versions (a good idea!), use the Android SDK Manager to download additional versions of the SDK to target each version.
Assuming the project is configured to build with an SDK that matches the OS on the target, you can run the project on the device. The Run command in Eclipse brings up the Android Device Chooser dialog shown in Figure 4.25. If you run into an API-level error, you can change the API level in the manifest file (AndroidManifest.xml).

Figure 4.25. Choosing a run target with the Android Device Chooser dialog.
The sample program is shown running on the physical Android device in Figure 4.26.
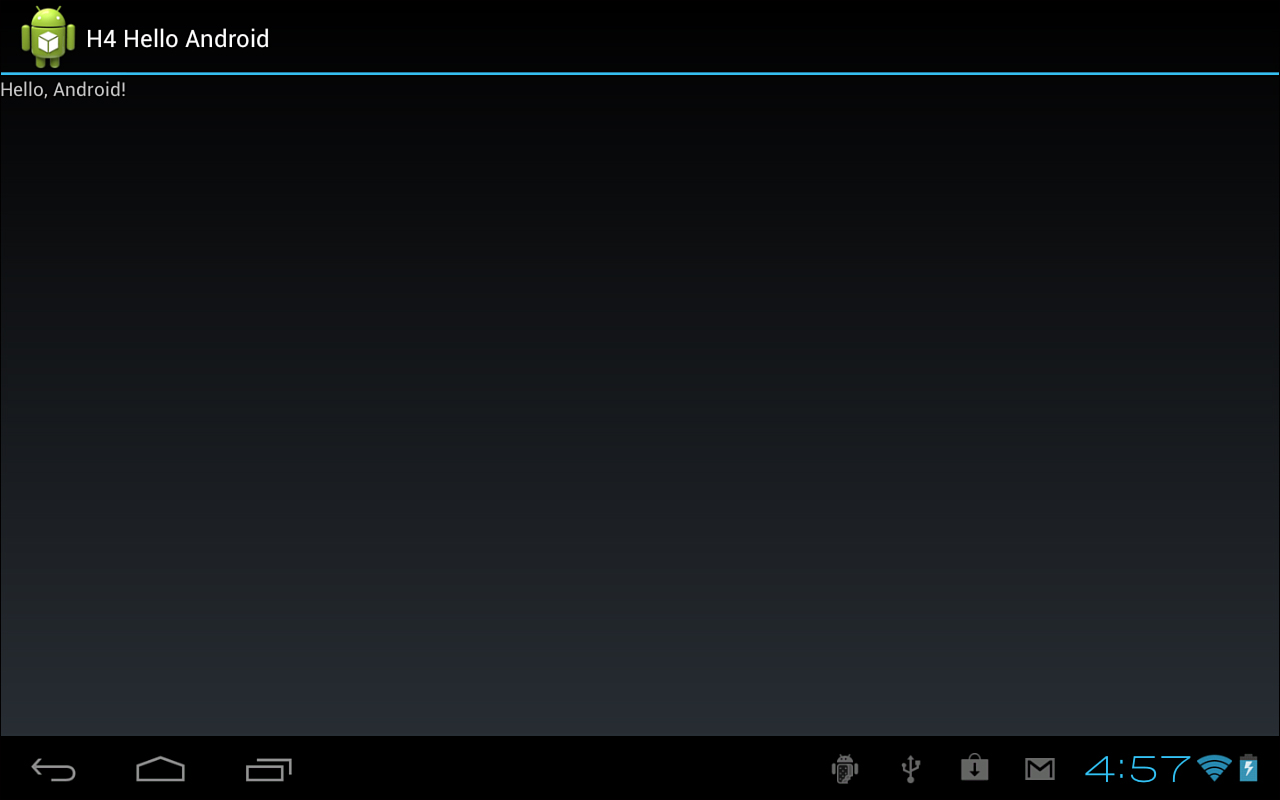
Figure 4.26. The sample program is now running on an Android device.
If you want to get screenshots from your Android device, look in the Android SDK install folder (usually in C:Program Filesandroidandroid-sdk on Windows systems) for a folder called tools, within which is a program called Dalvik Debug Monitor. Launch it by running the ddms.bat batch file. Use the Device menu or press Ctrl+S to take a screenshot. Or from within Eclipse, use the DDMS Perspective to gain access to the device.
Summary
Installing and configuring the tools to build Android code was quite a challenge. Admittedly, it goes much faster if you’re a regular user of NetBeans and already have the JDK installed. Just adding the Android SDK and NBAndroid plug-in is fairly quick if that is the case. Now you have a fully working development environment and can proceed to the next hour to start writing game code!
You have learned how to create new Android projects in both NetBeans and Eclipse. It is helpful to point out features and differences between these two comparable Android development tools, but for the sake of consistency, upcoming hours will feature NetBeans as our tool of choice.
Q&A
Q. When developing an app or game for sale, can you get by with the emulator, or should you test your code on an actual Android device? Discuss reasons for or against.
A. Answers will vary.
Q. Because there are so many devices in circulation running various versions of the Android OS, what approach should you take regarding compatibility?
A. Answers will vary.
Workshop
Quiz
1. What is the name of the program used to manage the Android emulator?
2. What is the base class for every Android program?
3. What software makes it possible to run programs on an Android device via USB?
Answers
1. AVD Manager
2. Activity
3. Android Device Bridge (ADB)
Activities
• Did you save the URL to the Android SDK documentation? If not, do a Google search to locate the most up-to-date location. Look for the list of version changes made with each new version of the SDK, from 1 to 18 (the latest version at the time of this writing). Are there significant differences among the versions from 13 on up to the latest? (13 targeted Honeycomb). Consider what would be a good target for you to use in your projects.