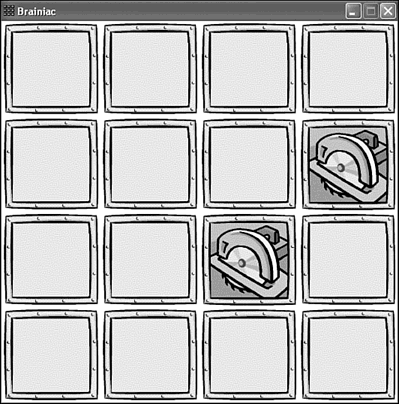
What good is a game book without any games? I have to admit to feeling kind of bad for spending seven lessons getting you primed for game programming. I’d loved to have hit you with a complete game in the first lesson, but you’d probably ended up wanting to hit me. The reality is that it’s taken seven lessons to give you enough knowledge for you to create a complete game, which is the purpose of this lesson. In this lesson, you create a tile game called Brainiac that is similar to the classic Concentration memory game in which you match pairs of hidden tiles. Okay, so the game isn’t quite a 3D shoot-em-up, but it is a complete game that you can show off to your buddies. In fact, you can plug in your own tile images to customize the game with pictures of your friends and family.
In this hour, you’ll learn
How to dream up the concept for a new game
How to take a game concept and turn it into a game design
How to use the game engine and a game design to build a working game from scratch
That testing a game is the best part of the game development process
The idea behind the Brainiac game that you design and develop in this hour is to present a grid of paired tiles. More specifically, a 4×4 grid contains sixteen tiles, so eight pairs of tiles are randomly placed on the grid. Each of the pairs of tiles has a unique image that you use to match up the pairs during the game. The unique image on the tiles is hidden when you start the game, and is only revealed as you click tiles and attempt to match them. So, when tiles are unmatched, you see a common tile image that makes the different tiles indistinguishable. It’s sort of like having a bunch of playing cards laid out face down. Figure 8.1 shows the grid of tiles in the Brainiac game and how they might be arranged for matching in pairs.
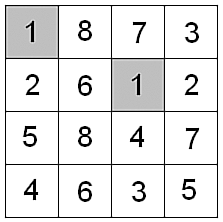
Figure 8.1. The Brainiac game consists of a 4×4 grid of randomly arranged tiles that are matched in pairs.
The game proceeds by allowing you to pick one tile, and then another. If the two tiles match, they are left visible and you move on to try and find two more matching tiles. If they don’t match, they are flipped back over to remain hidden again. Your job is to remember the positions of the tiles as you turn them over so that you can match them up. The game keeps track of how many attempts it takes to finish matching all the tiles and reports the total to you when you finish. This total is essentially your score for the game, and is a good incentive to play more and work on your memory skills.
In case you haven’t thought about it, the Brainiac game is a perfect game for mouse input. The most intuitive way to play this kind of game is by pointing and clicking the tiles with the mouse, so in this lesson the only user interface you’ll build in to the game is mouse input. It wouldn’t be a terrible idea to add keyboard and possibly even joystick support as an enhancement, but I didn’t want to add unnecessary code at this point. Keep in mind that both the keyboard and joystick would have to use an additional graphical component in order to work. For example, you would have to come up with some kind of selection or highlight graphic to indicate which tile is currently selected. The mouse doesn’t require such a component because you already have the mouse cursor to use as the basis for selecting tiles.
I realize that this probably isn’t the most fanciful game you might have envisioned as your first complete game, but it is pretty neat when you consider that it does present a challenge and allow you to play and win. Additionally, the Brainiac game is a fun little game for incorporating your own images into the tiles and personalizing it.
The Brainiac game probably sounds reasonably simple from the perspective of a player, but you’ll find that it still requires some effort from a programming perspective. Games generally are not simply programs to write, and Brainiac represents probably the simplest game you’ll ever develop. Even so, if you take your time and think through the design of your games, you’ll be much farther ahead of the curve when you sit down to hack out the code.
As with most games, the key to designing the Brainiac game is to figure out how to accurately store the state of the game at any given moment. In other words, how will you reflect what’s going on in the game in variables? Because the game is arranged as a 4×4 grid of tiles, it makes sense that the first thing you’ll need is a two-dimensional array of bitmaps that identifies the tile image to be displayed for each tile. Of course, the bitmap images alone don’t say anything about whether a match has been made. So, you also need another two-dimensional array that keeps track of whether a tile has been matched. Together, these two arrays have most of the knowledge required to indicate the state of the game at any given moment.
The other missing pieces to the Brainiac puzzle primarily involve the tile matching process. More specifically, you need to keep up with the two tiles that the user has currently selected so that you can display them properly, as well as perform a match test on them. If the tiles match, you just update their status in the tile state array so that they remain turned over; if not, you make sure that they get returned to their hidden state. Most of the logic in the Brainiac game takes place in the mouse handling code because mouse clicks are the primary means in which the user selects tiles and attempts to make matches.
The two remaining pieces of information critical to the design of the game are the number of matches and number of tries. The number of matches is extremely important because it determines when the game is over; because there are eight pairs of tiles, eight matches constitutes winning the game. The number of tries has more to do with keeping up with how well you did—it’s sort of a scorekeeping piece of information.
To recap, the design of the Brainiac game has led us to the following pieces of information that must be managed by the game:
A two-dimensional array (4×4) of tile bitmaps
A two-dimensional array (4×4) of tile states
The tiles selected by the user as a potential match
The number of matches
The number of tries
With this information in mind, you’re now ready to move on and put the code together for the Brainiac game.
In previous hours, you’ve seen how the game engine that you’ve built thus far has made it possible to create interesting programs with a relatively small amount of code. You’re now going to see the true value of the game engine as you assemble the code for the Brainiac game. The next couple of sections explore the code development for the Brainiac game, which is surprisingly straightforward considering that you’re creating a fully functioning game. The complete source code for the Brainiac game, not to mention all of the examples throughout the book, is located on the accompanying CD-ROM.
The code for the Brainiac game begins with the Brainiac.h header file, which is shown in Listing 8.1.
Example 8.1. The Brainiac.h Header File Declares Global Variables That Are Used to Manage the Game
 1: #pragma once
 2:
 3: //-----------------------------------------------------------------
 4: // Include Files
 5: //-----------------------------------------------------------------
 6: #include <windows.h>
 7: #include "Resource.h"
 8: #include "GameEngine.h"
 9: #include "Bitmap.h"
10:
11: //-----------------------------------------------------------------
12: // Global Variables
13: //-----------------------------------------------------------------
14: HINSTANCE   _hInstance;
15: GameEngine* _pGame;
16: Bitmap*     _pTiles[9];
17: BOOL        _bTileStates[4][4];
18: int         _iTiles[4][4];
19: POINT       _ptTile1, _ptTile2;
20: int         _iMatches, _iTries;
This code is where the design work you carried out earlier in this hour directly plays out. More specifically, the pieces of information that were mentioned as critical components of the game are now realized as global variables. The _pTiles variable stores away the tile images (line 16). You might be wondering why the array contains nine bitmaps when there are only eight different tile images for matching. The reason is because there is an extra tile image to represent the backs of the tiles when they are hidden.
Note

You might have noticed in the code that a data type called POINT is being used for the tile selections. This is a standard Win32 data type that stores two pieces of information: an X value and a Y value. The POINT data structure is quite handy and can be used in any situation in which you need to store a point, coordinate, or other numeric data consisting of two integer parts. The X and Y values in the structure are named x and y.
The tile states are stored in
a two-dimensional array of Boolean values named _bTileStates (line 17). The idea behind this variable is that a value of TRUE for a tile indicates that it has already been matched, whereas FALSE means that it is still hidden and unmatched. The bitmap associated with each tile is stored in the _iTiles array (line 18), which might seem strange because it doesn’t actually reference Bitmap objects. This is because you already have the Bitmap objects available in the _pTiles array, so all the _iTiles array has to do is reference each tile bitmap as an index into the _pTiles array.
The two tile selections are stored in the _ptTile1 and _ptTile2 variables (line 19). These variables are important because they keep track of the user’s tile selections, and are therefore used to determine when a successful match takes place. The last two variables, _iMatches and _iTries, are used to keep track of the number of matches made and the number of match attempts, respectively (line 20). The _iMatches variable will be used a little later in the code to determine if the game is over.
The GameInitialize()
function for the Brainiac game is similar to what you’ve seen in previous examples. In fact, the only change to this function from earlier examples is that the frame rate is set to 1. This means that the GameCycle() function is only called once per second, which is painfully slow for most games. However, the frame rate theoretically could be zero for Brainiac because there is nothing to update on a regular basis. This is because you know when game updates are necessary—when the user clicks a tile. Therefore, because it’s not a big deal having a high frame rate, you might as well minimize its effect on the game.
The GameStart() and GameEnd()
functions are responsible for initializing and cleaning up the game data, as shown in Listing 8.2.
Example 8.2. The GameStart()
Function Creates and Loads the Tile Bitmaps, as well as Initializes Game State Member Variables, Whereas the GameEnd() Function Cleans Up the Bitmaps
 1: void GameStart(HWND hWindow)
 2: {
 3:   // Seed the random number generator
 4:   srand(GetTickCount());
 5:
 6:   // Create and load the tile bitmaps
 7:   HDC hDC = GetDC(hWindow);
 8:   _pTiles[0] = new Bitmap(hDC, IDB_TILEBLANK, _hInstance);
 9:   _pTiles[1] = new Bitmap(hDC, IDB_TILE1, _hInstance);
10:   _pTiles[2] = new Bitmap(hDC, IDB_TILE2, _hInstance);
11:   _pTiles[3] = new Bitmap(hDC, IDB_TILE3, _hInstance);
12:   _pTiles[4] = new Bitmap(hDC, IDB_TILE4, _hInstance);
13:   _pTiles[5] = new Bitmap(hDC, IDB_TILE5, _hInstance);
14:   _pTiles[6] = new Bitmap(hDC, IDB_TILE6, _hInstance);
15:   _pTiles[7] = new Bitmap(hDC, IDB_TILE7, _hInstance);
16:   _pTiles[8] = new Bitmap(hDC, IDB_TILE8, _hInstance);
17:
18:   // Clear the tile states and images
19:   for (int i = 0; i < 4; i++)
20:     for (int j = 0; j < 4; j++)
21:     {
22:       _bTileStates[i][j] = FALSE;
23:       _iTiles[i][j] = 0;
24:     }
25:
26:   // Initialize the tile images randomly
27:   for (int i = 0; i < 2; i++)
28:     for (int j = 1; j < 9; j++)
29:     {
30:       int x = rand() % 4;
31:       int y = rand() % 4;
32:       while (_iTiles[x][y] != 0)
33:       {
34:         x = rand() % 4;
35:         y = rand() % 4;
36:       }
37:       _iTiles[x][y] = j;
38:     }
39:
40:   // Initialize the tile selections and match/try count
41:   _ptTile1.x = _ptTile1.y = -1;
42:   _ptTile2.x = _ptTile2.y = -1;
43:   _iMatches = _iTries = 0;
44: }
45:
46: void GameEnd()
47: {
48:   // Cleanup the tile bitmaps
49:   for (int i = 0; i < 9; i++)
50:     delete _pTiles[i];
51:
52:   // Cleanup the game engine
53:   delete _pGame;
54: }
Note

If you happen to get a “multiple initialization” compiler error while compiling the Brainiac program, you can easily fix it by removing the int variable declaration in line 27 of the code. This error stems from the fact that some compilers don’t fully support the standard C++ approach of declaring loop initializer variables local to the loop. So, the int variable i is mistakenly interpreted as being declared twice. Just remove int from line 27 and everything will work fine.
The GameStart() function contains a fair amount of code because all the variables in the game must be carefully initialized for the game to play properly. The function begins by seeding the random number generator (line 4), which is necessary because you’ll be randomly placing tiles in a moment. The tile bitmaps are then loaded into the _pTiles array (lines 8–16). From there, the real work of initializing the game data begins to take place.
Because a value of FALSE
indicates that a tile has not yet been matched, it’s necessary to initialize each element in the _bTileStates array to FALSE (line 22). Similarly, the elements in the _iTiles array are initialized to 0 (line 23), but for a different reason. When the tiles are randomly placed in the _iTiles array in a moment, it’s important to have the elements initialized to 0 so that you can tell which tile spaces are available for tile placement. The actual tile placement occurs in lines 27–38, and definitely isn’t as complicated as it looks. What’s happening is that a tile space is randomly selected and tested to see if it has been filled with a tile (line 32). If so, the code continues to select random tiles until an empty one is found. When an empty space is found, the tile is set (line 37).
The last few steps in the GameStart() function involve setting the _ptTile1 and _ptTile2 variables to -1 (lines 41 and 42). Because these variables are POINT structures, each of them contains an X and Y value. So, you’re actually initializing two pieces of information for each of the tile selection variables. The value of -1 comes into play because it’s a good way to indicate that a selection hasn’t been made. In other words, you can tell that the user hasn’t made the first tile selection by simply looking at the values of _ptTile1.x and _ptTile1.y and seeing if they are set to -1. The _iMatches and _iTries variables are simply initialized to 0, which makes sense given their purpose (line 43).
The GameEnd()
is responsible for cleaning up the tile bitmaps (lines 49 and 50), as well as the game engine (line 53).
The Brainiac game screen is painted in the
GamePaint() function, which is shown in Listing 8.3.
Example 8.3. The GamePaint()
Function Draws the Tiles for the Game According to the Tile States Stored in the Game State Member Variables
 1: void GamePaint(HDC hDC)
 2: {
 3:   // Draw the tiles
 4:   int iTileWidth = _pTiles[0]->GetWidth();
 5:   int iTileHeight = _pTiles[0]->GetHeight();
 6:   for (int i = 0; i < 4; i++)
 7:     for (int j = 0; j < 4; j++)
 8:       if (_bTileStates[i][j] || ((i == _ptTile1.x) && (j == _ptTile1.y)) ||
 9:         ((i == _ptTile2.x) && (j == _ptTile2.y)))
10:         _pTiles[_iTiles[i][j]]->Draw(hDC, i * iTileWidth, j * iTileHeight,
11:           TRUE);
12:       else
13:         _pTiles[0]->Draw(hDC, i * iTileWidth, j * iTileHeight, TRUE);
14: }
The job of the GamePaint()
function is to draw the 4×4 grid of tile bitmaps on the game screen. This is primarily accomplished by examining each tile state and either drawing its associated tile image if it is already matched (lines 10 and 11) or drawing a generic tile image if it isn’t matched (line 13). One interesting thing to note in this code is that you have to look beyond the tile state when drawing the tiles because it’s important to draw the two selected tiles properly even though they might not be a match. This test is performed in lines 8 and 9 where the tile selection values are taken into account along with the tile state.
Although GamePaint() is important
in providing the visuals for the Brainiac game, the bulk of the game logic is in the MouseButtonDown()
function, which is shown in Listing 8.4.
Example 8.4. The MouseButtonDown()
Function Carries Out the Majority of the Game Logic for the Brainiac Game
 1: void MouseButtonDown(int x, int y, BOOL bLeft)
 2: {
 3:   // Determine which tile was clicked
 4:   int iTileX = x / _pTiles[0]->GetWidth();
 5:   int iTileY = y / _pTiles[0]->GetHeight();
 6:
 7:   // Make sure the tile hasn't already been matched
 8:   if (!_bTileStates[iTileX][iTileY])
 9:   {
10:     // See if this is the first tile selected
11:     if (_ptTile1.x == -1)
12:     {
13:       // Set the first tile selection
14:       _ptTile1.x = iTileX;
15:       _ptTile1.y = iTileY;
16:     }
17:     else if ((iTileX != _ptTile1.x) || (iTileY != _ptTile1.y))
18:     {
19:       if (_ptTile2.x == -1)
20:       {
21:         // Increase the number of tries
22:         _iTries++;
23:
24:         // Set the second tile selection
25:         _ptTile2.x = iTileX;
26:         _ptTile2.y = iTileY;
27:
28:         // See if it's a match
29:         if (_iTiles[_ptTile1.x][_ptTile1.y] ==
30:           _iTiles[_ptTile2.x][_ptTile2.y])
31:         {
32:           // Set the tile state to indicate the match
33:           _bTileStates[_ptTile1.x][_ptTile1.y] = TRUE;
34:           _bTileStates[_ptTile2.x][_ptTile2.y] = TRUE;
35:
36:           // Clear the tile selections
37:           _ptTile1.x = _ptTile1.y = _ptTile2.x = _ptTile2.y = -1;
38:
39:           // Update the match count and check for winner
40:           if (++_iMatches == 8)
41:           {
42:             TCHAR szText[64];
43:             wsprintf(szText, "You won in %d tries.", _iTries);
44:             MessageBox(_pGame->GetWindow(), szText, TEXT("Brainiac"),
45:               MB_OK);
46:           }
47:         }
48:       }
49:       else
50:       {
51:         // Clear the tile selections
52:         _ptTile1.x = _ptTile1.y = _ptTile2.x = _ptTile2.y = -1;
53:       }
54:     }
55:
56:     // Force a repaint to update the tile
57:     InvalidateRect(_pGame->GetWindow(), NULL, FALSE);
58:   }
59: }
The first step in the MouseButtonDown() function is to determine which tile was clicked. This determination takes place in lines 4 and 5, and involves using the mouse cursor position provided in the x and y arguments passed into the function. When you know which tile was clicked, you can quickly check and see if it has already been matched (line 8); if so, there is no reason to do anything else because it doesn’t make sense to play a tile that has already been matched. Assuming that the tile hasn’t already been matched, the next test is to see if this is the first tile selected (line 11); if so, all you have to do is store the tile position in _ptTile1. If not, you have to move on and make sure that it isn’t the first tile being reselected, which wouldn’t make much sense (line 17). If you pass that test, you have to check and see if this is indeed the second tile selection (line 19); if so, it’s time to go to work and see if there is a match. If this isn’t the second tile selection, you know it must be the third click in an unsuccessful match, which means that the tile selections need to be cleared so that the selection process can be repeated (lines 47–51).
Getting back to the second tile selection, when you know that the user has just selected the second tile, you can safely increment the number of tries (line 22), as well as store away the tile selection (lines 25 and 26). You can then check for a match by comparing the two tile selections to each other (line 29). If there is a match, the tile states are modified for each tile (lines 32 and 33), and the tile selections are cleared (line 36). The match count is then incremented and checked to see if the game is over (line 39). If the game is over, a window is displayed that notifies you of winning, as well as displays how many tries it took (lines 41–43).
The last step in the MouseButtonDown() function is to force a repaint of the game screen with a call to InvalidateRect() (line 56). This line is extremely important because it results in the user’s action (the tile selection with a mouse click) being visually carried out on the screen.
The most rewarding part of the game development process is seeing the end result of all your toiling over game code. In fact, one of the most exciting aspects of game programming is how you can experiment with tweaking the code and seeing how it impacts the game play. There admittedly isn’t a whole lot to be tweaked on the Brainiac game, but it’s nonetheless a neat game to try out now that the code is complete. Figure 8.2 shows the game upon initially starting out, which shows all the tiles hidden and ready for you to attempt a match.
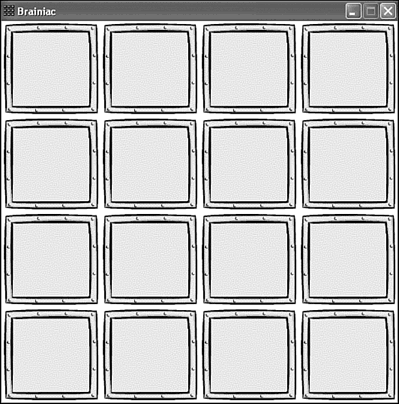
Figure 8.2. The Brainiac game begins with all the tiles hidden, waiting for you to make the first tile selection.
When you click to select a tile, its image is revealed, as shown in Figure 8.3.
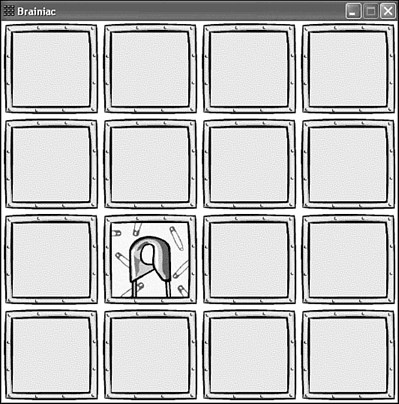
Figure 8.3. Clicking a tile reveals its underlying image, which lets you know what you’re attempting to match.
After making your first move, the next step is to try and make a match by selecting another tile. Of course, on the first round of the game, this is essentially a shot in the dark. When you fail to make a match, you have to click once more to return the tiles to their hidden state and attempt another match. This gives you time to memorize the locations of the tiles you attempted to match. Making a match simply involves selecting the same two tiles, as shown in Figure 8.4.
Note

You might be wondering why I selected tools as the basis for the graphics in the Brainiac game. The answer is that I’ve probably been watching too many home fix-it shows on television lately, so I just had tools on my mind. You could easily change the graphics to just about any theme you want: animals, cartoon characters, family members, you name it.
If you’re one of those people who can recall the name of every classmate in your kindergarten class, you’ll probably find the Brainiac game easy to master. Otherwise, you might just end up clicking aimlessly until you luck out on a few matches. Either way, the game will eventually end, and you’ll be able to judge how well you’ve done by the number of tries it took to match all the tiles. Figure 8.5 shows the window that is displayed upon completing the game.
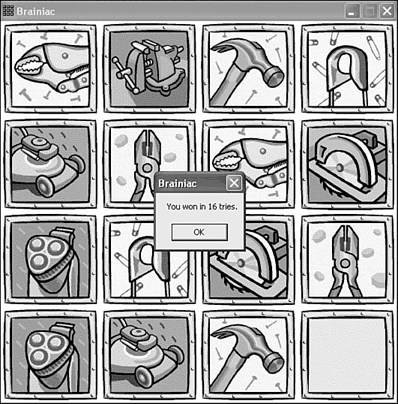
Figure 8.5. Upon completing a game of Brainiac, you are presented with a window that lets you know how many tries it took.
If you’re the obsessive, competitive type, you will no doubt spend hours trying to get the number of tries down to a ridiculously low number. Or you might decide that Brainiac is nothing more than a light diversion on your path toward creating new and more interesting games. Either way, it’s a good example of how to pull together a variety of different skills toward the creation of a complete game.
Up until this hour, you focused on individual aspects of game development ranging from drawing basic graphics to handling user input. This hour represents a first attempt at incorporating everything you’ve learned thus far into the development of a complete game that you can play and share with your friends. The Brainiac game is by most standards a simple game without too many frills, but it does demonstrate what it takes to put together a working game from start to finish. Perhaps more importantly, you got to experience first-hand what it’s like to start with an idea, move forward with a design, and then realize that design in actual code. You’ll be repeating this process several more times throughout the book as you construct more powerful and exciting games, so this experience will serve you well.
This hour wraps up this part of the book. The next part of the book tackles animation, which is a subject you’ve learned a little about, but you’re still missing a formal introduction. The next part of the book is quite interesting because it presents you with the skills to start building action games complete with animated graphical objects.
The Workshop is designed to help you anticipate possible questions, review what you’ve learned, and begin learning how to put your knowledge into practice. The answers to the quiz can be found in Appendix A, “Quiz Answers.”
Replace the tile images in the Brainiac game with some images of your own. Feel free to modify the existing tile images if you want to make sure that you get the tile size right, or you can resize the entire game screen if you want to go with different sized tiles.
You’ve probably noticed that the Brainiac game doesn’t provide a means of starting a new game without closing the program and restarting it. You also might have noticed that the game doesn’t distinguish between left and right mouse button clicks. Modify the game so that the game is played via the left mouse button, while the right mouse button is used to start a new game.

