
It’s hard to argue the impact of compelling sound effects and music on video games of all types. Even the video game classics with their limited sound-making capabilities often incorporated music that you simply couldn’t get out of your head, not to mention highly entertaining sound effects. Modern games now have the capability to use extremely realistic sound effects and intricate musical compositions. Even if you aren’t musically inclined, you owe it to yourself to figure out a way to incorporate sound and music into your games. This hour lays the conceptual groundwork for understanding how sound and music are used in computer games, as well as how to create sound effects, and how to find sounds and music for games.
In this hour, you’ll learn:
The basics of digital sound
How digital sound in Windows is represented by waves
What MIDI means, and how it relates to computer music
About some of the more powerful sound editing tools available
How to create and edit your own sound effects for games
Although you could probably get away with playing sounds in games without understanding how digital sound works, I’m not going to let you off the hook that easy. It’s important to at least have a basic understanding of digital sound, and how it relates to physical sound that we hear in the real world. A physical sound is a wave that moves through the air, kind of like an air equivalent of an ocean wave. A sound wave is actually a result of the pressure of air expanding and contracting. In other words, a sound wave is a series of traveling pressure changes in the air. You hear sound because the traveling sound wave eventually gets to your ears, where the pressure changes are processed and interpreted by your eardrums. If your eardrums are rocky outcroppings on a beach, you hear sound when an ocean wave crashes against the rocks. The softness or loudness of a sound is determined by the amount of energy in the wave, which corresponds to the height and force of an ocean wave. Because sound waves lose energy as they travel, you hear sounds louder up close and softer from a distance. Eventually, sound waves travel far enough to be completely absorbed by the air or some other object such as a wall in your house.
When I refer to the energy of a sound wave, I’m really talking about the amplitude of the wave. Amplitudes of sound waves are usually measured in decibels (dB). Decibels are logarithmic units of measurement, meaning that 80dB is 10 times louder than 79dB. This type of measurement is used because it reflects the hearing characteristics of the human ear. The threshold of human hearing is 0dB, which means that anything less is too soft to be heard by humans. Likewise, the threshold of pain is 120dB, which is the amplitude level at which humans experience physical pain. Prolonged exposure to sound this loud can cause permanent hearing damage.
Note

Many rock concerts over the years have hit the 120dB sound level. In 1976, The Who made it into the Guinness Book of World Records with a 125dB concert that is now considered the loudest concert of all time.
When a microphone converts sound waves to voltage signals, the resulting signal is an analog (or continuous) signal. Because computers are digital machines, it is necessary to convert this analog signal to a digital signal for a computer to process. Analog to digital (A/D) converters handle the task of converting analog signals to digital signals, which is also referred to as sampling. The process of converting an analog signal to a digital signal doesn’t always yield exact results. How closely a digital wave matches its analog counterpart is determined by the frequency at which it is sampled, as well as the amount of information stored at each sample.
To sample a sound, you just store the amplitude of the sound wave at regular intervals. Taking samples at more frequent intervals causes the digital signal to more closely approximate the analog signal and, therefore, sound more like the analog wave when played. So, when sampling sounds the rate (frequency) at which the sound is sampled is very important, as well as how much data is stored for each sample. The unit of measurement for frequency is Hertz (Hz), which specifies how many samples are taken per second. As an example, CD-quality audio is sampled at 44,000Hz (44kHz), which means that when you’re listening to a music CD you’re actually hearing 44,000 digital sound samples every second.
In addition to the frequency of a sampled sound, the number of bits used to represent the amplitude of the sound impacts the sound quality, as well as whether the sound is a stereo or mono sound. Knowing this, it’s possible to categorize the quality of a digital sound according to the following properties:
Frequency
Bits-per-sample
Mono/stereo
The frequency of a sampled sound typically falls somewhere in the range of 8kHz to 44kHz, with 44kHz representing CD-quality sound. The bits-per-sample of a sound is usually either 8bps (bits per sample) or 16bps, with 16bps representing CD-quality audio; this is also known as 16-bit audio. A sampled sound is then classified as being either mono or stereo, with mono meaning that there is only one channel of sound, whereas stereo has two channels. As you might expect, a stereo sound contains twice as much information as a mono sound. Not surprisingly, CD-quality audio is always stereo. Therefore, you now understand that a CD-quality sound is a 44kHz 16-bit stereo sound.
Although it would be great to incorporate sounds that are CD-quality into all of your games, the reality is that high-quality sounds take up a lot of memory and can therefore be burdensome to play if your game already relies on a lot of images and other memory-intensive resources. Granted, most computers these days are capable of ripping through memory-intensive multimedia objects such as MP3 songs like they are nothing, but games must be designed for extreme efficiency. Therefore, it’s important to consider ways to minimize the memory and processing burden on games every chance you get. One way to minimize this burden is to carefully choose a sound quality that sounds good without hogging too much memory.
Another issue you should consider in regard to using sound in games is that of copyrighted sounds—you can’t use copyrighted sounds without written permission from the owner of the copyright. For example, sounds sampled from copyrighted movies or audio recordings can’t be used without permission. It is technically no different than using copyrighted software without permission or a licensing agreement. So be careful when sampling sounds from copyrighted sources.
Note

Some seemingly public domain sound collections are actually copyrighted and can get you into trouble. Most of these types of collections come in the form of an audio CD containing a variety of sound effects. Be sure to read the fine print on these CDs, and make sure that you can legally reuse the sounds or get explicit permission from the publisher.
Digital sounds in Windows are known as waves, which refer to the physical sound waves from which digital sounds originate. Windows waves are stored in files with a .WAV file extension, and can be stored in a wide range of formats to accommodate different sound qualities. More specifically, you can save waves in frequencies from 8kHz to 44kHz with either 8 or 16 bits per sample and as either mono or stereo. Just as with any other sampled digital audio, the size of a wave file is directly proportional to the quality of the wave sound. So, higher quality waves take up more memory than lower quality waves.
You might be surprised to find out that waves are really just Windows resources like bitmaps, icons, and cursors. This means that you can specify waves as resources in the resource script for your games and compile them directly into the executable program files. The benefit is that you don’t have to worry about distributing a bunch of extra files when you make your game available to the public; all the wave files are included in the game’s executable program file.
If you want to experiment a little with Windows waves and how they work, you’ll be glad to know that Windows includes a built-in tool for working with waves. It’s called Sound Recorder, and you’ll find it by following these steps in Windows XP:
Click the Start button.
Select All Programs, followed by Accessories, and then Entertainment.
Select Sound Recorder to launch the program.
Note
If you aren’t using Windows XP, don’t worry because Sound Recorder is included with all versions of Windows. Just poke around within the Accessories folder, and you’ll be able to find it.
The Sound Recorder program is shown in Figure 13.1.
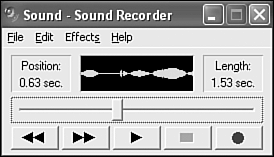
Figure 13.1. The Sound Recorder program allows you to record sounds and then manipulate them to some degree.
You’ll notice that the Sound Recorder tool includes a series of buttons that look like the buttons on a VCR. These buttons allow you to record new sounds using your computer’s microphone or CD-ROM drive, as well as play, stop, rewind, and fast forward sounds. Feel free to try your hand at recording a sound with the microphone and playing it back with Sound Recorder. You might also want to experiment with some of the effects that can be applied to the sound, such as reversing it and hearing the sound backwards. Remember all of the rumors about hidden messages in rock music when you play it backwards? Now you can create your own!
Although Sound Recorder is a fairly primitive tool in terms of features, it does give you capability to tinker with waves and even apply effects to them. Before you invest in a higher-powered sound tool, be sure to take some time to experiment with Sound Recorder. Later this hour in the section “Creating and Editing Sounds,” you’ll learn some interesting techniques used to create wave sound effects; you can certainly use Sound Recorder as the tool for creating these effects. If Sound Recorder ends up feeling too limited for you, you also learn about other sound tools in the later section “Exploring Sound Tools.”
Musical Instrument Digital Interface, or MIDI, started out in the early 80s as an attempt to establish a standard interface between musical instruments. The main use for MIDI back then was to enable a dedicated keyboard to control a synthesizer. Keyboard synthesizers consist of two main components: the keyboard and the synthesizer. The keyboard is responsible for keeping up with input information such as which musical note is being generated and how hard the key is being pressed on the keyboard. The synthesizer, on the other hand, is responsible for generating sounds based on the input information provided by the keyboard. So, the original goal of MIDI was to provide a standardized approach to controlling a synthesizer with a keyboard. MIDI eventually expanded to support an incredibly wide range of musical instruments and devices, but the keyboard/synthesizer relationship is significant to MIDI as it applies to computers.
One way to view a MIDI device is as a note generator in the input sense and as a sound generator in the output sense. It isn’t important how a MIDI device works internally as long as it adheres to a MIDI interface for generating or outputting notes. You might be thinking that the design of MIDI sounds somewhat reminiscent of the device-independent design of Windows, and in many ways this comparison is accurate. Just as Windows makes it possible to mix and match different kinds of hardware and have them work together, MIDI makes it possible to connect different kinds of musical devices together and have them work together as well. Most electronic musical equipment now comes standard with MIDI interface ports. In fact, the sound card on your computer has a MIDI-compatible interface through which a MIDI device can communicate with your computer.
Similar to waves, MIDI music is digital. However, unlike waves, which are just approximations of analog sound waves, MIDI music consists of musical notes. In other words, a MIDI song consists of a series of carefully timed musical notes. This means that you can create a MIDI song much like you might write out a musical composition on paper. This task requires special software, but it is possible if you have the knowledge and skill to write music. Because MIDI music is composed of notes rather than wave data, the resulting output sound quality is entirely dependent on the MIDI output device used to play the music. In the case of your computer, your sound card likely includes a MIDI synthesizer that can be used to play MIDI music. It’s up to the synthesizer and Windows multimedia features to decide how the specific music sounds when played.
The main benefit of MIDI is that it allows you to use one MIDI device to control others. You can use a MIDI keyboard to play notes through another MIDI device, such as a MIDI sequencer. Even though you’re generating notes by playing them on the keyboard, the actual instrument sounds are processed and output by the sequencer. In other words, you are triggering the sequencer with the keyboard. A similar situation occurs when you play MIDI music on your computer. The notes contained within the music are sent to the sound card where they trigger the synthesizer to play the actual sound.
I’ve mentioned MIDI music several times throughout this discussion, but I haven’t really clarified how it is stored or how you work with it. Similar to waves, MIDI music is stored in files, but MIDI files have the file extension .MID. Unlike waves, MIDI music files are typically fairly small because musical notes simply don’t take up a whole lot of space. Like waves, you can play MIDI files using Windows Media Player (see Figure 13.2). There is no built-in Windows tool for creating or editing MIDI files because creating MIDI music is more difficult than recording waves, and it involves a fair amount of music knowledge.
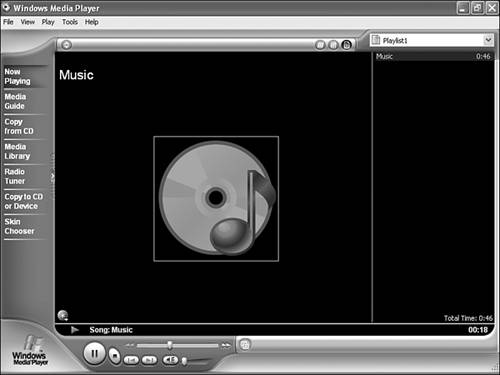
Playing a MIDI file in Windows Media Player is as simple as double-clicking the file in Windows Explorer. This works because MIDI files are automatically associated with Windows Media Player. You will likely use Windows Media Player to screen MIDI files for use in your games. Or, if you’re ambitious enough to create your own game music, you’ll likely use Windows Media Player as a final means of testing a MIDI file before incorporating it into a game.
To be able to create and modify your own sounds, you need some type of software sound editing utility. Sound editing utilities usually provide a means of sampling sounds from a microphone, CD-ROM, or line input. From there, each utility varies as to what degree of editing it provides. Some sound editing utilities include very advanced signal processing features, in addition to the relatively standard amplification and echoing features. Other sound utilities, such as Sound Recorder that you learned about earlier in the hour, are fairly bare bones tools for working with wave sounds.
The most important component of a good sound editor in regard to Windows games is the capability to save sounds in the wave audio format. It doesn’t matter how cool the sounds are if you can’t play them in your games. Fortunately, the wave audio standard is quite popular, and is supported in most sound tools. Another key feature is the capability to zoom in and clip sounds down to exactly the portions you want to use. Because the length of sounds is of the utmost importance in games, you should always clip sounds down to the absolute minimum length possible.
The next two sections focus on a couple of popular sound editors that you can use to edit sounds for games. They both support the wave sound format and provide a high degree of sound effects processing. You might also be able to find shareware sound utilities out there that are cheaper, possibly even free, but they likely won’t compare in terms of features with commercial sound editors.
Sound Forge, by Sonic Foundry, is in many ways the Adobe Photoshop of sound editing. What this means is that Sound Forge represents the high-end professional approach to sound editing, and is likely the most powerful option out there if you want to become a master of sounds. Of course, with power comes both price and complexity, which are two things that might be more than you’re ready for at the moment. Even so, you might still consider downloading the free Sound Forge demo from the Sonic Foundry Web site at http://www.sonicfoundry.com/.
Cool Edit, by Syntrillium Software, is a more affordable sound editor for Windows that is loaded with features. Its creators have suggested thinking of it as a paint program for audio. Just as a paint program enables you to create images with colors, brush strokes, and a variety of special effects, Cool Edit enables you to “paint” with sound: tones, pieces of songs with voices and other noises, sine and sawtooth waves, noise, or just pure silence. Cool Edit provides a wide variety of special effects for manipulating sounds, such as reverberation, noise reduction, echo and delay, flanging, filtering, and many others. Several different versions of Cool Edit are available to fit just about any budget. You can get additional information about Cool Edit from the Syntrillium Software Web site, which is located at http://www.syntrillium.com/.
After you’ve decided on a sound utility, you’re ready to start creating and editing sounds. The first decision to make is how you will create the sounds. For example, are you planning to record sounds yourself with a microphone or sample sounds from a stereo cassette deck or VCR? The microphone is probably the easiest route because many multimedia computers come equipped with one. It’s also the most creative route. However, you might already have some sounds in mind from a prerecorded cassette or movie, which means that you need to look into connecting an external sound source to your computer. This is covered in detail a little later in the hour.
Regardless of where you sample sounds from, the process of getting a sampled sound cleaned up for use in a game is basically the same. After you’ve sampled a sound, play it back to make sure that it sounds okay. It’s likely that the sound will either be too loud or too soft. You can judge whether the volume of the sound is acceptable by looking at the waveform displayed in the sound editor; the waveform of a sound is the graphical appearance of the sound when plotted over time. If the sound amplitude goes beyond the top or bottom of the waveform display, you know it’s definitely too loud. If you can barely hear it, it’s probably too soft. To remedy this problem, you can either adjust the input level for the sound device and resample the sound or try to use amplification effects provided by the sound utility.
The best way to fix the volume problem is to adjust the input level of the sound device and resample the sound. For example, in Windows XP you can easily adjust the microphone or line input level from the Control Panel. After you have the volume of the sound at a level you like, you need to clip the sound to remove unwanted portions of it. Clipping a sound involves zooming in on the waveform in a sound editor and cutting out the silence that appears before and after the sound. This helps shorten the length of the sound and prevents unnecessary latency.
Note
Latency is the amount of time between when you queue a sound for playing and when the user actually hears it. Latency should be kept to a minimum so that sounds are heard when you want them to be heard without any delay. Unnecessary silence at the beginning of a sound is a common cause of latency problems.
Once you have a sound clipped, it should be ready for prime time. You might want to check out the kinds of effects that are available with the sound utility you are using. Some simple effects range from reverse to echo, with more advanced effects including fading and phase shifts. It’s all up to your imagination and your discerning ears.
If you’ve decided that you don’t have what it takes to create your own sounds, you still have options. In this case, you need to seek an outside source for your sounds and probably for your music as well. The best source for finding prerecorded sounds and music is in sound archives on the Web. Many different archives are out there with a vast amount of sounds and music from which to choose. Many are even available already in the wave and MIDI audio formats. Even if you get sounds and music from an online archive, be very careful about the copyright issues surrounding using them.
A good starting point for finding sounds and music is the World Wide Web Virtual Library, which maintains an Audio page with links to archives. This Audio Web site is located at http://archive.museophile.sbu.ac.uk/audio/.
Just as tiny colored squares called pixels allow you to represent images digitally, it is possible to represent a physical sound digitally by sampling it several thousand times a second. Sampled digital audio can be recorded in a variety of different sound qualities, which dramatically impact the size and memory requirements of the digital sounds. Digital sounds in Windows are known as waves, and are stored in files with a .WAV file extension. In addition to learning how waves work, you also learned in this hour how MIDI music is used to represent music in computers. The hour concluded by giving you some practical tips regarding creating your own digital sound effects.
The next hour takes what you learned in this hour and applies it to game programming. More specifically, you find out how to write code to play digital sounds in games.
The Workshop is designed to help you anticipate possible questions, review what you’ve learned, and begin learning how to put your knowledge into practice. The answers to the quiz can be found in Appendix A, “Quiz Answers.”
Try your hand at recording a few wave sounds using the microphone or CD-ROM on your computer. Feel free to use the Sound Recorder utility if you don’t want to invest in a commercial sound editor. As you create these sounds, think about how they might be incorporated into games of your own.
Spend some time getting familiar with MIDI music by searching for .MID files on your hard drive. I also encourage you to perform a search on the Web and see if you can find any MIDI songs available for download. The main goal is to get comfortable dealing with .MID files and playing MIDI songs with Windows Media Player.