
One of the problems with the games you’ve developed throughout the book thus far is that they don’t adequately identify themselves when they first run. Sure, the title bar of the window has the name of the game, but it’s important to clearly identify your game when it first starts up. In this way, a game is a lot like a movie in that it should present a title at the beginning. Unlike movies, however, titles in games are referred to as splash screens, and they can contain useful information such as a copyright notice and directions on how to play the game. This hour shows you how to spruce up the Space Out game by adding a splash screen.
In this hour, you’ll learn:
Why splash screens are an important part of just about any game
What it takes to incorporate a splash screen into a game
How to add a splash screen to the Space Out game
Generally speaking, I get annoyed with opening credits in movies because I’m ready for the movie to get started. However, there are a few rare movies whose opening credits are creative and interesting enough to make them an enjoyable introduction to the movie. A big part of the opening credits for movies is the movie title, which is akin to splash screens used in video games. Similar to movie titles, a splash screen in a video game should convey the theme of the game and possibly provide a sneak preview of what’s to come in the game. Of course, it’s also possible to deliberately show very little in the splash screen for a game, with the idea being that you want to shroud the game in mystery until the game play actually starts.
Regardless of how much or how little you give away in the splash screen for a game, it’s important to at least communicate the title of the game and any other pertinent information, such as the copyright for the game. If a certain action is required to start the game, it’s also a good idea to mention it on the splash screen as well. No one likes a game that immediately throws you in the action without any warning when the game is launched, so at a bare minimum the splash screen should give you a chance to initiate the game starting.
A splash screen is also a good place to include abbreviated instructions for a game, as well as tips and hints about how to play. In the 1980s when arcade games were the rage, you could often read the splash screen for a game to quickly learn how to play the game. This isn’t as critical of a feature in computer games, but it never hurts to provide information that allows people to get started playing a game quickly. One final piece of information to consider for a splash screen is a high score list. This list contains the top scores people have achieved in the game, and is popular in classic arcade games. Hour 24, “Keeping Track of High Scores,” shows you how to create a high score list that saves high scores for the Space Out game to a file.
Many commercial games these days go far beyond a splash screen by including an introductory animation or video sequence. This “splash animation” is a lot flashier than a simple splash screen, but it often requires a considerable amount of effort to create, especially if it’s an actual video. For example, many popular sports games include video clips of the actual sports being played. On the other hand, some games just display animation sequences directly from the game, which serves as kind of a demo for the game. You find out how to turn a splash screen into a demo mode for the Space Out game in the next hour. For now, let’s continue to dig deeper into splash screens and how they work.
Although you could certainly dream up a complex approach to creating a splash screen, the simplest way to carry out the task is to simply create a bitmap image for the screen and then display it on the game screen before the game begins. The image for a splash screen can be large enough to fill the entire game screen or it can be smaller and displayed on top of the existing background for the game. The size of the splash screen for your own games is entirely up to you. However, for the Space Out game, I opted to create a splash screen that is smaller than the game screen. Figure 22.1 shows how the splash screen image is designed to overlay on top of the game background in the Space Out game.
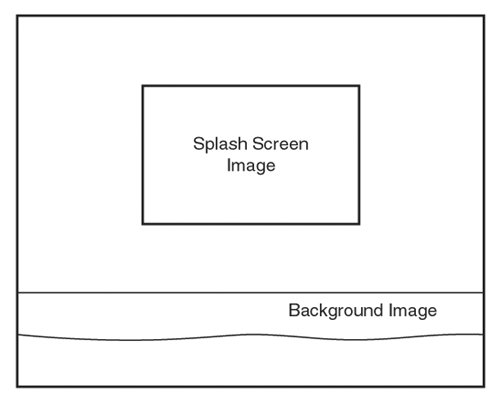
Figure 22.1. The splash screen image in the Space Out game is designed to be displayed over the background for the game.
As you can see in the figure, there really isn’t anything magical about displaying a splash screen, especially in the Space Out game. The only slightly tricky aspect of adding a splash screen to a game is establishing a separate mode of the game for the splash screen. For example, all the games you’ve created in the book are always in one of two modes, “game over” or “game not over.” These two modes are directly controlled by the _bGameOver global variable, which has one of two Boolean values, TRUE or FALSE. Although you could associate the splash screen with a game being over, it is more accurate to give it a mode of its own.
Giving a splash screen a mode of its own basically means adding a global variable that indicates whether the splash screen should be displayed. This makes sense because you probably don’t want to display the splash screen once a game has started and ended. In other words, the splash screen is only shown when the game first starts, and then it never appears again. You could create a splash screen that is shown in between games, but that’s a role better suited to demo mode, which you learn about in the next hour.
You now know enough about splash screens to take a stab at adding one to the Space Out game. In doing so, you’ll be making it more of a complete game with a professional touch. The new version of the Space Out game with a splash screen is called Space Out 2, and it is the focus of the remainder of this hour. Space Out 2 is very similar to the original Space Out program. In fact, the play of the game doesn’t change a bit; all that you’re doing is adding a splash screen to spruce up the game a bit.
The first step in adding a splash screen to the Space Out 2 game is to add a couple of global variables to the game that store the bitmap for the splash screen, as well as the mode for the splash screen. Following are these variables:
Bitmap* _pSplashBitmap;
BOOL    _bSplash;
The first variable, _pSplashBitmap, is pretty straightforward in that it represents the bitmap image for the splash screen. The other global variable, _bSplash, is a Boolean variable that indicates whether the game is in splash screen mode. More specifically, if the _bSplash variable is TRUE, the game is in splash screen mode and the splash screen is displayed; you can’t play the game while the splash screen is being displayed. If the _bSplash variable is FALSE, the game plays as normal as if there were no splash screen. So, the idea is to set the _bSplash variable to TRUE at the beginning of the game, and then return it to FALSE after the user starts the game by pressing the Enter key.
As with any global variables, it’s important to initialize the splash screen variables. This takes place in the
GameStart() function, which is very similar to the previous version. The first change to the
GameStart() function is the creation of the splash screen bitmap:
_pSplashBitmap = new Bitmap(hDC, IDB_SPLASH, _hInstance);
The only other change is the initialization of the _bSplash global variable, which must be set to TRUE in order to display the splash screen when the game starts:
_bSplash = TRUE;
A big part of making the splash screen work properly is disabling parts of the game when the game is in splash screen mode. Listing 22.1 contains the code for the GameActivate() and GameDeactivate()
functions, which check the value of the _bSplash variable before resuming or
pausing the MIDI background music.
Example 22.1. The GameActivate()
and GameDeactivate() Functions Check the Value of the _bSplash Variable Before Resuming or Pausing the MIDI Background Music
There isn’t too much explanation required for these functions because they simply check the _bSplash variable to see if the game is in splash screen mode before resuming or pausing the MIDI background music (lines 3 and 10).
The most important code in the Space Out 2 program in relation to the splash screen is contained in the GamePaint() function, which is where the splash screen is actually drawn. Listing 22.2 contains the code for the GamePaint()
function.
Example 22.2. The GamePaint()
Function Draws the Splash Screen Bitmap When the Game Is in Splash Screen Mode
 1: void GamePaint(HDC hDC)
 2: {
 3:   // Draw the background
 4:   _pBackground->Draw(hDC);
 5:
 6:   // Draw the desert bitmap
 7:   _pDesertBitmap->Draw(hDC, 0, 371);
 8:
 9:   if (_bSplash)
10:   {
11:     // Draw the splash screen image
12:     _pSplashBitmap->Draw(hDC, 142, 100, TRUE);
13:   }
14:   else
15:   {
16:     // Draw the sprites
17:     _pGame->DrawSprites(hDC);
18:
19:     // Draw the score
20:     TCHAR szText[64];
21:     RECT  rect = { 460, 0, 510, 30 };
22:     wsprintf(szText, "%d", _iScore);
23:     SetBkMode(hDC, TRANSPARENT);
24:     SetTextColor(hDC, RGB(255, 255, 255));
25:     DrawText(hDC, szText, -1, &rect, DT_SINGLELINE | DT_RIGHT |
26:       DT_VCENTER);
27:
28:     // Draw the number of remaining lives (cars)
29:     for (int i = 0; i < _iNumLives; i++)
30:       _pSmCarBitmap->Draw(hDC, 520 + (_pSmCarBitmap->GetWidth() * i),
31:         10, TRUE);
32:
33:     // Draw the game over message, if necessary
34:     if (_bGameOver)
35:       _pGameOverBitmap->Draw(hDC, 170, 100, TRUE);
36:   }
37: }
The change to the GamePaint()
function involves drawing the splash screen image if the _bSplash variable is TRUE (lines 9–13). If the _bSplash variable is FALSE, the GamePaint() function draws the sprites, score, and remaining lives, which are only pertinent to a game being played (lines 15–36). It’s important to notice that the starry background and desert bitmap are both drawn regardless of the value of the _bSplash variable (lines 3–7). This results in the background and desert image being drawn even when the splash screen image is drawn, which is necessary because the splash screen doesn’t fill up the entire game screen.
The last coding change in the Space Out 2 game involves the HandleKeys()
function, which you know processes key presses for the game. If you recall, the Enter key is used to start a new game if the current game is over. Because the same key is used to leave the splash screen and start a game, it is necessary to change the value of the _bSplash variable when the user presses the Enter key. Listing 22.3 shows the new version of the HandleKeys() function with this change in place.
Example 22.3. The HandleKeys()
Function Changes the Value of the _bSplash Variable if the Game Is Exiting the Splash Screen to Start a New Game
 1: void HandleKeys()
 2: {
 3:   if (!_bGameOver)
 4:   {
 5:     // Move the car based upon left/right key presses
 6:     POINT ptVelocity = _pCarSprite->GetVelocity();
 7:     if (GetAsyncKeyState(VK_LEFT) < 0)
 8:     {
 9:       // Move left
10:       ptVelocity.x = max(ptVelocity.x - 1, -4);
11:       _pCarSprite->SetVelocity(ptVelocity);
12:     }
13:     else if (GetAsyncKeyState(VK_RIGHT) < 0)
14:     {
15:       // Move right
16:       ptVelocity.x = min(ptVelocity.x + 2, 6);
17:       _pCarSprite->SetVelocity(ptVelocity);
18:     }
19:
20:     // Fire missiles based upon spacebar presses
21:     if ((++_iFireInputDelay > 6) && GetAsyncKeyState(VK_SPACE) < 0)
22:     {
23:       // Create a new missile sprite
24:       RECT  rcBounds = { 0, 0, 600, 450 };
25:       RECT  rcPos = _pCarSprite->GetPosition();
26:       Sprite* pSprite = new Sprite(_pMissileBitmap, rcBounds, BA_DIE);
27:       pSprite->SetPosition(rcPos.left + 15, 400);
28:       pSprite->SetVelocity(0, -7);
29:       _pGame->AddSprite(pSprite);
30:
31:       // Play the missile (fire) sound
32:       PlaySound((LPCSTR)IDW_MISSILE, _hInstance, SND_ASYNC |
33:         SND_RESOURCE | SND_NOSTOP);
34:
35:       // Reset the input delay
36:       _iFireInputDelay = 0;
37:     }
38:   }
39:
40:   // Start a new game based upon an Enter (Return) key press
41:   if (GetAsyncKeyState(VK_RETURN) < 0)
42:     if (_bSplash)
43:     {
44:       // Start a new game without the splash screen
45:       _bSplash = FALSE;
46:       NewGame();
47:     }
48:     else if (_bGameOver)
49:     {
50:       // Start a new game
51:       NewGame();
52:     }
53: }
Within the code that responds to the Enter (Return) key, you’ll find the code that checks to see if the game is leaving splash screen mode. This code first checks to see if the game is in splash screen mode (line 42), and then clears the _bSplash variable and starts a new game if so (lines 45 and 46). If the game is not in splash screen mode, the function checks to see if the game is over (line 48). If the game is over, a new game is started (line 51), which is similar to how the HandleKeys() function worked prior to adding the splash screen code.
The Space Out 2 game represents one of the easiest tests you’ll ever perform on a game. All you really have to do is run the game and make sure that the splash screen appears properly. Of course, you also need to make sure that the splash screen goes away when you press the Enter key to start a new game, but you get the idea. Figure 22.2 shows the splash screen displayed in the Space Out 2 game when the game first starts.

Figure 22.2. The splash screen in the Space Out 2 game presents the game title, copyright information, and information about how to start the game.
Keep in mind that you are free to get as fancy as you want with the splash screen image for your own games. I chose to keep the Space Out 2 splash screen relatively simple, but you might want to jazz it up to suit your own tastes. The important thing to note about this example is that the splash screen is properly displayed when the game starts.
This hour introduced you to an important feature of most games—the splash screen. Not only is the splash screen important in terms of conveying useful information about a game, such as a copyright notice, but it also serves as the player’s first glimpse at what your game looks like. You can take advantage of a splash screen to dramatize the theme of your game and even exaggerate the game graphics. For example, it was common for arcade games to include a fully illustrated splash screen—even though the graphics in the actual games were simpler. This is an engaging way to grab the player’s attention and get him interested in the game.
The next hour builds on what you learned about splash screens and shows you how to include a demo mode in your games. A demo mode is similar to a splash screen, but its goal is to provide a glimpse at how a game actually plays.
The Workshop is designed to help you anticipate possible questions, review what you’ve learned, and begin learning how to put your knowledge into practice. The answers to the quiz can be found in Appendix A, “Quiz Answers.”
Create your own splash screen bitmap image for the Space Out 2 game and incorporate it into the game.
Modify the splash screen for the Space Out 2 game so that it consists of two splash screen modes that display two images in succession for the splash screen. In other words, create one splash screen image for the game’s title and another that describes how to play the game and what keys to use.