
You’ve spent a great deal of time throughout the book thus far assembling a game engine and learning the ropes of what it takes to build games. You’ve even created a complete game, although it didn’t involve any animation. In this hour, you embark on your next complete game, which takes what you’ve learned about sprites and puts it to use. The Henway game developed in this hour uses several sprites and most of the sprite features built in to the game engine. The game is somewhat of a takeoff on the classic Frogger game, and it represents a significant milestone in your game programming quest because it is such an interesting little game. This is the kind of game that you can use as the basis for your own game development efforts.
In this hour, you’ll learn:
Why modeling a game on a classic arcade game is sometimes a good idea
How to design a game called Henway that is somewhat of a takeoff on Frogger
How to write the code for the Henway game
Why testing a game of your own is often the most fun part of the development process
The original Frogger arcade game involved a frog whose goal was to make it across a highway and a river safely. Several obstacles appeared in the frog’s path, including speeding cars, treacherous rushing water, and alligators, to name a few. Frogger played vertically, which means that you guided the frog from the bottom of the game screen to the top of the screen in order to reach safety. As you guided more and more frogs safely across, the game progressed to get more difficult by adding more cars and other obstacles to the mix. Although Frogger is certainly an incredibly simple game by modern gaming standards, it’s a perfect example of a classic game with fun game play. This makes it a perfect candidate for creating a game of your own—just put a twist on the concept, and you can create your own Frogger-like masterpiece.
Note

In case you’re wondering, I don’t generally encourage basing all of your games on existing classics, but I have found that popular games of the past can provide good ideas for new games. These days everyone is busy trying to model computer games after movies, but not everyone is interested in playing a heavily scripted drama. Sometimes it’s fun to fire up a game and play for a few minutes as a light diversion; in which case, the classics are perfect.
The popularity of Frogger resulted in a variety of knock-off games being created to coattail Frogger’s success. One of these games was called Freeway, and it involved a chicken trying to cross a busy highway. Freeway was made by Activision for the Atari 2600 game system, which was the first console system to really hit it big. As a proud owner and player of Freeway, I thought it would be fun to create a similar game in this hour. However, the game you create is called Henway, which comes from an old joke. If you’ve never heard the joke, it goes like this: You mention the word “henway” a few times in a conversation with a friend, and eventually he’ll get up the nerve to say, “What’s a henway?” And you immediately respond, “Oh, about three pounds.” I know, it’s a very bad joke, but it makes for a fun name for a game involving a chicken and a highway.
Unlike Frogger, the hero in Henway is a chicken who desperately needs to get from one side of a busy highway to the other. Also unlike Frogger, Henway plays horizontally, which means that you guide the chicken from the left side of the screen to the right side. So, the game screen looks something like the drawing in Figure 12.1.
Figure 12.1. The Henway game consists of a Start Area, a Highway, and a Finish Area, along with chicken and car sprites.
As you can see, the obstacles working against the chicken are four sprites that are cruising up and down four lanes of highway. The cars move at varying speeds, which makes it a little trickier to time the chicken’s crossing. Unlike Frogger, which requires you to guide the frog into specific zones of the Finish Area, Henway just requires you to get the chicken across the road.
Note
You’ll notice that a common thread throughout all of the game examples in the book is simplicity. Although there are all kinds of neat ways to improve on the games, I opted to leave it up to you to make the improvements. My goal is to provide you with a working game that is simple enough to understand, and then you can jazz it up with extra features.
You start the Henway game with a limited number of chickens: three. When all of your chickens get run over, the game is over. It’s important to show somewhere on the screen how many chickens you have remaining. Additionally, some kind of notification should take place to inform you when you lose a chicken, as well as when you successfully make it across the highway. It also wouldn’t hurt to have some kind of scoring system for rewarding good game play.
The Henway game is well suited for both keyboard and joystick input, although there isn’t really a good way to use the mouse in the game. For this reason, you’ll focus on supporting the keyboard and joystick, and skip the mouse entirely.
The overview of the Henway game has already given you a leg up on the game’s design, even if you don’t realize it. For example, you already know how many sprites are required for the game. Can you hazard a guess? There are five sprites in the game: one chicken sprite and four car sprites. There is certainly the opportunity to include additional car sprites if desired, but the basic game only uses four.
Beyond the sprites, can you guess how many bitmap images the game needs? If you guessed six, you’re very close. Following are the seven bitmap images required of the game:
Background highway image
Chicken image
Four car images
Small chicken image
You probably factored in all these images except the last one. The small chicken image is used to convey to the player how many chickens are left. As an example, when the game starts, three small chickens are displayed in the lower right edge of the screen. As you sacrifice your chickens to the highway, the small chickens disappear until you have none left and the game is over.
Now that you have a feel for the graphical objects involved in the game, let’s consider other data that must be maintained by the game. First, it’s pretty obvious that you’ll need to keep track of how many chicken lives are remaining. You’ll also want to keep a running score that is added to each time a chicken makes it safely across the highway. A Boolean variable keeping track of whether the game is over is also required.
There is one last variable that would be hard for you to anticipate without actually developing the game and testing it out. I’m referring to an input delay variable, which helps to alter the keyboard and joystick input response to improve the playability of the game. If you directly responded to the keyboard and joystick in every game cycle, which is how you would logically support input in the game, the chicken would zip around the game screen too fast. There are just too many game cycles taking place to give input devices that much attention. In order to slow down the input a little, you can use a delay variable and only check for keyboard and joystick input every third game cycle. Determining the appropriate delay is somewhat of a trial and error process, so you’re free to tinker with it and see what you like best. The point is that the game benefits dramatically from putting a leash on the speed of the user input handling.
To recap, the design of the Henway game has led us to the following pieces of information that must be managed by the game:
The number of chicken lives
The score
A Boolean game over variable
A delay variable
With this information in mind, you’re now ready to move on and put the code together for the Henway game.
Hopefully by now you’re getting antsy to see how the Henway game is put together. The next couple of sections explore the code development for the Henway game, which is relatively simple when you consider that this is the first fully functioning game you’ve created that supports double-buffer sprite animation. The revamped game engine with sprite management really makes the Henway game a smooth game to develop.
The code for the Henway game begins with the Henway.h header file, which is shown in Listing 12.1.
Example 12.1. The Henway.h Header File Declares Global Variables that Are Used to Manage the Game, as well as a Helper Function
 1: #pragma once
 2:
 3: //-----------------------------------------------------------------
 4: // Include Files
 5: //-----------------------------------------------------------------
 6: #include <windows.h>
 7: #include "Resource.h"
 8: #include "GameEngine.h"
 9: #include "Bitmap.h"
10: #include "Sprite.h"
11:
12: //-----------------------------------------------------------------
13: // Global Variables
14: //-----------------------------------------------------------------
15: HINSTANCE   _hInstance;
16: GameEngine* _pGame;
17: HDC         _hOffscreenDC;
18: HBITMAP     _hOffscreenBitmap;
19: Bitmap*     _pHighwayBitmap;
20: Bitmap*     _pChickenBitmap;
21: Bitmap*     _pCarBitmaps[4];
22: Bitmap*     _pChickenHeadBitmap;
23: Sprite*     _pChickenSprite;
24: int         _iInputDelay;
25: int         _iNumLives;
26: int         _iScore;
27: BOOL        _bGameOver;
28:
29: //-----------------------------------------------------------------
30: // Function Declarations
31: //-----------------------------------------------------------------
32: void MoveChicken(int iXDistance, int iYDistance);
The global variables for the Henway game consist largely of the different bitmaps used throughout the game. The offscreen device context and bitmap are declared (lines 17 and 18), as well as the different bitmaps that comprise the game’s graphics (lines 19–22). Even the sprite management features of the game engine are being used in this game; it’s necessary to keep a pointer to the chicken sprite so that you can change its position in response to user input events. The _pChickenSprite member variable is used to store the chicken sprite pointer (line 23). The input delay for the keyboard and joystick is declared next (line 24), along with the number of chicken lives remaining (line 25) and the score (line 26). The last variable is the Boolean game over variable, which simply keeps track of whether the game is over (line 27).
You’ll notice that a helper function named MoveChicken()
is declared in the Henway.h file. This function is called by other game functions within the game to move the chicken sprite in response to user input events. The two arguments to the MoveChicken() function are the X and Y amounts to move the chicken.
The actual game functions appear in the Henway.cpp source code file, which is located on the accompanying CD-ROM. The first game function worth mentioning is the
GameInitialize() function, which creates the game engine, establishes the frame rate, and initializes the joystick.
The GameStart() function is a little more interesting than GameInitialize(). This function is responsible for initializing the game data, as shown in Listing 12.2.
Example 12.2. The GameStart() Function
Creates the Offscreen Buffer, Loads the Game Bitmaps, Creates the Game Sprites, and Initializes Game State Member Variables
 1: void GameStart(HWND hWindow)
 2: {
 3:   // Seed the random number generator
 4:   srand(GetTickCount());
 5:
 6:   // Create the offscreen device context and bitmap
 7:   _hOffscreenDC = CreateCompatibleDC(GetDC(hWindow));
 8:   _hOffscreenBitmap = CreateCompatibleBitmap(GetDC(hWindow),
 9:     _pGame->GetWidth(), _pGame->GetHeight());
10:   SelectObject(_hOffscreenDC, _hOffscreenBitmap);
11:
12:   // Create and load the bitmaps
13:   HDC hDC = GetDC(hWindow);
14:   _pHighwayBitmap = new Bitmap(hDC, IDB_HIGHWAY, _hInstance);
15:   _pChickenBitmap = new Bitmap(hDC, IDB_CHICKEN, _hInstance);
16:   _pCarBitmaps[0] = new Bitmap(hDC, IDB_CAR1, _hInstance);
17:   _pCarBitmaps[1] = new Bitmap(hDC, IDB_CAR2, _hInstance);
18:   _pCarBitmaps[2] = new Bitmap(hDC, IDB_CAR3, _hInstance);
19:   _pCarBitmaps[3] = new Bitmap(hDC, IDB_CAR4, _hInstance);
20:   _pChickenHeadBitmap = new Bitmap(hDC, IDB_CHICKENHEAD, _hInstance);
21:
22:   // Create the chicken and car sprites
23:   Sprite* pSprite;
24:   RECT    rcBounds = { 0, 0, 465, 400 };
25:   _pChickenSprite = new Sprite(_pChickenBitmap, rcBounds, BA_STOP);
26:   _pChickenSprite->SetPosition(4, 175);
27:   _pChickenSprite->SetVelocity(0, 0);
28:   _pChickenSprite->SetZOrder(1);
29:   _pGame->AddSprite(_pChickenSprite);
30:   pSprite = new Sprite(_pCarBitmaps[0], rcBounds, BA_WRAP);
31:   pSprite->SetPosition(70, 0);
32:   pSprite->SetVelocity(0, 7);
33:   pSprite->SetZOrder(2);
34:   _pGame->AddSprite(pSprite);
35:   pSprite = new Sprite(_pCarBitmaps[1], rcBounds, BA_WRAP);
36:   pSprite->SetPosition(160, 0);
37:   pSprite->SetVelocity(0, 3);
38:   pSprite->SetZOrder(2);
39:   _pGame->AddSprite(pSprite);
40:   pSprite = new Sprite(_pCarBitmaps[2], rcBounds, BA_WRAP);
41:   pSprite->SetPosition(239, 400);
42:   pSprite->SetVelocity(0, -5);
43:   pSprite->SetZOrder(2);
44:   _pGame->AddSprite(pSprite);
45:   pSprite = new Sprite(_pCarBitmaps[3], rcBounds, BA_WRAP);
46:   pSprite->SetPosition(329, 400);
47:   pSprite->SetVelocity(0, -10);
48:   pSprite->SetZOrder(2);
49:   _pGame->AddSprite(pSprite);
50:
51:   // Initialize the remaining global variables
52:   _iInputDelay = 0;
53:   _iNumLives = 3;
54:   _iScore = 0;
55:   _bGameOver = FALSE;
56: }
The GameStart() function contains a fair amount of code, which primarily has to do with the fact that creating each sprite requires a few lines of code. The function starts out by creating the offscreen device context and bitmap (lines 7–10). All the bitmaps for the game are then loaded (lines 13–20). Finally, the really interesting part of the function involves the creation of the sprites, which you should be able to follow without too much difficulty. The chicken sprite is first created at a position in the Start Area of the game screen, and with 0 velocity (lines 25–29). The car sprites are then created at different positions and with varying velocities (lines 30–49). Notice that the bounds actions for the car sprites are set so that the cars wrap around the game screen, whereas the chicken sprite stops when it encounters a boundary. Also, the Z-order of the cars is set higher than the chicken so that the chicken will appear under the cars when it gets run over.
The remaining member variables in the Henway game are initialized in the GameStart() function after
the sprites are created. The input delay is set to 0 (line 52), whereas the number of chicken lives is set to 3 (line 53). The score is also set to 0 (line 54), and the game over variable is set to FALSE to indicate that the game isn’t over (line 55).
The Henway game relies on the keyboard and joystick for user input. In order to support joystick input, it’s important to capture and release the joystick whenever the game window is activated and deactivated. Listing 12.3 shows the code for the GameActivate() and
GameDeactivate() functions, which are responsible in this case for capturing and releasing the joystick.
Example 12.3. The GameActivate()
and GameDeactivate() Functions Capture and Release the Joystick, Respectively
The GameActivate() function
calls the CaptureJoystick() method on the game engine to capture the joystick (line 4), whereas the GameDeactivate() function calls ReleaseJoystick() to release the joystick (line 10).
As you know, the GamePaint()
function is responsible for painting games. Listing 12.4 contains the code for the Henway game’s GamePaint() function.
Example 12.4. The GamePaint()
Function Draws the Highway Background Image, the Game Sprites, and the Number of Remaining Chicken Lives
 1: void GamePaint(HDC hDC)
 2: {
 3:   // Draw the background highway
 4:   _pHighwayBitmap->Draw(hDC, 0, 0);
 5:
 6:   // Draw the sprites
 7:   _pGame->DrawSprites(hDC);
 8:
 9:   // Draw the number of remaining chicken lives
10:   for (int i = 0; i < _iNumLives; i++)
11:     _pChickenHeadBitmap->Draw(hDC,
12:       406 + (_pChickenHeadBitmap->GetWidth() * i), 382, TRUE);
13: }
This GamePaint() function must draw all the game graphics for the Henway game. The function begins by drawing the background highway image (line 4), and then it draws the game sprites (line 7). The remainder of the function draws the number of remaining chicken lives in the lower right corner of the game screen using small chicken head bitmaps (lines 10–12). A small chicken head is drawn for each chicken life remaining, which helps you to know how many times you can get run over before the game ends.
The GameCycle() function
works hand in hand with GamePaint() to update the game’s sprites and then reflect the changes onscreen. Listing 12.5 shows the code for the GameCycle() function.
Example 12.5. The GameCycle()
Function Updates the Game Sprites and Repaints the Game Screen Using an Offscreen Buffer to Eliminate Flicker
 1: void GameCycle()
 2: {
 3:   if (!_bGameOver)
 4:   {
 5:     // Update the sprites
 6:     _pGame->UpdateSprites();
 7:
 8:     // Obtain a device context for repainting the game
 9:     HWND  hWindow = _pGame->GetWindow();
10:     HDC   hDC = GetDC(hWindow);
11:
12:     // Paint the game to the offscreen device context
13:     GamePaint(_hOffscreenDC);
14:
15:     // Blit the offscreen bitmap to the game screen
16:     BitBlt(hDC, 0, 0, _pGame->GetWidth(), _pGame->GetHeight(),
17:       _hOffscreenDC, 0, 0, SRCCOPY);
18:
19:     // Cleanup
20:     ReleaseDC(hWindow, hDC);
21:   }
22: }
The GameCycle() function first checks to make sure that the game isn’t over (line 3); in which case, there would be no need to update anything. The function then updates the sprites (line 6) and goes about redrawing the game graphics using double-buffer animation. This double-buffer code should be fairly familiar to you by now, so I won’t go into the details. The main thing to notice is that the GamePaint() function is ultimately being used to draw the game graphics (line 13).
I mentioned earlier that the Henway game supports both keyboard and joystick input. Listing 12.6 contains the code for the HandleKeys() function,
which takes care of processing and responding to keyboard input in the game.
Example 12.6. The HandleKeys()
Function Responds to the Arrow Keys on the Keyboard by Moving the Chicken
 1: void HandleKeys()
 2: {
 3:   if (!_bGameOver && (++_iInputDelay > 2))
 4:   {
 5:     // Move the chicken based upon key presses
 6:     if (GetAsyncKeyState(VK_LEFT) < 0)
 7:       MoveChicken(-20, 0);
 8:     else if (GetAsyncKeyState(VK_RIGHT) < 0)
 9:       MoveChicken(20, 0);
10:     if (GetAsyncKeyState(VK_UP) < 0)
11:       MoveChicken(0, -20);
12:     else if (GetAsyncKeyState(VK_DOWN) < 0)
13:       MoveChicken(0, 20);
14:
15:     // Reset the input delay
16:     _iInputDelay = 0;
17:   }
18: }
The HandleKeys() function
begins by making sure that the game isn’t over, as well as incrementing and testing the input delay (line 3). By testing the input delay before processing any keyboard input, the HandleKeys() function effectively slows down the input so that the chicken is easier to control. The chicken is actually controlled via the arrow keys, which are checked using the Win32 GetAsyncKeyState() function. Each arrow key is handled by calling the MoveChicken() function, which moves the chicken by a specified amount (lines 6–13). After processing the keys, the input delay is reset so that the input process can be repeated (line 16).
The joystick is handled in the Henway game in a similar manner as the mouse, as Listing 12.7 reveals.
Example 12.7. The HandleJoystick()
Function Responds to Joystick Movements by Moving the Chicken, and also Supports Using the Primary Joystick Button to Start a New Game
 1: void HandleJoystick(JOYSTATE jsJoystickState)
 2: {
 3:   if (!_bGameOver && (++_iInputDelay > 2))
 4:   {
 5:     // Check horizontal movement
 6:     if (jsJoystickState & JOY_LEFT)
 7:         MoveChicken(-20, 0);
 8:     else if (jsJoystickState & JOY_RIGHT)
 9:         MoveChicken(20, 0);
10:
11:     // Check vertical movement
12:     if (jsJoystickState & JOY_UP)
13:         MoveChicken(0, -20);
14:     else if (jsJoystickState & JOY_DOWN)
15:         MoveChicken(0, 20);
16:
17:     // Reset the input delay
18:     _iInputDelay = 0;
19:   }
20:
21:   // Check the joystick button and start a new game, if necessary
22:   if (_bGameOver && (jsJoystickState & JOY_FIRE1))
23:   {
24:     _iNumLives = 3;
25:     _iScore = 0;
26:     _bGameOver = FALSE;
27:   }
28: }
The HandleJoystick() function performs the same check on the _bGameOver and _iInputDelay variables to make sure that it is time to check the joystick for input (line 3). If so, the joystick is first checked for horizontal movement by examining the jsJoystickState argument passed in to the function. The chicken is then moved left or right, if necessary, by calling the MoveChicken() function (lines 6–9). A similar process is then repeated for vertical joystick movement (lines 12–15). After handling joystick movement, the HandleJoystick() function resets the _iInputDelay variable (line 18). The function then concludes by checking to see if the primary joystick button was pressed (line 22); in which case, a new game is started (lines 24–26).
Speaking of starting a new game, the mouse is used in the Henway game solely to start a new game if the current game has ended. Listing 12.8 shows the code for the MouseButtonDown()
function, which starts a new game in response
to a mouse button click.
If a mouse button is clicked and the current game is over, the MouseButtonDown() function starts a new game by clearing the game state variables (lines 6–8).
The game play of the Henway game is largely dictated by the sprites in the game. These sprites are capable of colliding; in which case, the SpriteCollision()
function gets called. Of course, the car sprites are designed to only move vertically up and down the screen, so they’ll never hit each other. This means that the SpriteCollision() function only gets called when a car hits the chicken, or vice versa. Listing 12.9 shows how this collision is handled in the SpriteCollision() function.
Example 12.9. The SpriteCollision()
Function Checks to See if the Chicken Was Hit by a Car, and Then Responds Accordingly
 1: BOOL SpriteCollision(Sprite* pSpriteHitter, Sprite* pSpriteHittee)
 2: {
 3:   // See if the chicken was hit
 4:   if (pSpriteHittee == _pChickenSprite)
 5:   {
 6:     // Move the chicken back to the start
 7:     _pChickenSprite->SetPosition(4, 175);
 8:
 9:     // See if the game is over
10:     if (--_iNumLives > 0)
11:       MessageBox(_pGame->GetWindow(), TEXT("Ouch!"), TEXT("Henway"), MB_OK);
12:     else
13:     {
14:       // Display game over message
15:       TCHAR szText[64];
16:       wsprintf(szText, "Game Over! You scored %d points.", _iScore);
17:       MessageBox(_pGame->GetWindow(), szText, TEXT("Henway"), MB_OK);
18:       _bGameOver = TRUE;
19:     }
20:
21:     return FALSE;
22:   }
23:
24:   return TRUE;
25: }
Most of the game logic in the Henway game is located in the SpriteCollision() function. First, a check is made to ensure that the chicken was indeed involved in the collision (line 4). If so, you can safely assume that the chicken was hit by a car, so the chicken’s position is restored to its starting position in the Start Area (line 7). The number of chicken lives is then decremented and checked to see if the game is over (line 10). If the game isn’t over, a message is displayed indicating that you lost a chicken (line 11), but the game ultimately continues on. If the game is over, however, a special “Game Over” message is displayed and the _bGameOver variable is set to TRUE (lines 15–18).
If you recall from the design of the sprite manager, the return value of the SpriteCollision() function determines whether the sprite’s old position is restored; a value of TRUE restores the old position, whereas FALSE allows the sprite to keep its newly updated position. In this case, the sprite keeps its new position when it collides with a car (line 21). Because the position was just set to the Start Area in line 7, the effect is that the chicken is allowed to move to the start area, which gives the appearance of a new chicken appearing.
The final function in the Henway game is
the MoveChicken() function, which you’ve used several times throughout the game code. Listing 12.10 shows the code for the MoveChicken() function.
Example 12.10. The MoveChicken()
Function Moves the Chicken Sprite by a Specified Distance While Checking to See if the Chicken Made It Across the Highway
 1: void MoveChicken(int iXDistance, int iYDistance)
 2: {
 3:   // Move the chicken to its new position
 4:   _pChickenSprite->OffsetPosition(iXDistance, iYDistance);
 5:
 6:   // See if the chicken made it across
 7:   if (_pChickenSprite->GetPosition().left > 400)
 8:   {
 9:     // Move the chicken back to the start and add to the score
10:     _pChickenSprite->SetPosition(4, 175);
11:     _iScore += 150;
12:     MessageBox(_pGame->GetWindow(), TEXT("You made it!"), TEXT("Henway"),
13:       MB_OK);
14:   }
15: }
The MoveChicken() function is a helper function that simplifies the task of moving the chicken around on the game screen. The iXDistance and iYDistance arguments specify how many pixels to move the chicken in the X and Y directions (line 1). These arguments are used to move the chicken by calling the OffsetPosition() method on the Sprite class (line 4). If you didn’t care what happened to the chicken, this is all the code you would need in the MoveChicken() function. However, you need to know when the chicken makes it across the highway, and this is a perfect place to perform the check (line 7). If the chicken made it safely across, its position is set back to the Start Area (line 10) and the score is increased (11). A message is also displayed that notifies the player of a successful highway crossing (lines 12–13).
Unless you just happen to be a fan of memory games, you’ll hopefully find the Henway game to be much more fun to test than the Brainiac game from Hour 8, “Example Game: Brainiac.” The Henway is the first legitimate action game that you’ve created, which makes it considerably more interesting from a playability perspective. Keep in mind that action games often require a greater deal of testing because it’s hard to predict how sprites will react in every little situation. You should play your games a great deal to make sure that nothing out of the ordinary ever happens, or at least nothing detrimental that’s out of the ordinary.
Figure 12.2 shows the Henway game at the start, with your lion-hearted chicken poised for a trip across the highway.
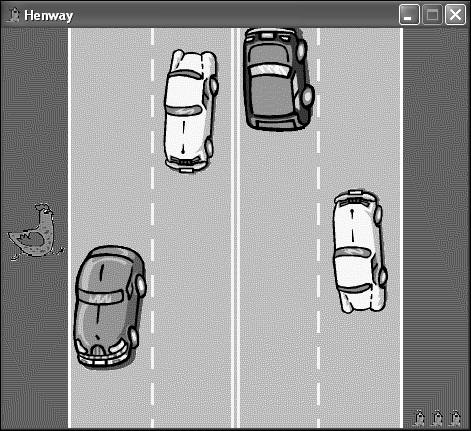
Figure 12.2. The Henway game begins with the chicken in the Start Area, ready to make an attempt at crossing the busy highway.
Note
If the chicken immediately starts moving when you start the game, there’s a good chance that your joystick needs calibrating. Refer back to the section titled “Calibrating Joysticks” in Hour 7, “Improving Input with Joysticks,” if you’ve forgotten how to calibrate your joystick.
To get started with the game, just begin guiding your chicken through traffic using the keyboard or joystick. If you successfully navigate the chicken across the highway, the game will display a message and award you with 150 points. Figure 12.3 shows the message that appears when you succeed in crossing the highway.
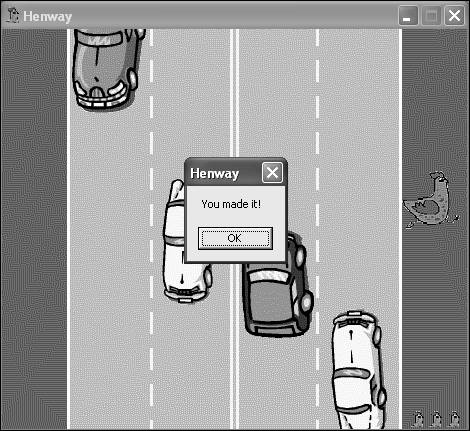
Figure 12.3. Upon successfully making it across the highway, you are notified by the game and awarded 150 points.
Of course, even the best Henway player will eventually get careless and steer the chicken into the path of an oncoming car. Figure 12.4 shows the message displayed after a chicken is hit by a car.
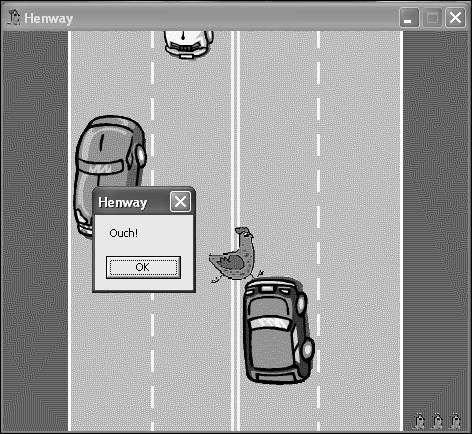
Figure 12.4. Getting hit by a car isn’t as grisly as you might expect, but the game does display a message to let you know that you’ve lost a chicken.
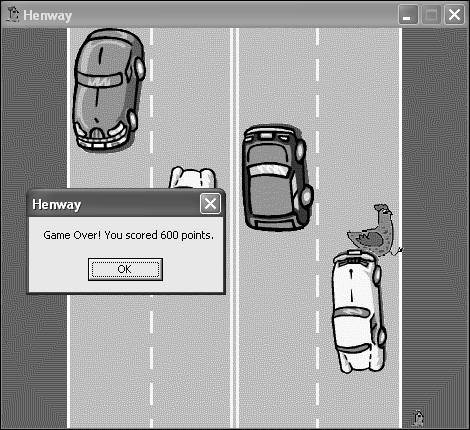
After you lose a chicken, the number of chicken lives in the lower right corner of the screen will reduce by one to show the remaining lives. When you eventually lose all three chickens, the game ends. Figure 12.5 shows the end of the game, which simply involves a message being displayed that notifies you of your final score.
Although it might be sad to steer three chickens to their demise in a highway full of busy traffic, it’s all just a game. Despite it’s relative simplicity, hopefully you can appreciate the Henway game in terms of it representing a culmination of much of what you’ve learned throughout the book thus far. Even so, there is much ahead as you continue to build more exciting games from here on.
It is a fact of life that book knowledge can only get you so far before you have to experience something yourself. This hour is an example of how book knowledge was made real when you assembled a game that relied on what you’ve learned about game programming. The Henway game made use of the sprite animation code that you developed in the previous two hours, as well as a great deal of the user input code that you built in to the game engine earlier in the book. Hopefully, you’re feeling a sense of gratification that the work you’ve spent constructing the game engine is starting to pay off in the development of a complete game with a surprisingly small amount of code.
This hour concludes the current part of the book. The next part, “Making Noise with Sound and Music,” introduces you to digital sound effects and music, as well as the role they play in games. Not surprisingly, you learn how to add sound and music to games. In fact, you’ll encounter the Henway game once more in the next part when you add sound effects and music to it.
The Workshop is designed to help you anticipate possible questions, review what you’ve learned, and begin learning how to put your knowledge into practice. The answers to the quiz can be found in Appendix A, “Quiz Answers.”
Modify the Henway game so that additional car sprites are added to make the game harder. (Hint: You can use the score as the basis for adding these sprites and making the game harder over time.)
Modify the background image for the Henway game so that there are limited spaces in the Finish Area for the chicken to finish. Then modify the code in the game so that the chicken is only allowed to move into the new spaces. This change effectively makes Henway play more like Frogger, and adds a bit more challenge to the game.