Hour 4. Using Xcode 5
What You’ll Learn in This Hour
![]() Creating an Xcode project
Creating an Xcode project
![]() Using source code repositories
Using source code repositories
![]() Committing changes to Git
Committing changes to Git
![]() Using Git branches
Using Git branches
Getting to Work with Xcode
Now that you have seen the basics of Objective-C and its use with object-oriented programming, you can start to write code. As noted previously, today the overwhelming majority of Objective-C programs are written for use on OS X and iOS; most of them are written using Xcode, Apple’s development tool.
Note: Getting Xcode
The simplest way to get Xcode is from the Mac App Store. The price is right (free). Before the existence of the Mac App Store, Xcode was distributed as a free download or on the installation disc(s) for the operating system. In those scenarios, the Xcode files were installed in a root-level folder called Developer, thus making them available to all user accounts on the Mac in question. Now, Xcode is just another app installed in the root-level Applications folder so all user accounts on the Mac have access to it. The root-level Developer folder is gone, and your Xcode files now live in your own account. This only matters to you if you used Xcode in the past or if you are referring to documentation that is now out of date. Customarily, developer preview editions of Xcode are available on developer.apple.com to registered developers. Those versions are sometimes distributed in other ways, which are described on developer.apple.com if necessary.
Xcode is a complete development environment that includes editors for text-based code, user interfaces, and Core Data data models. It comes with debugging tools, as well as a variety of extra tools you need for building and managing your projects.
As of this writing, the current version of Xcode is 5. Xcode 4 was a major change from Xcode 3, including a new single-window interface and the integration of the user interface design tool, Interface Builder (previously a separate program), into Xcode and the addition of storyboarding for iOS apps. Xcode 5 is another major change that continues the simplification started in Xcode 4. In Xcode 5, debugging tools are more closely integrated with Xcode itself along with more extensive support for Git repositories (this is discussed throughout this hour). In addition, the interface of Xcode 5 shows how some of the major design principles of iOS 7 can be applied to Mac apps. (Xcode has always served as somewhat of a testbed for new interface technologies.)
The download of Xcode typically contains the SDKs for the current and various previous versions of the operating systems for iOS and OS X. For that reason, during the development process of a new OS, revisions to the SDKs are typically reflected in revisions to Xcode. Furthermore, in 2012 and 2013, a further pattern emerged that may or may not continue. In both of these years, the new version of iOS was released a few weeks before the new version of OS X. A version of Xcode was released for the new version of iOS and the current version of OS X. A few weeks later, a minor (“dot”) release of Xcode reflected the new OS X version.
Most of the time, you use Xcode to build projects from built-in Xcode templates that include several frameworks for OS X or iOS. You write code that customizes and adds on to those frameworks for your own project’s needs.
Note
This book does not go into the frameworks you use because the goal of the book is to help you learn Objective-C itself. Still, it is important to know how your code is going to be arranged in an Xcode world.
With Xcode, you create projects. Each project can have several targets. In the simplest case, you have a single target for your project, but you can also have several targets (such as a full version and a lite version or an OS X version and an iOS version). You can switch among the targets to build them separately in Xcode.
Try it Yourself: Create a New Xcode Project
1. Launch Xcode.
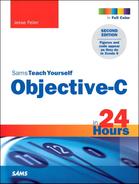
The first time you launch it, you see the splash screen shown in Figure 4.1. The check box at the bottom left enables you to choose whether or not to see it in the future. If you do not see it, you can always reopen it from Window, Welcome to Xcode or ![]() -Shift-1.
-Shift-1.
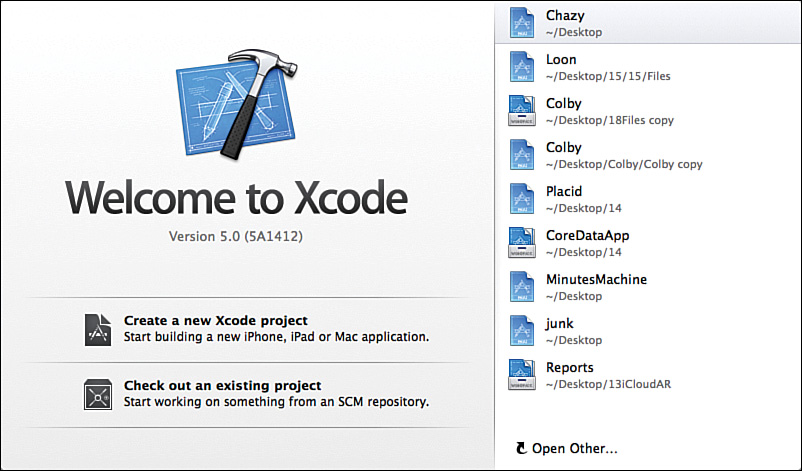
2. Click Create a New Xcode Project to open the window shown in Figure 4.2. Select the operating system and template you want to use.
3. Select the templates for each of the operating systems. For this experiment, choose the Master-Detail Application template for iOS.
Figure 4.3 shows the templates for OS X.

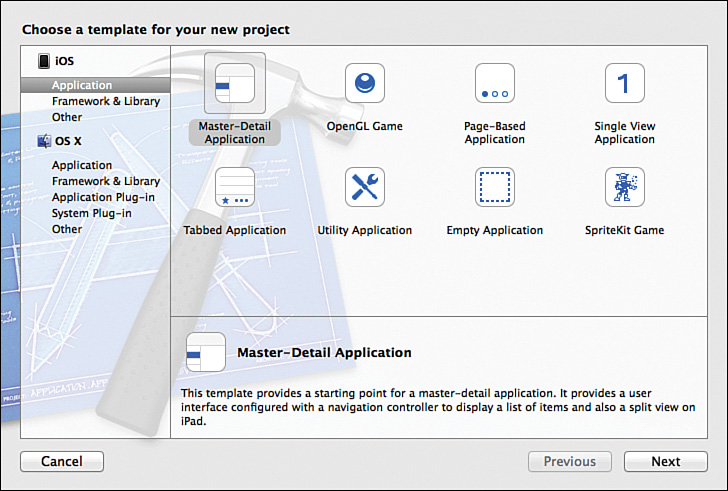
4. On the next screen (see Figure 4.4), name the project and provide additional information.
Tip
The choices and settings differ for iOS and OS X projects as well as for different templates within them, but you always name the project.
5. Provide a location for the project and create a source code repository, as shown in Figure 4.5. From the pop-up menu, choose My Mac for the location.
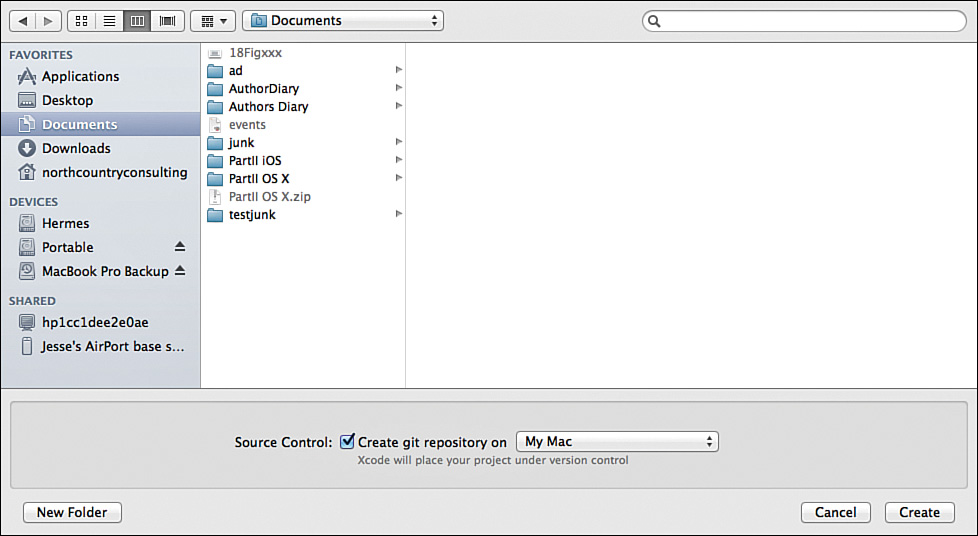
Make sure to check the Create Git Repository on My Mac check box source code repository. There is more on Git in particular and source code repositories in general in the next section.
Keeping Track of Your Source Code
In Step 5 of the Try It Yourself activity, “Create a New Xcode Project,” you set the check box to create the Git source code repository. In this section, you explore what Git in particular and source code repositories in general are and how they can make your life easier as you develop a project. You may wonder why you need to worry about them at this point in your Objective-C programming adventures. The reason is simple: By the time your projects and files are so many that you need a source code management system, it is often too late to implement one easily. Thus, source code management joins security, multiuser architectures, and runtime version control of data structures as issues you should confront before you need them.
Note: What Doesn’t Need Version Control?
A one-time test or experiment that you plan to definitely discard does not need source control management. You write it, test whatever it is you want to test, and then you throw it away. You may actually save some or all of the code so that you can refer to the relevant section or snippet that solved a problem you might need to address in larger systems. For many people, considering the trade-off between not having source control for a project that needs it and having source control for a project that doesn’t really need it is not a challenge: When in doubt, use it.
Xcode supports both Subversion and Git with a common interface for both. However, it creates repositories only for Git, which is why it is used in this hour. Both Subversion and Git can be controlled from the command line in the Terminal app. Because Subversion is a client/server version control system rather than a distributed one, Git and its distributed architecture make it easier to integrate into Xcode in a totally automated manner.
Exploring Source Code Control
When software development moved beyond consisting of a single file for each program or app, it started to become more difficult to manage the various project files. On top of that, when more than one developer—maybe in more than one location—was working on a project, it became necessary to automate the management of the various files. Source code repositories were born. In multiple-developer, multiple-location situations, there are not only multiple files in a project, but also multiple versions of each file. The complexity of storing these files and, most important, knowing which versions of which files make up a single version of the project as a whole quickly becomes hard to manage.
Tip: Finding Out More About Version Control
Wikipedia is a terrific resource, particularly for technology issues. Start by looking up Git and then follow whatever links interest you. This section provides only a high-level overview of the Git interface in Xcode.
A key aspect of source code management is the ability to check out files from the repository and modify them in your own directory. When you are done, you can check the code back in. In both the check-in and checkout processes, you are allowed to add a comment about what you have done, and perhaps what you plan on doing next. (Using these comments is definitely a best practice.) In addition to your optional comment, the source code management software automatically captures the date and time of the check-in/checkout as well as the user’s name. Thus, you have a management record of the files.
Using Forks and Branches
Whether you are working with other developers or are working on your own, there are times when you do not simply want to check out files and then check them back in. Sometimes you want to fork or branch the code.
In the case of branching, you create an independent branch or series of check-ins and checkouts that remain within the overall project. Depending on the project and the development, you might eventually merge a branch back into the main branch, or a branch might become the main branch. However it is handled, the intention of branching is to create multiple development paths within a single project. In the case of forking, you might take an existing project, copy it (with permission, of course), and then continue development on the separate fork.
Tip: Using Branches in a Classroom
One example of branching is when a single project is placed in a source code repository for a class. Each student can then check out a branch independently of the other students. The teacher and students can view the various branches to see how different people have addressed the same problems in the project. Think about how you would accomplish the same results if each student worked in a separate set of files in separate directories. For even a small class with fewer than a dozen people, you could quickly wind up with people manipulating more than a hundred files in various projects.
The problem of source code management was addressed in two primary ways. Starting in the mainframe era, the notion of management of any kind of data was generally solved by storing the data in a centralized location (think databases) and in a client/server scenario.
With the advent of fast networks, it became feasible to decentralize the storage of the shared data, and that is what Git does. There is no centralized repository; rather, there can be many repositories, each of which is complete.
In practical terms, for most people working on their own Xcode projects, there is only one repository: their own. There is no need to sync it with other copies of the repository because there are none. This means that although Git can manage multiple repositories on a peer-to-peer basis, the only commands that you need to worry about are the commands to check in or check out a file, create a branch, or merge a branch.
The final thing you need to worry about is the check box shown previously in Figure 4.5. Check it to create your Git repository on your own computer—and you are ready to go.
Tip: The History of Git
Git is free software initially developed by Linus Torvalds for handling the source control needs of the Linux Kernel project. It is distributed under the GNU Public License (GPL), version 2.
Working in a Source Code Repository World
There are two points to remember as you move into the world of source code repositories:
![]() Everything is a version or a revision. If you want to split hairs, you can even suggest that the first version of a file posted to a repository is itself a revision—a revision from nothing to that first version.
Everything is a version or a revision. If you want to split hairs, you can even suggest that the first version of a file posted to a repository is itself a revision—a revision from nothing to that first version.
![]() Trust the version control. For many people, the hardest thing to learn is to stop managing files and versions themselves. Before embarking on an attempt to solve a problem, many developers are used to copying the project files to a new directory so that, if there are problems, they can revert to a known version. This is no longer necessary. You can create a branch if you want, but you can also check out files to modify them and discard the modifications. All of the file and naming manipulation can be handled by the version control system.
Trust the version control. For many people, the hardest thing to learn is to stop managing files and versions themselves. Before embarking on an attempt to solve a problem, many developers are used to copying the project files to a new directory so that, if there are problems, they can revert to a known version. This is no longer necessary. You can create a branch if you want, but you can also check out files to modify them and discard the modifications. All of the file and naming manipulation can be handled by the version control system.
Tip
As you might have noticed, in this book the terms source code control and version control are used interchangeably. There are subtle differences, but for all intents and purposes, they are the same thing.
Because you will be relying on the version control software to keep track of the versions of your code along with your comments as you check files in and out, you do not need to name files to reflect their test status. This can be a difficult habit to break, but unless you do, you will not reap the benefits of source code management software. Furthermore, you will make your development environment more complicated.
Establish a naming convention for your files and stick to it. With Xcode, the naming convention can be very simple: Accept the Xcode default names. You can set up a class prefix as shown previously in Figure 4.4 to add a default prefix to new files. Make certain that the prefix has to do with the files (for example, who owns licensed code in them) and does not reflect the state of the file, such as test or development. Those considerations can be managed very well with source code control. Prefixes enable you to prevent namespace collisions between existing code and your new code. They also can help you keep track of where code you have included from other developers and open sources comes from.
Thus, when you create and name your project, consider that you are naming what will be the project in all of its configurations—test, production, enhancements, and so forth. Use the production name in most cases.
Tip
There is one exception to this. You might want to have a single alternate version of the project with its own name. This can facilitate testing on a sandboxed app environment where the name matters.
Using Git with Xcode
If you have created a new project as described in the Try It Yourself activity, “Create a New Xcode Project,” you have an iOS app that can run as is. It does not do much, but it builds and runs, and, most important, it provides a shell with which you can test your Objective-C code.
Without making any changes, build the project. Click the Run arrow at the left of the toolbar in the Xcode window and select where to run it. If you have created an iOS project, your choices will be an actual device or the simulator, which has a variety of hardware configurations built in to it, as shown in Figure 4.6.
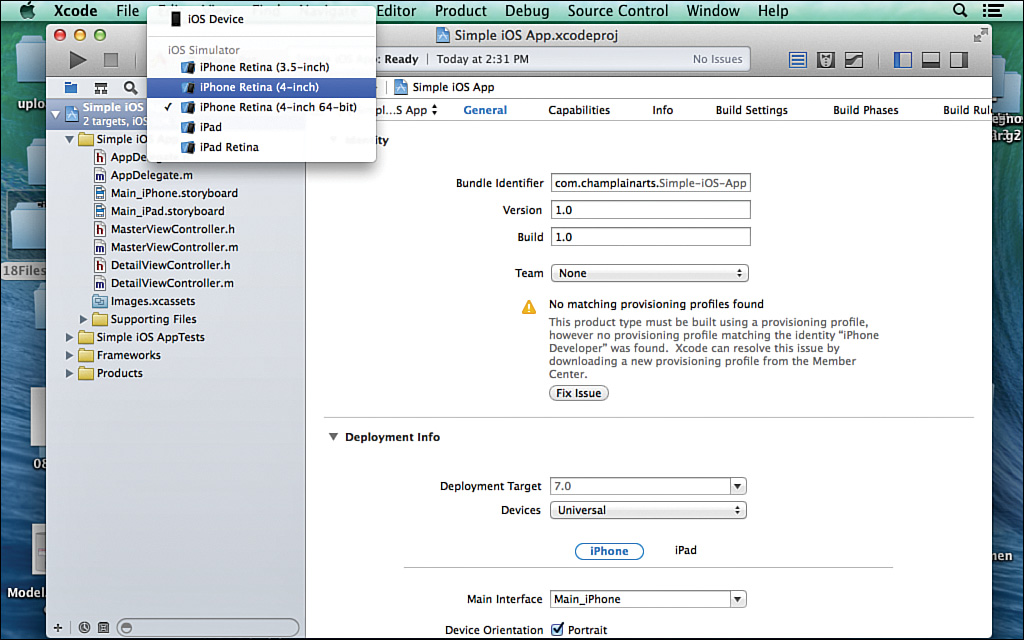
You may see a message about a missing provisioning profile. If you are just testing Objective-C code, you can ignore that message. If you are using the frameworks that implement iCloud and access to shared services, you must resolve the issue; for the projects in this book, however, you should be okay.
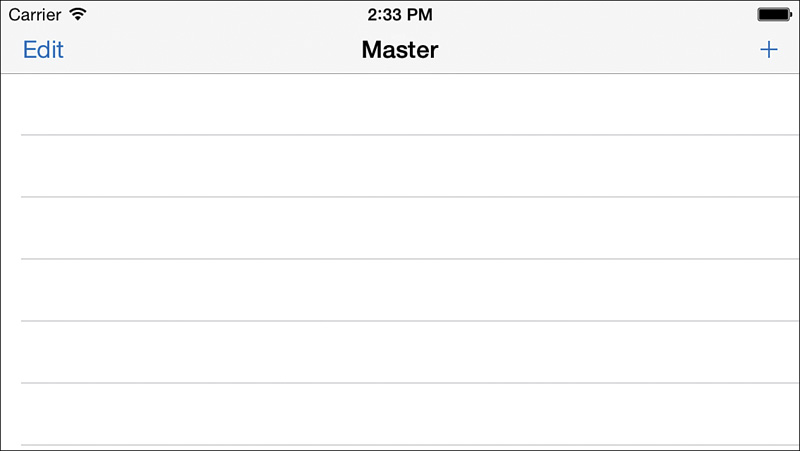
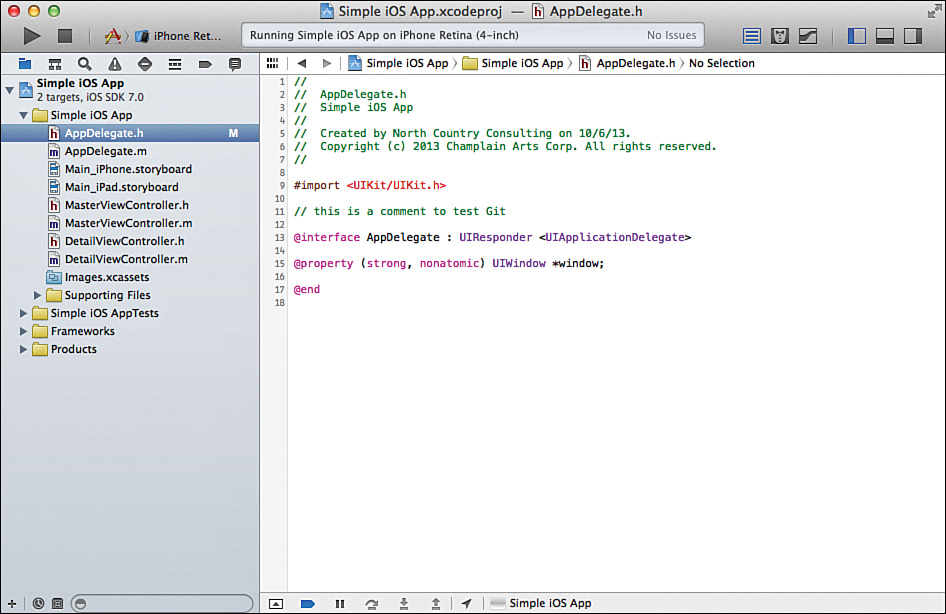
When it runs, you’ll see the app as shown in Figure 4.7. You can use the simulator’s menu commands to rotate the simulated device.
Note: Local and Remote Repositories for Git
If you create a git repository as shown previously in Figure 4.5, you’ll want to see it and be able to use it within Xcode. However, you won’t see it in the Finder. It is a hidden file (starting with a period) inside your project’s directory. That way, if you move the directory elsewhere, you’ll still have your repository. However, if you move the individual files, you’ll lose the repository unless you go back and show invisible files and move it.
Git (including the Git interface in Xcode) enables you to manage remote repositories as well as a local one. The most common way of doing this is to clone a remote repository. You can then work on your local copy and, when you are ready, synchronize it back to the remote version. This is described at the end of this hour in “Using a Remote Repository.”
After you start to use Git, you will see what it can do (and how you can do it).
Try it Yourself: Use Git to Track Changes
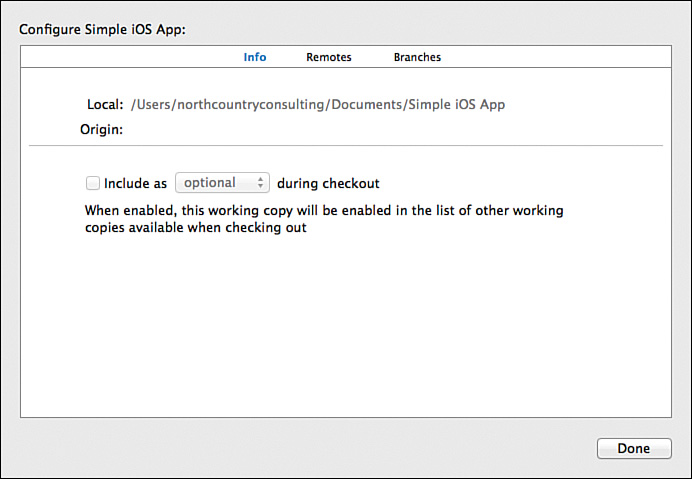
1. Select the working copy of your app and choose Configure from the submenu, as shown in Figure 4.8.
You may see repositories other than the one you have just created.
Tip
If you do not see the project you have just created, create a new project and make certain to indicate that you want a Git repository.
2. Check that the local repository has been created, using the command Source Control, History as shown in Figure 4.9.
3. Make a change to a file in the project.
In Figure 4.10, you see a traditional C language-style comment added at the top of AppDelegate.h. Note the badge (the letter M) indicating a modification to the file in the project navigator. (It might take a moment or two for it to show up.)
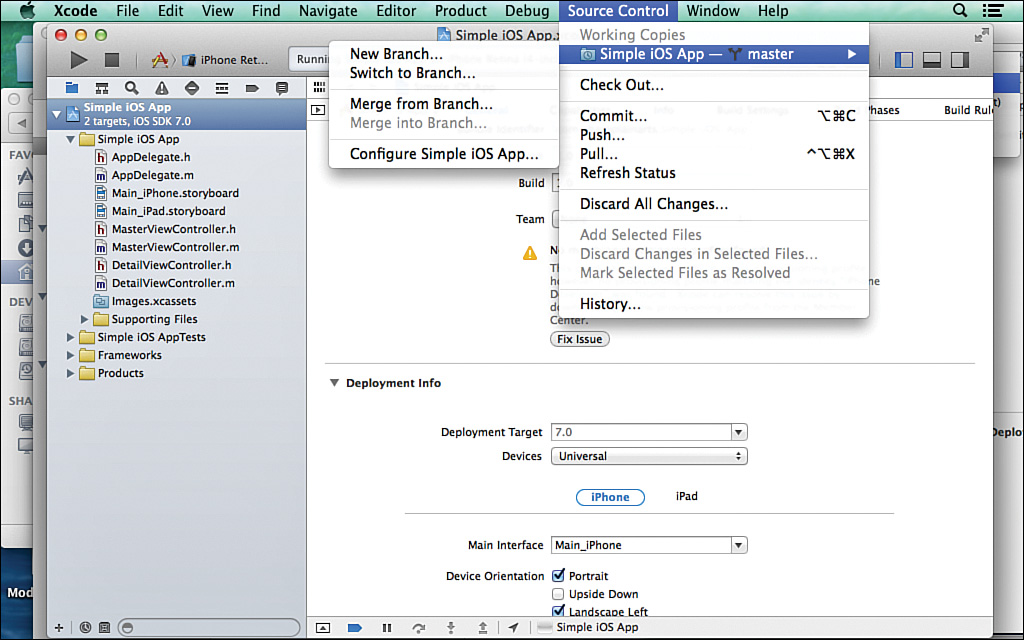
4. Commit the change by choosing Source Control, Commit.
5. Review the changes.
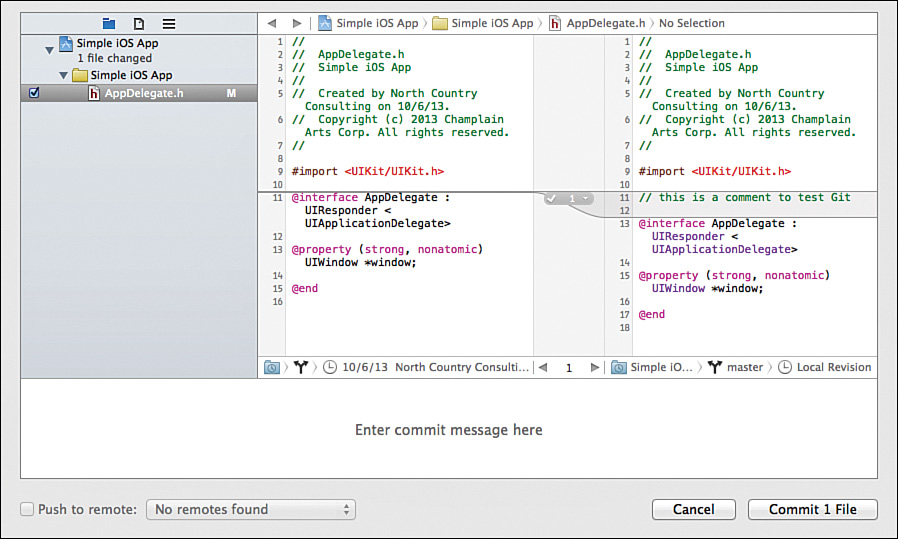
Figure 4.11 shows you the changes (right) and the previous version (left). Check that they are OK. If they are, type a commit message at the bottom of the window and click Commit in the lower right. You use the check boxes in the project navigator to add or remove changed files from the commit. You also can use the check mark in the gutter between the changes and original version to accept or reject an individual change.
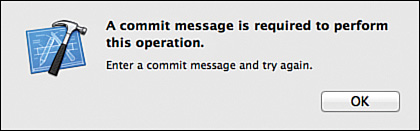
6. If you do not provide a description of your changes, you will not be able to commit them (see Figure 4.12).
7. Provide the commit message and commit the changes. The M in the project navigator will disappear (there may be a brief delay).
8. Review the history with Source Control, History, as shown in Figure 4.13.

You can review individual changes to each file in a commit.
You have seen the basics of using Git: creating a repository, making a change, and committing it. Moving beyond the basics is not so much a matter of getting more complicated but, rather, of mastering a few special cases.
When you review your changes before committing them, it is sometimes easy to decide whether to commit or discard them. There are also cases where you know as you are embarking on a series of changes that they might not work. In such a case, it is often not just a matter of a few lines of code, but a matter of significant changes to several files—sometimes over a period of time as you explore a new architecture or interface. In those cases, branches are a good solution. You create a branch and work within it. You can commit changes as you go along. When you are at a stopping point, you might decide that the new branch is the way to move forward, and you can merge it back into the main branch.
On the other hand, you might decide that the branch has been a good experiment and learning process, but it really is not the way you want to move forward with the project. In such a case, you can revert to the main branch and continue committing from the point before you split off the new branch or you can merge in the changes. You can delete the unused branch or keep it around for reference and possible future use.
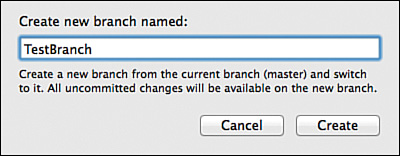
1. Use the submenu shown previously in Figure 4.8 to create a new branch.
2. Name the new branch (see Figure 4.15). (Spaces are not allowed in branch names.)
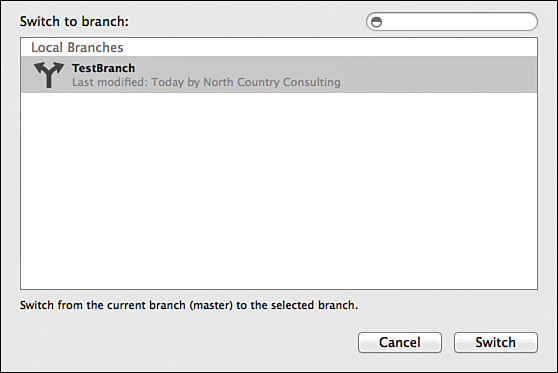
3. You are automatically switched to the new branch. You can verify this by choosing Switch to Branch from the workspace submenu. As you see in Figure 4.16, all branches are listed in the center of the sheet; the current branch is identified in the text at the bottom. You can switch back and forth. Figure 4.16 shows the perspective when you switch back to the master branch after having created a branch for testing.
4. Modify a line of code to your project and commit it with a comment. If you added a comment line to AppDelegate.h to test committing changes, you can delete it now and commit that change.
5. Use Source Control, History to view changes, including this one.
6. Using the Source Control submenu, switch back to the main branch. The sheet shown in Figure 4.16 shows the master branch as a branch to which you can switch from the current branch (TestBranch).
7. Use Source Control, History to view the history of the current branch. Because you have switched back to the master branch, the last commit from Step 6 on TestBranch is not shown.
8. From the Source Control submenu, you can use Merge from Branch or Merge into Branch to combine two branches. Note that from the master branch, Merge into Branch is not possible.
Using a Remote Repository
The source control commands you have seen in this hour work in general with both Subversion and Git. As noted, the biggest difference between the two approaches is that Subversion is a client/server architecture and Git is a distributed architecture. However, because Git is designed for a distributed environment and because it is integrated into Xcode’s interface when you create a new project, it is easier for many people to use.
Note: Using Subversion on a Single Computer
Even though Subversion is a client/server architecture, for a small project you can install it on your own computer so that you are both the client and the server. This is the same sort of thing that you do when you build a website and host it on your own computer for testing.
The first step in using a remote repository is to either create one or gain access to one. Fortunately, this is remarkably easy to do. If you search the Web for “Git Hosting,” you find a variety of vendors that provide the service. Their prices vary, so it is worth your time to look at their rates. Perhaps the biggest provider is Github.com. In common with some other services, they offer a free account for open source projects. For private repositories, their prices currently start at $7 a month.
Version control is essential on large-scale projects, and often open source projects are very large scale. If you want to participate in an open source project, the first step often is connecting to the source code repository and downloading the existing code.
Some organizations run their own semiprivate repositories. For example, a school might set up Git on one of its servers and allow students and faculty to connect to it.
If you want to create a remote repository, normally you open an account with a vendor or with your organization. You then create the repository using whatever tools are provided to you. After it is created, you or others can connect to it and get to work.
The standard practice with Git is to clone a repository on which you want to work. Each distributed copy of the project is managed on its own, and the changes are then merged back. With Subversion, you check out the code. With Subversion, committing changes to your local copy automatically merges them back to the main version. (You might want to review the commit interface, as shown previously in Figure 4.11.)
With Git, the commits to your local copy of the repository are distinct from the updating and merging of the remote repository, although the interface that lets you review, merge, and discard changes is similar. After you have committed your local changes, you can use Source Control, Push to move them back to the shared repository.
Try it Yourself: Check Out or Clone a Repository
1. In the Accounts tab of Xcode Preferences, use the + at the bottom left to create a new repository. The shortcut menu shown in Figure 4.17 appears.
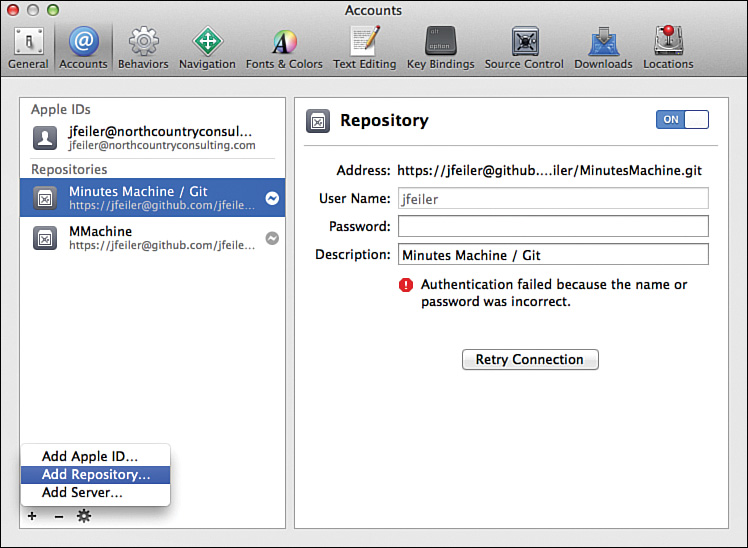
2. Specify the location of the repository you want to clone. You can either use the HTTPS or the ssh address shown in github or your own remote repository.
3. When requested, provide the username, password, and a brief description of the remote repository.
You now work with your copy of the repository as you would with any other repository on your local computer. Use Source Code, Push with Git to merge your changes to the remote repository. With Subversion, this is provided as part of the regular Commit command.
You can also use Source Control, Check Out and choose the Repositories tab to check out a project as a new Xcode project on your Mac. You can find more information on Git at http://git-scm.com/.
There’s one final point to mention. You saw in Figure 4.5 that you can automatically create a Git repository on your Mac when you create a project. If you are running Git on a server, you can choose that server to create the new repository. Eventually, that pop-up menu will contain the names of all local servers that are running Git.
Summary
This hour explored the Xcode interface to source control management. Both Subversion and Git are supported, although Git, which is designed as a distributed source control tool, is more strongly supported because it fits neatly into Xcode.
Q&A
Q. Why does source control matter?
A. When you identify versions of your software, you can keep track of the project’s evolution. More important, all of the code is in one place, and you do not accumulate a variety of copies of your project inside folders with names like Friday Test, Restructured Database, and the like. Perhaps most useful is that you can back out changes without searching through various disk archives and backups.
Q. When do you use a branch?
A. A branch is a series of updates that start from the master (or another branch) and continue with revisions. You can merge a branch back into the master or other branch, or simply abandon it and continue with the main branch.
Workshop
Quiz
1. What is the difference between Commit in Subversion and Git?
2. Why is there a difference between Commit for Subversion and Git?
Quiz Answers
1. With Subversion, Commit updates the shared repository. With Git, you have to push changes to the shared repository after the commit.
2. Because Git is a distributed architecture, you have a complete copy of the repository on your local computer and can merge changes without disturbing the shared repository (which, in fact, is shared mostly in the fact that it is one of many repositories).
Activities
Create an OS X app in Xcode using the OS X Cocoa Application template. You can call is Simple Mac App. Without any further work, you can run it and see that you have an app with a window and functioning menu bar. You’ll use it in the next hour.
Browse Github.com to see the features it offers (and that many other hosting services offer). Open source projects are often available for download, so experiment by connecting to an open source repository with Github or another product and browse the files.