
Lesson 2. Completing Your Profile
In this lesson, you learn the value of setting up your profile, where to locate your personal profile, how to set the various options, and what each option does.
Finding Your Profile
Note: Profile Differences Between WordPress.com and WordPress.org
The profile options mentioned in this lesson apply to WordPress.com. Where necessary, exceptions for WordPress.org users are noted.
Let’s begin by finding your profile. If you are not already logged in to WordPress.com, start by taking one of the following steps:
• Go to http://wordpress.com, log in, and click the Dashboard link under the name of your blog.
• Go to http://yoursite.wordpress.com, click the Log in link, and enter your login ID and password. If your browser remembers you from a previous session, click the Site Admin link.
After you are logged in, look at the side menu on the left and scroll down if necessary to locate the section labeled Users. As you move your cursor over the Users label, a downward-pointing triangle will appear. Click the triangle to expand the menu options. In that list, click Your Profile. Your screen should now look similar to the one shown in Figure 2.1.
Figure 2.1. Taking the time to set the various options in your profile gives your blog a more polished look.

Profile Options
Your user profile contains several options to help manage and personalize your blog including personal preferences, contact information, and how you would like to be represented online. The information in your user profile applies to all the blogs you own on WordPress.com. Most of the information in your user profile is not displayed publicly.
Your Personal API Key
The first item displayed at the top of the profile screen is your Personal API key. This key is your personal identifier to the WordPress.com system. It allows the system to identify you if you choose to use services and enhancements the system has to offer, even if you host your blog elsewhere. It is generated automatically when you create your WordPress.com account. Treat the API key like a password and do not share it. The most popular use of the API key is with the WordPress antispam service Akismet. You can find more details about Akismet in Lesson 5, “Managing Comments.”
Plain English: API
API stands for Application Programming Interface. It is a method by which programmers allow other programmers to access to his software so that a program that they write can enhance or extend the functionality of the original program.
Personal Options
The Personal Options section of the user profile defines the basics of how you interact with WordPress. Options include the color scheme for the administrative interface, the image you present to the world, and even what language you use.
Visual Editor
The Visual Editor setting allows you to turn on or off the enhanced functionality of the editor when you are composing content such as a blog posting or page. I recommend leaving this box unchecked so that you can see the text you create much as it will be displayed when the reader reads it. The Visual Editor operates much like most common word processors do with WYSIWYG (“wizzy-wig,” which stands for What You See Is What You Get) functionality. For example, when you click the icon for a bulleted list, you see a list of bullets in the editor window. If you uncheck Visual Editor, the icons change to Hypertext Markup Language (HTML) tags, and you aren’t able to edit your text unless you understand HTML, which is beyond the scope of this book. If you do know HTML, you can still see it and manipulate it even with the Visual Editor enabled.
Admin Color Scheme
The Admin Color Scheme option gives you a choice of using blue or gray highlights and borders in your WordPress admin screens. This is a personal preference. Choose whichever you feel most comfortable with.
Keyboard Shortcuts
Keyboard Shortcuts were introduced in 2008 to help you rapidly manage comments using your keyboard instead of several mouse clicks. By default, Keyboard Shortcuts is turned off, so if your blog gets a lot of comments or you manage them en masse, you might want to consider turning it on. To turn on Keyboard Shortcuts, check the box next to Enable Keyboard Shortcuts for Comment Moderation. Read more about comments and moderating them in Lesson 5.
Missing Options?
This book is based on WordPress version 2.9. WordPress.com users are automatically upgraded to the latest version of software. WordPress.org users need to upgrade themselves. If you do not see some of the options mentioned in this book, you should upgrade your WordPress software to the latest version.
Browser Connection
To enable an encrypted connection between your browser and the server when you manage your blog or its settings, which is recommended, check the Always Use HTTPS When Visiting Administration Pages box. By default, this option is disabled (unchecked). Although enabling this option is not mandatory, it is a good idea, particularly when you reset user passwords. Without the feature enabled, all information is passed between your computer and the WordPress.com server in “clear format,” meaning anyone with moderate technical skills could listen to your conversation. If you enable this feature, all traffic between your browser and the server is encrypted, so anyone listening gets a garbled message.
Interface Language
WordPress.com supports a wide variety of languages. When you select a language, all the settings, application labels, and other features of WordPress.com are translated. Changing the Interface Language setting does not modify the language in which the content is presented, so if your posts are written in English, changing the interface language to French will not translate your postings.
Primary Blog
As mentioned in Lesson 1, “Introducing WordPress,” WordPress.com allows you to operate multiple blogs from the same account. The Primary Blog setting in your profile lets you specify one blog as your primary blog, which is the default blog displayed when you look at stats and other information in the Global Dashboard.
Proofreading
The Proofreading section allows you to enable and disable certain types of grammatical checks the Visual Editor performs when you click the ABC Check button. Depending on what options you choose in your profile, the proofreading feature will catch or ignore these. For example, checking the Clichés option instructs the proofreader to underline phrases such as “Have a nice day.”
The same button can also check for spelling errors and make style suggestions. For example, say you enable the proofreading feature and later type the sentence I got all the way threw the test without a mistake. Clicking the ABC Check button runs the proofreader and identifies the word threw as a possible mistake and allows you to correct it. When you click the underlined word, the proofreader makes the suggestion “Did you mean...through?” If you find the grammar checker catching phrases you use repeatedly, you can add them to the list of phrases just under the series of check boxes in the Proofreading option. For example, the proofreader often underlines the word Technorama, the title of one of the blogs I operate. Typing the word in the Ignored Phrases text field tells the proofreader not to underline the word, but to ignore it.
Name
The following sections describe how to set or change your name and the way it is displayed to others (see Figure 2.2).
Figure 2.2. How the name part of the profile might be filled out.
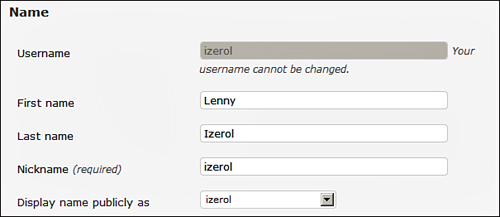
Username
The Username is the name that you use for logging in to the system. It cannot be changed after it is set—not even by a user with Administrator rights.
First Name, Last Name
The First Name and Last Name fields are used, of course, for your first name and last name (surname).
Nickname
Your nickname can be different from your login name. It is the name that people will know you by. For example, I signed up with the account “ctomasi,” but I want everyone to know me as “chucktomasi” on this blog. I can use the nickname to differentiate it from my login name. This capability is helpful because the login name cannot be changed.
Display Name Publicly As
The value selected from the Display Name Publicly As list is how the system displays your name when you make a post. You can choose from your login name, nickname, first name only, last name only, or both in either order (see Figure 2.2). Changing this setting later updates any previous postings you have made. The system stores your real name with the posting and displays the value you select from the list.
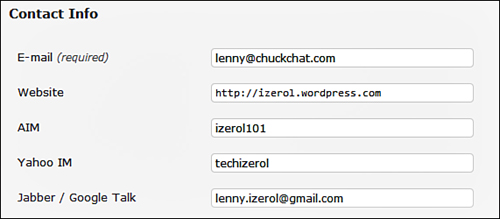
Contact Info
You use the Contact Info section to provide information regarding how other users can contact you. The only required field is E-mail, which is how WordPress contacts you when you have new comments or user registrations. WordPress automatically uses the email address you entered when you registered. If you try to change your email address here, WordPress puts your original email address back and sends a message to the new address you entered with a link that takes you to the settings where can make the actual change. The correct place to change your email address is in General Settings (explained in Lesson 4, “Configuring Your Blog Settings”).
Optionally, you can provide your website, AOL Instant Messenger (AIM), Yahoo IM, and Jabber/Google Talk IDs for those who might want to reach you through one of those online services (see Figure 2.3).
Figure 2.3. Provide additional contact information to let others know how to reach you.
About Yourself
If you want to let your readers know a little bit more about you, fill in the About Yourself section. Although you aren’t required to complete the fields in this section, sharing a bit of yourself with your readers is not a bad idea.
Biographical Info
The text area labeled Biographical Info is a place for you to give a brief overview of yourself. The information you include here can be a simple one-line entry such as “Personality on the Technorama podcast,” or it can be something a little more detailed. I recommend entering really in-depth personal information in the About page, which is explained in the “Completing Your About Page” section.
New Password
At some point, you might need to change your password. If you host your own blog, you probably want to change your password right after you set up the blog with a default Administrator account and random password. Change your password in the section at the bottom of your profile.
Choosing a new password can be tricky. The goal is to use something meaningful that you are likely to remember, yet challenging enough so someone else won’t be likely to guess it. Optimally, you don’t want to use a password that has been used somewhere else in case that one has been compromised.
Here are a few guidelines for choosing a password:
• Use a password that is at least six characters long (the longer, the better).
• Use a combination of letters (upper- and lowercase), numbers, and symbols.
• Try to stay away from dictionary words.
• Use mnemonics (memory devices) to help you remember passwords.
• Change your password regularly. This procedure is a nuisance, but it’s less painful than losing valuable data. Some people on the Internet seem to have nothing better to do than try to break into accounts on popular sites like WordPress.com.
WordPress offers a “strength indicator” just under the password field. As you type your password, WordPress tells you how good your password is on a rating from very weak to strong.
Examples of poor passwords are
• wordpress—All lowercase—too obvious.
• 1234abcd—Although this example uses a combination of letters and numbers, it is fairly easy for a computer to calculate this combination.
• Bunny—Too short and uses a word from the dictionary.
Examples of strong passwords are
• My1stBl0g!—A decent length (10 characters); uses uppercase, lowercase, numbers, and symbols. Uses a mnemonic for “my first blog” to help you remember.
• Ra!s!ns+Ch0c0late—Although these look like dictionary words, symbols and numbers replace some letters, which makes it more difficult for a computer to crack but easy for a human to remember.
• 2Maps&2Chart$—Uppercase, lowercase, numbers, symbols, and good length. Sometimes you only need to look around the room to find a good password.
Your Gravatar
Gravatar is a concatenation of “global recognized” avatar. An avatar is a photo or other graphic that represents you. Avatars are usually 80 × 80 pixels in size. Normally, as you navigate around the Web, you need to upload an avatar to each site. A gravatar allows you to use one avatar across multiple sites, chat rooms, forums, and so on. You might see one in a WordPress site if the theme has been designed to display them.
There are several ways to set your WordPress gravatar. These include
• Uploading an existing image from your computer.
• Using your webcam to take a snapshot of yourself. You need a machine with a functioning webcam and Adobe FlashPlayer installed to take this approach.
• Using a link to an existing online image.
• Using your previous WordPress.com avatar (if you had one).
• Going to http://en.gravatar.com set your avatar there and having WordPress.com reference it.
This example uses an image from the local computer. The following steps walk you through one way of setting your gravatar:
- Click on the image that looks like a sideways G in the upper right on your profile page (or the Change Your Gravatar link just below it). A window displays in front of the other text on your browser window (see Figure 2.4).
Figure 2.4. The screen for uploading your gravatar.

- Click the link Upload a New Image from Your Computer to instruct WordPress to use an image on your computer as your gravatar.
- Click the Browse button and look around for an image that suits you. When you have located an image, select it, click Open, and click the Next button.
- The image file is sent to the server, and the gravatar image is displayed on the screen. A square on top of your image indicates the actual part of the image that is displayed (as shown in the two preview windows on the right).
- Resize the box on top of your image by dragging the handlebars to change the size of the image area. You also can drag the square to a different area on your image.
- After you have selected the appropriate area and your preview windows look the way you want, click the Crop and Finish! button.
- Provide a rating for your image by clicking on the appropriate letter. Descriptions of the ratings are provided. Depending on the rating, your image may not be displayed on all sites that use gravatars.
- Click the X in the upper right of the window to close the Gravatar window.
Your gravatar is associated with your email address; in this case, it’s associated with the email address you provided for your WordPress.com account. If your gravatar does not appear right away, you might need to refresh your screen or click Your Profile (on the left).
Behind the scenes, you just interacted with the gravatar.com website to set your image across multiple websites.
Remember to Save Your Changes
You must click the Update Profile button at the bottom of the page if you changed any options (excluding your gravatar). If you make changes and do not click Update Profile, your changes are lost.
Completing Your About Page
Another way to tell your readers more about yourself is to set up a page with more detailed information than what is in your profile. WordPress presents a tip with a link at the top of the Dashboard like the one shown in Figure 2.5. If the tip is not available, use the side menu on the left, click the Pages section, then click About from the list of pages. You can find more information about creating and editing posts and pages in Lesson 3, “Creating Posts and Pages.”
Figure 2.5. WordPress offers some useful tips on the Dashboard, such as this one about updating your About page.

Summary
In this lesson, you learned to set up your profile. You also learned that setting preferences for your profile makes navigating and using WordPress.com more enjoyable and effective for you and your blog’s readers.