Writing for the Web without linking is like eating without digesting. It’s literary bulimia. | ||
| --Doc Searls | ||
So maybe that quote is a little strong in regard to the importance of linking on the Web, but the underlying point is still very much valid. Just as XML has been leveraged to improve other facets of the Web such as the core syntax and structure of HTML, so is it being used to improve upon the very linking mechanism that forms the interconnections between pages on the Web. I’m referring to XLink, which is the XML linking technology that allows you to carry out advanced linking between XML documents. Coupled with another important XML technology called XPointer, XLink builds on the premise of HTML hyperlinks but goes several steps further in supporting advanced linking features such as two-way links. Although XML linking is still a relatively new technology, it is already having an impact on how information is connected on the Web.
Linking XML documents goes hand in hand with addressing XML documents. Yet another XML-related technology called XPath makes it possible to specify exactly where XML content is located. Just as your mailing address helps you to remember where you live, XPath provides a means of remembering where nodes are located in XML documents. Okay, you probably don’t rely on your mailing address to remember where you live, but you will rely on XPath if you use technologies such as XSLT, XLink, or XPointer, which must reference parts of XML documents. XPath is the enabling technology that allows you to drill down into XML documents and reference individual pieces of information.
In this hour, you’ll learn
How to navigate through an XML document using XPath patterns
How to build powerful expressions using XPath patterns and functions
What technologies come together to support linking in XML
How to reference document fragments with XPointer
How to link XML documents with XLink
XPath is a technology that enables you to address parts of an XML document, such as a specific element or set of elements. XPath is implemented as a non-XML expression language, which makes it suitable for use in situations where XML markup isn’t really applicable, such as within attribute values. As you know, attribute values are simple text and therefore can’t contain additional XML markup. So, although XPath expressions are used within XML markup, they don’t directly use tags and attributes themselves. This makes XPath considerably different from its XSL counterparts (XSLT and XSL-FO) in that it isn’t implemented as an XML language. XPath’s departure from XML syntax also makes it both flexible and compact, which are important benefits when you consider that XPath is typically used in constrained situations such as attribute values.
XPath is a very important XML technology in that it provides a flexible means of addressing XML document parts. Any time you need to reference a portion of an XML document, such as with XSLT, you ultimately must rely on XPath. The XPath language is not based upon XML, but it is somewhat familiar nonetheless because it relies on a path notation that is commonly used in computer file systems. In fact, the name XPath stems from the fact that the path notation used to address XML documents is similar to path names used in file systems to describe the locations of files. Not surprisingly, the syntax used by XPath is extremely concise because it is designed for use in URIs and XML attribute values.
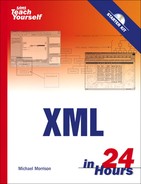
Similar to other XML technologies, XPath operates under the notion that a document consists of a tree of nodes. XPath defines different types of nodes that are used to describe nodes that appear within a tree of XML content. There is always a single root node that serves as the root of an XPath tree, and that appears as the first node in the tree. Every element in a document has a corresponding element node that appears in the tree under the root node. Within an element node there are other types of nodes that correspond to the element’s content. Element nodes may have a unique identifier associated with them that is used to reference the node with XPath. Figure 22.1 shows the relationship between different kinds of nodes in an XPath tree.
Figure 22.1. XPath is based upon the notion of an XML document consisting of a hierarchical tree of nodes.
Nodes within an XML document can generally be broken down into element nodes, attribute nodes, and text nodes. Some nodes have names, in which case the name can consist of an optional namespace URI and a local name; a name that includes a namespace prefix is known as an expanded name. Following is an example of an expanded element name:
<xsl:value-of select="."/>
In this example, the local name is value-of and the namespace prefix is xsl. If you were to declare the XSL namespace as the default namespace for a document, you could get away with dropping the namespace prefix part of the expanded name, in which case the name becomes this:
<value-of select="."/>
If you declare more than one namespace in a document, you will have to use expanded names for at least some of the elements and attributes. It’s generally a good idea to use them for all elements and attributes in this situation just to make the code clearer and eliminate the risk of name clashes.
Getting back to node types in XPath, following are the different types of nodes that can appear in an XPath tree:
Root node
Element nodes
Text nodes
Attribute nodes
Namespace nodes
Processing instruction nodes
Comment nodes
You should have a pretty good feel for these node types, considering that you’ve learned enough about XML and have dealt with each type of node throughout the book thus far. The root node in XPath serves the same role as it does in the structure of a document: it serves as the root of an XPath tree and appears as the first node in the tree. Every element in a document has a corresponding element node that appears in the tree under the root node. Within an element node appear all of the other types of nodes that correspond to the element’s content. Element nodes may have a unique identifier associated with them, which is useful when referencing the node with XPath.
The point of all this naming and referencing of nodes is to provide a means of traversing an XML document to arrive at a given node. This traversal is accomplished using expressions, which you learned a little about back in Hour 13, “Access Your iTunes Music Library via XML.” You use XPath to build expressions, which are typically used in the context of some other operation, such as a document transformation. Upon being processed and evaluated, XPath expressions result in a data object of one of the following types:
Node set— A collection of nodes
String— A text string
Boolean— A true/false value
Number— A floating-point number
Similar to a database query, the data object resulting from an XPath expression can then be used as the basis for some other process, such as an XSLT transformation. For example, you might create an XPath expression that results in a node set that is transformed by an XSLT template. On the other hand, you can also use XPath with XLink, where a node result of an expression could form the basis of a linked document.
By the Way
To learn more about the formal XPath specification, visit the XPath section of the W3C web site at http://www.w3.org/TR/xpath.
XPath expressions are usually built out of patterns, which describe a branch of an XML tree. A pattern therefore is used to reference one or more hierarchical nodes in a document tree. Patterns can be constructed to perform relatively complex pattern matching tasks and ultimately form somewhat of a mini-query language that is used to query documents for specific nodes. Patterns can be used to isolate specific nodes or groups of nodes and can be specified as absolute or relative. An absolute pattern spells out the exact location of a node or node set, whereas a relative pattern identifies a node or node set relative to a certain context.
The next few sections examine the ways in which patterns are used to access nodes within XML documents. To better understand how patterns are used, it’s worth seeing them in the context of a real XML document. Listing 22.1 contains the code for the familiar training log sample document that you saw earlier in the book, which serves as the sample document in this hour for XPath.
Example 22.1. The Training Log Sample XML Document
01: <?xml version="1.0"?>
02: <!DOCTYPE trainlog SYSTEM "etml.dtd">
03:
04: <trainlog>
05:   <!—This session was part of the marathon training group run. —>
06:   <session date="11/19/05" type="running" heartrate="158">
07:     <duration units="minutes">45</duration>
08:     <distance units="miles">5.5</distance>
09:     <location>Warner Park</location>
10:     <comments>Mid-morning run, a little winded throughout.</comments>
11:   </session>
12:
13:   <session date="11/21/05" type="cycling" heartrate="153">
14:     <duration units="hours">2.5</duration>
15:     <distance units="miles">37.0</distance>
16:     <location>Natchez Trace Parkway</location>
17:     <comments>Hilly ride, felt strong as an ox.</comments>
18:   </session>
19:
20:   <session date="11/24/05" type="running" heartrate="156">
21:     <duration units="hours">1.5</duration>
22:     <distance units="miles">8.5</distance>
23:     <location>Warner Park</location>
24:     <comments>Afternoon run, felt reasonably strong.</comments>
25:   </session>
26: </trainlog>
You may want to keep a bookmark around for this page, as several of the XPath examples throughout the next section rely on the training log sample code.
The most basic of all XPath patterns is the pattern that references the current node, which consists of a simple period:
.
If you’re traversing a document tree, a period will obtain the current node. The current node pattern is therefore a relative pattern because it makes sense only in the context of a tree of data. As a contrast to the current pattern, which is relative, consider the pattern that is used to select the root node of a document. This pattern is known as the root pattern and consists of a single forward slash:
/
If you were to use a single forward slash in an expression for the training log sample document, it would refer to the trainlog element (line 4) because this element is the root element of the document. Because the root pattern directly references a specific location in a document (the root node), it is considered an absolute pattern. The root pattern is extremely important to XPath because it represents the starting point of any document’s node tree.
As you know, XPath relies on the hierarchical nature of XML documents to reference nodes. The relationship between nodes in this type of hierarchy is best described as a familial relationship, which means that nodes can be described as parent, child, or sibling nodes, depending upon the context of the tree. For example, the root node is the parent of all nodes. Nodes might be parents of some nodes and siblings of others. To reference child nodes using XPath, you use the name of the child node as the pattern. So, in the training log example, you can reference a session element (line 6, for example) as a child of the root node by simply specifying the name of the element: session. Of course, this assumes that the root node (line 4) is the current context for the pattern, in which case a relative child path is okay. If the root node isn’t the current context, you should fully specify the child path as /session. Notice in this case that the root pattern is combined with a child pattern to create an absolute path.
By the Way
I’ve mentioned context a few times in regard to node references. Context simply refers to the location within a document tree from which you are referencing a node. The context is established by the current node you are referencing. All further references are then made with respect to this node.
If there are child nodes there must also be parent nodes. To access a parent node, you must use two periods:
..
As an example, if the current context is one of the distance elements (line 15, for example) in the training log document, the .. parent pattern will reference the parent of the node, which is a session element (line 13). You can put patterns together to get more interesting results. For example, to address a sibling node, you must first go to the parent and then reference the sibling as a child. In other words, you use the parent pattern (..) followed by a forward slash (/) followed by the sibling node name, like this:
../duration
This pattern assumes that the context is one of the child elements of the session element (other than duration). Assuming this context, the ../duration pattern will reference the duration element (line 14) as a sibling node.
Thus far I’ve focused on referencing individual nodes. However, it’s also possible to select multiple nodes. For example, you can select all of the child nodes (descendants) of a given node using the double slash pattern:
//
As an example, if the context is one of the session elements in the training log document (line 20, for example), you can select all of its child nodes by using double slashes. This results in the duration (line 21), distance (line 22), location (line 23), and comments (line 24) elements being selected.
Another way to select multiple nodes is to use the wildcard pattern, which is an asterisk:
*
The wildcard pattern selects all of the nodes in a given context. So, if the context was a session element and you used the pattern */distance, all of the distance elements in the document would be selected. This occurs because the wildcard pattern first results in all of the sibling session elements being selected, after which the selection is limited to the child distance elements.
To summarize, following are the primary building blocks used to reference nodes in XPath:
Current node—
.Root node—
/Parent node—
..Child node—
ChildSibling node—
/SiblingAll child nodes—
//All nodes—
*
These pattern building blocks form the core of XPath, but they don’t tell the whole story. The next section explores attributes and subsets and how they are referenced.
Elements aren’t the only important pieces of information in XML documents; it’s also important to be able to reference attributes. Fortunately, XPath makes it quite easy to reference attributes by using the “at” symbol:
@
The at symbol is used to reference attributes by preceding an attribute name:
*/distance/@units
This code selects all of the units attributes for distance elements in the training log document, assuming that the context is one of the session elements. As you can see, attributes fit right into the path notation used by XPath and are referenced in the same manner as elements, with the addition of the at (@) symbol.
One other important feature of XPath expressions is support for the selection of subsets of nodes. You select a subset by appending square brackets ([]) to the end of a pattern and then placing an expression within the brackets that defines the subset. As an example, consider the following pattern that selects all the session elements in the training log document:
*/session
It’s possible that you might want to limit the session elements to a certain type of training session, such as running. To do this, you add square brackets onto the pattern, and you create an expression that checks to see if the session type is set to running:
*/session[@type='running']
This pattern results in selecting only the session elements whose type attribute is set to running. Notice that an at symbol (@) is used in front of the attribute name (type) to indicate that it is an attribute. You can also address elements by index, as the following expression demonstrates:
/session[1]
This expression selects the first session element in the document.
Back in Hour 13, you learned about some of the more commonly used XPath functions and how they can be used to create expressions for XSLT stylesheets. I’d like to revisit the standard XPath functions and go into a little more detail regarding their use in creating expressions. Before getting into the specifics of the XPath functions at your disposal, it’s worth taking a look at their general use. The functions supported by XPath, which are available for use in creating XPath expressions, can be roughly divided along the lines of the data types on which they operate:
Node functions
String functions
Boolean functions
Number functions
The next few sections explore the functions in each of these categories in more detail. For a complete XPath function reference, please visit the XPath page at the W3C web site at http://www.w3.org/TR/xpath#corelib.
Node functions are XPath functions that relate to the node tree. Although all of XPath technically relates to the node tree, node functions are very direct in that they allow you to ascertain the position of nodes in a node set, as well as how many nodes are in a set. Following are the most common XPath node functions:
position()— Determine the numeric position of a nodelast()— Determine the last node in a node setcount()— Determine the number of nodes in a node set
Although these node functions might seem somewhat abstract, keep in mind that they can be used to carry out some interesting tasks when used in the context of a broader expression. For example, the following code shows how to use the count() function to calculate the total distance in the training log document for sessions whose distances are recorded in miles:
count(*/distance[@units='miles'])
Following is another example that shows how to reference a child node based solely upon its position within a document:
child::item[position()=3]
Assuming there are several child elements of type item, this code references the third child item element of the current context. To reference the last child item, you use the last() function instead of an actual number, like this:
child::item[position()=last()]
The XPath string functions are used to manipulate strings of text. With the string functions you can concatenate strings, slice them up into substrings, and determine the length of them. Following are the most popular string functions in XPath:
concat()— Concatenate two strings togetherstarts-with()— Determine if a string begins with another stringcontains()— Determine if a string contains another stringsubstring-before()— Retrieve a substring that appears before another stringsubstring-after()— Retrieve a substring that appears after another stringsubstring()— Retrieve a substring of a specified length starting at an index within another stringstring-length()— Determine the length of a string
These XPath string functions can come in quite handy when it comes to building expressions, especially when you consider that XML content is always specified as raw text. In other words, it is possible to manipulate most XML content as a string, regardless of whether the underlying value of the content is numeric or some other data type. Following is an example that demonstrates how to extract the month of a training session from a date attribute in the training log document:
substring-after(/session[1]@date, "/")
In this example, the substring-after() function is called and passed the date attribute. Because a forward slash (/) is passed as the second argument to the function, it is used as the basis for finding the substring. If you look back at one of the date attributes in the document (line 6, for example), you’ll notice that the month appears just after the first forward slash. As a comparison, you could extract the year as a substring by providing the same arguments but instead using the substring-before() function:
substring-before(/session[1]@date, '/')
Another use of the string functions is finding nodes that contain a particular substring. For example, if you wanted to analyze your training data and look for training sessions where you felt strong, you could use the contains() function to select session elements where the comments child element contains the word “strong”:
*/session[contains(comments, 'strong')]
In this example, the second and third session elements would be selected because they both contain the word “strong” in their comments child elements (lines 17 and 24).
Boolean functions are pretty simple in that they operate solely on Boolean (true/false) values. Following are the two primary Boolean functions that you may find useful in XPath expressions:
not()— Negate a Boolean valuelang()— Determine if a certain language is being used
The not() function is pretty straightforward in that it simply reverses a Boolean value: true becomes false and false becomes true. The lang() function is a little more interesting because it actually queries a node to see what language it uses. As an example, many English-language XML documents set the xml:lang attribute to en in the root element. Although this value typically cascades down to all elements within the document, it’s possible for a document to use multiple languages. The lang() function allows you to check the language setting for any node. Following is an example of how to use the not() and lang() functions to determine if the English language is not being used in a document:
not(lang("en"))The XPath number functions should be somewhat familiar to you since you saw them in action back in Hour 13 when you created XSLT stylesheets that relied on the number functions. Following are the most commonly used number functions in XPath:
ceiling()— Round up a decimal value to the nearest integerfloor()— Round down a decimal value to the nearest integerround()— Round a decimal value to the nearest integersum()— Add a set of numeric values
Following is an example of how to use the sum() function to add up a bunch of attribute values:
sum(cart/item/@price)
Of course, you can make nested calls to the XPath number functions. For example, you can round the result of the sum() function by using the round() function, like this:
round(sum(cart/item/@price))
You may have noticed that I’ve used the word “select” a lot in this hour when explaining how an XPath expression effectively selects part of a document. However, this selection process doesn’t take place within XPath alone. XPath is always used in the context of another technology such as XSLT, XPointer, or XLink. The examples of XPath that you’ve seen in this lesson must therefore be used in conjunction with additional code. For example, the following code shows how one of the training log expressions from earlier in the hour might be used in an XSLT stylesheet:
<xsl:value-of select="*/session[@type='running']" />
In this code, the XPath expression appears within the select attribute of the xsl:value-of element, which is responsible for inserting content from a source XML document into an output document during the transformation of the source document. Refer back to Hours 12 and 13 for more information on XSLT stylesheets and how they are used. The point I want to make here is that the XSLT xsl:value-of element is what makes the XPath expression useful. XPath plays a critical role in XSLT, as you probably remember from Hour 13.
Similar to its role in XSLT, XPath serves as the addressing mechanism in XPointer. XPointer is used to address parts of XML documents, and is used heavily in XLink, which you learn about in a moment. XPointer uses XPath to provide a means of navigating the tree of nodes that comprise an XML document. Sounds familiar, right? XPointer takes XPath a step further by defining a syntax for fragment identifiers, which are in turn used to specify parts of documents. In doing so, XPointer provides a high degree of control over the addressing of XML documents. When coupled with XLink, the control afforded by XPointer makes it possible to create interesting links between documents that simply aren’t possible in HMTL, at least in theory.
Similar to HTML web pages, XML documents can also benefit greatly from links that connect them together. Knowing this, the architects of XML created a linking mechanism for XML that provides support for traditional one-way links, such as those you may be familiar with in HTML, along with more advanced links, such as two-way links. Links in XML are in fact considerably more powerful than HTML links, as you will learn in a moment when you begin exploring XLink and XPointer. Before getting into that, however, it’s worth taking a moment to assess the role of links in HTML.
HTML links (hyperlinks) are based upon the concept of connecting one resource to another resource—a source is linked to a target. The source of an HTML link is typically displayed on a web page (via text or an image) so as to call out the fact that it links to another resource. Text links are typically displayed with an underline, and the mouse pointer usually changes when the user drags it over a link source. Traversing a link in HTML typically involves clicking the source resource, which results in the web browser navigating to the target resource. This navigation can occur in the same browser window, in which case the target resource replaces the current page, or in a new browser window.
The important thing to understand about HTML links is that although they involve two resources, they always link in one direction. In other words, one side of the link is always the source and the other side is always the target, which means you can follow a link only one way. You might think that the Back button in a web browser allows HTML links to serve as two-way links, but the Back button has nothing to do with HTML. The Back button in a web browser is a browser feature that involves keeping a running list of web pages so that the user can back through them. There is nothing inherent in HTML links that supports backing up from the target of a link to the source; the target of a link knows nothing about its source. So, HTML links are somewhat limited in that they can link only in one direction. You might be wondering how it could possibly be useful to link in two directions—we’ll get to that in a moment.
By the Way
It’s worth pointing out that many of the conventions we’ve come to expect in terms of HTML linking aren’t directly related to HTML. For example, an HTML link doesn’t specify anything about how it is to be displayed to the user (colored, underlined, and so forth). It is up to stylesheets, browsers, and user preferences to determine how links are presented. Although this may not seem like a big deal right now, the browser’s role in displaying links may become more significant if and when browsers support XLink. This is because XLink supports links between multiple resources and in multiple directions, which makes them difficult to visualize with a simple underline or mouse pointer.
If you’ve spent any time coding web pages with HTML, you’re no doubt familiar with the a element, also known as the anchor element, which is used to create HTML links. The anchor element identifies the target resource for an HTML link using the href attribute, which contains a URI. The href attribute can either reference a full URI or a relative URI. HTML links can link to entire documents or to a document fragment. Following is an example of an HTML link that uses a relative URI to link to a document named fruit.html:
Click <a href="fruit.html">here</a> for fruit!
This code assumes the document fruit.html is located in the same path as the document in which the code appears. If you want to link to a document located somewhere else, you’ll probably take advantage of a full URI, like this:
Click <a href="http://www.michaelsgroceries.com/veggies.html">here</a> for veggies!
Document fragments are a little more interesting in terms of how they are linked in HTML. When linking to a document fragment, the href attribute uses a pound symbol (#) in between the URI and the fragment identifier. The following is an example of how you create an HTML link to a specific location within a document:
Click <a href="fruit.html#bananas">here</a> for bananas!
In this code, the fragment identifier bananas is used to identify a portion of the fruit.html document. You associate a fragment identifier with a portion of a document using the anchor element (a) and the id attribute in the link target. This attribute value is the name used to the right of the pound symbol (#) in the anchor element that serves as the link source. Following is an example of an HTML link that establishes a banana document fragment for a link target:
<a id="bananas">We have the freshest bananas for $0.99 per pound.</a>
This code shows how a sentence of text can be marked as a link target by setting the id attribute of the a tag with a unique fragment identifier.
By the Way
If you’re already an HTML guru, I apologize for boring you with this recap of HTML links. Boring or not, it’s important to have a solid grasp of HTML links because they serve as the basis for simple XML links.
HTML links are both very useful and very easy to create. Simply based on the power and usefulness of the Web, it’s hard to make an argument against the strength of HTML’s simplistic approach to linking documents. However, there are many ways that it can be improved, some of which you might have never thought about. For one, it would be nice if links could be bidirectional, which means that you wouldn’t be dependent on a browser’s implementation of a Back button in order to navigate backwards to a previous resource. Although this may seem trivial, it could be extremely useful to be able to traverse a link in either direction, thereby eliminating the need for fixed source and target resources. A bidirectional link would treat the two resources as both sources and targets depending on the context.
In addition to bidirectional links, it could be extremely beneficial to have links that reference multiple target resources. This would keep web developers from having to duplicate content for the sole purpose of providing link sources. More specifically, a link with multiple targets could present a pop-up menu with the target selections from which the user selects. An example of this type of link might be a book listing on Amazon.com. A multiple-target link for the cover image of a book could present a pop-up menu containing links to documents such as a book summary, reviews, and a sample chapter. This tightens up the user interface for the web site by reducing the content used purely for navigational purposes. It also provides a logical grouping of related links that would otherwise be coded as unrelated links using HTML anchors.
If your only exposure to document linking is HTML, you probably regard link resources as existing completely separate of one another, at least in terms of how they are displayed in a web browser. XML links shatter this notion by allowing you to use links to embed resources within other resources. In other words, the contents of a target resource can be inserted in place of the link in a source document. Granted, images are handled much like this in HTML already, but XML links offer the possibility of embedding virtually any kind of data in a document, not just an external image. Traversing embedded links in this manner ultimately results in compound documents that are built out of other resources, which has some interesting implications for the Web. For example, you could build a news web page out of paragraphs of text that are dynamically pulled from other documents around the web via links.
Speaking of link traversal, HTML links are limited in that the user must trigger their traversal. For example, the only way to invoke a link on a web page is to click the linked text or image, as shown in Figure 22.2.

Figure 22.2. In order to traverse an HTML link, the user must click on linked text or a linked image, which points to another document or resource.
You may be wondering why it would be desirable to have it any other way. Well, consider the situation where a linked resource is to be embedded directly in a document to form a compound document. You might want the embedding to take place immediately upon opening the document, in which case the user would have nothing to do with the link being invoked. In this sense, the link is serving as a kind of connective tissue for components of a compound web document (see Figure 22.3), which is far beyond the role of links in HTML. Again, images already work like this in HTML via the img tag, but XML links open the door for many other possibilities with flexible linking.
Figure 22.3. XML links are flexible enough to allow you to construct compound documents by pulling content together from other documents.
As you’re starting to see, XML links, which are made possible by the XLink technology, are much more abstract than HTML links, and therefore can be used to serve more purposes than just providing users a way of moving from one web page to the next. Admittedly, you almost have to take a few steps back and think of links in a more abstract sense to fully understand what XML links are all about. The up side to this shift in thinking is that when the significance of XLink fully sinks in, you will probably view the web quite differently.
By the Way
The problem at the moment is that XLink has been brutally slow to catch on, and only has limited support in Firefox and no support in Internet Explorer or any other browser. So the pie in the sky features of XLink are unfortunately still in the realm of the hypothetical, at least in terms of the Web.
Yet another facet of XLink worth pointing out is its support for creating links that reside outside of the documents they link. In other words, you can create a link in one document that connects two resources contained in other documents (see Figure 22.4). This can be particularly useful when you don’t have the capability of editing the source and target documents. These kinds of links are known as out-of-line links and will probably foster the creation of link repositories. A link repository is a database of links that describe useful connections between resources on the Web.

Figure 22.4. XML links allow you to do interesting things such as referencing multiple documents from a link within another document.
One example of a link repository that could be built using XLink is an intricately cross-referenced legal database, where court cases are linked in such a way that a researcher in a law office could quickly find and verify precedents and track similar cases. Though it’s certainly possible to create such a database and incorporate it into HTML web pages, it is cumbersome. XLink provides the exact feature set to make link repositories a practical reality.
By the Way
One of the side benefits of out-of-line links is the fact that the links are maintained separately from the documents that they link. This separate storage of links and resources makes it possible to dramatically reduce broken links, which are otherwise difficult to track down and eliminate.
You now understand that XML linking is considerably more powerful than its HTML counterpart. Perhaps more interesting is the fact that XML links involve a concert of technologies working together. XLink is the primary technology that makes XML links possible, but it requires the help of two other technologies—XPointer and XPath. If you traced the history of XLink in the W3C, you’d learn that it originally consisted of only two components, XPointer and XLink. However, the W3C realized that XPointer wasn’t the only XML technology that needed a means of addressing parts of a document. XSLT also needed a means of addressing document parts, so it was decided to separate document addressing into XPath. XPointer builds on XPath to provide support for addressing the internal structure of XML documents. XLink in turn uses XPointer to describe flexible links to specific structures within XML documents.
XLink is designed to support simple one-way links similar to those in HTML, as well as a variety of different extended links that offer interesting new ways of linking documents. XLink is implemented as an XML language, which means that it can be easily integrated into XML applications. XPointer is a non-XML language based upon XPath that is used to address internal structures in XML documents. XPointer is an important part of XLink because it specifies the syntax used to create fragment identifiers, which are used to reference internal document constructs.
XPointer allows you to walk the tree of nodes that an XML document is comprised of to address a specific node or nodes. XPointer expands the syntax set forth by XPath to provide a means of creating fragment identifiers, which are used to specify parts of documents. XPointer provides considerably more control over the referencing of XML document data than the hyperlink approach employed by HTML. For example, XPointer allows you to do things such as address an element with a given value within a list of elements of a given type. You use XPointer expressions in XML links by appending them onto the end of URIs with a pound symbol (#), as in the separation between a URI and an XPointer expression. The next few sections break down XPointer into further detail and demonstrate exactly how to create XPointer expressions.
The most important component of XPointer expressions is the location path, which is a construct used to describe the path that must be followed to arrive at a node within an XML document tree. Location paths are the building blocks of XPointer expressions, which are evaluated to arrive at a specific location within a tree. More specifically, location paths allow you to traverse siblings, ancestors, children, and descendants of nodes, not to mention attributes. Location paths are broken down into two basic types—absolute paths and general paths.
Absolute location paths point to a specific location within an XML tree, and therefore aren’t dependent on context. Following are the different absolute location paths defined in XPointer:
/— Locates the root node, which is the parent node for the entire document treeid(Name)— Locates the element with an attribute ID value ofNamehere()— Locates the node containing the current XPointer expressionorigin()— Locates the sub-resource from which the user initiated a link (used with out-of-line links)
The most important absolute location paths are the root and id() paths. The root path is represented by a forward slash (/), and is often used at the start of an XPointer expression as the basis for absolute location paths. The id() location path is used to locate an element with a specific attribute value.
In addition to absolute location paths, XPointer also defines a rich set of relative location paths. Relative location paths are always relative to some node, which is known as the context node for the path. Following are the relative location paths available for use in XPointer expressions:
child— Locates child nodes of the context nodedescendant— Locates nodes within the context nodedescendant-or-self— Same asdescendantexcept the context node is also includedparent— Locates nodes one level above the context node that contains the context nodeancestor— Locates all nodes above the context node that contain the context nodeancestor-or-self— Same asancestorexcept the context node is also includedpreceding-sibling— Locates sibling nodes that precede the context nodefollowing-sibling— Locates sibling nodes that follow the context nodepreceding— Locates nodes that precede the context nodefollowing— Locates nodes that follow the context nodeself— Locates individual context nodes within a list of context nodesattribute— Locates attributes of the context node
If you’re totally confused by all this context node talk, don’t worry because it will all make sense in a moment. As confusing as it may seem, the relative location paths in the previous list really are quite useful and are much easier to use than you might think. The next section shows you how to use these location paths to create expressions in XPointer.
Seeing a few examples of XPointer expressions can make all the difference in understanding how XPointer is used to define document fragment identifiers. Following is an example of a simple XPointer expression:
child::factoid
This example uses the child relative location path to locate all of the children of the context node that are of element type factoid. Let me rephrase it in a different way: The sample expression locates element nodes of type factoid that are child nodes of the context node. Keep in mind that the context node is the node from which you are issuing the expression, which is a lot like the current path of a file system when you’re browsing for files. Also, it’s worth clarifying that the XPointer expression child::factoid simply describes the fragment identifier for a resource and is not a complete resource reference. When used in a complete expression, you would pair this fragment identifier with a URI that is assigned to an href attribute, like this:
href="http://www.stalefishlabs.com/factoids.xml#child::factoid"
In this example, a URI is specified that references the XML document named factoids.xml. The XPointer expression is then provided as a fragment identifier, which is separated from the URI by a pound symbol (#). This is the typical way in which XPointers are used, although expressions can certainly get more complex than this. For example, the following code shows how to use location paths to create a more elaborate expression that carries out a more intricate reference:
child::factoid/following-sibling::legend
This example first locates all child elements that are of type factoid and then finds the second siblings following each of those element nodes that are of type legend. To understand how this code works, let’s break it down. You begin with the familiar child::factoid expression, which locates element nodes of type factoid that are child nodes of the context node. Adding on the following-sibling::legend location path causes the expression to locate sibling elements of type legend. Granted, this may seem like a strange use of XPointer, but keep in mind that it is designed as an all-purpose language for addressing the internal structure of XML documents. It’s impossible to say how different applications might want to address document parts, which is why XPointer is so flexible.
In addition to location paths, XPointer defines several functions that perform different tasks within XPointer expressions. One class of functions is known as node test functions, which are used to determine the type of a node. Of course, you can use the name of an element to check if a node is of a certain element type, but the node test functions allow you to check and see if a node contains a comment, text, or processor instruction. The following is an example of how to use one of these functions:
/child::processing-instruction()
This expression results in the location of any processing instructions that are children of the root element. The reason the expression results in children of the root element is because the root element (/) is specified as the basis for the expression.
As you can see in these few examples, XPointer is a comprehensive yet flexible technology that is capable of doing some pretty interesting things. I’ll readily admit that there is more to XPointer than I’ve touched on here; I mainly wanted to provide a solid overview and demonstrate how basic expressions are created. I encourage you to explore XPointer more on your own and experiment with creating XPointer expressions. However, before you do that you need to learn how XPointer fits into XLink.
The whole point of XPointer (no pun intended) is to provide a means of referencing portions of XML documents for the purpose of creating powerful XML links. XLink ultimately makes links possible through linking elements, which are elements that describe the characteristics of links. The anchor element in HTML is a good example of a linking element. Although linking elements form the basis of XLink, there are no predefined linking elements in the XLink language. Although it may seem strange at first, you won’t find any standard element in the XLink language. The reason is because XML is all about the creation of custom tags (elements), which precludes the use of a fixed linking element in XLink. In other words, you are encouraged to define your own linking elements specific to a particular XML-based language, as opposed to being locked into a fixed element, such as HTML’s anchor element (a).
Even though HTML’s anchor element is somewhat limiting in the context of XML, there still must be some kind of mechanism in XLink that identifies links. This mechanism comes in the form of standard linking attributes that can be associated with any element. There are several of these attributes, which you learn about in the next section. For now, just understand that the presence of XLink attributes is sufficient to identify an element as a linking element.
A linking element uses a construct called a locator to connect resources involved in a link. In both HTML and XML, the href attribute serves as the locator for links. Although HTML and XML share this attribute, links in XML are described in much more detail than their HTML counterparts. Perhaps the most important difference is the fact that XML links completely describe the resources involved, even if a target resource is just a document fragment. In HTML, it is necessary to place an anchor element in a target fragment resource and identify it using the id attribute. This is not the case in XML because XLink provides the necessary ingredients to fully describe the resources involved in a link.
There are two types of linking elements supported in XLink:
Inline links
Out-of-line links
An inline link is a link whose content serves as one of the link’s participating resources. Typically, an inline link has a linking element that contains content that serves as the source for the link. HTML anchor links are good examples of inline links because an anchor link contains text or an image that acts as the source for the link. Due to HTML’s use of inline links, you may be curious as to how a link could work any other way. Out-of-line links extend the concept of linking in XML by allowing you to create links that are independent of the linked resources.
An out-of-line link is a link whose content doesn’t serve as one of the link’s participating resources. This means that out-of-line links are independent of their participating resources and therefore serve a very different purpose than inline links. Out-of-line links are useful for linking information in documents that you can’t modify for one reason or another. For example, if you wanted to create a link between two resources that reside on other web sites, you’d use an out-of-line link. Such a link is possible because out-of-line links are geared toward opening up interesting new opportunities for how links are used to connect documents. More specifically, it would be possible to create link databases that describe relationships between information spread across the Web.
Out-of-line links partially form the concept of extended links in XML. Extended links are basically any links that extend the linking functionality of HTML. Out-of-line links obviously are considered extended links because HTML doesn’t support any type of out-of-line linking mechanism. Extended links also support the association of more than one target resource with a given link. With extended links, you could build a table of contents for a web site that consists solely of extended links that point to the various pages in the site. If the links were gathered in a single document separate from the table of contents page itself, they would also be considered out-of-line links.
Hopefully I’ve sold you on the fact that XLink offers some interesting opportunities for creating XML links that are impossible in HTML. Now it’s time to look at exactly how such interesting linking is made possible by XLink. Earlier I mentioned that XLink defines standard attributes that are used to establish linked elements in XML documents. Following are the XLink attributes that can be used to create linked elements:
type— A string that specifies the type of linkhref— A locator that addresses a target resource using a URIfrom— A string that identifies the resource being linked from when describing an arcto— A string that identifies the resource being linked to when describing an arcshow— A string that determines how a target resource is to be revealed to the useractuate— A string that determines how a link is initiatedrole— An application-specific string used to describe the function of a link’s contenttitle— A string that serves as a name for a link
The type attribute determines the type of a link and can have one of the following values: simple, extended, locator, resource, arc, or group. The href attribute is one with which you are already familiar, based on its use in HTML. The from and to attributes are used by arcs, which describe the traversal behavior of links. More specifically, an arc defines where a two-way link comes from and where it goes. Arcs could be used to establish web rings, where web pages are linked from one to the next using the from and to attributes to traverse the ring.
The show attribute determines how a target resource for a link is revealed to the user. There are three main values for the show attribute:
replace— The target resource replaces the current document (default value).new— The target resource is shown in a new window.embed— The target resource is inserted into the current document in place of the link.
The functionality of the show attribute follows that of HTML anchor links until you get to the last possible value, parsed. If you set the show attribute to parsed, the link will be replaced by the target resource. This type of link allows you to divide a document into subdocuments and then link them together to form a compound document, which can help improve the organization of data.
The actuate attribute determines how a link is initiated and is typically set to one of the following values:
onRequest— The link must be manually traversed by the user (default value).onLoad— The link is automatically traversed upon loading the source document.
Setting the actuate attribute to onRequest makes a link act like an HTML link, which means that you have to click the link in order to activate it. The onLoad value offers functionality not directly available in HTML by allowing a link to be traversed when a document is first loaded. The onLoad value is particularly useful when used in conjunction with the embed value for the show attribute; this results in a resource being automatically loaded and placed directly in a document.
The last two XLink attributes are role and title, which are used primarily for descriptive purposes. The role attribute describes the role of the content in a link, whereas title provides a human-readable title for the link that may be displayed in a browser.
You’re now finally ready to put all of your XPointer and XLink knowledge to work and create some links that would never be possible in HTML. As an example, consider an element named employees that is used to identify a group of employees for a company. Following is an example of how you might create a simple link for the employees element:
<employees xmlns:xlink="http://www.w3.org/1999/xlink"
  xlink:href="employees.xml">
  Current Employees
</employees>
This example is the simplest possible link you can create using XLink, and it actually carries out the same functionality as an HTML anchor link, which is known as a simple link in XML. Notice in the code that the XLink namespace is declared and assigned to the xlink prefix, which is then used to reference the href attribute; this is the standard approach used to access all of the XLink attributes. What you may not realize is that this link takes advantage of some default attribute values. The following is another way to express the exact same link by spelling all of the pertinent XLink attribute values:
<employees xmlns:xlink="http://www.w3.org/1999/xlink"
  xlink:type="simple"
  xlink:href="employees.xml"
  xlink:show="replace"
  xlink:actuate="user"
  xlink:role="employees"
  xlink:title="Employee List">
  Current Employees
</employees>
In this code, you can more clearly see how the XLink attributes are specified in order to fully describe the link. The type attribute is set to simple, which indicates that this is a simple link. The show attribute has the value replace, which indicates that the target resource is to replace the current document when the link is traversed. The actuate attribute has the value user, which indicates that the link must be activated by the user for traversal to take place. And finally, the role and title attributes are set to indicate the meaning of the link and its name.
The previous example demonstrated how to create a link that imitates the familiar HTML anchor link. You can dramatically change a simple link just by altering the manner in which it is shown and activated. For example, take a look at the following link:
<resume xmlns:xlink="http://www.w3.org/1999/xlink"
  xlink:type="simple"
  xlink:href="resume_e1.xml"
  xlink:show="parsed"
  xlink:actuate="auto"
  xlink:role="employee1 resume"
  xlink:title="Employee 1 Resume"/>
This code shows how to effectively embed another XML document into the current document at the position where the link is located. This is accomplished by simply setting the show attribute to parsed and the actuate attribute to auto. When a web browser or XML application encounters this link, it will automatically load the resume_e1.xml document and insert it into the current document in place of the link. When you think about it, the img element in HTML works very much like this link except that it is geared solely toward images; the link in this example can be used with any kind of XML content.
By the Way
In case you haven’t fully caught on, XPointer impacts links through the href attribute, which is where you specify the location of a source or target resource for a link. All of the flexibility afforded by XPointer in specifying document parts can be realized in the href attribute of any link.
Although simple links such as the previous example are certainly important, they barely scratch the surface in terms of what XLink is really capable of doing. Links get much more interesting when you venture into extended links. A powerful use of extended links is the linkset, which allows you to link to a set of target resources via a single source resource. For example, you could use an extended link to establish a link to each individual employee in a company. To create an extended link, you must create child elements of the linking element that are set to type locator; these elements are where you set each individual target resource via the href attribute. Following is an example of an extended link, which should help clarify how they work:
<employees xmlns:xlink="http://www.w3.org/1999/xlink"
  xlink:type="extended"
  xlink:role="employees"
  xlink:title="Employee List"
  xlink:show="replace"
  xlink:actuate="user">
  <employee xlink:type="locator" xlink:href="employee1.xml">
    Frank Rizzo
  </employee>

  <employee xlink:type="locator" xlink:href="employee2.xml">
    Sol Rosenberg
  </employee>

  <employee xlink:type="locator" xlink:href="employee3.xml">
    Jack Tors
  </employee>
</employees>
This example creates an extended link out of the employees element, but the most interesting thing about the link is that it has multiple target resources that are identified in the child employee elements. This is evident by the fact that each of the employee elements has an href attribute that is set to their respective target resources.
By the Way
Keep in mind that the examples shown in this section reveal only a couple of ways to use extended links. In truth, it has yet to be revealed exactly how XLink will affect XML, and what kinds of innovative linking applications people will dream up. If web browsers eventually get on board with support for XLink, we will likely see a revolution of sorts when it comes to how links are used and perceived.
Of course, you might be wondering exactly how a link like the extended link shown here is used. In web pages, links are usually identified by colored, underlined text, and are activated simply by clicking them with the mouse. When there are multiple targets associated with a link, as in the example, it somehow becomes necessary to specify which target you want when you traverse the link. Because extended links currently aren’t supported in any web browsers, it’s hard to say exactly how this target resource selection will be carried out. My hunch is that you will be able to select from multiple targets that are displayed in a pop-up menu after you click a link. So, when you first click on a source resource for an extended link with multiple targets, a pop-up menu could appear with the available target links. To visit one of the links, you simply select the target from the menu. This is a reasonably intuitive way to implement the user interface portion of extended links with multiple targets, but it still isn’t clear yet if browser vendors will employ this approach.
Another type of extended link is the arc, which is essentially a two-way link that connects two resources in such a way that the link can be traversed in either direction (forward or reverse). When you create an arc, you must first create locators for each resource involved in the link, and then you create the arc connections that connect the resources together. A web ring is a good example of how arcs work—each web page in a web ring has a Forward and Back button that allows you to view more pages in the ring. The URI of a web page in a web ring would be identified in a locator, whereas the connections between each page in the ring would be established with arcs.
I’ve mentioned a few times throughout this lesson how XLink has unfortunately yet to garner much support in major web browsers. That’s the bad news. The good news is that the Firefox browser does include support for simple XLink links. You can create links in Firefox using XLink that approximate the same links supported in HTML. In other words, you can’t create extended links or embedded links, which is somewhat of a bummer. Listing 22.2 contains the code for a Top Five movie list XML document that makes use of simple XLink links.
Example 22.2. The Top Five Sample XML Document
 1: <?xml version="1.0"?>
 2: <?xml-stylesheet type="text/css" href="topfive.css"?>
 3:
 4: <topfive xmlns:xlink="http://www.w3.org/1999/xlink">
 5:   <title>Top Five Movies</title>
 6:
 7:   <intro>Following are my top five favorite movies:</intro>
 8:
 9:   <item>
10:     1. <itemLink xlink:type="simple" xlink:show="replace"
11:     xlink:actuate="onRequest" xlink:title="Number 1"
12:     xlink:href="http://www.amazon.com/exec/obidos/ASIN/B00004TDTO/">
13:     Jaws</itemLink>
14:   </item>
15:
16:   <item>
17:     2. <itemLink xlink:type="simple" xlink:show="replace"
18:     xlink:actuate="onRequest" xlink:title="Number 2"
19:     xlink:href="http://www.amazon.com/exec/obidos/ASIN/6305499128/">
20:     Raising Arizona</itemLink>
21:   </item>
22:
23:   <item>
24:     3. <itemLink xlink:type="simple" xlink:show="replace"
25:     xlink:actuate="onRequest" xlink:title="Number 3"
26:     xlink:href="http://www.amazon.com/exec/obidos/ASIN/B00003CWTI/">
27:     Magnolia</itemLink>
28:   </item>
29:
30:   <item>
31:     4. <itemLink xlink:type="simple" xlink:show="replace"
32:     xlink:actuate="onRequest" xlink:title="Number 4"
33:     xlink:href="http://www.amazon.com/exec/obidos/ASIN/0767821408/">
34:     Bottle Rocket</itemLink>
35:   </item>
36:
37:   <item>
38:     5. <itemLink xlink:type="simple" xlink:show="replace"
39:     xlink:actuate="onRequest" xlink:title="Number 5"
40:     xlink:href="http://www.amazon.com/exec/obidos/ASIN/B000286RKW/">
41:     GoodFellas</itemLink>
42:   </item>
43:
44:   <conclusion>To find out more about me, please feel free to visit
45:   <popupLink xlink:type="simple" xlink:show="new"
46:   xlink:actuate="onRequest" xlink:title="michaelmorrison.com"
47:   xlink:href="http://www.michaelmorrison.com/">
48:   my Web site</popupLink>.
49:   </conclusion>
50: </topfive>
This code consists of six different links: five for the top five movies and one as a contact link near the bottom of the document. The movie links all link to Amazon.com, whereas the contact link directs you to my web site. The movie links all have their show attributes set to replace, which means the linked resource is opened in the same window as (replaces) the original document. The contact link is slightly different in that its show attribute is set to new (line 45), which means the linked resource is opened in a new window. The actuate attribute for all of the links is set to onRequest (line 46), which requires the user to click the links in order for them to be navigated. Figure 22.5 shows the Top Five movie document as viewed in Firefox.

Figure 22.5. The Top Five sample document provides an example of how simple XLink links can be used in an XML document.
You may be wondering how the browser knows to underline the links. There isn’t anything magical going on here. I just neglected to show you the CSS stylesheet that is responsible for styling the Top Five document. You can find this stylesheet along with the complete code for this book on my web site, which is located at http://www.michaelmorrison.com/.
If you think of an XML document as a hierarchical tree of data, which it is, then it’s not too hard to make a comparison between XML documents and the family trees used in genealogy. This comparison is useful because it turns out that one of the best ways to interact with XML data is by thinking in terms of nodes of data that are related to each other as family members. For example, there are parent, child, and sibling nodes at most points in a document’s node tree. XPath is a technology that takes advantage of this hierarchical nature of XML by allowing you to reference parts of XML documents as nodes within a node tree. Although you’ve heard mention of XPath earlier in the book, this hour formally introduced you to it and explored what it has to offer in terms of referencing XML documents.
XPath plays a role in two other emerging XML technologies, XLink and XPointer, which bring advanced linking support to XML, and at some point to the web. You found out about the theoretical underpinnings of XML linking and what it aims to accomplish. You then learned how to create expressions in XPointer, followed by links in XLink. Although you gained some practical knowledge of XLink and XPointer, there unfortunately is very little support for either technology in major web browsers at the moment. Even so, they are compelling enough technologies that you need to keep an eye out for them potentially making an impact in the XML landscape at some point.
The Workshop is designed to help you anticipate possible questions, review what you’ve learned, and begin learning how to put your knowledge into practice.
1. | Now that you understand XPath a little better, modify the |
2. | While you’re at it, modify the root template in the |