
Mocking Up Your Pages
An important part of the design process is mocking up what the pages will actually look like and how they will function. This process can help you understand which features you need and which features don’t make sense. During the course of development, an idea may seem like it can work with your product, but producing mockups can demonstrate that it doesn’t fit with your theme. Mocking up your pages can help you develop your app faster and avoid the temptation to put things in that don’t fit.
Because you have the basic structure in place, you need to plan the pages that you will be creating to support your application. As discussed at the start of this chapter, Corks has are the following goals:
• Record and save the wines you have in your cellar (using SQL-Lite, local storage)
• Query a wine locator (using geolocation)
• Use social APIs (using AJAX, JSON)
• Create web app settings (local storage)
• Enable searching for and adding wines
Each Page involves a different aspect of HTML5. Because you will be using HTML5 SQL-Lite, you keep all the data for the user in the browser. This will be retained unless the user removes all the data from his or her browser. In the following sections, I discuss each page and introduce a mockup for visual learners.
Settings/About
On the settings page, you give your users the capability to clear the database in case they want to start over and erase their data. This feature will request that users confirm the changes and then erase any wines that they have currently created.
This page holds static information about the app, its features, and contact information for the app owner. You could also include a help section on features for users learning how to use the application. You use HTML5 input types to enable a user to dial a phone number or send an e-mail from your web app. (See Figure 4-4.)
In this example, you are going to add a simple tool to change your display name within the application. This helps the user define who is using the application and give it a personal touch.

Figure 4-4: Setting up the About page
Because the main point of the application is to add wines to a “virtual cellar,” the process of adding, viewing a timeline, and viewing wines will drive users to use your app. The following sections break down each of these sections for a better idea on how they will interact and use features of HTML5 to deliver a solid experience.
Cellaring a wine
To start, users must be able to add a wine to their cellar. The second tab on the top navigation enables users to add a wine to their cellar through a simple process. The page shows a Search box that enables users to search for a wine. If there is a match, the users can select the wine and enter the quantity they have in their cellar via a pop-up box, with an optional box for a comment about this wine.
Figure 4-5, 4-6, and 4-7 show the example or mock-up of the Manage Wine screen where users can add wines to the database. Subsequently, the user can add a wine to their cellar right away so it appears in their activity.

Figure 4-5: The Manage Wines main screen

Figure 4-6: Additional view of the Manage Wines main screen

Figure 4-7: Add a wine to the cellar.
If no wines are found, the user can use the Search functionality by tapping Add Wine, as shown in Figure 4-8. This enables the user to create a wine using a form. Users enter the name of the wine, winery, alcohol content, and color to quickly add the new wine to their cellar.

Figure 4-8: Search for wines.
Using the Cellar Timeline
The first tab on the top navigation is the Cellar Timeline. This is a list of all the wines you have added to your cellar, sorted in descending order of being added. You can tap on each item in the list to view the individual wine information page that we discuss later in this chapter. At the top of the feed, a Select button enables users to change the sort of the results based on Name Ascending, Name Descending, and Date Added. (See Figure 4-9.)

Figure 4-9: Example view of the Activity main page
This project uses SQL-Lite to pull in a query from the local database using the options set by the Select button at the top of page. These settings define the parameters of the query and how to display the results.
Searching for a wine
The far right button on the top navigation bar enables you to search your wine database. Tapping the search icon displays a search bar below the navigation bar. It will appear superimposed over the content so it will not interrupt your browsing. (See Figure 4-10.) Searching for a wine will take you to the search list page that shows a list of wines that match your results. Tapping the wine will give you the option of adding this wine to your cellar or viewing more information. (See Figure 4-11.)

Figure 4-11: Example view of the Wine Search Detail page

Figure 4-10: Example view of the Wine Search page
Individual wine page
On the Cellar Timeline, tapping on any wine displays the individual information on that wine. On the page, you want to show the user the name of the wine, the ABV, color, and winery. When the user adds the wine to his cellar, the page also shows the date it was added along with space for an optional comment. The Cellar Timeline also provides an option for adding a wine to the cellar. (See Figure 4-12.)
In addition, every wine page will have a link to Twitter, which enables the user to scan the social network for tweets and stories about the wine name. The link will open up a new window that will search Twitter using the API and return the results for the selected wine. A back button on the top right enables the user to go back to the preceding page.

Figure 4-12: Example view of the Wine Detail page
Wine location search
The goal of the wine location search is to find wine shops within a user-defined radius. This app uses the Google Maps API to gather the data and display the results on a map. The page shows Google Map objects with a GPS Location symbol at the top. (See Figure 4-13.)
When the user navigates to this tab, it gathers the user’s location and sends a query to Google to obtain a list of wine shops within a 10-mile radius. The returned results are parsed and added as map markers and scattered along the map. The map is centered on the user’s location, and different markers are also placed around it, indicating their proximity to the user’s location. (See Figure 4-14.)

Figure 4-13: Example view of the Wine Location page

Figure 4-14: Example view of the Wine Location Detail page
If users leave the Wine Location Search page and return later, the data remains consistent; however, the users can touch the GPS icon to recycle the search to return new results based on their new location.
Defining hash navigation
It’s important to define how the site will navigate. This app uses AJAX to pull data for the database, so you need a way to keep a history of your pages without actually having pages. This enables users to navigate between pages in the app without having to refresh the entire document.
With AJAX and the HTML5 structure, the pages won’t actually be pages in the form of separate HTML documents. Each page will live in a <div>, which represents a page. All pages are tracked within separate <div>, so you use an HTML5 method called hashChange to track changes to your navigation. A hash is represented in the URL as shown here:
http://example.com/#wine-page
http://example.com/#activity
When a user taps a link that triggers the hash change, the script detects there has been a hash change event and fires some custom code. Here is an example of one way to code for detecting page changes:
<script type=’text/javascript’>
// whenever the onhashchange event is fired, the locationHashChanged function is
executed.
window.onhashchange = locationHashChanged;
function locationHashChanged() {
// this function passes in the location variable, which contains the hash
(#wine-page)
var hash = location.hash;
// based on the hash, you can fire particular code
if (hash == “#wine-page”)
{
// hides all DIVs with the class of page
$(“.page”).hide()
$(“#wine-page”).show();
}
}
</script>
The preceding script detects any changes to the hash in URL and then fires the custom function called locationHashChanged. This tells the JavaScript to load based on what the hash defined. To make this work, all links will include this hash change in the href attribute of your links, as the following code demonstrates:
<li>
<a href=”#wine-page”>
....
</a>
</li>
Every time a user taps the anchor tag, the script detects the change, hides the current page, and makes the #wine-page visible. At this point, you run some scripts to pull information in about the wine that you selected.
The power of using the onHashChange method is that you have a fully functional back button in your web app without having to code anything special. Once the back button is tapped, the same script runs again and shows the <div> that matches the hash name. As long as you give all your <div> elements the following structure, the onHashChange function you wrote earlier will take care of the rest.
<div id=”page1” class=”page”>
....
</div>
<div id=”page2” class=”page”>
....
</div>
<div id=”page3” class=”page”>
....
</div>
Hash change events are very popular on both mobile websites and desktop websites. Twitter uses hash change events to direct to the correct page in order to serve the content via AJAX.
Figure 4-15 shows the hash symbol followed by the username. It will serve content based on what follows the hash, which is gregavola in this example. Whenever the page is changed, it reloads the content based on the hash. When the user fires the browser back button, the reverse process occurs, as we describe earlier in this chapter.
It’s important to note that onHashChange isn’t supported in all browsers, so it will depend on your target platform. JQuery Mobile supports degradation so it will work with other devices that do not support onHashChange. You could always use the following code to detect usage:
if (“onhashchange” in window) {
//...
}
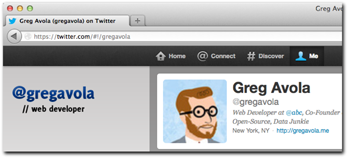
Figure 4-15: At Twitter.com, the URL view shows the hash in the address bar.
Pushstate navigation
In addition to onHashChange events, HTML5 also has a History API that enables you to change the URL without refreshing the page. It essentially works the same as the onHashChange events; however, the URL actually changes the call you are making.
The method is called pushState, and it enables you to push the URL to the address bar, but load the page without reloading the entire website. This is the default page navigation system of jQuery Mobile. This method changes your URLs of each page from:
http://example.com/#page1
to
http://example.com/page1.html
The benefit is that search engines will be able to read page1.html better than #page1. For this sample app, each page is customized to the user so there is no need to use the more complex pushState to handle navigation.
Additionally, the browser has a different implementation, which makes it hard when doing mobile apps. There are third-party solutions that help you bring the same experience to all browsers, including History.js (https://github.com/balupton/History.js), a Github project that brings the same methods to all browsers without having to worrying about cross-browser support.