
Go ahead and create a new Xcode playground and delete the autogenerated content. Let's continue with our example of modeling a person by adding the following to our playground:
class Person {

}
Note
All related source code for this chapter can be found here: https://github.com/swift-book-projects/swift-3-programming-for-kids/tree/master/Chapter-9
Let's take a look at the simple code we just wrote. The class keyword is how we define a class in Swift. Remember that a class is our abstract representation of something we are trying to model and the object is the instance of our class. Next, Person is the name of our class, and is also called our type. In Swift, we capitalize the names of our classes. This is similar to other types we have seen so far, such as String and Int; the difference being that this is a type that we define ourselves.
If we want to instantiate our new class that does not hold any functionality, we will do it by writing the following code:
let bob = Person()
This means that we now have an object of the Person class, which we can now reference using the bob constant.
A class without properties or methods is not much fun, so let's look at how we can add some properties to our new class. We already discussed what properties could be associated with a person, so let's go ahead and add some of these to our class:
class Person {
    var name: String
    var age: Int
    var hairColor: String
}
At this point, Xcode will throw a couple of errors, but let's not worry about that for now. We added the following three properties to our class:
nameis the name of our person. The type is aString.ageis the age of our person. The type isInt, which means that we only care about natural numbers.hairColoris the hair color of our person. The type isString.
Xcode is throwing errors because we defined our types as not being optional. If you recall from Chapter 7, Toy Bin, optional allows a property to not have a value (or to be nil). In our class, we are not allowing this for our properties to simplify the example. It might be that a person has not been baptized and, because of that, is without a name. It might also be that a person is bald, which means that it is hard to determine the person's hair color. However, let's simplify our person class by always requiring our properties to have values.
To fix these errors, we can add an initializer, making it possible to initialize an instance of our class with some given values:
init(name: String, age: Int, hairColor: String) {
    self.name = name
    self.age = age
    self.hairColor = hairColor
}
This initializer is essentially a special kind of method that allows us to create an instance of our person. Note how the parameters match the properties we have added to our class. Inside the method body, we simply set each value of the method to the properties of our class. When we are inside a method and in the event of overlapping property names, we can distinguish the parameters from the class properties by referring to class properties using the self keyword. At this point, your playground should look like this:

Note how we're still seeing an error in Xcode:

Xcode is letting us know that in order to make an instance of our person class, we need to provide a name. This is because of the special init method we just added, which will be used automatically when we try to make an instance of our class. However, even though we add a name to our method call, it will complain afterwards about a missing argument for the age. In order to satisfy Xcode, we need to provide values for all three parameters in our init method:
let bob = Person(name: "Bob", age: 13, hairColor: "black")
In order to retrieve the values of our instance, we can use the dot notation and then reference the property we want to access; for example, bob.name to get the name of the person. To verify that we actually created a correct instance of a person, we can add this print statement to our program:
print("My name is (bob.name), I am (bob.age) years old and my hair color is (bob.hairColor).")If you take a look at the console, the output should now correctly output the values we set to instantiate bob:

The console should be saying My name is Bob, I am 13 years and my hair color is black., which makes sense because we created our instance with the Bob, 13, and black values.
At this point, we have our own class that is trying to model a person. We have added properties to our person in order for us to easily represent a person. The next thing we can look at is how to add tasks that can be performed by our person class. In other words, adding instance methods. We discussed earlier that it made sense for a person to be able to jump. Let's try and add this behavior to our class. The simplest approach to this behavior is to add a method that does not take any input and does not return anything. All it does is to simulate that it is jumping by printing that to the console:
func jump() {
    print("(self.name) is jumping")
}
This way of creating a function should be familiar, as this is how we did it back in Chapter 6, Making Pizza. The only difference is that we're now referencing the instance using the self keyword; in this case, we're saying the name of the instance that has been created is jumping. Remember that a class is like a blueprint and an instance of a class is an object. Instance methods are tied to the object which makes it possible for us to reference the name of the person that is jumping. Adding this method to our class looks like this:
class Person {
    var name: String
    var age: Int
    var hairColor: String

    init(name: String, age: Int, hairColor: String) {
        self.name = name
        self.age = age
        self.hairColor = hairColor
    }

    func jump() {
        print("(self.name) is jumping")
    }
}
Let's try and call our newly added method:
jump()
Wait a second, now Xcode starts reporting an error saying that it cannot find our new function:

How can that be? This is the difference between a function and an instance method. Remember that we placed our new jump method inside our class. This means that we are only able to call it on an instance of Person. If we move the method outside the class, then it will be a function and we can call it just by typing jump(). So, in order to call this function, we can use our bob instance to make him jump:
bob.jump()
If we take a look at Xcode, it should show in the console that Bob is jumping:
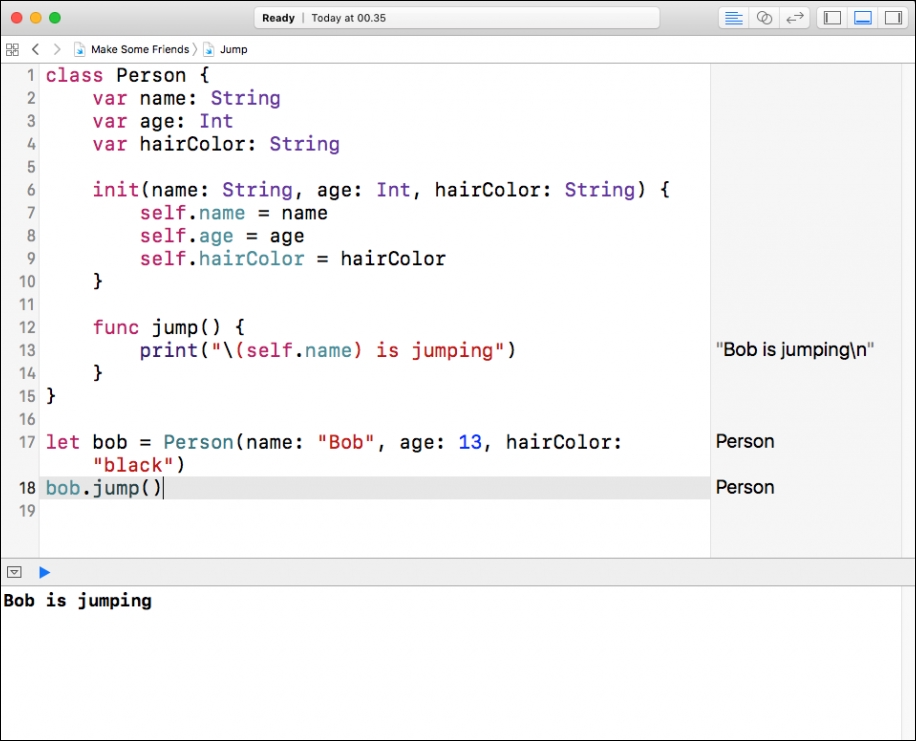
How cool is that? We are now able to instantiate our Person class with a set of values and simulate that our person performs a task.
Let's continue to develop our person class by adding more methods. We can, for example, make our class able to greet, as shown:
func greet() {
    print("(self.name) is greeting")
}
This method is very similar to our jump method, the only difference being the name of the method and the simulation that goes on inside the method body.
Usually when we greet, we do it to greet other people, why should our Person class be any different? We can add a parameter to our greet method that takes in an instance of another person. This is similar to saying that we want our person instance to greet the person we give as input. The function will then look like this:
func greet(person: Person) {
    print("(self.name) greets (person.name)")
}
Note how the first name is being printed using the self keyword, which means that this refers to the instance that is being asked to perform this task. The input is of the Person type and can be referenced using the person label. Therefore, in order to print out the name of the person we asked our instance to greet, we use person.name. The last part is very similar to how we used parameter values in Chapter 6, Making Pizza.
In order to use our new method, we need two instances of a person:
let bob = Person(name: "Bob", age: 13, hairColor: "black")
let alice = Person(name: "Alice", age: 12, hairColor: "blonde")
We are reusing our code from earlier to instantiate Bob, but we have added another line of code that takes care of instantiating Alice. Now, in order to make Bob greet Alice, we need to call the instance method on Bob, passing Alice as input:
bob.greet(person: alice)
If we take a look at the console, it should say Bob greets Alice:
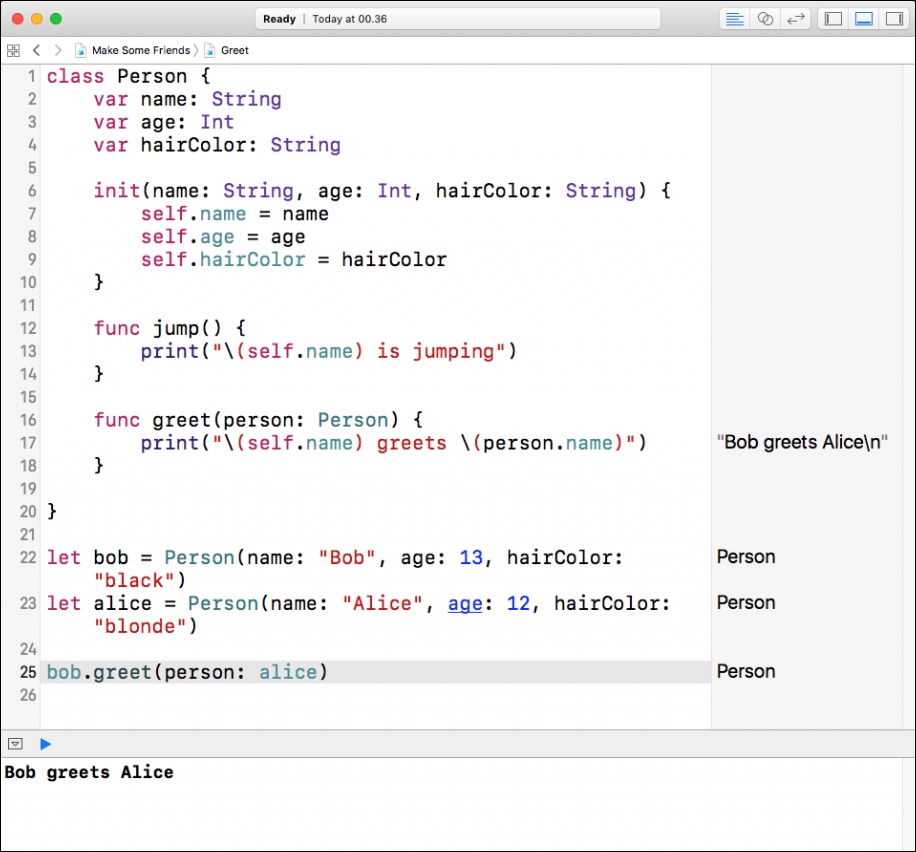
How cool is that? We just made two instances of a person communicate using the knowledge we acquired on OOP. In particular, note how the objects are communicating using the abstract Person type.
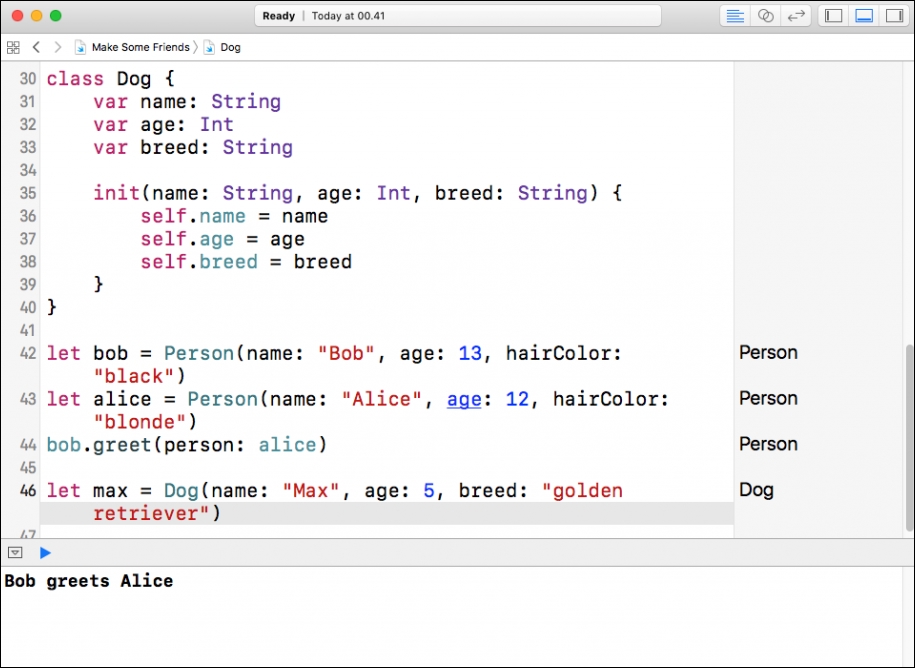
Let's extend our program by introducing another class. We could add a Dog class to represent a dog that our persons are able to interact with. It could look something like this:
class Dog {
    var name: String
    var age: Int
    var breed: String

    init(name: String, age: Int, breed: String) {
        self.name = name
        self.age = age
        self.breed = breed
    }
}
Very similar to our Person class, our new Dog class has the following properties:
nameis the name of the dogageis the age of the dogbreedis the breed of the dog
To instantiate a dog, we follow a similar pattern as with our Person class by writing the following code:
let max = Dog(name: "Max", age: 5, breed: "golden retriever")
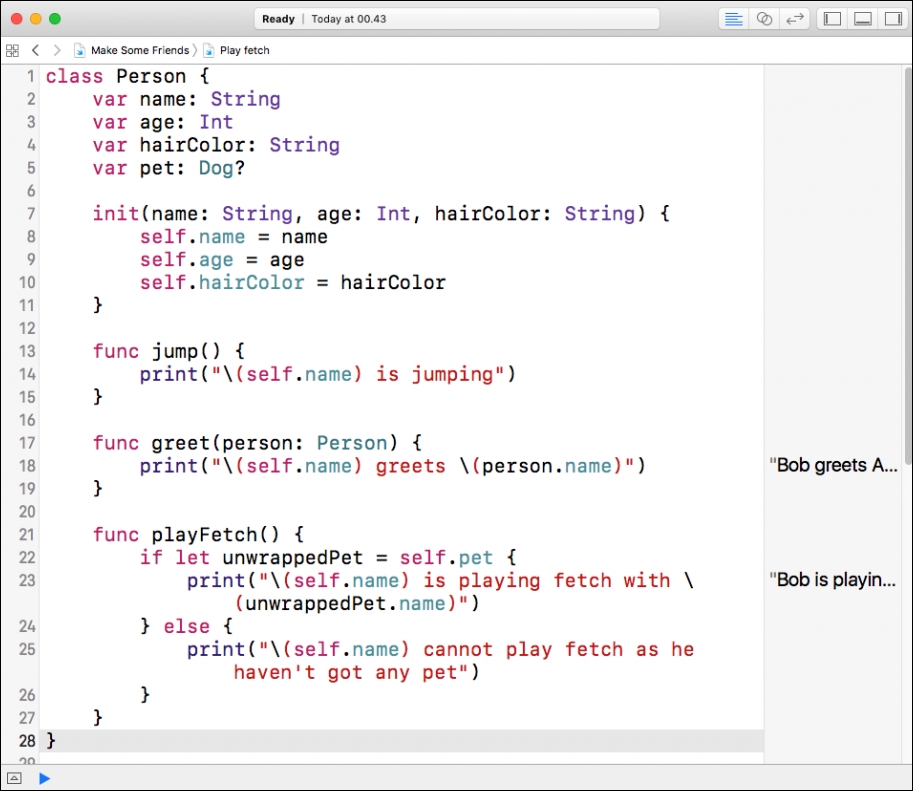
We can combine our objects by allowing a person to have a pet. Now that we have our Dog type, we can use that to update our Person class by adding one more property:
var pet: Dog?
In this case, we are making it optional for a person to have a pet; this allows us to use the same initializer and avoid having to update how we created Bob and Alice.
Let's add another instance method to our Person class that uses this new pet property. We can, for example, make it possible for a person to play fetch with their pet:
func playFetch() {
    if let unwrappedPet = self.pet {
        print("(self.name) is playing fetch with (unwrappedPet.name)")
    } else {
        print("(self.name) cannot play fetch as he haven't got any pet")
    }
}
In the method body of playFetch, we are first unwrapping the optional pet property of the Person instance. As this property is optional, we do not know whether or not it has been set. If the person has a pet, we simulate that they play fetch together. If they do not have a pet, we print a small message saying that the person cannot play fetch, because the person does not have a pet. Note how playFetch is not taking in any pet as a parameter. This is intentional, as the purpose of this function is to encapsulate the task of playing fetch with the pet a person owns (if any).
This means that we rely on the instance property of pet. At this point, your playground should look something like this:

The lower portion of the playground would look like this:
If we want to check whether our playFetch method works as intended, we can try to ask Bob to play fetch:
bob.playFetch()
If you look at the console, it should say Bob cannot play fetch as he haven't got any pet, which makes sense because we haven't set which pet Bob has. Let's try and make Max Bob's pet:
bob.pet = max
Now, if we try and make Bob play fetch again, the result should be different:
The result would be as shown below:

Feel free to try and create other instances of our Person class and make them perform tasks and interact with each other.