
Create a new (Single View Application) project in Xcode and name it Movie Night. Save the project in a place on your hard drive where you will be able to locate it again. Remember that the description of how to create a project can be found in Chapter 11, Simon Says.
Then, open Main.storyboard and select View Controller on the canvas:

Tip
All related source code for this chapter can be found here: https://github.com/swift-book-projects/swift-3-programming-for-kids/tree/master/Chapter-14.
Having selected that, we will press Backspace on the keyboard in order to delete it from the canvas. After deleting that, we will try and find the Table View Controller from the Object Library at the lower right-hand side of Xcode (in the Utilities area):

Next, we will drag a table view controller into the canvas. Then, to ensure that this view will be the first we see when we run our application, we will select our newly added table view controller and ensure that Is initial View Controller is checked in the Attributes Inspector:

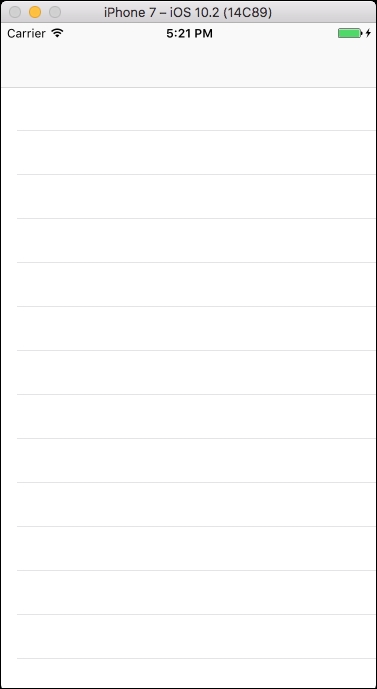
Running our application at this point should give us an application with an empty list we can scroll by swiping up and down:

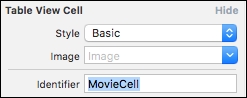
At this point, Xcode will give us a minor warning relating to a missing identifier on our cell in our list. To fix this, we click on our cell, which is the area with the Prototype Cells label in our canvas. Then, in the Attributes Inspector, there's a field with no value that has the Identifier label. This will be an identifier for the particular cell we are creating. The identifier may become useful when we want to add dynamic values to our cells in code. In this text field, go ahead and type in MovieCell as our identifier.
At the same time, change the Style of our cell from Custom to Basic. This is a built-in style for our cell that will give us one label (similar to the cell displayed in the Contacts app):
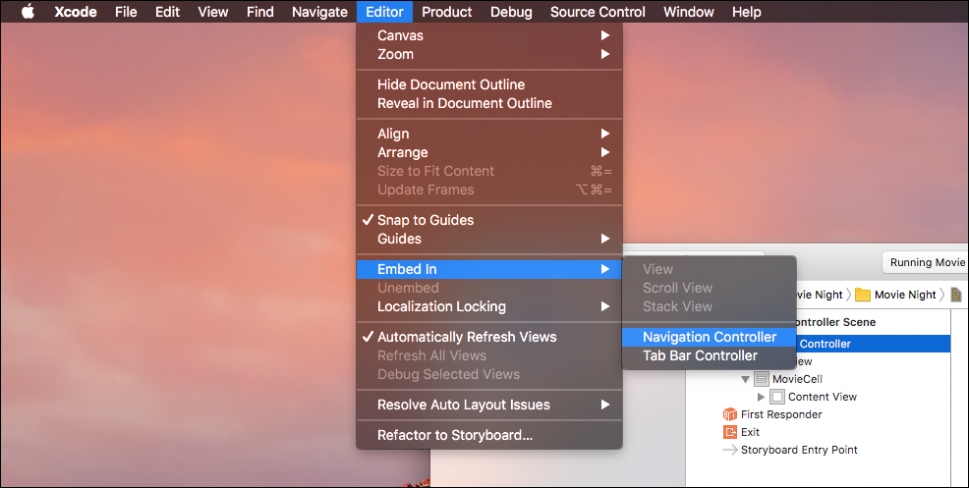
In order to add a title and the plus button to our application, we need to add something called a navigation controller. To do this, we will select our table view controller and then, in the menu bar, navigate to Editor | Embed In | Navigation Controller:
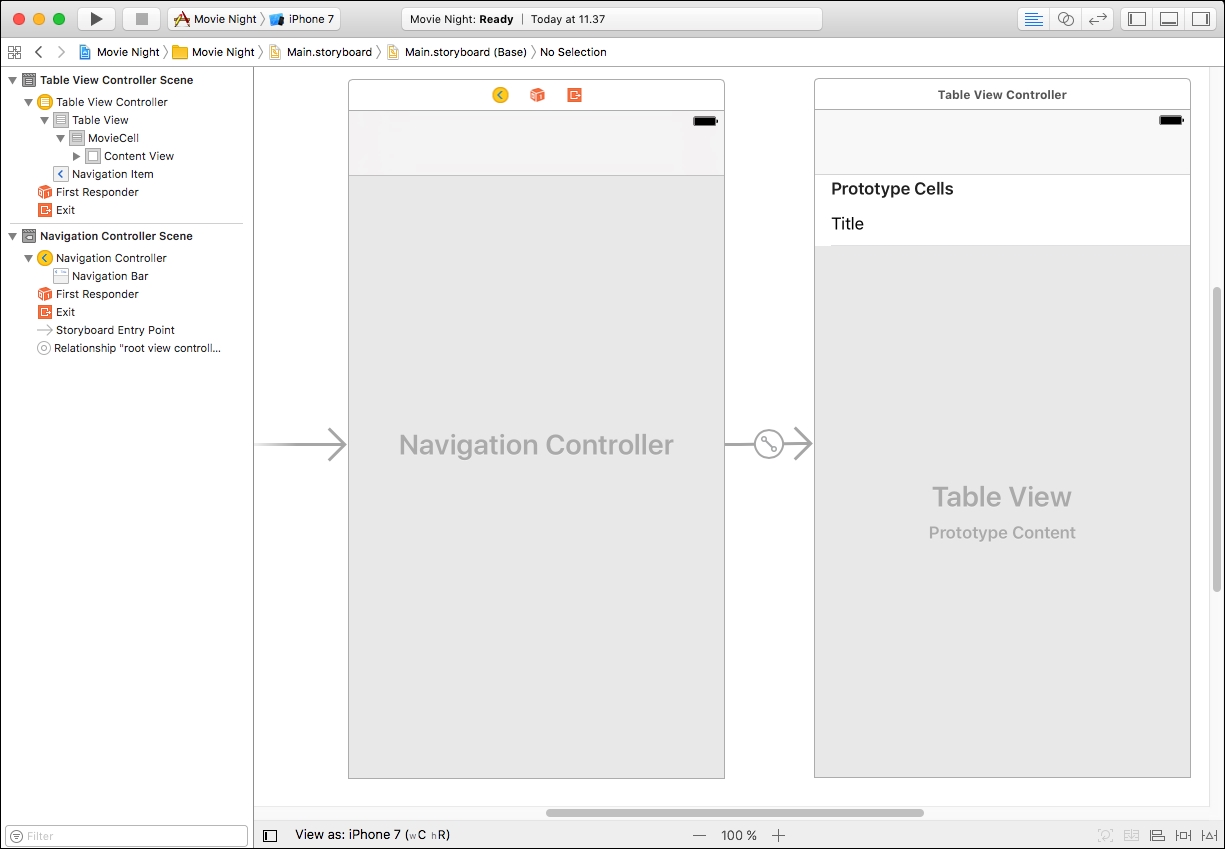
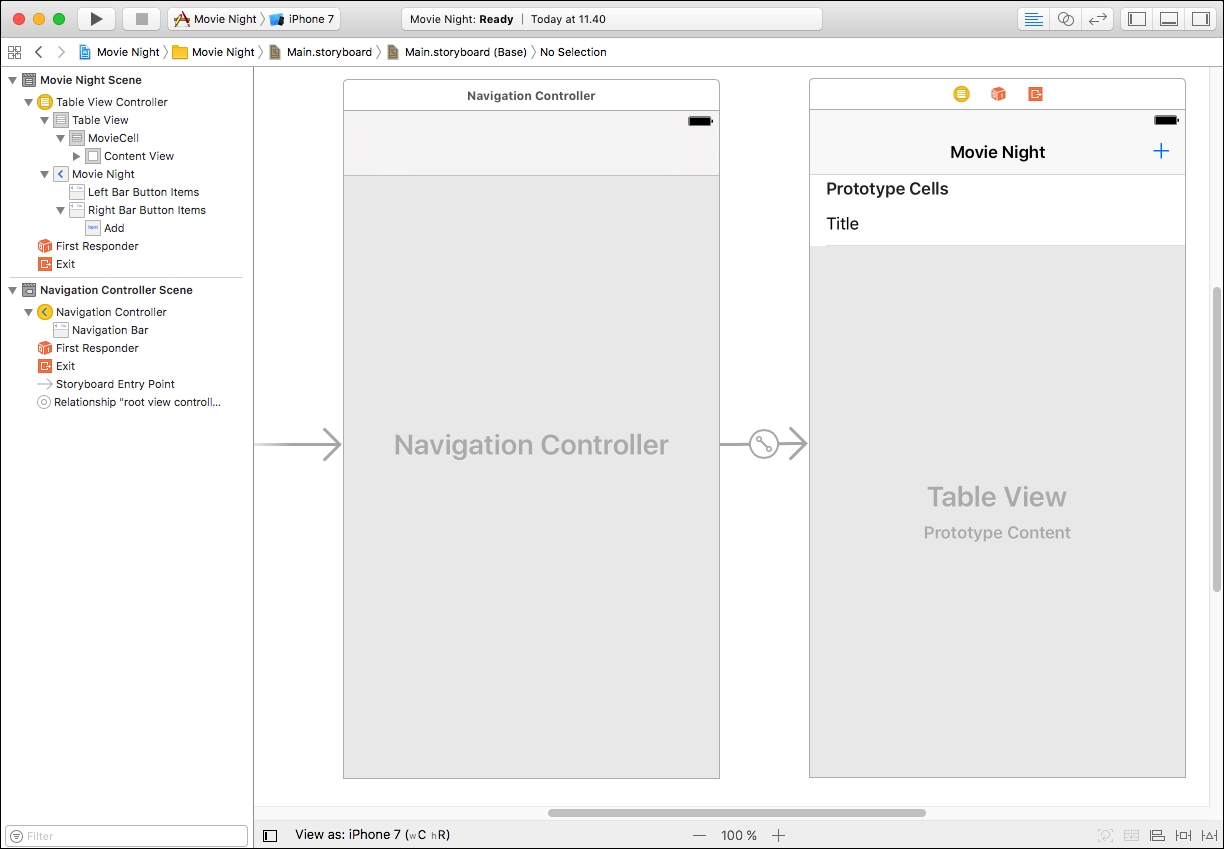
This should add a navigation controller to the canvas, making our canvas look like this:
If we now run our application, we can see that a navigation bar (the gray area above the list) has been added to our application:
We are already making great progress with our UI. Let's add the final touches before moving on to our code.
Next, we will specify a title for our application by double-clicking on the gray area in the navigation bar in our table view controller. This will reveal a small input field where we can type in Movie Night. To the right of the title, we will drag a Button from the Object Library that will be the button to add a movie. After placing the button, the style of the button can be changed to Done and the System Item can be changed to Add in order to get the built-in plus symbol button. This should give you a canvas like this:
One last thing to do before we start coding is to add a function for our button. Before we can do this, we need to ensure that there is a proper link between our ViewController.swift and our new table view controller on our canvas. First, open up ViewController.swift and remove the following line:
class ViewController: UIViewController {In its place, insert the following line:
class ViewController: UITableViewController {This will indicate that our view controller is now a UITableViewController. Open up Main.storyboard again and select our table view controller. Then, in the Utilities area, we will take a look in the Identity Inspector. Here, we type in ViewController as the Class for our table view controller:

With that in place, we can now click on the Show the Assistant editor button (with the two circles) in the upper-right corner to let Xcode display the canvas and a code editor side by side. Then, as we did in Chapter 12, Starry Night, we will hold Ctrl while left-clicking on the button (with the plus symbol), dragging the cursor into our source editor, and then we will release the left-click right before the last } in our code. We will then change the connection to an Action and name it addTapped. This should us leave with the following content in our ViewController.swift:
import UIKit

class ViewController: UITableViewController {

    override func viewDidLoad() {
        super.viewDidLoad()
        // Do any additional setup after loading the view, typically from a nib.
    }

    override func didReceiveMemoryWarning() {
        super.didReceiveMemoryWarning()
        // Dispose of any resources that can be recreated.
    }


    @IBAction func addTapped(_ sender: Any) {
    }
}
With this in place, we can now look at how we can display items in our list.
With the interface in place, we are now ready to add the code for our application. Before getting started, go ahead and remove the didReceiveMemoryWarning() method from our ViewController.swift, as we will not be using this method.
Then, the first thing we will do is to introduce a variable that will hold our movies:
var movies: [String] = []
Our movies will be an array of strings that will correspond to the titles of the movies and, initially, our list will be empty, until a user adds a movie to the list.
Next, we will add the required methods defined in the UITableViewDataSource and UITableViewDelegate protocols to display data in our list:
override func tableView(_ tableView: UITableView, numberOfRowsInSection section: Int) -> Int {
    return movies.count
}

override func tableView(_ tableView: UITableView, cellForRowAt indexPath: IndexPath) -> UITableViewCell {
    let cell = tableView.dequeueReusableCell(withIdentifier: "MovieCell", for: indexPath)
    cell.textLabel?.text = movies[indexPath.row]
    return cell
}

override func tableView(_ tableView: UITableView, didSelectRowAt indexPath: IndexPath) {
    tableView.deselectRow(at: indexPath, animated: true)
}
Note how we have added the override keyword. This is required because we are now inheriting from UITableViewController, which already has these methods defined.
The first method simply returns the amount of movies we have in our variable. The number of cells in the list will then correspond to the number of movies in our variable.
The second method will try to create a cell using the identifier we specified in our canvas and then set the title of the label to the title of the movie we have stored in our movies array.
Note
When creating a UITableView, we can enhance the performance of our application by limiting the number of views created for our list by reusing cells. This makes a lot of sense since we are often unable to show all items in our list onscreen at the same time. The method dequeueReusableCell(withIdentifier:) tries to find a cell that can be reused; if not found, it will create a new one.
The last method will simply deselect any selected row in the list, as we will not be adding any functionality for when the user taps on a row in the list.
By separating our code using // MARK:, it can become a bit easier to grasp our code. At this point, your ViewController.swift should look like this:
import UIKit

class ViewController: UITableViewController {

    var movies: [String] = []


    // MARK: View life cycle

    override func viewDidLoad() {
        super.viewDidLoad()
        // Do any additional setup after loading the view, typically from a nib.
    }


    // MARK: UITableViewDataSource

    override func tableView(_ tableView: UITableView, numberOfRowsInSection section: Int) -> Int {
        return movies.count
    }

    override func tableView(_ tableView: UITableView, cellForRowAt indexPath: IndexPath) -> UITableViewCell {
        let cell = tableView.dequeueReusableCell(withIdentifier: "MovieCell", for: indexPath)
        cell.textLabel?.text = movies[indexPath.row]
        return cell
    }


    // MARK: UITableViewDelegate

    override func tableView(_ tableView: UITableView, didSelectRowAt indexPath: IndexPath) {
        tableView.deselectRow(at: indexPath, animated: true)
    }


    // MARK: IB Actions

    @IBAction func addTapped(_ sender: Any) {

    }
}
We are now very close to being able to display something in our list; all we need is values in our movies array.
If our movies array contained any items, we would have everything in place to display items in our list. However, let's move on and look at how we can add items to our list using our button with the plus symbol. To do this, we will use something called a UIAlertController, which will help us display a small popup, in this case, to add a movie. Following our movies declaration, go ahead and add the given line:
let alert = UIAlertController(title: "Add movie", message: "What movie do you want to add?", preferredStyle:.alert)
Now that we have an instance of an UIAlertController, we can present that to the user when tapping on the add button. To present the alert, add the following code inside our already-created addTapped(_ sender: Any) method:
present(alert, animated: true, completion:nil)
Now, when we run our application, we should be able to see our popup when we click on the button with the plus symbol; however, there is no way to add a title for our movie, nor any way of dismissing the popup. To fix this, we will introduce a small helper function to add the required functionality to our alert:
func setupAddMovieAlert() {
    // Setup textfield
    alert.addTextField()

    // Action for add
    alert.addAction(UIAlertAction(title: "Add", style: .default) { action in
        guard let text = self.alert.textFields?.first?.text else {
            return
        }
        guard text.characters.count > 0 else {
            return
        }

        // Reset textfield
        self.alert.textFields?.first?.text = ""

        // Add movie
        self.movies.append(text)
        self.tableView.reloadData()
    })

    // Action for cancel
    alert.addAction(UIAlertAction(title: "Cancel", style: .cancel, handler: nil))
}
This helper can be broken into three steps:
- Add a text field to type in the title of a movie.
- Add the functionality that should be fired when we want to add a movie. In this case, we're checking, using a
guardstatement, to see that some text has been entered to avoid adding movies with no titles. Aguardstatement is useful for making sure a value with an optional type has a value, but can also be used for comparisons. Basically, it says "if this is not true then do this", which in this case will return from our function. After that, we ensure that we delete whatever has been entered in the field so that it appears empty the next time the user wants to add another movie. Lastly, we ensure that we add the movie to our array of movies and reload our table view so that our newly added movie appears in the list. - Add the functionality that should be fired when we want to cancel adding a movie. Since the default behavior for the action is to close the popup, there's no need to add any extra code in this case.
In order for this code to be run, we should remember to call the helper function inside our viewDidLoad() method. Our code should now look like this:
import UIKit

class ViewController: UITableViewController {

    var movies: [String] = []
    let alert = UIAlertController(title: "Add movie", message: "What movie do you want to add?", preferredStyle:.alert)


    // MARK: View life cycle

    override func viewDidLoad() {
        super.viewDidLoad()

        setupAddMovieAlert()
    }


    // MARK: UITableViewDataSource

    override func tableView(_ tableView: UITableView, numberOfRowsInSection section: Int) -> Int {
        return movies.count
    }

    override func tableView(_ tableView: UITableView, cellForRowAt indexPath: IndexPath) -> UITableViewCell {
        let cell = tableView.dequeueReusableCell(withIdentifier: "MovieCell", for: indexPath)
        cell.textLabel?.text = movies[indexPath.row]
        return cell
    }


    // MARK: UITableViewDelegate

    override func tableView(_ tableView: UITableView, didSelectRowAt indexPath: IndexPath) {
        tableView.deselectRow(at: indexPath, animated: true)
    }


    // MARK: IB Actions

    @IBAction func addTapped(_ sender: Any) {
        present(alert, animated: true, completion:nil)
    }


    // MARK: Helpers

    func setupAddMovieAlert() {
        // Setup textfield
        alert.addTextField()

        // Action for add
        alert.addAction(UIAlertAction(title: "Add", style: .default) { action in
            guard let text = self.alert.textFields?.first?.text else {
                return
            }
            guard text.characters.count > 0 else {
                return
            }

            // Reset textfield
            self.alert.textFields?.first?.text = ""

            // Add movie
            self.movies.append(text)
            self.tableView.reloadData()
        })

        // Action for cancel
        alert.addAction(UIAlertAction(title: "Cancel", style: .cancel, handler: nil))
    }
}
If we run our application and click on the button with the plus symbol, we should see the following screen:

After entering a title for a movie and clicking on Add, it should appear in the list:
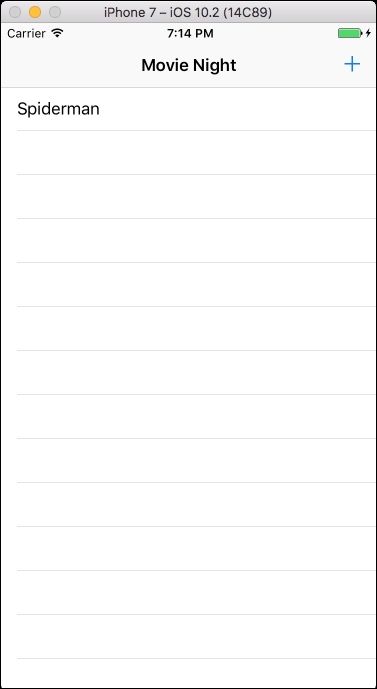
As soon as you add more items to the list than can be displayed, you will be able to scroll by swiping up and down.
Adding functionality for deleting movies in our list can be a fairly easy task, since a lot of it is built-in. In fact, all we have to do is to add a method from the UITableViewDelegate protocol, like this:
override func tableView(_ tableView: UITableView, commit editingStyle: UITableViewCellEditingStyle, forRowAt indexPath: IndexPath) {
    guard editingStyle == .delete else {
        return
    }
    movies.remove(at: indexPath.row)
    tableView.deleteRows(at: [indexPath], with: .fade)
}
This will then enable the swiping gesture that will make it possible for a user to swipe from right to left and then press the Delete button in order to delete a movie from the list. The two lines toward the bottom ensure that the selected movie is deleted from our array of movies and removed from the table view using a fade animation.
If you add a movie and then try to swipe from right to left on that specific movie, the Delete button should be slowly revealed:

After pressing the Delete button, the movie should disappear from the list.
As you might have already noted, if you add movies, close the app and then reopen it, the movies are gone. This is because the movies are stored in memory and, as soon as we close the app, all the data related to the app will be deleted. To overcome this, we will persist the movies in a small database so that when we reopen the app, the movies will still be there. For this, we will introduce two helper methods: one for saving movies and one for loading movies.
First, we need to add a small constant to the top of our ViewController.swift, right where we declared our movies array and our alert constant:
let storageKey = "myMovies"
This will be our identifier for saving and loading our movies. Then, we will add the following method for saving movies:
@objc func saveMovies() {
    UserDefaults.standard.setValue(movies, forKey: storageKey)
    UserDefaults.standard.synchronize()
}
This method simply uses a small database, which can be accessed by calling UserDefaults.standard . We use this database to store a value (being our movies) using the key we have just defined (storageKey). Then, to complete our store operation, we need to remember to call synchronize().
Next, we will add a method to load movies:
func loadMovies() {
    guard let movies = UserDefaults.standard.array(forKey: storageKey) as? [String] else {
        return
    }
    self.movies = movies
}
This method tries to load our array of movies from the same database using our key, and if it is not to be found, we just return from the function. If we find our movies in the database, we will assign them to our movies variable so that we can use that to set up our table view.
The last thing we need to do is consider when to call these two methods. Loading movies makes sense as soon as our view loads (in viewDidLoad()); however, when to save our movies can be a bit tricky. As viewWillDisappear(_:) (as explained in Chapter 12, Starry Night) won't be called in any scenarios where our view gets out of focus, we need to find another approach. Basically, what we want is to save our movies every time our application becomes inactive, either because it was put into the background, or because it was closed completely. To do this, we can add the following code to viewDidLoad():
NotificationCenter.default.removeObserver(self, name:
  .UIApplicationWillResignActive, object: nil)
NotificationCenter.default.addObserver(self, selector: #selector(saveMovies),
  name: .UIApplicationWillResignActive, object: nil)
The first line ensures that we are not already observing for notifications based on when the app becomes inactive. The next line will ensure that we get notifications when the application becomes inactive. When the application becomes inactive, we want our saveMovies() method to be called, which is specified using the #selector(), which also explains why we needed to add the @objc keyword to our saveMovies() function. The reasons for this are not important at this point.
Your complete code in ViewController.swift should now look like this:
import UIKit

class ViewController: UITableViewController {

    var movies: [String] = []
    let alert = UIAlertController(title: "Add movie", message: "What movie do you want to add?", preferredStyle:.alert)
    let storageKey = "myMovies"


    // MARK: View life cycle

    override func viewDidLoad() {
        super.viewDidLoad()

        // Setup app notifications
        NotificationCenter.default.removeObserver(self, name: .UIApplicationWillResignActive, object: nil)
        NotificationCenter.default.addObserver(self, selector: #selector(saveMovies), name: .UIApplicationWillResignActive, object: nil)

        // Setup add movie alert
        setupAddMovieAlert()

        // Load movies
        loadMovies()
    }


    // MARK: UITableViewDataSource

    override func tableView(_ tableView: UITableView, numberOfRowsInSection section: Int) -> Int {
        return movies.count
    }

    override func tableView(_ tableView: UITableView, cellForRowAt indexPath: IndexPath) -> UITableViewCell {
        let cell = tableView.dequeueReusableCell(withIdentifier: "MovieCell", for: indexPath)
        cell.textLabel?.text = movies[indexPath.row]
        return cell
    }


    // MARK: UITableViewDelegate

    override func tableView(_ tableView: UITableView, didSelectRowAt indexPath: IndexPath) {
        tableView.deselectRow(at: indexPath, animated: true)
    }

    override func tableView(_ tableView: UITableView, commit editingStyle: UITableViewCellEditingStyle, forRowAt indexPath: IndexPath) {
        guard editingStyle == .delete else {
            return
        }
        movies.remove(at: indexPath.row)
        tableView.deleteRows(at: [indexPath], with: .fade)
    }


    // MARK: IB Actions

    @IBAction func addTapped(_ sender: Any) {
        present(alert, animated: true, completion:nil)
    }


    // MARK: Helpers

    func setupAddMovieAlert() {
        // Setup textfield
        alert.addTextField()

        // Action for add
        alert.addAction(UIAlertAction(title: "Add", style: .default) { action in
            guard let text = self.alert.textFields?.first?.text else {
                return
            }
            guard text.characters.count > 0 else {
                return
            }

            // Reset textfield
            self.alert.textFields?.first?.text = ""

            // Add movie
            self.movies.append(text)
            self.tableView.reloadData()
        })

        // Action for cancel
        alert.addAction(UIAlertAction(title: "Cancel", style: .cancel, handler: nil))
    }

    func loadMovies() {
        guard let movies = UserDefaults.standard.array(forKey: storageKey) as? [String] else {
            return
        }
        self.movies = movies
    }

    @objc func saveMovies() {
        UserDefaults.standard.setValue(movies, forKey: storageKey)
        UserDefaults.standard.synchronize()
    }
}
If you run the application now, add some movies, close it, and then reopen it, you should be able to still see all our movies. You now have an application to keep track of your favorite movies; good job!