As we mentioned before, using TypoScript, you can manage not only template configuration but also adjust the backend layout and view. We should note some common examples that can facilitate and improve work with TYPO3. These examples are:
- Content column options—amount and arrangement. For example, if you use a template that contains one or two columns, you also see one or two columns in the backend, but not four.
- Content element input fields' configuration—for example, if you want to remove an input field because you don't need this field and always leave it empty.
- Extension fields configuration
- RTE (WYSIWYG text editor) configuration, stylesheets, advanced options
- And other options that you can find in the TYPO3 TSconfig (TypoScript configuration) documentations on the TYPO3 web page: http://typo3.org/documentation/document-library/references/doc_core_tsconfig/current
There are four default content columns that you can see without extra options—LEFT, NORMAL, RIGHT, and BORDER. This means that you can create a page template down to four columns. Also, you can use extensions that provide the possibility to add extra columns. Prevalent in these are nested columns where one column is split into several subcolumns. Also, if you use the TemplaVoila! template system, you can create as many columns as you need.
All the options that are seen below should be entered by you in the root page configuration (so that they will be visible in the backend), but not in the Template module (where the TypoScript configuration is added—information from TypoScript will be visible in your web page frontend. This means that the information will be visible to online shop visitors).
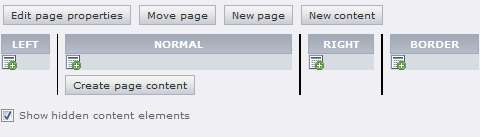
So, originally, you have four columns and each column has its own ID. You can use this ID for configuring the amount and arrangement of columns:
- NORMAL column: 0
- LEFT column: 1
- RIGHT column: 2
- BORDER column: 3
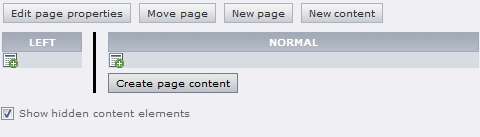
If you need the end result to show two columns—LEFT and NORMAL—you should use the code like this:
mod.SHARED.colPos_list= 1,0
And you'll see the output in the backend, as shown in the following screenshot:
You can add the columns IDs as you need, according to the arrangement and amount. For example, arrangement can be similar to the code below (NORMAL-LEFT-RIGHT):
mod.SHARED.colPos_list= 0,1,2
It is possible that one of the necessary functions is the option to choose heading tag style for content elements like h1, h2, h3, and others. TYPO3 provides this option. If you use these tags, the result for your web page search will be better in search engines like Yahoo! and Google. If you use the heading tags, you specify page content importance in a hierarchy.
A good example is that you can use the h1 tag together with logotype or slogan line and hide it using CSS:
h1 {
text-indent: -9999px;
}
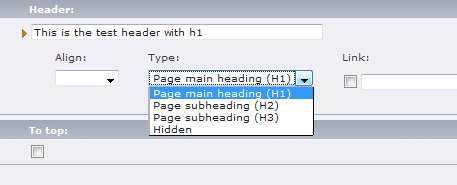
If you create a new content element by default, TYPO3 will offer prepared heading examples, as you can see in the following screenshot:
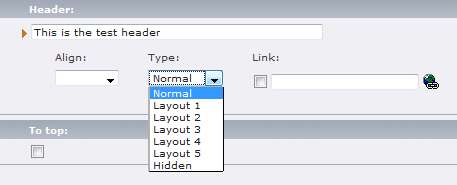
You can see that the attributes Layout 1, Layout 2, and so on are not self-explanatory. So, you can specify what they mean with the following configuration:
TCEFORM.tt_content.header_layout {
altLabels {
# Let's rename the headings with h1, h2 and h3 tags
0 = Page main heading (H1)
1 =
2 = Page subheading (H2)
3 = Page subheading (H3)
4 =
5 =
}
# Remove the unneeded Layout types
removeItems = 1,4,5
}
Save the configuration and see the results of adding a new record or editing the existing ones, as you can see in the following screenshot:
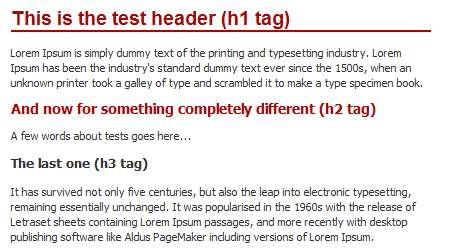
Titles that are outputted in the frontend will be corresponding and friendly to search engines. Titles will be marked following these hierarchies. In the following screenshot, you can see the result of the output in frontend, which depending on your CSS configuration (font size, color, and so on) looks like this:
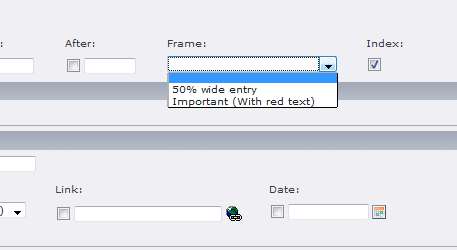
You can see one more field in the content element window where you add a new record. This field is named Frame. You can easily use this field if you need to wrap the record into a defined element or element class. For this you can also use special formatted elements, such as another background color, text size, record width, and so on. So, you can use these options when you need to format special elements in your online shop.
To make changes in this field, in the root page Options, add the following TypoScript configuration (we will specify two values: for a record that is 50% wide and for a wrapper record for special notes):
TCEFORM.tt_content.section_frame { # Remove default items removeItems = 1,5,6,10,11,12,20,21 # Add new items addItems.40 = 50% wide entry addItems.41 = Important (With red text) }
Also, in the template section, you need to add configuration that contains code with values, which should be the output for page visitors in one or another case:
### SECTION FRAME WRAPPER
tt_content.stdWrap.innerWrap.cObject = CASE
tt_content.stdWrap.innerWrap.cObject {
key.field = section_frame
40 = TEXT
40.value = <div class="50percent-wide">|</div>
41 = TEXT
41.value = <div class="important-wrap">|</div>
}
In this way, a record with value "Frame" - "50% wide entry" will be wrapped with the class 50percent-wide. Also, it is important to specify class 50percent-wide view in the CSS file.
Here are some of the options you can use in TCEFORM.
This is when you don't use or need a field—frequently, you leave it empty. Also, there could be a situation when you need to limit the access to some fields in your online shop backend. It is possible to manage these options with TypoScript. Using TCEFORM, you can switch off fields for:
- Pages
- Extension's records
- Default content elements
In the following example we can see which fields are specified:
TCEFORM.pages{
header_position.disabled = 1
spaceBefore.disabled = 1
spaceAfter.disabled = 1
selectionIndex.disabled = 1
layout.disabled = 1
cache_timeout.disabled = 1
no_cache.disabled = 1
no_search.disabled = 1
}
TCEFORM.tt_products {
subtitle.disabled = 1 # Disable subtitle field
www.disabled = 1 # Disable WWW field
price2.disabled = 1 # Disable Price2 field
tax.disabled = 1 # Disable Tax
weight.disabled = 1 # Disable Weight
note2.disabled = 1 # Disable Note field
datasheet.disabled = 1 # Disable Datasheet field
}
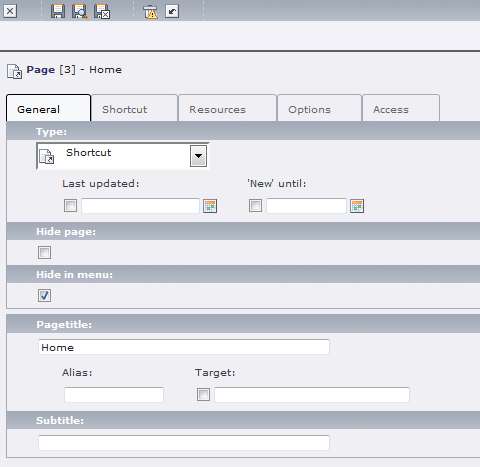
So, these fields will be switched off in the Page options. Also, some fields will be switched off in the extension tt_products. You can see the result in the following screenshot.:
You can find more examples about TCEFORM (and page TSconfig) configuration in the TYPO3 TSref documentation: http://typo3.org/documentation/document-library/references/doc_core_tsconfig/current.