
Manage Your Photos
Apple knows most of us don’t have a lot of time to organize our photo libraries. Even though Photos deeply analyzes each image to figure out its contents, it still can’t divine everything about a photo—at least, not yet. That’s why Photos also contains a set of simple organizational tools that let you embed additional meaning into the images you’ve captured.
Play Favorites
Some of us like to precisely quantify things. I knew a kid in high school who actually rated every movie he watched on a five-star system. (He grew up to be a movie critic—true story!) But most of us can’t be bothered with complex ratings systems, so Photos uses a simpler approach: Favorites.
In thumbnail views, all your Favorites appear with little white hearts in their bottom-left corner (Figure 30). Awwww. (There’s even a subtle drop shadow, so if that corner of your photo is white, you can still see the heart.)

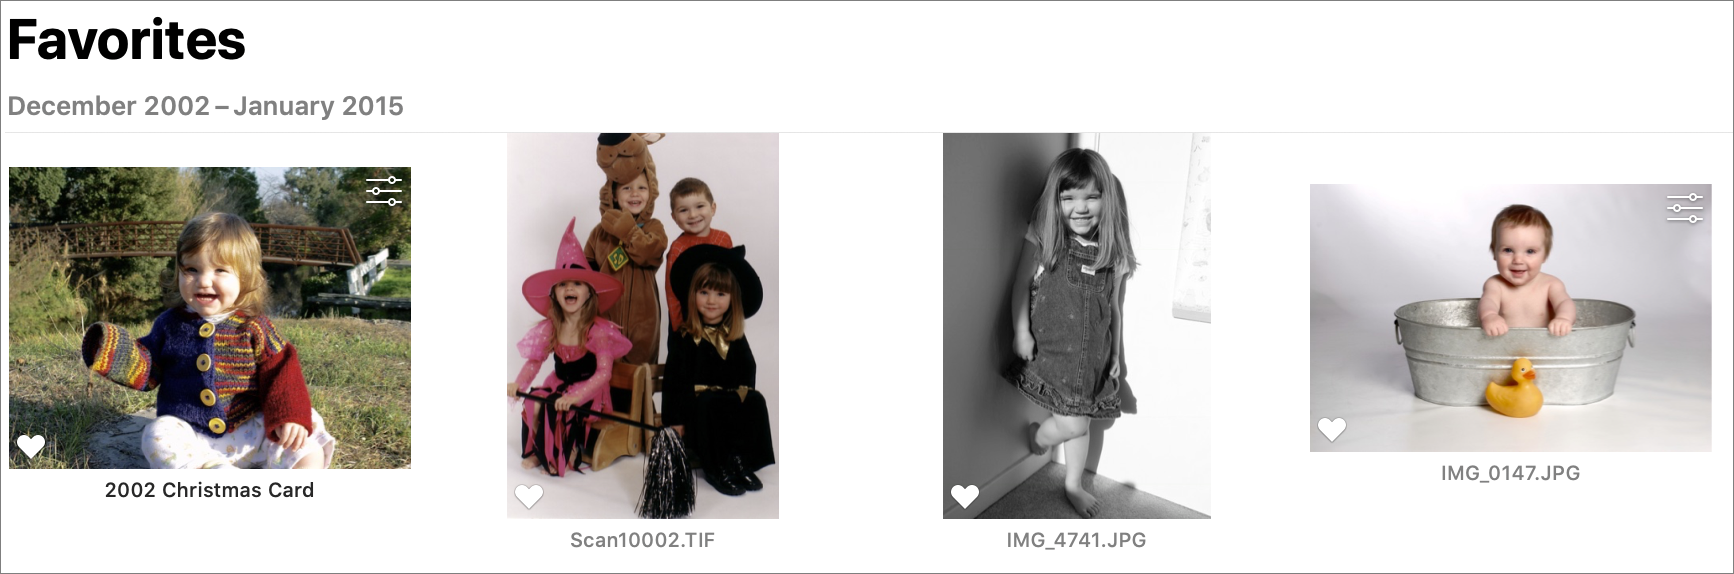
Click Favorites in the sidebar and you’ll see just your very best shots, as judged by you (Figure 31)!
Make a Favorite on the Mac
There are plenty of ways to mark a photo as a Favorite:
Select an image and then click the heart
 icon located toward the right side of the toolbar (Figure 32).
Figure 32: Show your love with the heart icon. Select an image and press the Period (.) key.
Hover your pointer over the image and click the heart that appears
Select an image and choose Image > Add to Favorites.
In the Info window (press ⌘-I), click the heart
 in the upper-right corner.
Make a Favorite in iOS
Unfortunately, Photos for iOS doesn’t really let you do much in the way of adding more information to your photos. You can’t even add keywords. You can create albums (see Make Albums in Photos) and you can mark items as Favorites.
To favorite a photo, tap its thumbnail to view it full-screen and then tap the heart ![]() icon in the toolbar. (If the heart is filled in, the image is a favorite. You can un-favorite the photo by tapping it again.)
icon in the toolbar. (If the heart is filled in, the image is a favorite. You can un-favorite the photo by tapping it again.)
Organize with Keywords
If the binary nature of Favorites doesn’t work for you, you can get as specific as you like in organizing your photos by assigning them keywords. Keywords can be just about anything—you get to name them and assign them.
Assign Keywords
To assign keywords:
Select a single image, or even a whole group of them, in the main window.
Choose Window > Info (⌘-I) to open the floating Info window.
Click in the keywords section (if you don’t have any keywords already visible, it will be labeled Add a Keyword) and enter keywords, separated by commas.
Manage Keywords
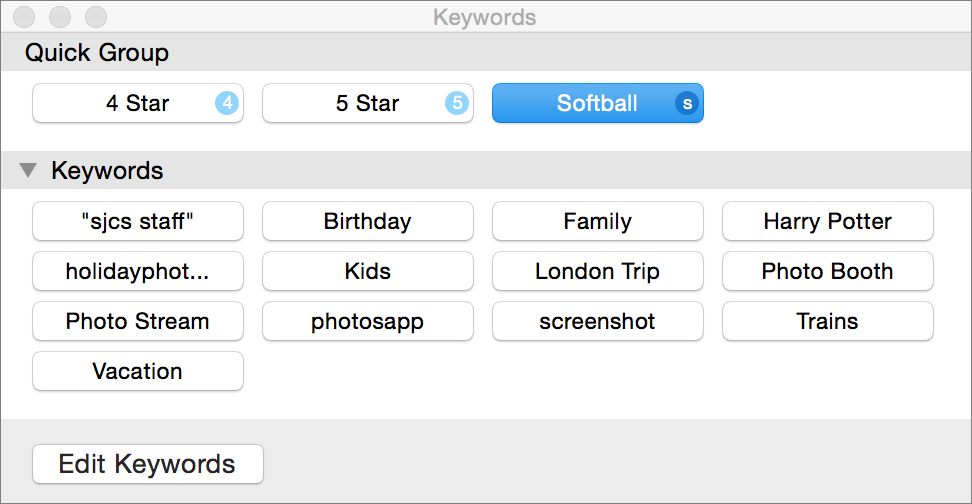
If you maintain a large list of keywords and want to see them all, choose Window > Keyword Manager (⌘-K) to open the Keyword Manager (Figure 34).
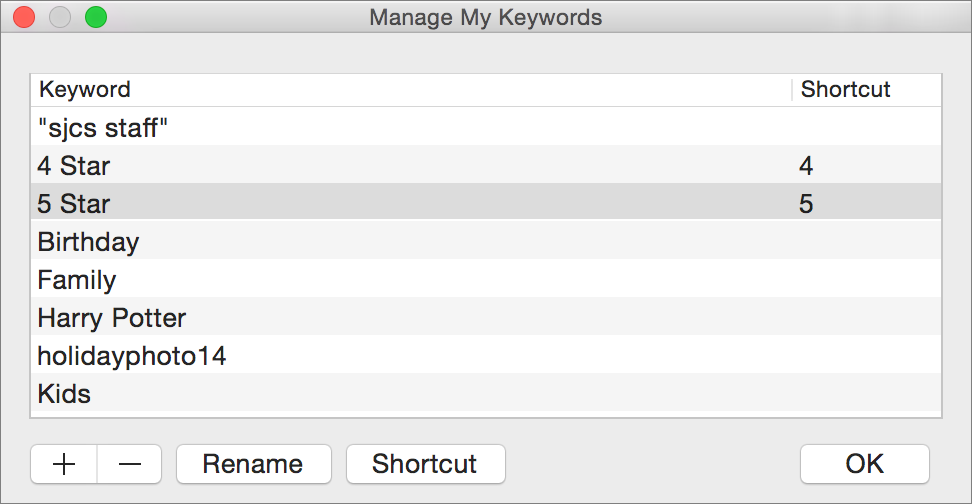
You can use the Keyword Manager to assign keywords to photos, or to edit your list of keywords. To edit your list, click the Edit Keywords button in the Keyword Manager to see the Manage My Keywords view (Figure 35). From here, you can add, delete, and rename keywords, as well as manually assign a keyboard shortcut to a keyword.
Add to the Quick Group
Drag a keyword from the lower Keywords list up into the Quick Group for quicker access. Photos automatically assigns a keyboard shortcut to it (available only when the Keyword Manager is visible)—for example, it assigned the letter s to my Softball keyword. These items also appear in the Show Only filter menu at the top right corner of the thumbnail window, so you can view them quickly.
Hide Photos from View
There are some photos you just don’t want to see. (I recently heard from someone who wanted to hide all his photos of his ex-fiancé.) Hidden photos don’t appear in Moments, Collections, Years, or Memories—only in the Hidden album. Here’s how to hide a photo:
In macOS, select images you want to hide and press ⌘-L, or choose Image > Hide X Photos. (To reverse the process, choose Image > Unhide X Photos.) To control whether your Hidden album appears in the Albums pane, choose View > Show/Hide Hidden Photo Album.
To hide a photo in iOS, select the photo, tap the Share
 icon, and tap Hide (you may need to scroll to the right to see this option). You can also use the Share sheet to unhide images from the Hidden album.
If you use iCloud Photos, note that the Hidden album syncs with iCloud and your various devices.
Delete Photos
Sometimes you never want to see a photo again. Here’s how to delete them:
In macOS, select the photo in the Photos pane and then press Delete.
In iOS, to remove a photo, tap the photo to select it, tap the Trash
 icon, and tap Delete Photo.
Deleting a photo moves it to a special album called Recently Deleted. A deleted photo remains in this album for about a month, after which Photos deletes it permanently.
If a photo hasn’t aged out of the Recently Deleted album, you can get it back. Open the album, select the photo, and then tap or click Recover.
If you use iCloud Photos, deleted photos are moved to the Recently Deleted album on all your devices! You can also recover a photo on any device.