Share Your Photos
What good are photos if you can’t share them with friends? Traditionally, sharing photos meant sending prints or making albums. You can still do that—see Build Books and Calendars—but sometimes you want sharing to be more immediate. iCloud Photo Sharing lets you share an entire album that others can update and comment on (see Share Using iCloud). And if your desired sharing method requires that you get your photos out of Photos, you can do that too (see Export and Resize Images). At the end of the chapter, I discuss how to Share from iOS.
Use the Share Menu
One way to share images with other apps and macOS system features is to use the Share menu in Photos for macOS. Select a photo, and then choose File > Share, control-click an image and choose Share (Figure 84) from the contextual menu, or select a photo and click the Share ![]() icon in the toolbar.
icon in the toolbar.

Transfer a Photo
Some options in the Share menu directly transfer a photo to another person or a privately shared area:
iCloud Photo Sharing: If you have this feature turned on, click here to add a photo to any of your shared albums. (See Share Using iCloud, later in this chapter.) Images shared using this feature are reduced to 2048 pixels on the longest edge.
AirDrop: Quickly transfer a photo to another device—Mac or iOS—using Apple’s AirDrop technology.
Messages: Send a photo directly to one of your contacts via the Messages app (Figure 85)—all without ever leaving Photos.
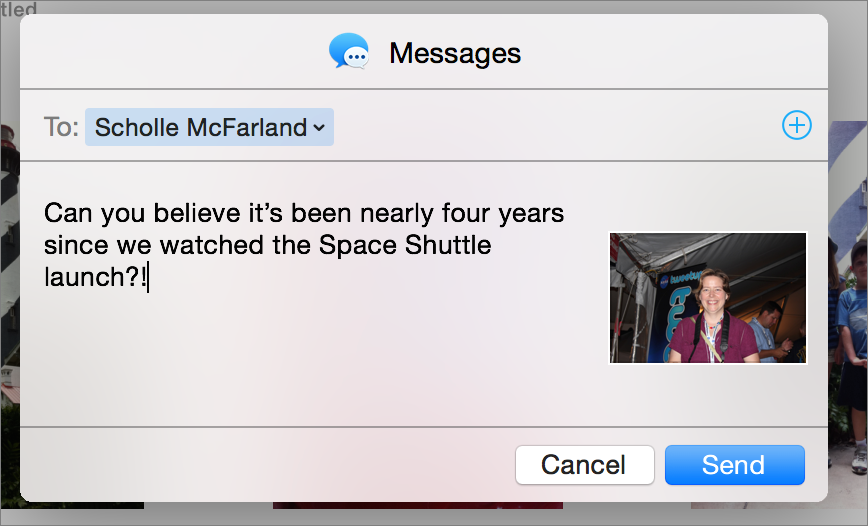
Figure 85: You can send an iMessage to someone without even leaving the Photos app. Other apps: Insert your photo in a document in the Notes app or set it as your desktop picture.
Try Drag and Drop Image Sharing
You’d think the easiest thing to do would be to drag images out of Photos and drop them in other apps, right? Unfortunately, in the early days of Photos this wasn’t widely supported, because of the unique way Photos handled dragging images out of the library. (The solution was always to drag a photo to the desktop, and then drag that file somewhere else.)
The good news is that Photos has gotten a lot better when it comes to dragging and dropping. In High Sierra and Mojave, I’ve noticed an increasing number of apps that support direct dragging and dropping from Photos, so if you’re trying to share a photo, it’s worth a try.
But if that doesn’t work, you can always drag to the desktop. Photos will copy the image to the desktop at full quality, and every app understands how to insert an image that’s a normal file on the desktop.
Share Multiple Photos
Photos offers a few different ways for you to share more than one photo in one go:
Manual selection: For an arbitrary group, Shift-click or ⌘-click to select a batch of photos and then choose File > Share. Or, Control-click the selected group and choose Share from the contextual menu.
Album: To share an entire album, click its name and then click the Share
 icon in the toolbar.
Moment: To share a group of photos attached to a Moment, click the date/location header and then click the Share
icon in the toolbar (Figure 86.)
Figure 86: Click the date/location header in a Moment to open it in a Memory-like view. Once you’re there, you can click the Share icon in the toolbar to share those images. Memory: To share photos in a Memory, click the Share
icon at the top of the window.
Export and Resize Images
Sometimes you need to export an image or collection of images, but don’t want or need them at full resolution. (This often happens when I’m uploading a photo as an avatar or background image for a social-media service, where there are very specific file-size and image-size constraints.) Photos makes that sort of export a breeze via its Export command. Here’s how to use it:
Select the photos.
Choose File > Export > Export X Photos.
Choose whether to export the images in JPEG, TIFF, or PNG format; whether or not to embed metadata such as titles, keywords, and locations; and which file naming convention to use.
To resize the images or set a compression level, click the disclosure caret
 by the Photo Kind pop-up menu to reveal those options.
To constrain images by width or height or by an overall largest dimension, choose Custom from the Size pop-up menu (Figure 87).
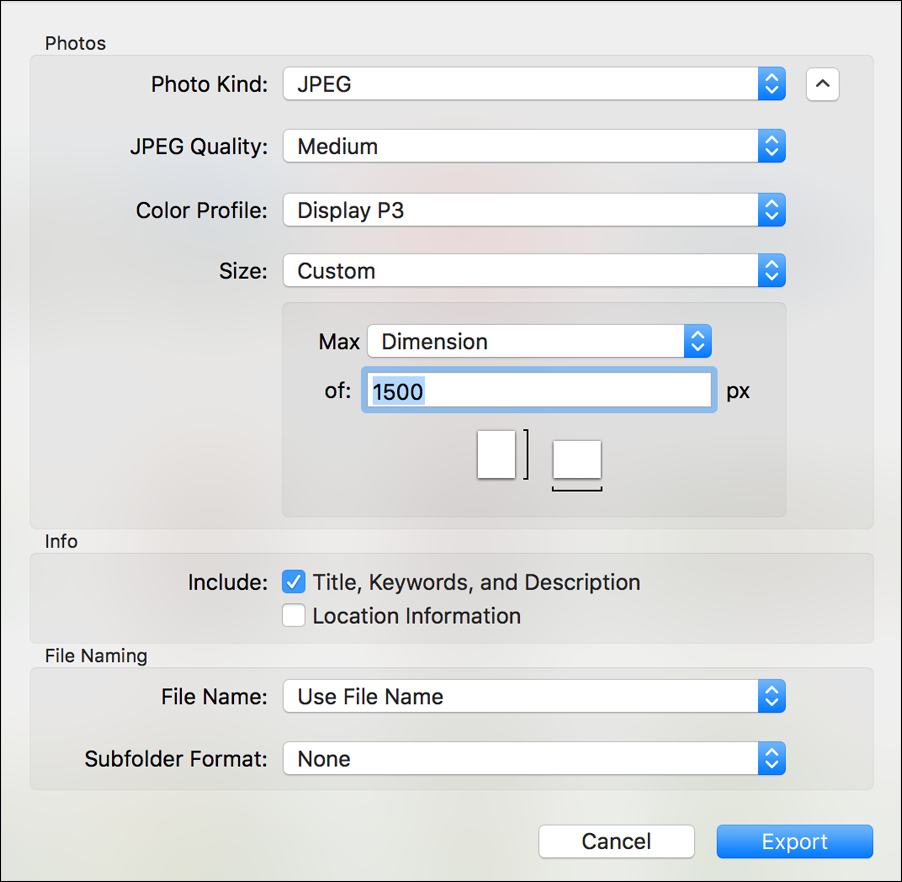
Figure 87: Photos will resize and recompress a batch of images upon export. Finally, click Export.
Share Using iCloud
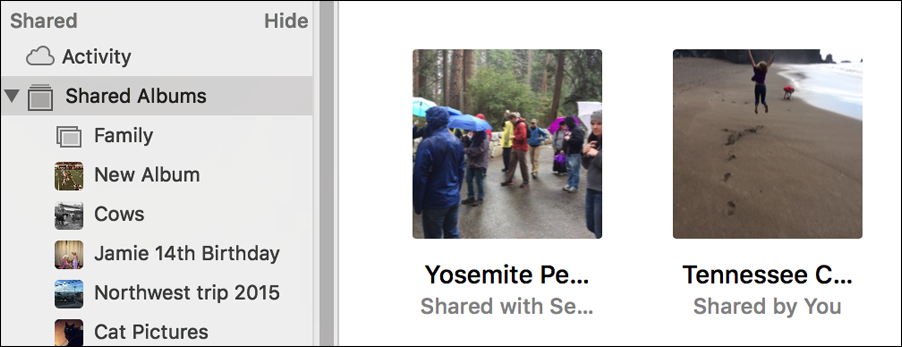
Turn on the Shared Albums option, in Photos > Preferences > iCloud, to create a Shared section in the sidebar, from which you can share albums with other iCloud users and subscribe to albums they’ve shared with you (Figure 88).
Create a Shared Album
To create an album and share it with others:
In the Shared section of the sidebar, click the plus
 icon next to Shared Albums.
Name the album.
Enter the email address of anyone with whom you’d like to directly share the album.
Click Create.
Work with a Shared Album
Once you’ve created a shared album, you can:
Add photos: Drag them into the shared album in the sidebar, or select the album and click “Add photos and videos” (under the album title).
Read and add comments: Click the Comments
 icon in the bottom-left corner of a shared image.
Let other people contribute photos: Open your album, click the People
 button in the toolbar, and select Subscribers Can Post (Figure 89).

Share an Album on the Web
You can also share the album with someone who doesn’t have an iCloud account, by taking these steps:
Open an album that you’ve shared.
Click the People
icon in the toolbar.Select Public Website.
Copy the URL that appears below that option and send it to anyone, and they’ll be able to view your pictures (Figure 90) in a web browser.
Share from iOS
Of course, you can share images and videos from within Photos for iOS, as well, all from that same Share ![]() icon. And since the Share menu is much more widely supported in iOS, it’s the best way to share images on iPhone and iPad.
icon. And since the Share menu is much more widely supported in iOS, it’s the best way to share images on iPhone and iPad.
Choose Photos to Share
To share a bunch of items, tap the Select button in the top right and the tap the items you want to select. (This even works inside Memories, if you want to quickly pick some images to share from a Memory.) Once you’ve tapped the Select button, you can also select an entire Moment by tapping another Select button, this one to the right of the header for any given Moment.
You can also tap the Share ![]() icon when viewing a single photo. You still have the option of sharing multiple items: in the resulting Share sheet (Figure 91) you see your photo selected front and center, but you can scroll left and right to choose other photos to add to your selection.
icon when viewing a single photo. You still have the option of sharing multiple items: in the resulting Share sheet (Figure 91) you see your photo selected front and center, but you can scroll left and right to choose other photos to add to your selection.

Share with Others via iCloud
Apple has revamped its approach to sharing full-resolution photographs with other people, and the result is a much better method of sharing photos than attaching them to an enormous email message or sending a series of multimedia text messages.
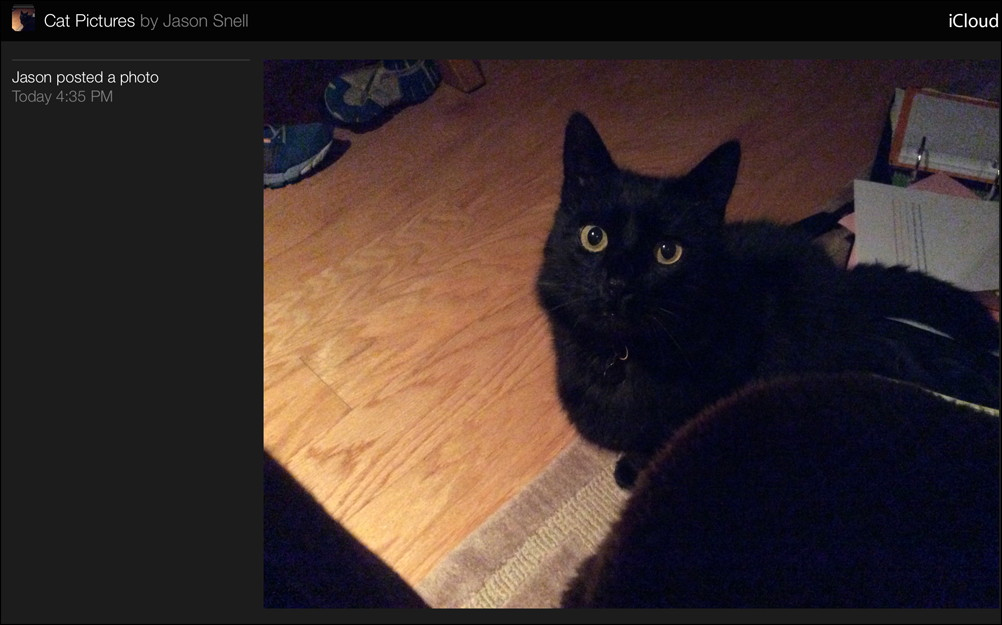
This new approach shows up in a few different places. If you bring up a share sheet for one or many photos, you’ll see a Copy iCloud Link option in the bottom row. If you choose this, Apple will generate a shareable URL containing links to all of the photos you selected. You can paste this in an email message, send it via Messages, or copy it into a chat room—anything you want. When anyone clicks on the link, they’ll go to a page on Apple’s servers (Figure 92) that presents them with the images and gives them the option to open them directly in Photos or download them.
Sharing Suggestions via Messages
In the new For You tab in Photos on iOS, you may see a row of photos called Sharing Suggestions. This is a set of suggestions generated by Apple’s machine-learning technology based on dates, locations, and faces that appear in photos. What Photos is trying to do is detect special events that featured recognizable people and prompt you to share your photos of that event with those people.
It’s a clever idea, and sharing those photos couldn’t be easier. Tap on a sharing suggestion and you’ll see a larger poster image, with a sharing prompt listed below and a large Next button to the right (Figure 93). (You can also tap the Select button if you don’t want to share every photo.)
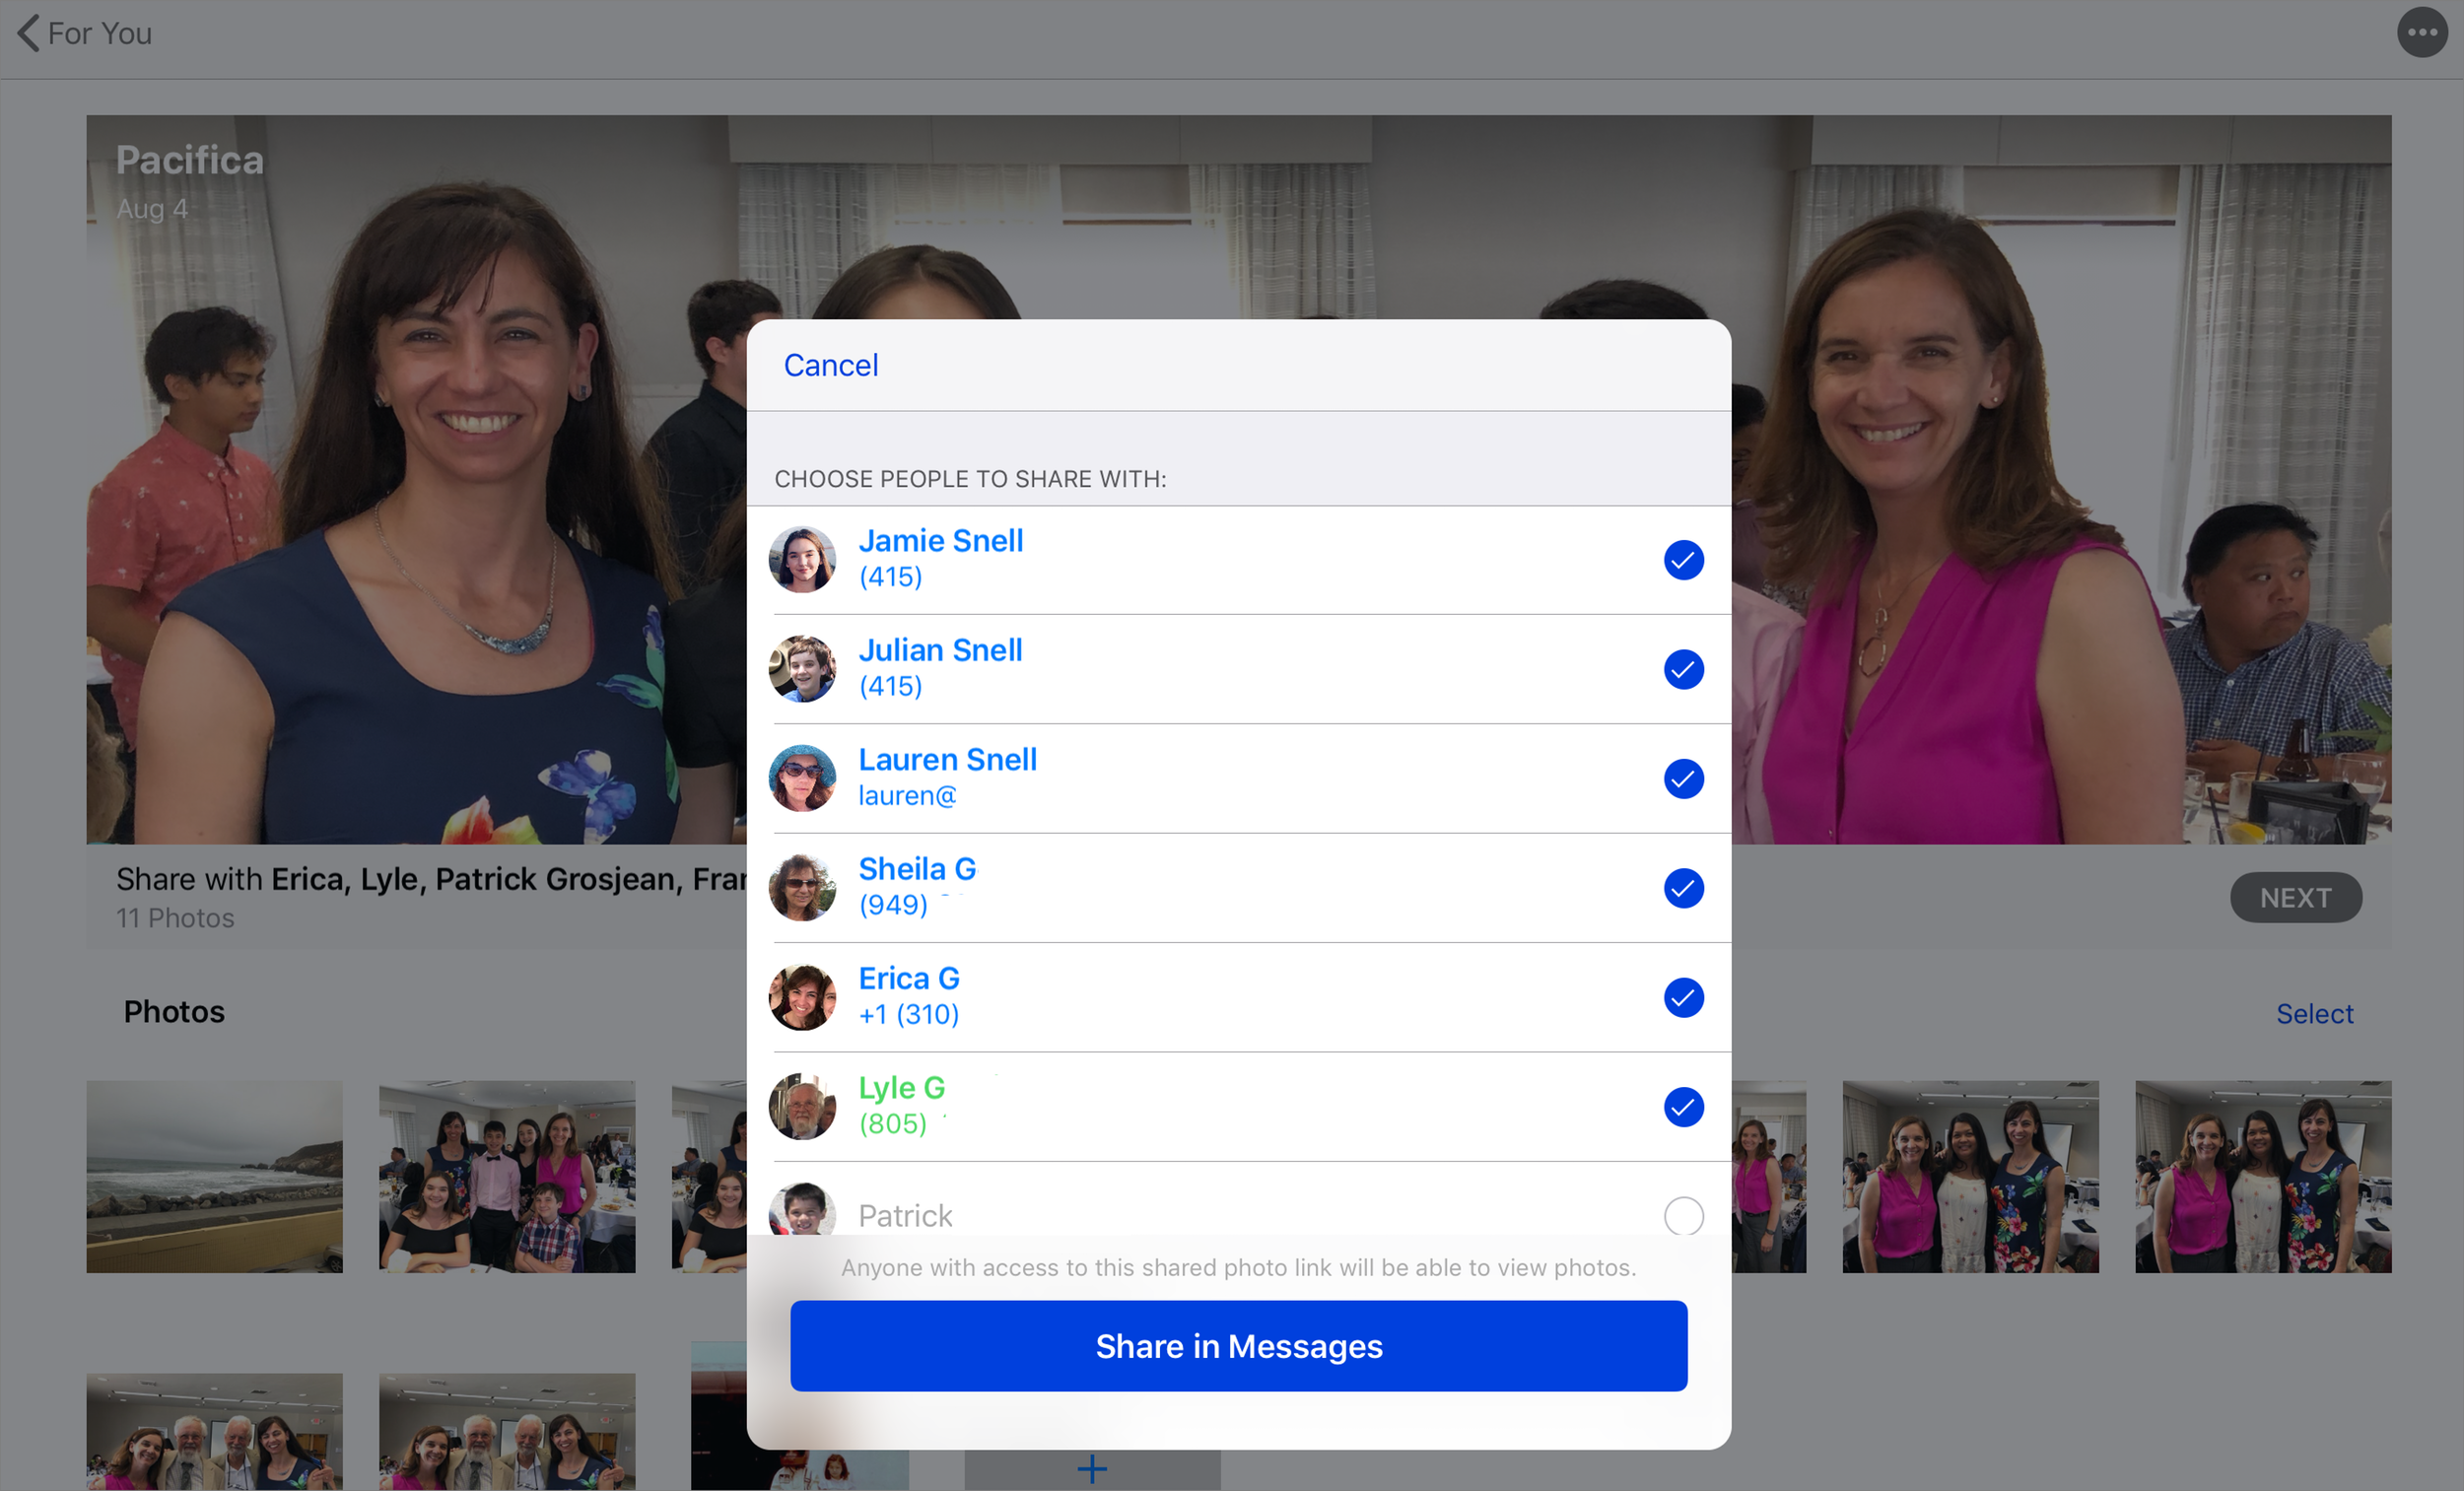
When you tap Next you are prompted to choose who you want to share with. Any faces Photos recognizes that are in your Contacts library will be added by default, though you can remove them and add others.
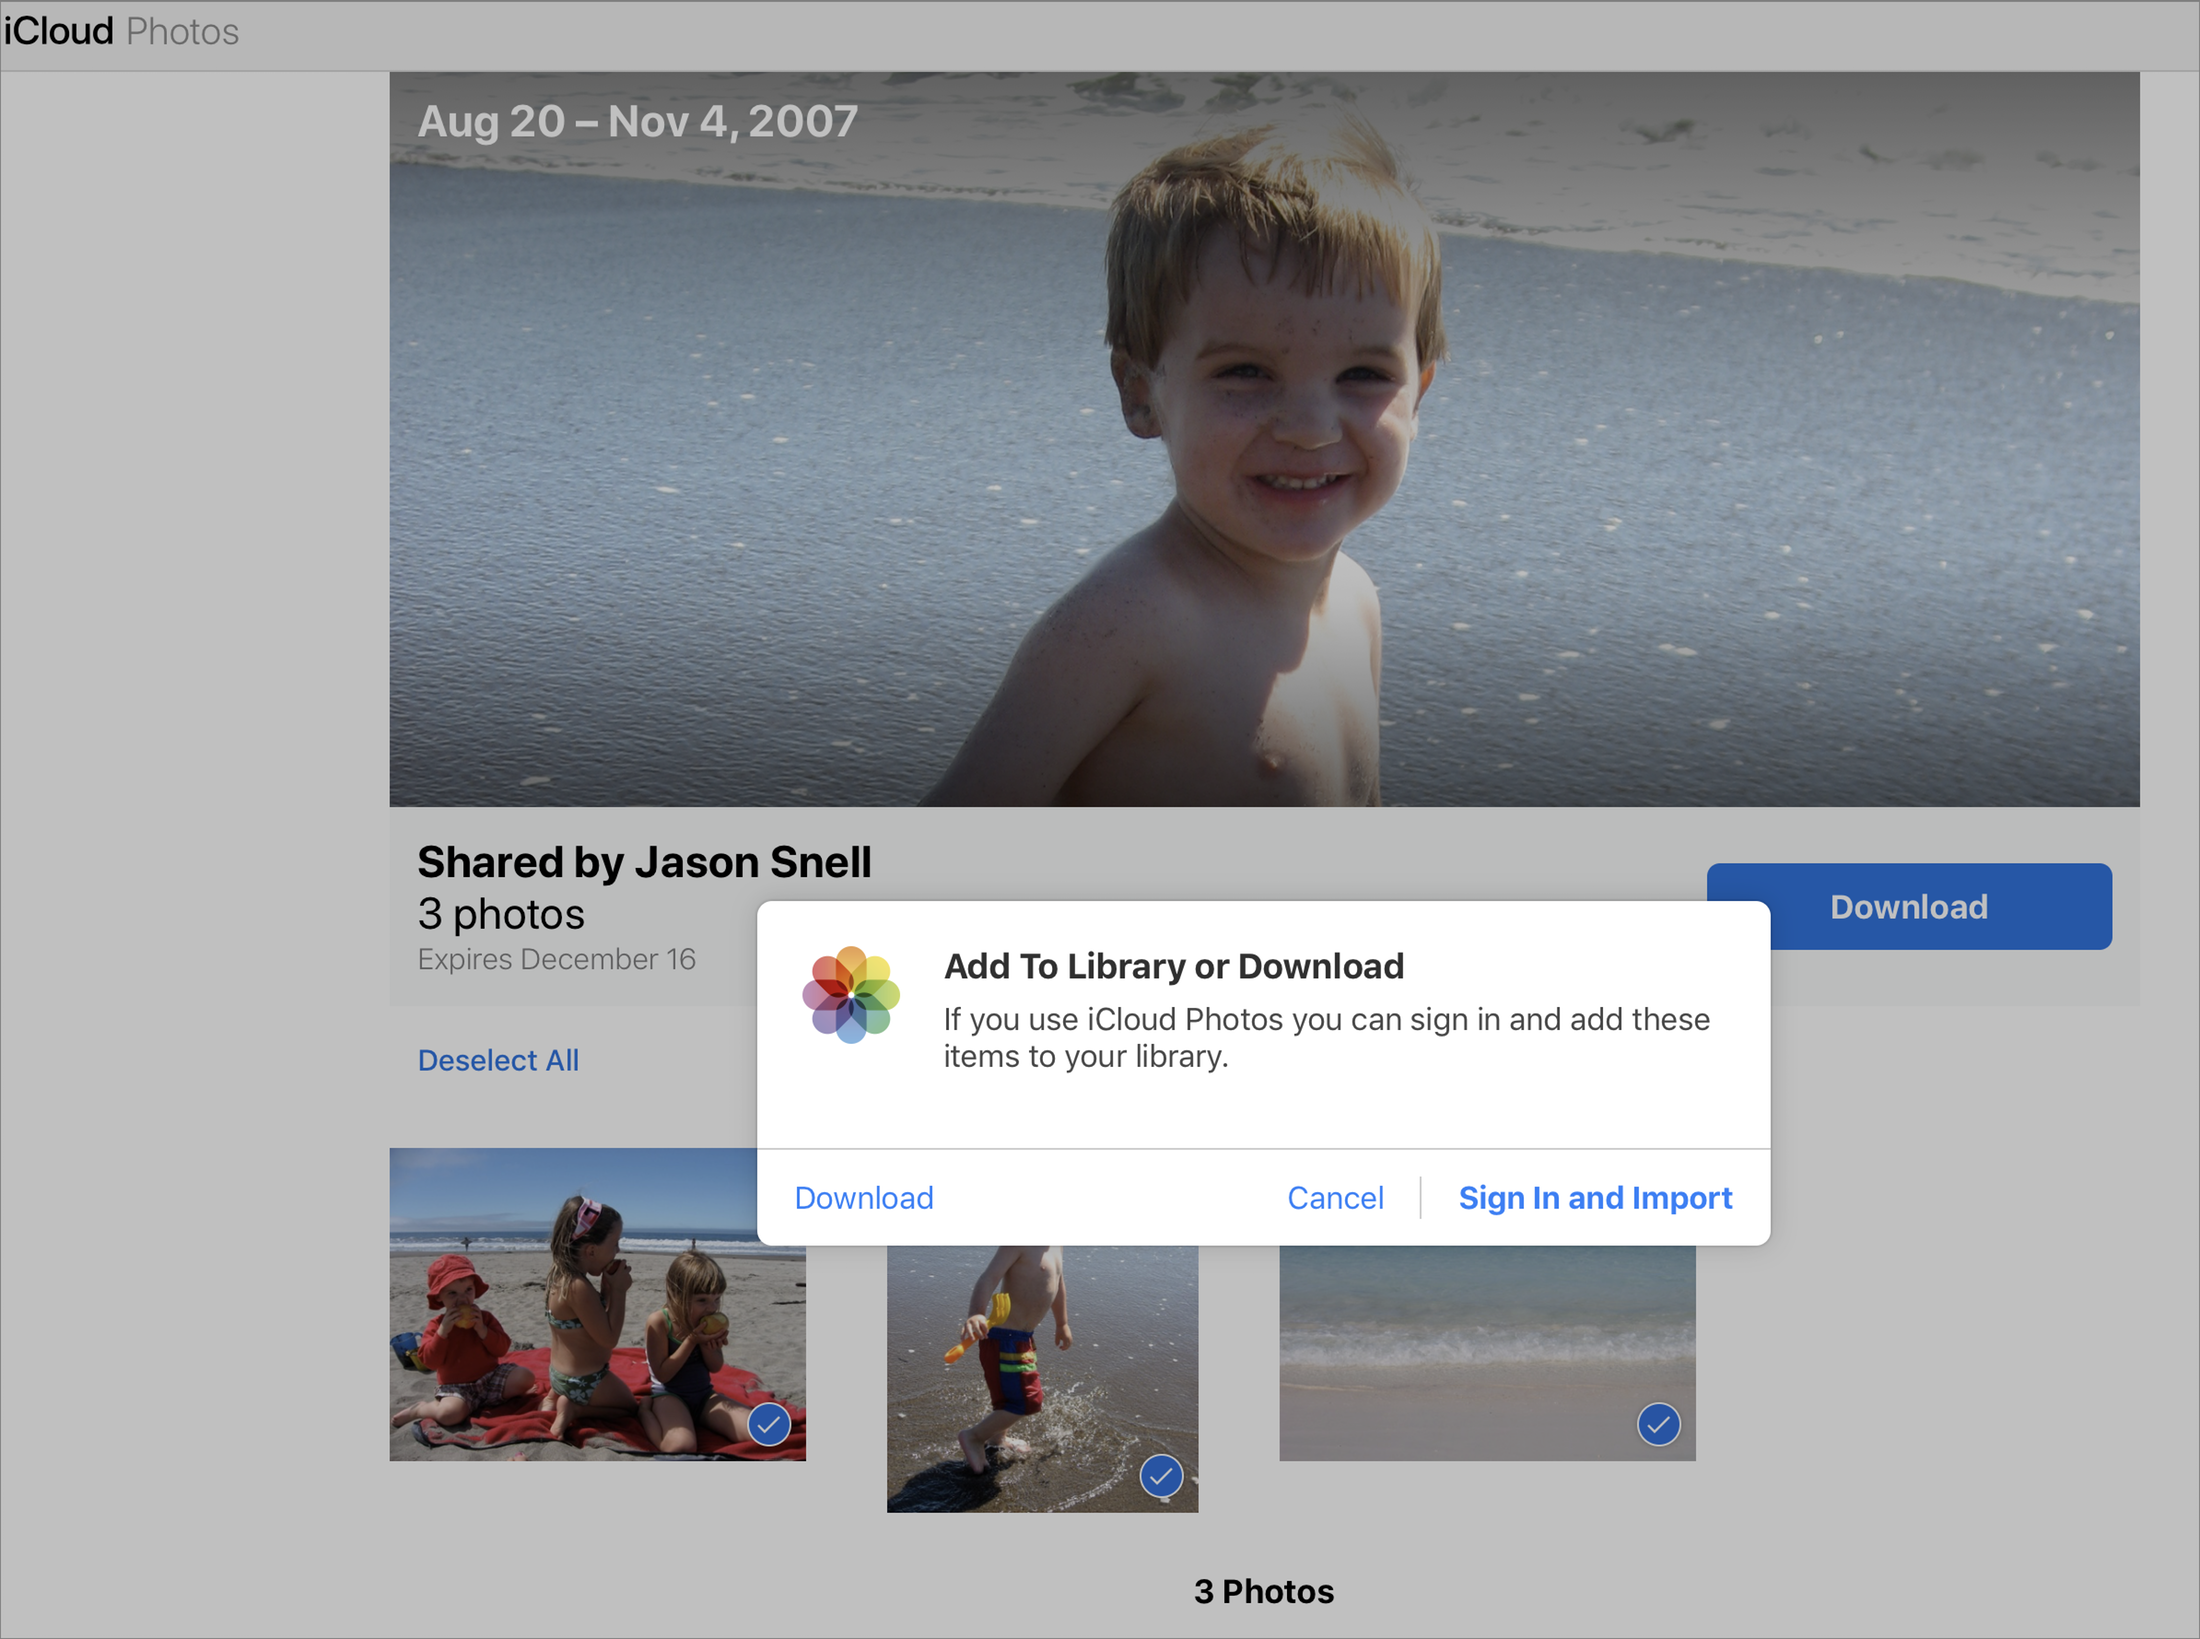
Select who you want to share with and tap Share in Messages. An iCloud link is sent to everyone you selected—whether they use iMessages or not. When they tap the resulting link, they see a similar set of options to the ones people receive when you send a URL via the Copy iCloud Link button (Figure 94).

But that’s not all. After you’ve accepted photos, your Photos app will check to see if it’s got any photos it thinks may be from the same event, and will suggest that you share those back (Figure 95).

Apple didn’t used to make sharing full-quality photos this easy. If you want to share photos with friends, keep an eye on the Sharing Suggestions tab and share liberally.