
Make Slideshows in Photos
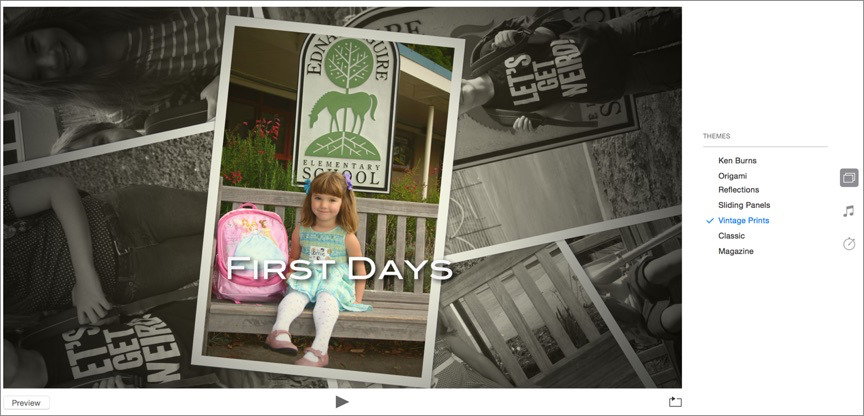
I can’t go to a school function without seeing at least one slideshow. Photos provides seven different slideshow themes (Figure 100), and if you’re the type who wants your slideshows just so, you have a lot of power to control exactly how yours behave.
This chapter begins by talking about the slideshow options in Photos for macOS; for iOS information, read Make Slideshows in iOS, at the end of the chapter.
Create a Slideshow
To create a Slideshow select photos and choose File > Create > Slideshow > Photos. Give your slideshow a name, and click OK. A new entry appears in the My Projects section of the sidebar.
In the slideshow editor that opens, you can organize the images, choose a theme and music, and determine how long your slideshow lasts, as I describe next.
Choose a Theme
Click the Theme Picker ![]() icon at the right and then click a theme name. You can re-order the images in all themes by dragging their thumbnails around in the strip at the bottom of the window—drag the rule above the thumbnails up a bit if they’re too small (Figure 101).
icon at the right and then click a theme name. You can re-order the images in all themes by dragging their thumbnails around in the strip at the bottom of the window—drag the rule above the thumbnails up a bit if they’re too small (Figure 101).

Pick Some Music
Though themes come with default music, you can opt to override that selection and choose one—or even many—tracks from your iTunes library to play during your slideshow.
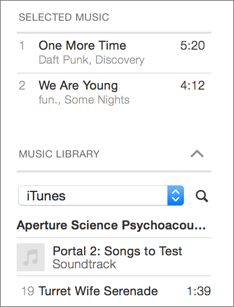
To reveal the music picker, click the Music ![]() button. The Selected Music section (Figure 102) lists the music that will play with your slideshow. To preview the music, move your pointer over a track and click the Play
button. The Selected Music section (Figure 102) lists the music that will play with your slideshow. To preview the music, move your pointer over a track and click the Play ![]() icon that appears to the left of the track name. To delete a track, click the delete
icon that appears to the left of the track name. To delete a track, click the delete ![]() button.
button.
To pick different music, click the disclosure caret ![]() next to the Music Library header to display music from iTunes. (You can also choose music from other themes or even from Apple’s Logic music app from the pop-up menu that appears.)
next to the Music Library header to display music from iTunes. (You can also choose music from other themes or even from Apple’s Logic music app from the pop-up menu that appears.)
Click the Search ![]() icon to search your iTunes library, or just scroll through. When you find a track you want to add, click it; it will appear in Selected Music. You can drag tracks around in Selected Music until you get the order you want.
icon to search your iTunes library, or just scroll through. When you find a track you want to add, click it; it will appear in Selected Music. You can drag tracks around in Selected Music until you get the order you want.
Set a Duration
Click the Duration ![]() icon to set how long you want your slideshow to run. You can choose a specific duration or choose Fit to Music, in which case the duration of your slideshow is the running time of the music you’ve chosen.
icon to set how long you want your slideshow to run. You can choose a specific duration or choose Fit to Music, in which case the duration of your slideshow is the running time of the music you’ve chosen.
The duration of each individual slide in your presentation is generally determined by the number of slides and the length of the presentation. If you’re using the Ken Burns theme, though, you can set the duration of individual slides.
Play in Photos
To play a full-screen slideshow from within Photos, click the Play ![]() button, located below the slideshow preview in the slideshow editor.
button, located below the slideshow preview in the slideshow editor.
When a slideshow is playing, you can use a floating controller (Figure 104) to control the volume, advance forward and backward between slides, and quit.

Save a Slideshow as a Video
You can export a slideshow project as a MPEG-4 video file, ready to transfer to iTunes, play back on an iPad, or upload to a video-sharing service like YouTube or Vimeo:
Click the Export button in the upper-right corner of the slideshow editor. A dialog opens (Figure 105). Name the file, and choose a folder to save it into.
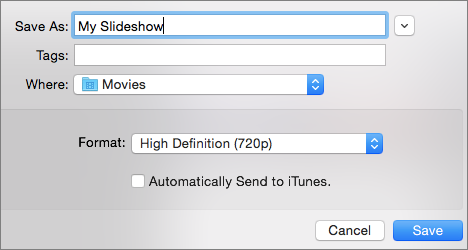
Figure 105: Choose the resolution of your slideshow movie from the Export dialog. Choose which resolution (480p, 720p, or 1080p) you’d like to use. If you’re displaying on an HDTV, for instance, choose 1080p.
Specify whether you want the file automatically added to iTunes when the export is complete. (If you select this checkbox, your video will be placed in the Home Videos subsection of the Movies app.)
Click Save.
Make Slideshows in iOS
iOS slideshows are much more casual affairs than macOS slideshows. To make a slideshow, tap a photo, tap the Share ![]() icon, and select the photos you want in the slideshow. Then tap the Slideshow button (Figure 106), located in the bottom row of the Share sheet.
icon, and select the photos you want in the slideshow. Then tap the Slideshow button (Figure 106), located in the bottom row of the Share sheet.

Once you tap the Slideshow button, your slideshow will immediately begin playing. If you’d like to take control of things, tap to reveal the slideshow interface screen (Figure 107).

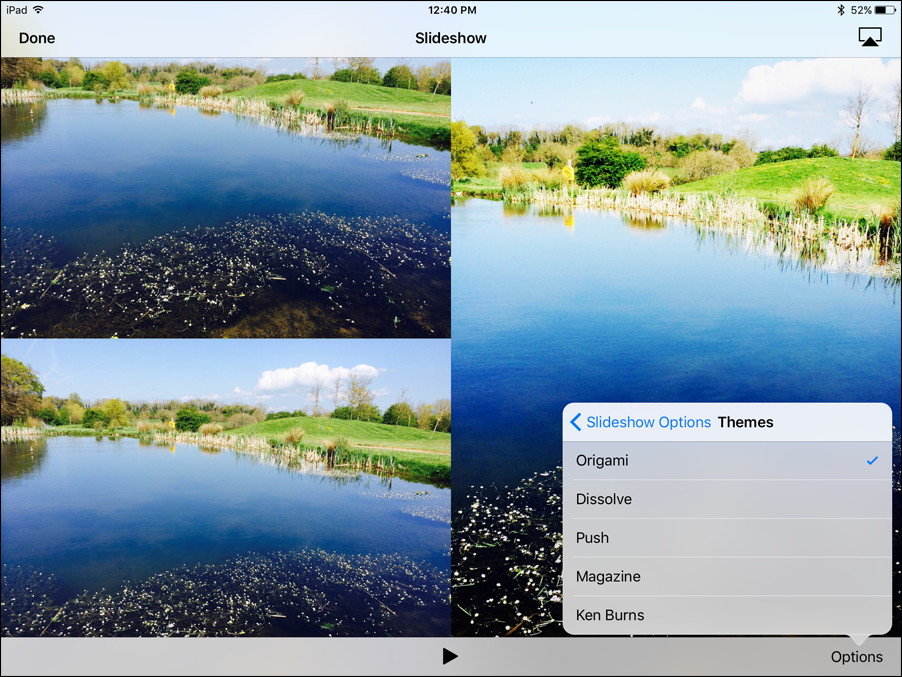
From here, you can pause or play the slideshow, send it to an Apple TV via AirPlay, or customize it by tapping Options (Figure 108).
Customize iOS Slideshows
Your ability to customize iOS slideshows is pretty limited. You can choose from five different themes (Origami, Dissolve, Push, Magazine, and Ken Burns), choose the music that plays during the slideshow, choose whether the slideshow repeats or not, and set a speed for the slideshow. That’s it.
Maybe it’s all for the best that your options are this limited: You can’t save slideshows or share them with other people. iOS slideshows are ephemeral, meant to quickly show off a bunch of photos in your library and then die a silent death.