Build Books and Calendars
For many years, Apple let you use iPhoto and then Photos to create designs with your photos, upload those designs to Apple’s servers, and then take delivery of custom-printed objects in a few days’ time. My family created annual calendars and books. These physical products are great ways to keep our photos in view throughout the year, even when we aren’t staring at a device.
Unfortunately, Apple has decided to get out of the business of producing books and calendars. Instead, it’s allowed third-party services to create special apps and make them available for download in the Mac App Store. These free apps allow you to create projects based on your Photos library and order them from right within Photos. It’s a new approach, but there are a lot of encouraging signs.
Here, then, are various ways to get your photos out of your library and into the real world.
Design Books with Mimeo and Motif
As of this writing (in late 2018), there are two apps that really excel at letting you build paper books and calendars within Photos: Mimeo Photos and Motif, both free. I’ll describe the process of building books in both of them below.
Build with Mimeo Photos
I’ve been very impressed with Mimeo Photos (Figure 109). In general, I found it to be a suitable replacement for Apple’s own book-building tool, with some features that surpass the ones that Apple previously offered.

To create a project using Mimeo Photos, first download the app from the App Store. After you launch the app and give it permission to access your photos, you can start a new project by selecting images or choosing an album in Photos and then selecting File > Create > Book > Mimeo Photos.
Choose the type of book you’d like to create (Mimeo offers six styles of hard- and softcover books). Click Create, select a theme, and Mimeo generates an automatic layout based on the images you add to the project. Though, I found myself deleting all those pages and then slowly building my own.
In the sidebar on the right side of the window, click Layout to view all the optional layouts for a page (Figure 110). Mimeo provides dozens of layout designs based on how many photos you want on a page or spread.

Once you’ve chosen a layout, you can drag photos out of the Photos list (accessible by clicking the Photo icon in the Mimeo sidebar) right onto the rectangles in your document.
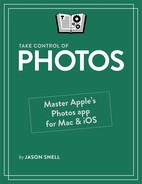
Where Mimeo really impresses, however, is in its support for free-form layout design. At any point you can change the size or aspect ratio of a photo frame by clicking on the frame and then clicking Transform ![]() in the resulting floating menu (Figure 111).
in the resulting floating menu (Figure 111).
You can entirely remove a frame from a page by selecting it and clicking the Delete button. Add new frames by selecting the Photo list from the Mimeo sidebar and clicking the Add Empty Photo Box button at the bottom of the screen.
With these tools, you can customize every page design. For example, I was able to create a page with a single image that spanned the entire spread of the book, crossing two pages—but with two additional pictures floating over that background image on one of the pages. This is a level of control and design freedom that I never felt I had with Apple’s own built-in tools. (Of course, this much freedom can lead to some pretty questionable design decisions, so most people may want to stick with Mimeo’s predesigned templates most of the time.)
Build with Motif
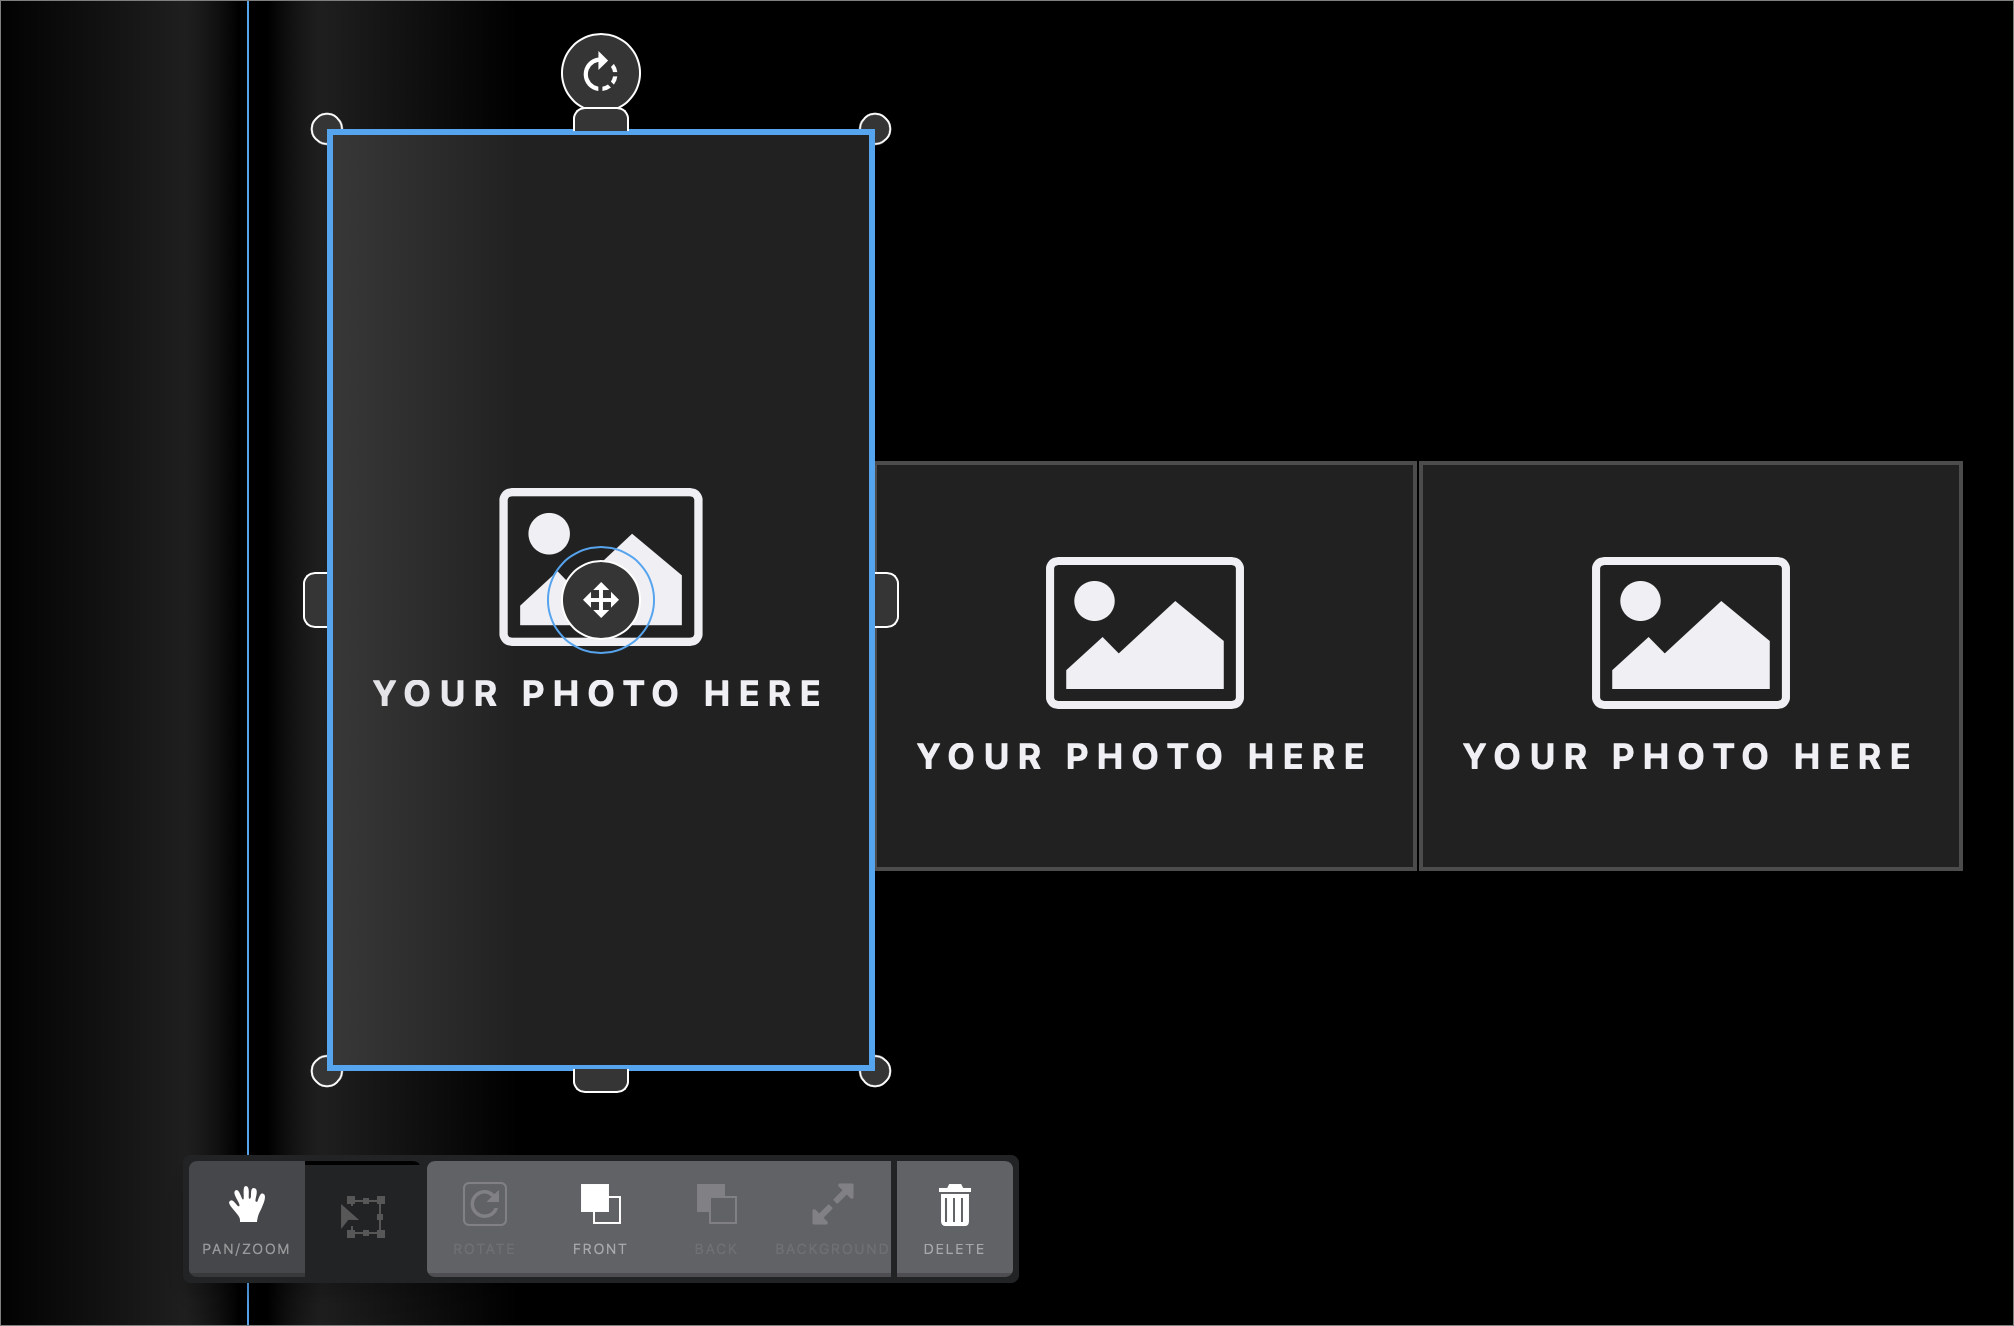
Motif, from R.R. Donnelly—the company that apparently was Apple’s source for its own photo books—is also a solid book-design tool. To create a project using Motif, first download the app from the App Store. After you launch the app and give it permission to access your photos, you can start a new project in Photos by selecting images or choosing an album and then selecting File > Create > Book > Motif.
After choosing a book format and theme, Mimeo lets you choose if you want it to generate an automatic layout based on the images you have selected by clicking the Autoflow Book button, or will generate an entirely empty layout for you to populate if you click the Don’t Autoflow button (Figure 112).
In the main Motif window, the photos you’ve added to your project appear in a strip along the bottom. At the top of the screen, there’s a button to let you add page spreads, and two buttons that let you toggle between a per-spread view and a zoomed out view of your entire book. There’s also a slider to let you zoom in and out on the layout.
When you’re viewing a spread, at the outside corners of each page you’ll see two controls, one of which lets you pick a layout template for that page, the other of which adds an editable text area to your page.
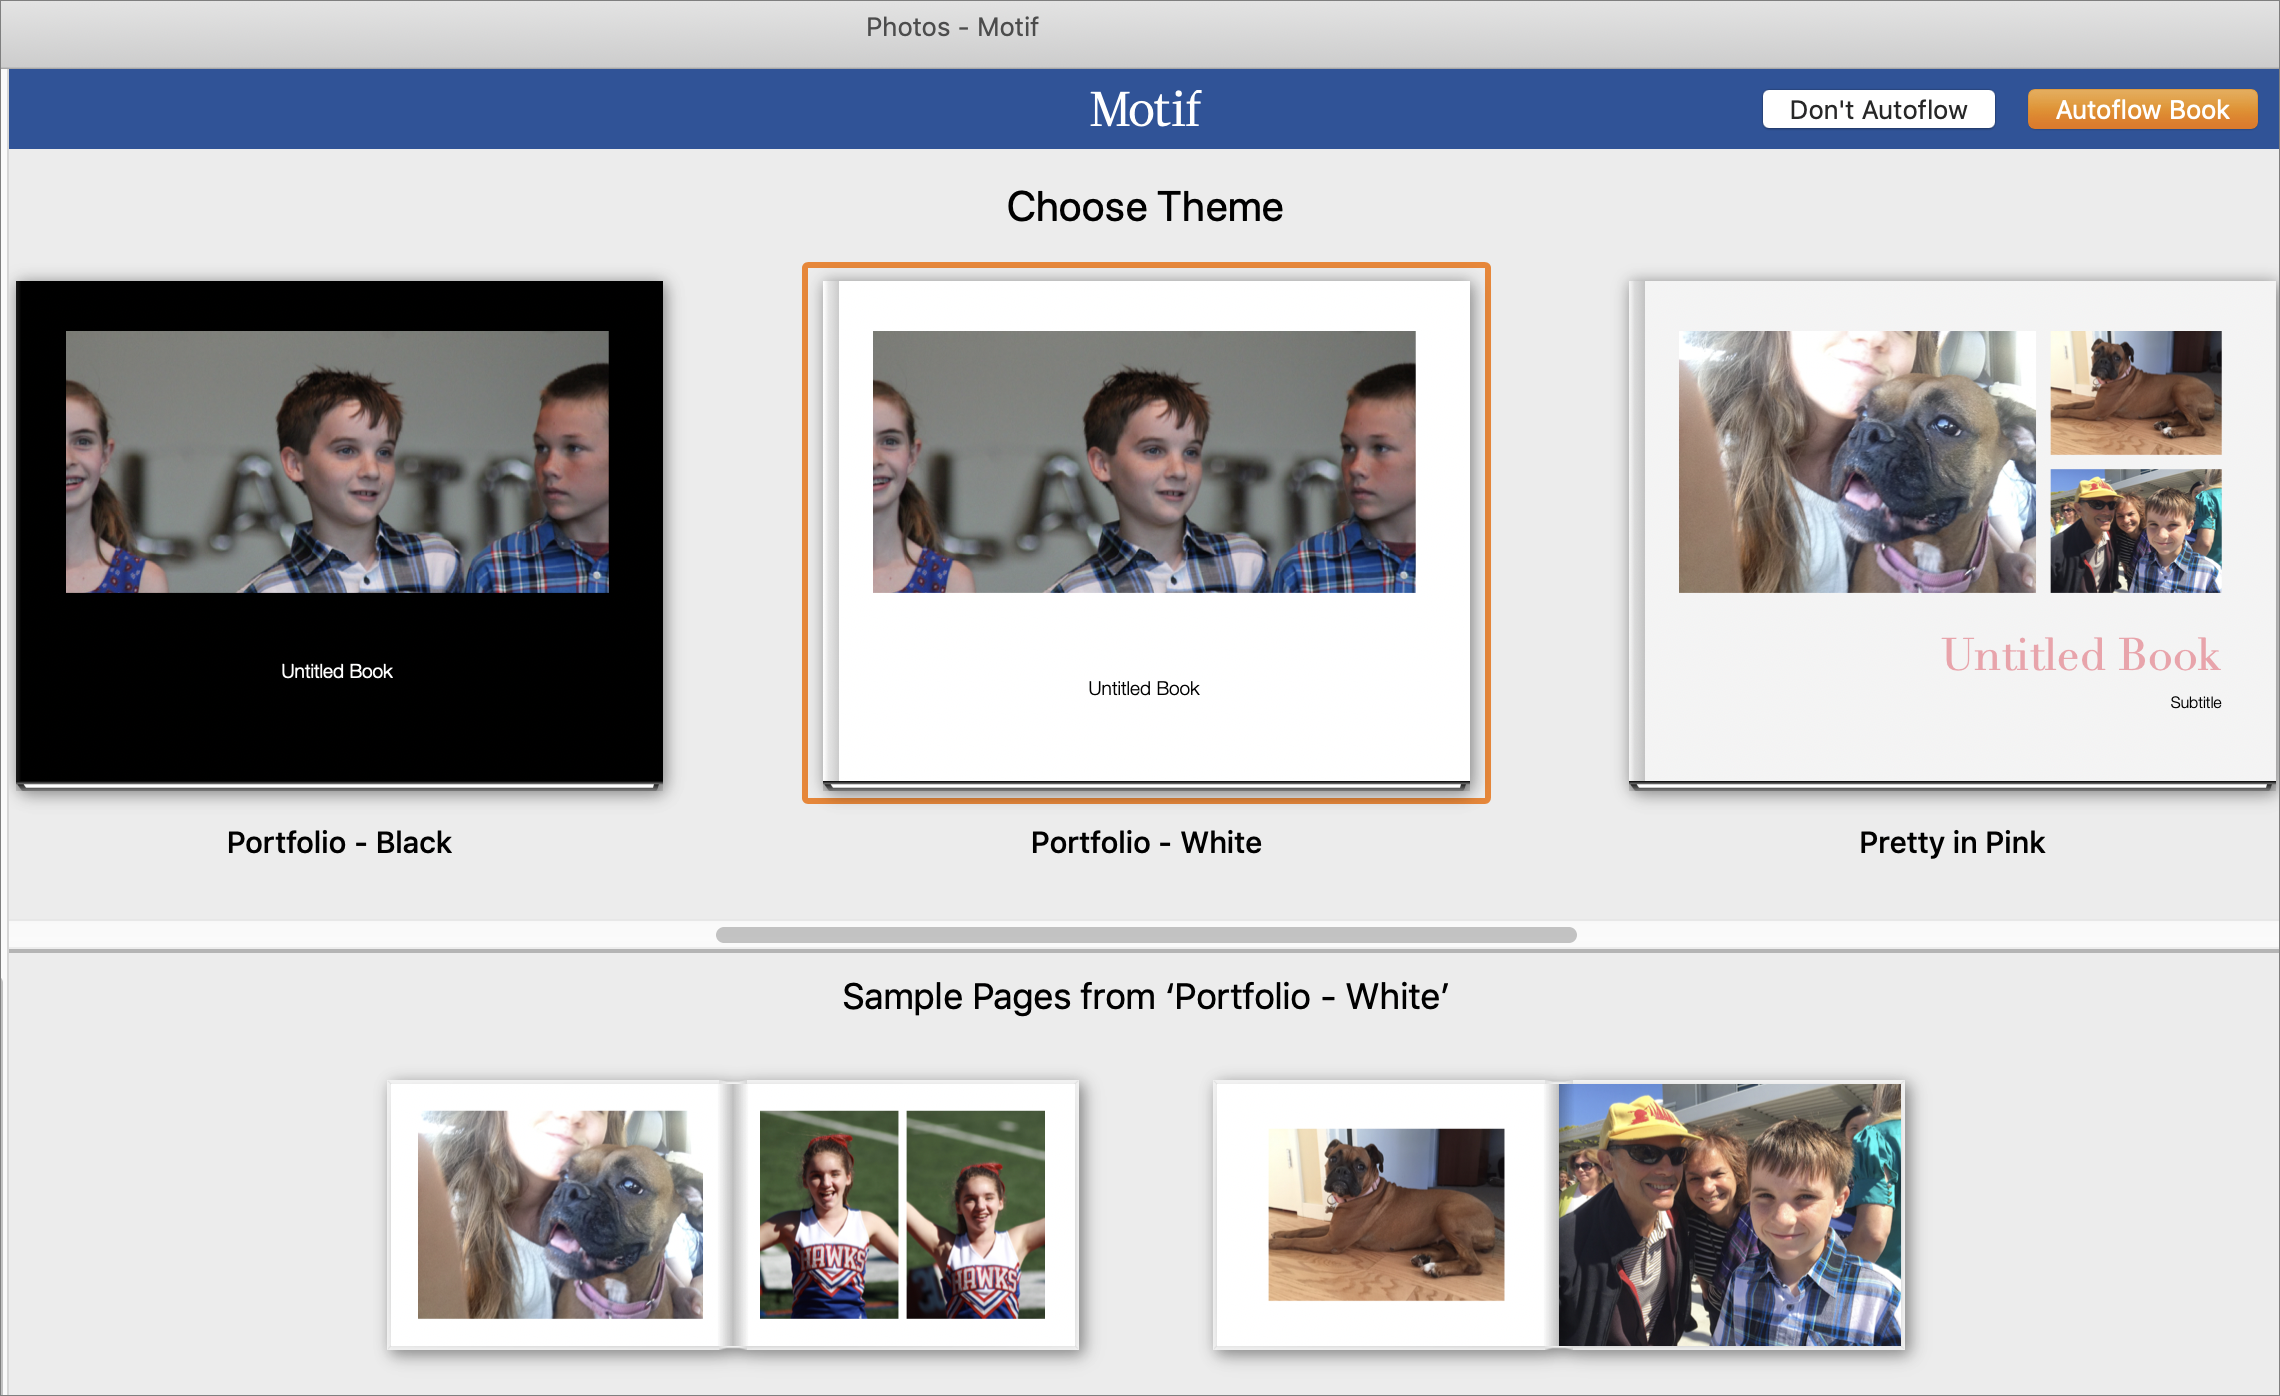
When you click the template icon, the main window changes to show numerous template options for the current number of photos set for that page (Figure 113). At the top of the window, there’s an option to select between one and nine items to fit on the page; click the number of images you desire and Motif will show you the layout options for that number of images.
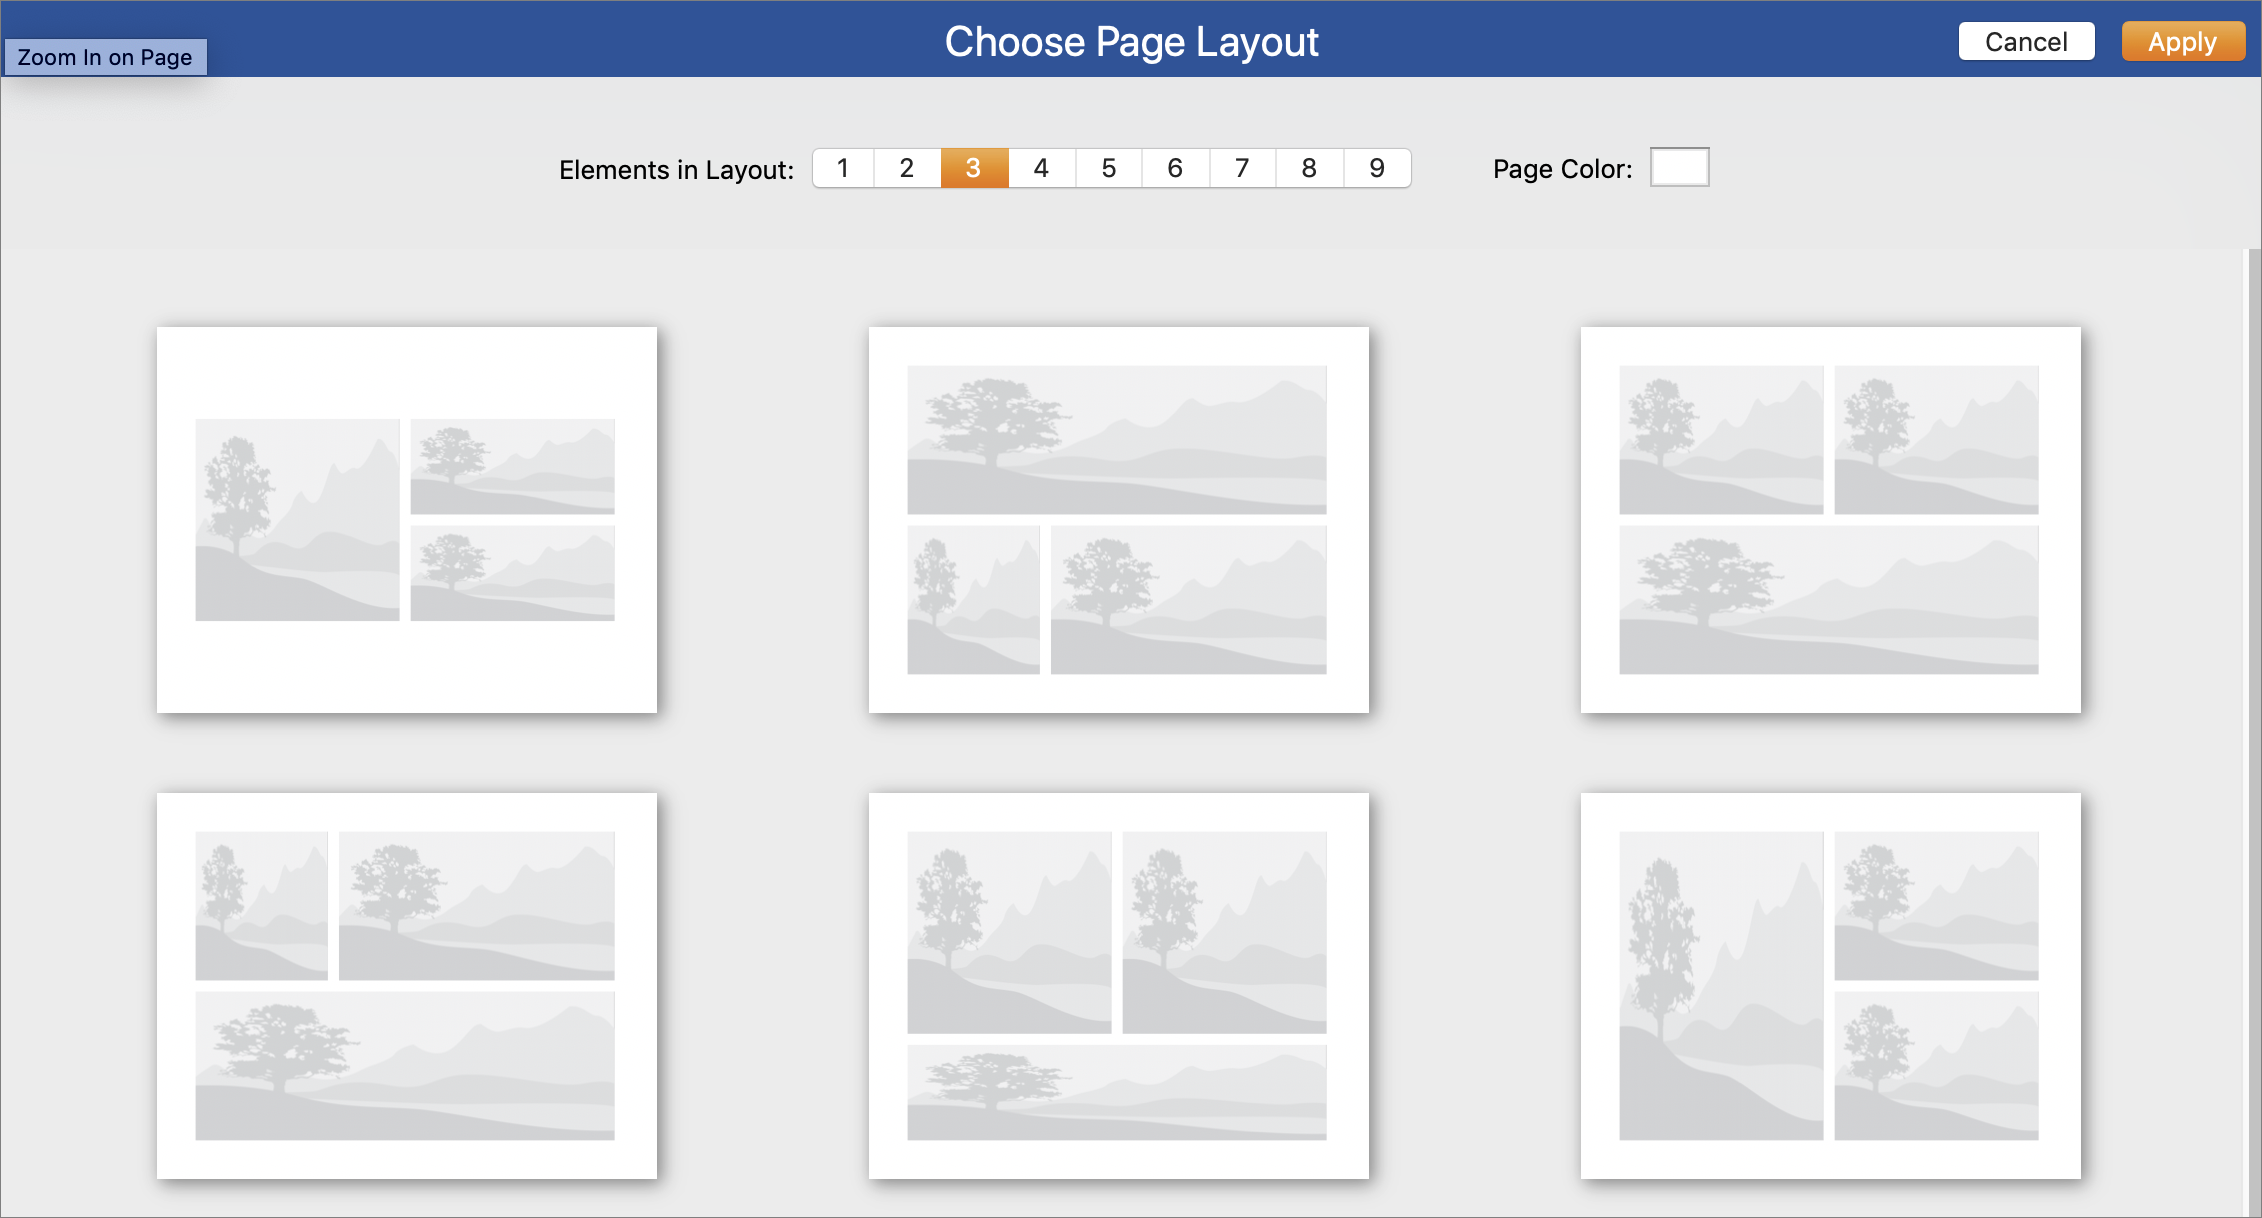
Once you’ve chosen a layout, you can drag photos out of the Photos list at the bottom of the screen onto the rectangles in your document (Figure 114).

If you find that one photo just needs to be a little taller or wider, don’t worry—Motif lets you slide the divisions between photos back and forth to modify your template. And if you click on any photo box’s frame and click the Trash icon, that photo box is deleted altogether. By using these techniques, you can alter the grid of a page to be almost anything you can imagine. I was able to adjust layouts to take into account extremely tall or wide images.
Enjoy the Results
When you’re all done designing your book, click the Buy button in Mimeo Photos or the Checkout button in Motif. You’ll need to buy your book with a credit card and may need to sign up for an account with that service. I’ve found the printing costs of both companies to be comparable to those Apple offered back when it printed books. Your book will be uploaded to Mimeo or Motif’s servers, which can take some time.
I was impressed with the quality of the books I ordered from both Mimeo and Motif. The dust jacket style I chose for the Mimeo book—photos on a black background—proved to be a mistake, as Mimeo’s black dust jacket paper showed white cracks at every fold and around the edges. Fortunately, the photos that appear on the outside of the dust jacket are also printed on the hard front cover, so I could discard my dust jacket and be left with an attractive book regardless.
Overall, I felt like my book from Motif was of somewhat higher quality than the one from Mimeo. Then again, Mimeo Photos let me design “bonus” photos on the inside dust jacket and the rear of the dust jacket, and Motif didn’t. The Mimeo Photos app has more layout flexibility than Motif does, but both are more flexible than Apple’s old book-building feature within Photos.
In short, if you like making photo books, these apps will do the job.
Make a Calendar
We still make a custom calendar every year based on photos we took during each month of the previous year. (So my January 2019 calendar image is from January 2018, and so on.) The good news is that this tradition will be able to live on beyond the death of Apple’s own built-in calendar tools. Both Mimeo Photos and Motif also offer calendar-creation features that use layout tools adapted from the same ones they use for building books.
Mimeo Photos has the edge over Motif on the calendar front. It’s got more available template themes and offers the capability to customize the date portion of the calendar (Figure 115).

You can add or remove holidays and even add photos to specific squares. It’s a fun feature that Apple offered in its calendar-building tools, and it’s missing from Motif.
Order Prints and Cards
If you want to order prints or build cards based on your Photos images, my advice is to use a web service like Shutterfly or PaperCulture. I couldn’t find any great plug-ins that add this feature to Photos, and uploading an image or two to a webpage isn’t particularly onerous. I’ve been using PaperCulture for cards for years now, and highly recommend them. They’ve got great templates, excellent paper choices, and will even mail your cards for you if you want.