Find and Name People
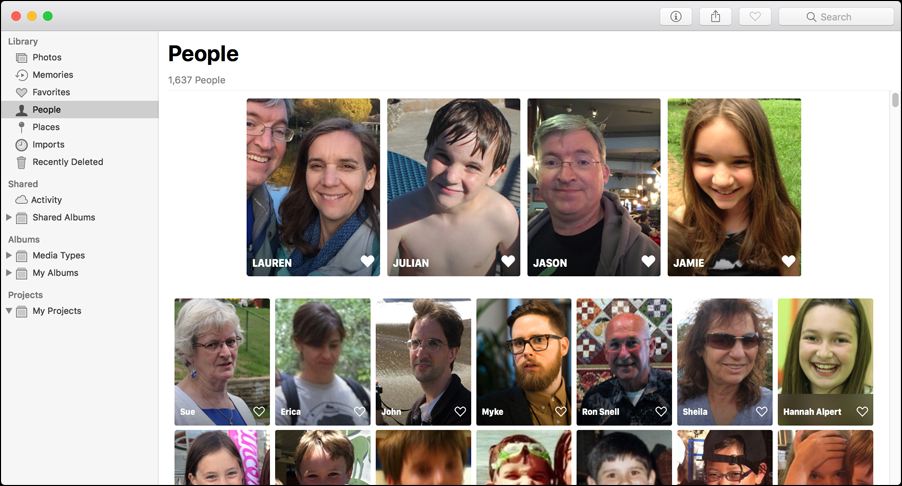
Photos performs 11 billion computations on every photo to analyze its contents for faces, scenes, and objects. But while Photos is good at recognizing faces, it’s terrible at putting names to those faces. Unless you’ve been diligent about adding everyone whose picture you take to the Contacts app (complete with a picture that Photos can use to identify them), you’ll need to do some work in the People view (Figure 36), located in the Library section of the sidebar, to teach Photos who’s who.
Find All Photos for a Person
The People view contains all the faces Photos has identified and connected to a name. If you want to find photos of a specific person, this is the place to go—just double-click an item to see all the photos that Photos has matched to that face.
Having your photos tagged based on who’s in them is a great organizational tool. For example, when it’s time to find photos of my family for our holiday cards and annual calendars, I use a smart album that displays photos containing all four of our faces (see Define Smart Albums). It’s sobering to discover that in a full year, you were photographed with your family fewer than ten times.
Name and Merge People
Apple’s face recognition engine is really good at finding faces. Once it had done its job on my 79,000-image library, it had found 1,000 different faces and plopped them into my People window. Of course, it doesn’t know who most of those people are, and you’ll find that the same people will be listed multiple times. It takes a little work to get your People list in order, though every move you make helps the face recognition engine learn and improve so that it’s better at matching other faces across all your devices.
To associate a name with an unnamed face in the People view, move the pointer over any unnamed face and click Name. Then begin to type that person’s name.
As you type, a pop-up menu suggests people Photos already knows about via its own catalog of faces or your Contacts app (Figure 37). If one of those is the person you’re looking for, select it. Otherwise, just type the person’s name and press Return.
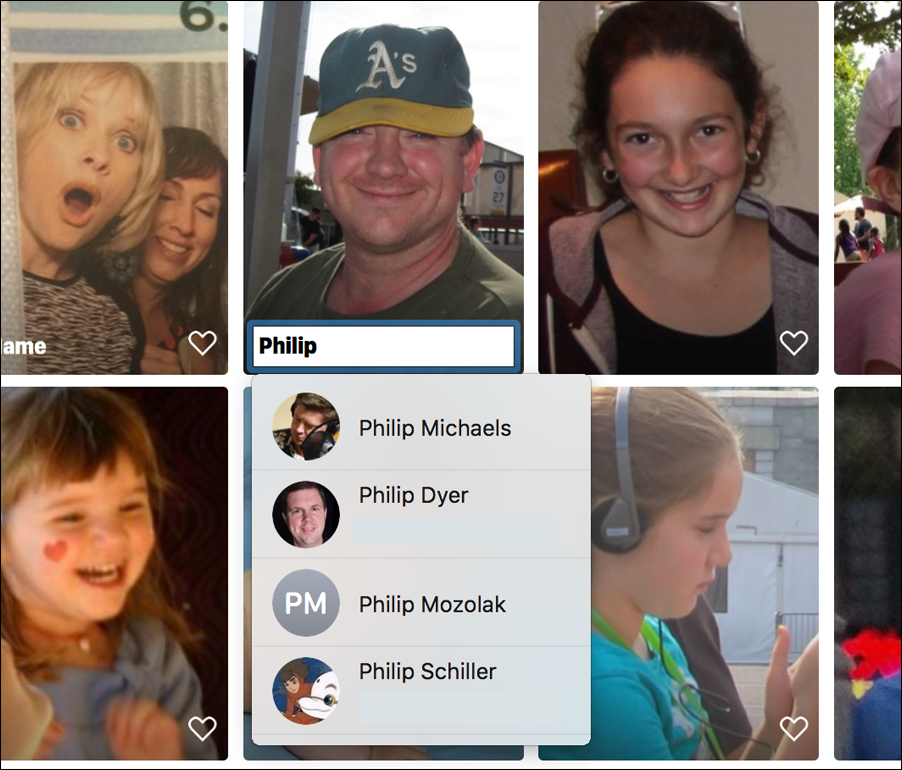
If the full name you assign is already represented in the People album, both sets of photos are merged together.
There are several ways to merge faces together. Select the duplicates by ⌘-clicking them. Then, Control-click one of them and choose Merge X People. Or, just drag a selection on top of another face (Figure 38).

Delete Face Data Entirely
So what if you’ve screwed up your face data? Perhaps you misassigned someone, or merged a bunch of different faces together? Don’t despair. This happened to a friend of mine, and he found out that there is a solution that lets your start over from the very beginning.
It’s pretty simple: In Photos for macOS, click the People view and press ⌘-A to select every single person in your library. Then press Delete. Photos will ask you if you want to “Reset People Album”. This will let you declare bankruptcy on face training and start again from scratch.
Expect a Long Wait for Old Faces
When a new image is imported into Photos, the app scans that image immediately for objects and faces. But if you’ve updated from an older version of Photos or just turned on iCloud Photos, you may need to wait quite some time for Photos to re-scan your entire library.
For best results, quit Photos and leave your Mac on (and plugged in, if it’s a laptop) overnight so that it has time to process every single photo you’ve got.
The same rule goes for iOS devices—leave them plugged in overnight after you upgrade so they can analyze all the images in your library.
See People in iOS
Photos for iOS keeps its list of faces in the People section of the Albums view. From iOS 11 onward, all the face training you do on one device is synced with all other devices, so if you do a lot of work on your Mac, the People view on your iOS devices will get a leg up.
Find People in iOS
To see the faces detected in any photo, tap a photo, then scroll down within the photo. Below it, you’ll find interesting information (Figure 39), including a map of where the photo was taken and related Memories collections.

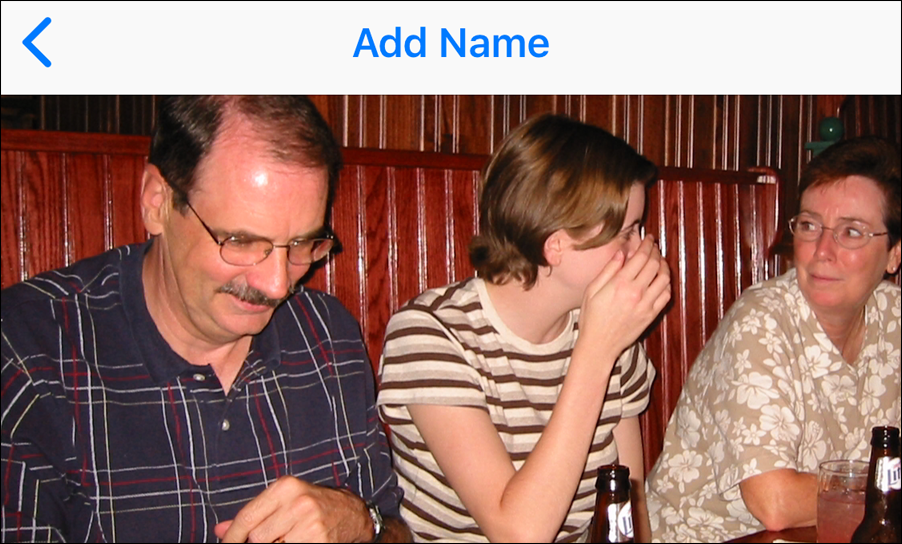
Add New Names in iOS
To add a name to a recognized face, tap one of the faces in the People section below the photo. (Or if you’re viewing the People album, tap any unnamed face.)
Photos opens a screen for that face, with a collection of photos, related groups and people, places where that person was spotted, and related collections of photos.
At the very top of that screen, tap the Add Name header (Figure 40). Enter in the person’s name and click Done. Photos suggests names based on people in your Contacts app, but you can also assign a name that isn’t currently in Contacts. If you identify a person who is already listed in People, Photos merges the two entries.