
Chapter 11
Reading Books and Newspapers with iBooks and Newsstand
Not only is your iPhone a wonderful device for playing games, surfing the Web, and listening to music, but with iBooks, it’s also a powerful e-book reader with a library of more than 30,000 free books at your fingertips as well as thousands more paid books, including many New York Times best sellers. But iBooks doesn’t stop there! You can add your PDFs to iBooks so you can carry them with you on the iPhone. This allows you to access all your PDFs from the same library as your books—a great feature for those of you who regularly work with or receive PDF files. In addition to iBooks, Apple has introduced Newsstand in iOS 5. Newstand lets you view and buy all your magazine and newspaper subscriptions in one easy to access location.
In this chapter, you’ll discover how to navigate your iBooks bookshelf and the books themselves. You’ll also learn about bookmarking favorite passages from books, creating notes, and even having a book read to you. We’ll take you through all the PDF features of iBooks. Finally, we’ll explore Newstand and show you how to shop for and organize all your subscriptions. Let’s get started.
iBooks App
The iBooks application does not ship on the iPhone. To use it, you must download it first for free from the iTunes Store. Alternately, the first time you launch the App Store on your iPhone, it will ask you if you want to download iBooks as well. Once you have done this, the iBooks icon will appear on your iPhone’s home screen (see Figure 11–1).

Tap the icon to launch the iBooks app. When you do, you’ll be presented with your iBooks bookshelf (see Figure 11–2). The bookshelf will be populated with any e-books you have added to your books library in iTunes (more on that in a moment).
View a Book’s Info Page
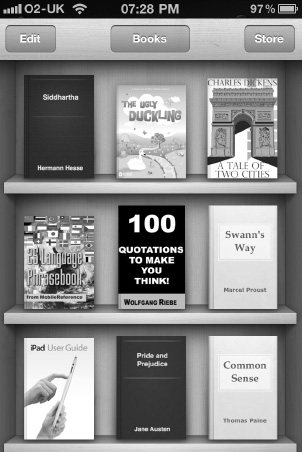
Figure 11–2. The iBooks bookshelf
Syncing Books
Before you can sync books, you need to first get some to sync. We talked about syncing books to your iTunes library in Chapter 2, but we’ll touch on it again here. There are a few ways for you to obtain books to sync to your iPhone.
iBookstore
In the previous chapters, you learned how to buy music, videos, and apps using the separate applications to buy them (such as iTunes for music and movies and the App Store for apps). With iBooks, Apple has combined both the store and the reader into one app. In the upper-right corner of your bookshelf, you’ll see a Store button (see Figure 11–2). Tap this button, and your bookshelf will flip around like it’s a secret passageway. On the backside of the bookshelf, you’ll be presented with the iBookstore. Here you can buy books, download samples, and navigate best-seller lists. Let’s look at the iBookstore more closely now. As you can see in Figure 11–3, the iBookstore is laid out similarly to the iTunes and App stores.
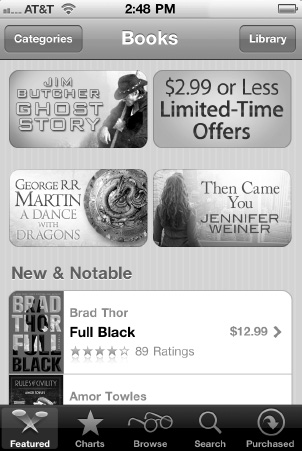
Figure 11–3. The iBooks bookshelf. The Featured page is the first page you’ll see.
At the top of the store you’ll see a Categories button that allows you to select specific sections of the iBookstore like Mystery or Non-Fiction. The Library button on the right will flip the store around and bring you back to your iBooks bookshelf. The bottom of the screen is populated with five shortcut buttons that allow you to browse the bookstore in different ways.
Featured: This is the home page of the iBookstore. On it you’ll see banner ads for specific books or collections of books. Below the banner ads you’ll see individual listing of select books. Tap any listing to be taken to the book’s information page. We’ll talk more about a book’s individual information page a little later.
Charts: This button displays two tabs at the top of the screen: Top Charts and New York Times (Figure 11–4).
Top Charts shows you the top downloaded paid and free books on the iBookstore in groups of ten. You can tap Ten More Books at the bottom of the listings to show an additional ten books.
The New York Times gives you a listing of its fiction and nonfiction best sellers that are available on the iBookstore. Note that only New York Times books that are available on the iBookstore will show in the charts. If the iBookstore doesn’t sell a particular book that is on the New York Times list, it will not show on the screen.

Figure 11–4. Charts shows you the top iBookstore downloads as well as the New York Times best sellers.
Browse: This allows you to search through the iBookstore by author (Figure 11–5). Scroll through the list with your finger, or drag your finger along the alphabet on the side to jump to a specific letter. Authors are in alphabetical order by their last names. You can choose to browse by authors of paid or free books by selecting the Top Paid or Top Free tab at the top of the screen. You can further whittle down your authors list by choosing a specific category from the categories button. For example, selecting Romance will show only romance authors.
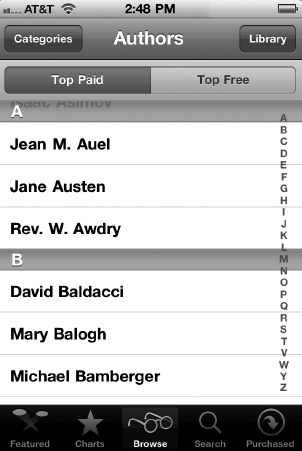
Figure 11–5. The Browse function lets you search through the iBookstore by author.
Search: The search function allows you to search for a book by typing in the name of the author or title (Figure 11–6).
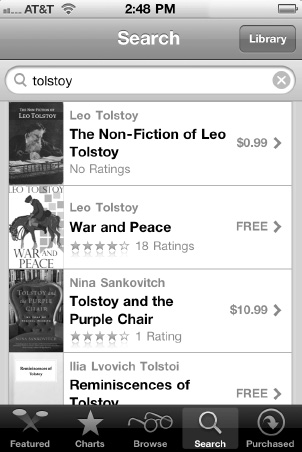
Figure 11–6. Search for books by author or title.
After you’ve entered your query, tap the search button in the keyboard, and you’ll be presented with a list of results. Tap any item in the list to be taken to the book’s information page.
Purchased: This page allows you to see all the purchases you have made in the iBookstore (Figure 11–7). Not only can you see all your purchases, but you can redownload them if you’ve deleted them from your device. Simply tap on the button with the downward arrow in a cloud icon. You will not be charged again for downloading book you already bought. Don’t worry—you won’t be charged again for it!
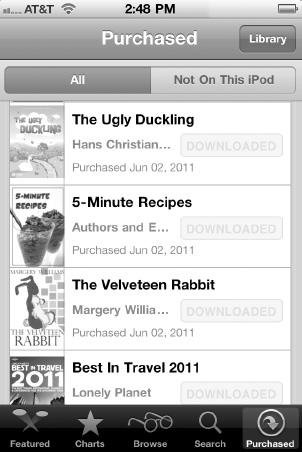
Figure 11–7. The Purchases screen lets you view and re-download all your iBooks.
NOTE: You don’t need to spend money to enjoy reading books on your iPhone. The iBookstore offers more than 30,000 free books from the Project Gutenberg book library. Project Guttenberg is a digital collection of books that are in the public domain. The only lame thing about Project Guttenberg titles is that they’re given the plain-looking brown covers you see in some of the figures. Though Guttenberg does redeem itself by making plenty of ePub books available with illustrations, there’s no need to rely solely on PDFs if you want illustrations in your book.
View a Book’s Info Page
Once you have found a book you’re interested in, tap it to be taken to its information page. As you can see in Figure 11–8, a book’s information page allows you to read a summary of the book (this is equivalent to reading what’s on the book of the book in a real bookstore). It also has a link to the author’s page where you can read more about the author and their other works. You can also view user ratings for the book.

Figure 11–8. An individual book’s information page
As you can tell, the information page has a ton of information about the book, but the main features are the two buttons at the top. The first button in Figure 11–8 reads $11.99. This is the price button. If you want to buy the book, tap the price, and it turns into a green Buy Book button. Tap it again to purchase and download the book. You may be asked to enter your iTunes password if you haven’t entered it in a while, and then the iBookstore will flip around, and the book will appear on your bookshelf with a blue progress bar (see Figure 11–9). Once the progress bar is complete, it will disappear, and you can begin reading your new book! Note that with free books, the price button will read Free. When you tap it, the button changes to Get Book. Tap it again to download the free book.
The Get Sample button shows on every book listing. It allows you to download a sample of any book on the iBookstore. Simply tap the Get Sample button; the iBookstore will flip around, and the book will appear on your bookshelf with a blue progress bar. Once the progress bar is complete, it will disappear, and you can begin reading the sample of the book. Samples always start on the first page and usually include the first chapter (or first several chapters if the book has smaller chapters).
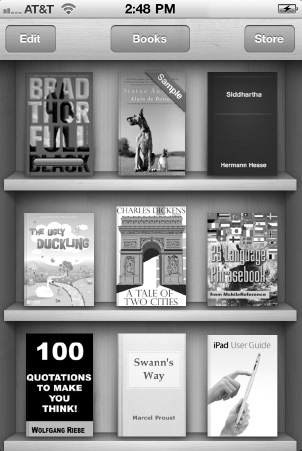
Figure 11–9. Downloading an iBook. Note the blue progress bar on the upper-left book. This means you are downloading the book.
NOTE: As with the iTunes Store and the App Store, you need to sign into your iTunes account before you can buy or download any book. To sign in, simply scroll to the bottom of the iBookstore home page, and tap the Sign In button. Enter your iTunes user name and password, and you’re good to go!
ePub Books
Besides using the iBookstore to read books in the iBooks app, there is a second way to get books on your bookshelf. You can download ePub-formatted books from other web sites and then drag them into your book library in your iTunes source list on your computer. Any ePub books you’ve added to your iTunes library will be automatically synced the next time you connect your iPhone to your computer.
What Is ePub?
ePub is a universal e-book file format. Any device capable of opening and displaying ePub files can display the book no matter where you bought the e-book. In other words, you don’t need to buy your books from the iBookstore only. Several sites sell e-books in the ePub format that are compatible with the iPhone. ePubbooks (www.epubbooks.com/buy-epub-books) has an excellent list of sites that offer ePub books for sale and for free download. Once you’ve downloaded an ePub book, simply drag it to your iTunes library, and the book will sync to your iPhone on the next connection.
NOTE: Amazon’s Kindle bookstore is another popular place to buy e-books. However, Kindle books don’t use the ePub format. If you buy an e-book from the Kindle store, you’ll need to download Amazon’s free Kindle book reader app for the iPhone to read those books. You will not be able to read a Kindle book in the iBooks app. Barnes & Noble’s BN eReader for iPhone is another way to buy e-books on the iPhone, but the BN eReader app supports the standard ePub format so you can move books back and forth between various ePub readers.
ePub vs. PDF
As you’ll see later in this chapter, iBooks can read both ePub books and PDFs. So, if you have a choice between buying a book in ePub format or PDF, which do you choose? Let’s look at the pros and cons of each:
ePub pros:
- Selectable and searchable text in iBooks
- Smaller file sizes
ePub cons:
- Requires a dedicated ePub reader if you want to read the book on your Mac or PC. Currently there is no desktop version of iBooks available.
PDF pros:
- Can be read in iBooks or on almost any computer in the world. PDF is one of the most universal document formats.
PDF cons:
- Files sizes can be large. A 300-page book can be more than 100 MB in size, taking up valuable room on your iPhone.
- iBooks doesn’t offer font adjustment, searchable text, or notes for PDFs.
After look ing at the pros and cons, I would say that if you have an option of buying a book in ePub or PDF format, choose ePub, especially if you’ll be viewing the book primarily in iBooks. The ePub format offers many more feature-rich options than PDF does.
Navigating Your Bookshelf
OK, you have a bunch of books downloaded and synced. Before you start reading them, let’s get a little better acquainted with navigating all your books on your bookshelf. By default, your iBooks bookshelf will look like it does in Figure 11–2. If you swipe you finger down, you’ll be presented with a few more options, as shown in Figure 11–10.

Figure 11–10. From the title bar of the iBooks bookshelf, you can access the iBookstore, navigate between your collections, and access view and edit modes.
The title bar in the iBooks bookshelf features three buttons with an additional search field and view buttons below it:
- Edit: Allows you to rearrange or delete books on your bookshelf as well as sort your books into collections.
- Collections: In Figure 11–10 the collections button is labeled “Books” but the label on the button will change to whatever the name of the collection you are viewing is. The collections button displays a list of all your book collections in iBooks. By default you’ll see two collections:
- Books: When you tap Books, you’ll be present with your bookshelf. This contains all the ebooks you have in the iBooks app.
- PDFs: Tapping PDFs will take you to your PDF bookshelf. We’ll talk more about the PDF features of iBooks in the second half of this chapter.
We’ll talk about collections in detail later on in this chapter.
- Store: As mentioned, tapping this will take you to the iBookstore where you can go shopping to expand your library.
- Search: If you have a large collection of books, you can use this search feature to quickly find the book you are looking for. The search feature searches all the titles on your shelf by name or author.
- Icon View: This is the default view of your bookshelf. The button with four white squares shows you all your books’ covers in large, easy-to-see thumbnails.
- List View: This is the button next to the Icon View button. It has three white lines in it. Tap it to display a list view of your iBooks bookshelf (see Figure 11–11).
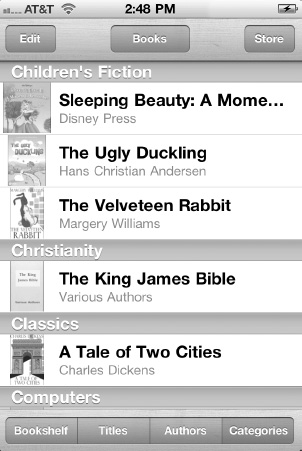
Figure 11–11. List view with sorting options by bookshelf, title, author, and category
When you tap the List View button, you’ll notice that at the bottom of the screen you have four ways to sort your lists:
- Bookshelf: Displays your books in the order that they appear in icon view.
- Titles: Displays your books in alphabetical order by title.
- Authors: Displays your books in alphabetical order by name of author.
- Categories: Displays your books in genre groups. Books are arranged alphabetically in each grouping.
You may notice that some of your books have a blue or red ribbon in their cover’s right corner. The red ribbons say Sample, and they signify the book on your bookshelf is a sample you’ve downloaded from the iBookstore. Samples will stay on your iPhone until you delete them or buy the full book, but they will not sync back to your iTunes book library.
Blue ribbons say New, and they signify that you have not begun reading the book yet. The New ribbon will appear until you’ve turned at least one page inside the book (Figure 11–12).

Figure 11–12. Books with the New and Sample ribbons next to a previously read book
Rearranging the Order of Your Books
iBooks allows you to rearrange the order of the books in your library. In icon view tap the Edit button, then simply tap and hold a book’s cover, and drag it to a new position on your bookshelf. This is no different from the way you arrange apps on your iPhone’s home screen. In list view in edit mode, you can only rearrange books in the Bookshelf sorting category. Tap and hold the grip bars on the right of the book’s genre, and drag to your preferred position.
Deleting Your Books
Deleting books is also easy in iBooks. In icon view tap the Edit button, you’ll notice a red Delete button appears in the upper-right corner of the screen. Tap the book or books you want to delete so a blue checkmark appears over them (Figure 11–13). Next, tap Delete. A confirmation dialog will appear asking if you’re sure you want to delete the book. Tap Delete again to confirm.
In list view in Edit mode, you can delete books from any of the four sort views. Simply tap the the book or books you want to delete so a blue checkmark appears next to them (Figure 11–13). Next, tap Delete. A confirmation dialog will appear asking if you’re sure you want to delete the book. Tap Delete again to confirm.
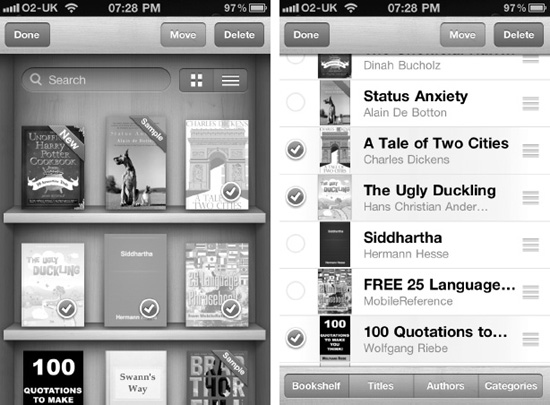
Figure 11–13. Deleting books in icon and list views
Sorting Your Books into Collections
iBooks does a wonderful job of displaying your books and PDFs on a digital bookshelf, however there may come a time when your book collection grows so large, seeing them all displayed on a single iBooks bookshelf might not make for the easiest browsing experience.
Luckily, Apple has a built-in feature called “Collections” that allows you to sort your books onto different bookshelves for easier orginaization. In the center the iBooks screen you’ll see the Collections button. It will be labeled according to the name of the selected collection. In Figure 11–10 the collections button is labeled “Books” because that is the currently selected collection. Tap the collections button to reveal a list of book collections in iBooks (Figure 11–14).
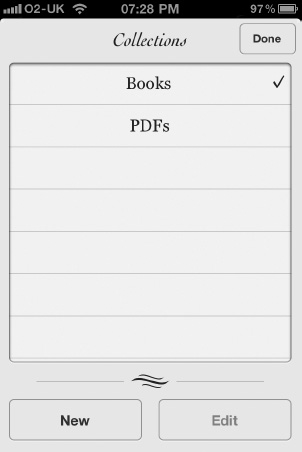
Figure 11–14. The Collections menu.
Be default you’ll see two collections: Books and PDFs. Any ebooks you have will appear on their own bookshelf under the Books collection, and any PDFs you have will appear on their own bookshelf under the PDFs collection.
Creating New Collections
If you’d like to create new collections to better manage your library, you can do so easily:
- Tap the Collection button so the collections menu appears.
- Tap the “New” button.
- A new Collections field will appear (Figure 11–15) and enter the name of your new Collection.
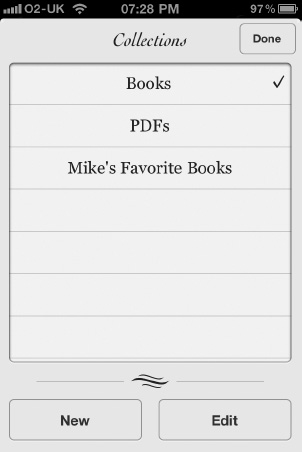
- When you have entered your Collection’s name, tap Done and your new Collection will be created.
Adding Books and PDFs to Your Collections
Once you’ve created a new collection, you need to add some books or PDFs to it. To add books or PDFs to a collection:
5. Tap the Edit button in the upper-right corner of an iBooks bookshelf.
6. Tap the book(s) or PDF(s) you want to add to a collection. The selected book or PDF’s cover will fade and a blue checkmark will appear in its lower-right corner (Figure 11–16).

Figure 11–16. Selecting books to move to a collection.
7. Tap the Move button at the top of the iBooks bookshelf. The collections list will be displayed (Figure 11–17, left).
8. Choose the collection you want to add the selected books or PDFs to by tapping its name. An animation will show the selected collection sliding onscreen and you’ll be taken to that collections bookshelf where you’ll now find your selected books or PDFs (Figure 11–17, right).
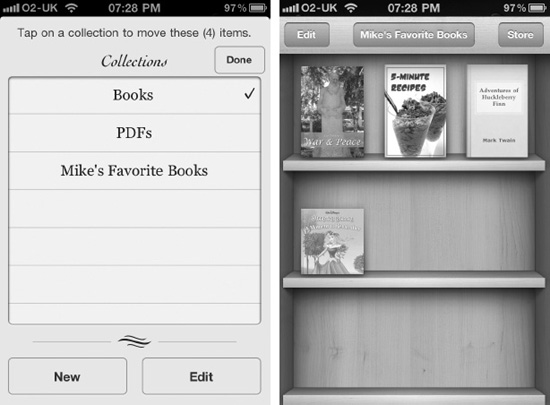
Figure 11–17. Moving books to your new collection, left, and your new collection, right.
NOTE: You can only place the same book or PDF in one collection at a time. When you add a PDF or book to a collection, it is removed from its previous collection.
Navigating Between Your Collections
iBooks makes it easy to navigate between your collections. Matter of fact, it gives you two ways to do this:
- Tap the Collections menu and then tap on the Collection you want to view, OR
- From any Collections bookshelf, drag your finger left or right to swipe to the previous or next collection.
Editing Collections
iBooks lets you edit the names of existing Collections, arrange the collections in a specific order, and delete collections.
To edit the name of a collection:
- Tap the Collection button so the collections menu appears (Figure 11–15).
- Tap the Edit button.
- Tap the collection whose name you want to edit.
- Enter the new name of you’re the Collection.
- Tap the Done button when finished.
To arrange the order of a collection:
- Tap the Collection button so the collections menu appears.
- Tap the Edit button.
- Use the grip bars to drag your collections up or down in the Collections list (Figure 11–18). You can’t move the Books or PDFs collections.
- Tap the Done button when finished.
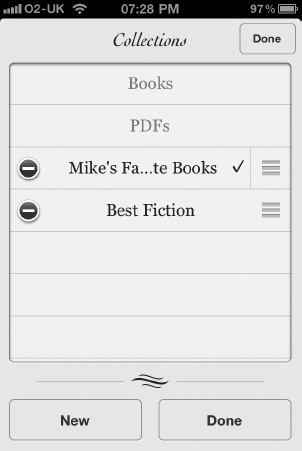
Figure 11–18. Editing collections.
To delete a collection:
- Tap the Collection button so the collections menu appears.
- Tap the Edit button.
- Tap the red minus sign button (Figure 11–10).
- A red delete button will appear. Tap it to delete the collection. A warning dialog will appear asking you if you want to remove the collection’s items from the device or move the back to their original collections. Tap “Remove” to remove the items from your iPad or tap “Don’t Remove” to keep them on the iPad and move them back to their default (Books or PDFs) collection.
Reading Books
The bookshelf displays your books in a gorgeous and easy-to-find layout, but books are meant to be read, not just ogled at on a shelf. Let’s get started!
To read a book, simply tap its cover. The book will fly forward and open. If it’s the first time you’ve opened the book, you’ll be on the first page. If you have opened the book before, it will open on the page you left off on.
While reading a book, you can choose between landscape or portrait orientation. As you can see in Figure 11–19, landscape mode shows you about a paragraph of text on average, while portrait mode shows you slightly more text. You can navigate between the two modes by simply rotating your iPhone.

Figure 11–19 . Reading a book in landscape and portrait modes
At the top of any book’s page, no matter what orientation you are in, you’ll notice a menu that contains a series of buttons (see Figure 11–20). We will get to using all these features momentarily, but we’ll familiarize you with the menu first.
Figure 11–20. A book’s menu buttons
- Library: Tapping this effectively closes the book and takes you back to your bookshelf. The next time you open this book, you’ll be taken to the page you were on when you left it.
- Table of Contents/Bookmarks: This button is signified by three dots, each with a line after them. Tap this button to be taken to the book’s Table of Contents/Bookmarks page.
- Brightness: This is the button that looks like the sun and changes the screen brightness while inside the iBooks app only.
- Font: This button, symbolized by a small and big A, allows you to change the font of the book’s text as well as the font size. This is helpful for those people who need larger text while reading, such as older people or anyone with sight difficulties. You can also change the background of the book’s page to a sepia tone.
- Search: The magnifying glass button allows you to search through a book’s text.
- Bookmark: Tap the bookmark ribbon to lay down a red bookmark in the upper-right corner.
- Page scrubber: This is the series of dots that run along the bottom of a book’s page (see Figure 11–22). Tap and hold the square button that sits on the dots; then drag it left or right to quickly navigate through the book’s pages.
- BUY: A Buy button appears when you are reading a sample book. Tap the Buy button to purchase the book. Your sample copy will be replaced with the full copy.
While reading, you can tap the center of a book’s page to show/hide the menu bar and page scrubber. You’ll be left with only the title of the book and name of the author (in landscape view) at the top of the page and the page number at the bottom.
Turning Pages
You have three ways to move through a book’s pages:
- Tap and hold the side of a page; then drag your finger across, and the page will curl on the screen (see Figure 11–21). When you lift your finger, the page turn will be complete.
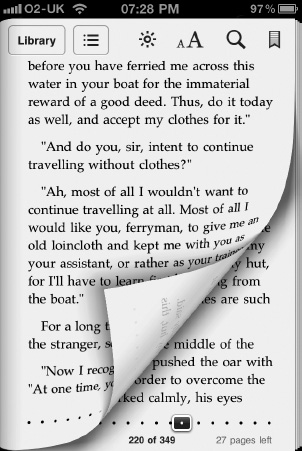
Figure 11–21. You get cool eye candy when turning a page.
- Tap the right or left side of the screen to move forward or backward. This accomplishes the same function as the previous one, but with less interactive eye candy.
- Tap and hold the scrubber bar at the bottom of a page (see Figure 11–22); then slide your finger in either direction. The name of the chapter and the page number will appear above the scrubber as you slide. When you’ve found the right page, remove your finger from the scrubber, and the page will flip, taking you to the page you’ve selected. The scrubber lets you go to a specific page number quickly without having to flip through all the pages of the book.

Figure 11–22. The page scrubber shows the page number and chapter title.
Adjusting Brightness
Depending on your eyes, you may find it easier to read text with a brighter or darker screen. To adjust the iPhone’s screen brightness while reading a book, tap the Brightness button (the one that looks like a sun) in the menu bar. A drop-down menu will appear with a slider in it (see Figure 11–23).

Figure 11–23. The brightness slider
Slide to the left to reduce brightness and to the right to increase it. When adjusting the brightness in the iBooks app, the entire screen will brighten or dim according to your slider settings, but once you leave the iBooks app, the screen brightness will return to the settings you have specified in the iPhone’s Settings application. This is a great feature because you can instantly switch between brightness levels when you enter or exit the iBooks app without having to reconfigure them each time.
To change your iPhone’s overall brightness levels, go into Settings on the iPhone’s home screen, and choose Brightness. Adjust the slider there to set your preferred brightness.
Adjusting Font, Font Size, and Page Color
Depending on your eyesight, you may want to adjust the font size of the text. Tap the double-A font button to be presented with the font menu (see Figure 11–24). Tap the small A to decrease the font size and the large A to increase it. Increasing or decreasing the font size will result with fewer or more words on a page, respectively.
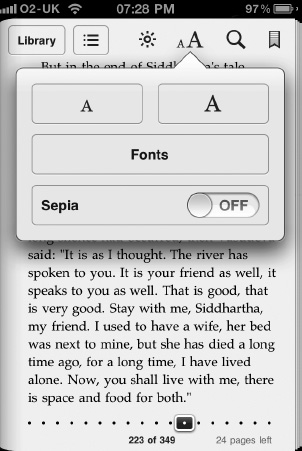
Figure 11–24. The font panel
Below the font size controls, you’ll see a Fonts button. Tap this to select from six font types (see Figure 11–25). Different font types can affect the number of words you see on the screen slightly. Why change the font? Some people have an easier time reading different fonts, especially serif or sans serif fonts. A sans-serif font is like the font of the text of this book; there are no little lines hanging off the letters. A serif font is one like Times New Roman.
Below Fonts, you’ll see the Sepia button. Tap to toggle on or off. When set to ON, the entire book will take on a yellow-brown tone, similar to how pages in an old paper book start to turn color after a while. Some people find reading from a sepia screen easier on the eyes since you aren’t staring at a bright white background.
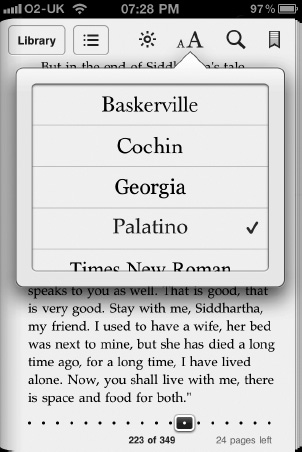
Figure 11–25. The fonts you can choose from
Searching Text
You can search for any word or text in the book you are reading by simply tapping the magnifying glass icon. A search field will pop up along with the keyboard. Type any search term you want, and you’ll be presented with a list of results, displayed by order of page number (see Figure 11–26). Tap any result to be taken instantly to that page. On the page, your search term will have a brownish yellow bubble over it.
You can also perform a Google or Wikipedia search for your word or phrase. Below the search results, you’ll see a Search Google button and a Search Wikipedia button. Tap either to leave the iBooks app. You’ll be taken to Safari where the Google search results or Wikipedia entry page will be presented.
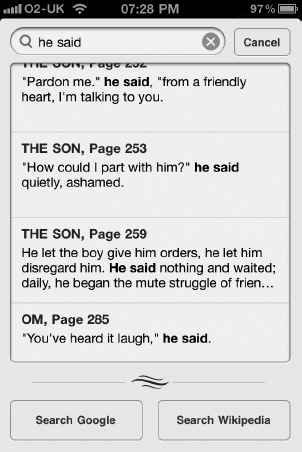
Figure 11–26. The search panel lets you perform in-text searches as well as quickly link to Google and Wikipedia searches on the Web.
Bookmarking a Page
Tapping the bookmark icon will cause a red bookmark to be laid down at the top of the page (see Figure 11–27). Laying down a bookmark adds a shortcut of the page to the Table of Contents/Bookmarks page so you can quickly access the bookmarked page later. Bookmarking in iBooks isn’t really like using a bookmark in a physical book. In the iBooks app, the bookmarking feature is more akin to dog-earing a page on a real book, since you aren’t limited to one bookmark. You can bookmark as many pages as you want. To unbookmark a page, tap the red bookmark ribbon.

Figure 11–27. Tap the bookmark button (left) to lay down a bookmark (right).
Interacting with Text
Your interaction with the book’s text isn’t limited to search. What we’ll show you next is one of the reasons why e-books are superior to traditional paper books. However, paper books still have a leg up on e-books in many ways. See the article about the two formats here: www.tuaw.com/2010/05/08/a-tale-of-two-mediums-despite-the-iPhone-traditional-books-aren/. Paper books have the advantage over e-books that they are relatively cheap (especially if you buy them used), and you don’t need to be afraid to take them to a park or a beach. Sand or dirt isn’t going to affect the usability of a paperback like it will an electronic device like the iPhone. Also, while reading in public, paper books are a much lower theft target than Apple’s latest gadget wonder.
While on any page, press and hold your finger to the screen, and a spyglass will pop up on the page. To move it around, simply drag your finger. Below the spyglass, a single word will be highlighted in blue. When you’ve found the word you want, remove your finger from the screen. The spyglass will disappear, and the word will be highlighted with grab bars on either side. Drag the grab bars to select more than one word, such as a sentence or entire paragraph.
With your selection confirmed, you’ll be presented with five text-selection tools from the black pop-up menu that appears (see Figure 11–28). Alternately, you can double-tap a word to bring up the contextual menu.
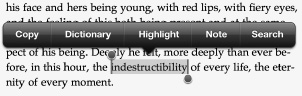
Figure 11–28. The text selection tools
- Copy: Select to copy the text so you can paste it into another application or the search field.
- Dictionary: This is our favorite feature of the iBooks app because it shows you one of the primary advantages—and ease-of-use features—that e-books have over traditional paper books. When reading a paperback book, if you don’t know a word, you need to put the book down and grab a dictionary. On the iPhone, if you don’t know a word in a book, you can simply select it and tap the Dictionary button. The first time you tap the dictionary command you’ll get a notice that iBooks need to download a dictionary. Tap the download button to download the dictionary. This needs to be done only once. After that, a page will appear with the definition of the word (see Figure 11–29). You can then tap Done on the page to close the dictionary window and get back to reading the book. Simple.

- Highlight: Tapping highlight will mark the text as if it’s been highlighted by a highlighter (see Figure 11–30). Apple has outdone itself here, because the highlighting actually looks the same as it does on physical paper.

Figure 11–30. Highlighted text. When you highlight text, it automatically gets added to the bookmarks page.
If you tap the colored highlight, another pop-up menu appears that allows you to change the color of the highlight, create a note to go along with the highlighted text, or remove the highlight (see Figure 11–31). Color selections are yellow, green, blue, pink, and purple. Any newly selected text you choose to highlight will be highlighted the color of your last choosing. Any text you highlight will show up in a list on the bookmarks page (which we’ll get to in a moment).
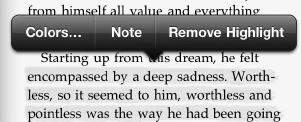
Figure 11–31. Options for highlighted text
- Note: Tapping Note will automatically highlight the selected text and then cause a Post-it note to fly forward on the screen and the on-screen keyboard to appear (see Figure 11–32). You can type as much as you want in the note and scroll up and down using your finger. The color of the note will be based on the color you chose for your highlight. Tap the note’s Done button to close the note. You’ll see a small note icon appear on the side of the page (see Figure 11–32). Tap the note’s icon to edit the note. Tap the text’s highlight, and select Remove Note to delete the note.
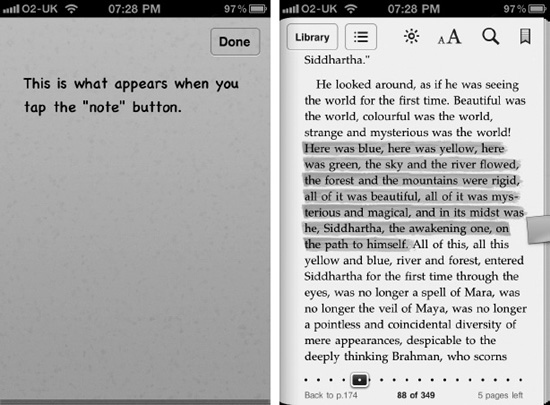
Figure 11–32. Creating a note and the note icon in the margin of the page after creation. The note is tied to the highlighted text.
- Search: Tapping Search will open the magnifying glass search window in the upper-right corner of the page. The text you selected will be automatically filled in as the search query.
Accessing the Table of Contents, Bookmarks, and Notes
Tap the Table of Contents/Bookmarks button (the button that has three dots followed by three lines; see Figure 11–19) at the top of your page to be instantly taken to the Table of Contents/Bookmarks page (see Figure 11–33).
The Table of Contents/Bookmarks page is, unsurprisingly, divided into Table of Contents and Bookmarks sections; each has their own tab.
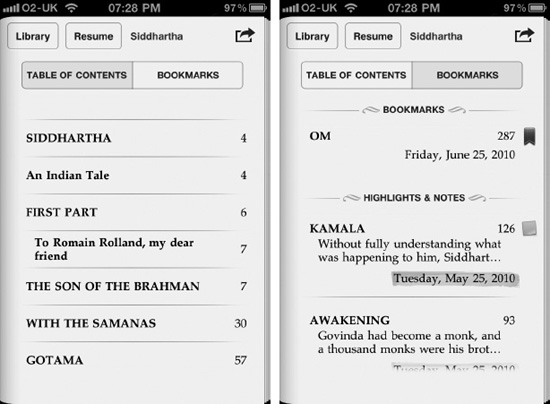
Figure 11–33. The Table of Contents/Bookmarks page. Switch between the two by tapping the appropriate tab. Return to your last position in the book by tapping the Resume button.
The Table of Contents tab displays the book’s table of contents as a scrollable list. Tap any item in the table of contents to be instantly taken to it.
The Bookmarks tab displays all your bookmarks, highlights, and notes. They are divided into two sections: Bookmarks and Highlights & Notes. Under the Bookmarks heading, you’ll see a list of chapter names or numbers that hold the bookmark, as well as the page number of the bookmark and the date you bookmarked the page. A red ribbon representing the bookmark lies next to the bookmark’s page number. Tap any bookmark to jump to the bookmarked page.
Under the Highlights & Notes heading, you’ll see a list of all the highlights and notes you’ve created. For each highlight and note, you’ll see the beginning of the first sentence that the highlight or note appears in, as well as the chapter name or number and also the page number and the date you marked the page. The date is highlighted in the color that you choose to highlight the text in. This is a nice feature if you use different colors for different bookmark classifications, such as quotes from the antagonist in blue and from the protagonist in pink.
Remember than whenever you create a note, a highlight is automatically created. You can distinguish between a highlight and a note easily. Any note has a tiny sticky note icon in the right margin. To be instantly taken to any highlight or note, tap it in the list. To read a note you created without leaving the Table of Contents page, tap the note icon in the margin. The note will spring forward on the screen. You can then tap the note to bring up the on-screen keyboard to edit it. Tap the Done button on the note to close the note.
At the top of the Table of Contents and Bookmarks page you will notice a Share button in the top-right corner. Tap it to insert the TOC and your notes into an email message or print the TOC and your notes to a wireless AirPrint printer.
To exit the Table of Contents/Bookmarks page, tap the Library button to return to your bookshelf, or tap the Resume button to return to your last position in the book.
Having a Book Read to You
Not only can you read books on the iPhone, but also you can have the iPhone read books to you. Using iPhone’s VoiceOver screen reader technology, you can make the iPhone read any text to you, including the text of an entire novel. We’ll talked about VoiceOver in detail in the final chapter of this book, but for now we’ll touch on how to activate it for iBook reading.
- Turn VoiceOver on. Go your iPhone’s home screen, and tap Settings; then choose General Accessibility VoiceOver. Tap the ON button.
- Return to your book in iBooks. To have everything on the page read to you, use two fingers held together and flick up. Everything from the top of the screen down will be read. When VoiceOver reaches the bottom of the page, it will automatically turn it for you and continue reading.
- To stop VoiceOver reading, tap anywhere on the screen with one finger. It would also be a good idea to return to Settings and turn VoiceOver off, unless you want to continue using VoiceOver gestures.
Now, you might be wondering why you would have VoiceOver’s mechanical voice read you a book when you can just buy an audiobook and sync it to the iPhone. The simple answer is because not all books are in audiobook format. It should also be noted that the iBooks VoiceOver ability isn’t a feature intended to appeal to a large number of readers but an accessibility option to help those who are hard of sight read their favorite books.
Syncing PDFs
You have two ways of syncing PDFs to iBooks on your iPhone: using iTunes or using the iPhone’s Mail app. To sync PDFs via iTunes, simply drag any PDFs you want to sync into your iTunes library. They will automatically be added to the Books section of your iTunes library. The next time you sync your iPhone to iTunes, your PDFs will sync as well.
You can also add PDFs to iBooks through the iPhone’s Mail app. To do this, open Mail, and select an e-mail that has a PDF attachment. Tap the attachment in the body of the e-mail to see it previewed full-screen. While previewing it full-screen, you’ll see a Share button in the upper-right corner. Tap this button, and select Open in “iBooks” from the pop-up list (see Figure 11–34). Mail will close, and the PDF will automatically open in iBooks and be added to your PDF bookshelf. When you sync your iPhone with iTunes, any PDFs you have added to iBooks in this manner will be added to your iTunes books library.
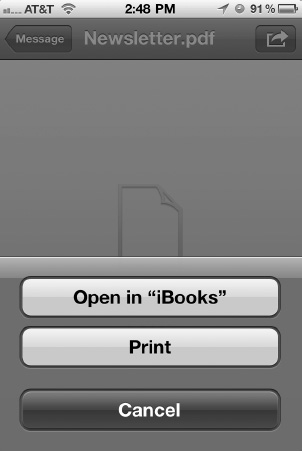
Figure 11–34. Opening a PDF in iBooks using Mail
Navigating the PDF Bookshelf
To see all your PDFs that iBooks contains, open iBooks, and tap the Collections button in the iBooks menu bar (see Figure 11–10). From the collections menu (Figure 11–14) tap the PDFs collection. Doing so will take you to your PDF bookshelf. As you can see from Figure 11–35, the PDF bookshelf is similar to the regular bookshelf. The PDF bookshelf will be populated with any PDFs you have added to iBooks.
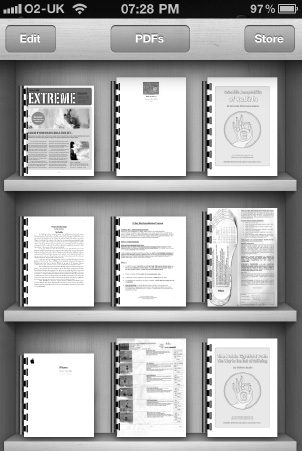
Figure 11–35. The PDF bookshelf is identical to the regular bookshelf. If you know how to navigate one, you know how to navigate the other.
Just like with the regular bookshelf, you can choose to view your PDFs as icons or in a list. In list view you will find you can sort your PDFs by titles, authors, categories, or bookshelf (the way they are arranged in icon view). List view also presents you with a search field so you can search your PDFs by name or author. The PDF bookshelf works just like the regular bookshelf in editing and deleting items as well. Simply tap the Edit button to rearrange or delete PDFs.
Navigating and Reading PDFs
To read a PDF, simply tap its cover. The PDF will fly forward and open. If it’s the first time you’ve opened the PDF, you’ll be on the first page. If you have opened the PDF before, it will open on the page you left off on.
You can view PDFs in portrait or landscape mode (see Figure 11–36).
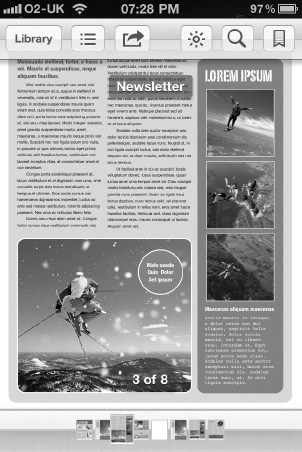
Figure 11–36. Viewing PDFs in iBooks
At the top of any PDFs page, no matter what orientation you are in, you’ll notice a menu that contains a series of buttons with the name of the PDF document in the center. These buttons will already be familiar to you because they are similar to the ones you see while reading an e-book.
- Library: Tapping this closes the PDF and takes you back to your PDF bookshelf. The next time you open the PDF, you’ll be taken to the page you were on when you left it.
- Contact Sheet: This button is signified by three dots, each with a line after them. Tap this button to be presented with a contact sheet—a series of thumbnails of all the pages in a PDF.
- Share: Tap this button to email or print the PDF.
- Brightness: This is the button that looks like the sun and changes the screen brightness while inside the iBooks app only.
- Search: The magnifying glass button allows you to search through a PDF’s text. It also has quick links to search Google and Wikipedia for your selected search term.
- Bookmark: Tap the bookmark ribbon to bookmark the current page you are on. Remember that iBooks uses bookmarks differently than traditional bookmarks are used in a paper book. Bookmarking a page in iBooks means you have effectively “dog-eared” the page. You can have multiple bookmarks in the same document. To remove a bookmark, tap the bookmark icon again.
- Page scrubber: This is the series of page icons that run along the bottom of a PDF’s page. Drag your finger across the thumbnails to quickly navigate through the PDF’s pages. You’ll see the page number of the page currently selected float overhead. You can also just tap any thumbnail to jump right to that page.
While reading, you can tap the center of a book’s page to show/hide the menu bar and page scrubber. While on a page, you can double-tap it to zoom in or, for more control, you can use a pinch gesture to zoom in or out. To navigate the pages of a PDF, simply swipe your finger to the left or right to move forward or backward one page. You can also tap the margins of a page to move forward or backward, or you can use the page scrubber at the bottom of the page. Alternately, you can scroll through large thumbnails representing all the pages in the PDF document by using the contact sheet.
Using the Contact Sheet
As you can now see, you already know how to use the PDF menu bar because it is so similar to an e-book’s menu bar. The only feature that is slightly different is the Table of Contents button, which has been replaced with a contact sheet button (though both icons are identical—three dots, each followed by a line).
Tap the contact sheet button, and you’ll see all the pages in the PDF document presented to you in large thumbnails that you can then scroll through with the swipe of your finger (Figure 11–37). This is useful when you are dealing with a very large document with lots of diagrams or images. It allows you to quickly search the PDF by eye. When you find the desired page, tap it, and you’ll be instantly taken to that page in the document.
You’ll also notice that some contact sheets might have a little red bookmark in their upper-right corner. This means you’ve bookmarked that page by tapping the bookmark button in the PDF menu bar (see Figure 11–36). To see only your bookmarked pages, tap the bookmark button in the upper-right corner of the contact sheet menu (see Figure 11–38). Any page without a bookmark will be hidden from view.

Figure 11–37. The contact sheet lets you see all the PDF’s pages as large thumbnails.
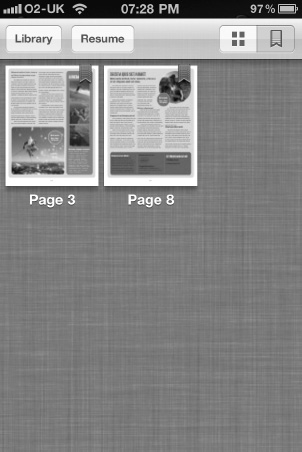
Figure 11–38. The contact sheet bookmarked pages view
To leave the contact sheet, you can tap the Library button to return to your PDF bookshelf, you can tap the Resume button to return to the page you were on when you navigated to the contact sheet, or you can tap any page to be taken to that page.
TIP: Want to create a PDF on your computer? On a Mac, if you can print it, you can PDF it. Simply choose what you want to turn into a PDF, and then from the File menu of the application you are in (Word or Firefox, and so on) choose Print. You’ll see a PDF button in the lower-left corner of the Print dialog box. Click it, and select Save as PDF from the drop-down menu. Name the PDF, click Save, and then drag it to your iTunes library. On your next sync, your new PDF will appear in iBooks. If you own a Windows computer, there are several options to turning documents into PDFs. You can find one such solution at www.primopdf.com. Google “print to PDF” to find the right solution for you.
Settings
There are a few external settings for the iBooks app. Navigate to Settings from the iPhone’s home screen, and select iBooks from the Apps header on the left side. You’ll see three settings (see Figure 11–39):
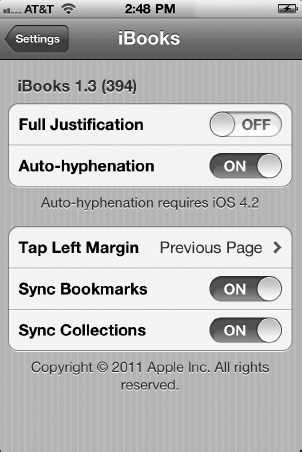
Figure 11–39. The iBooks app settings
Full Justification: When this set to ON, the text on a book’s page will fill the width of the page evenly. When full justification is set to OFF, the text on the right side of the page will be ragged (see Figure 11–40).
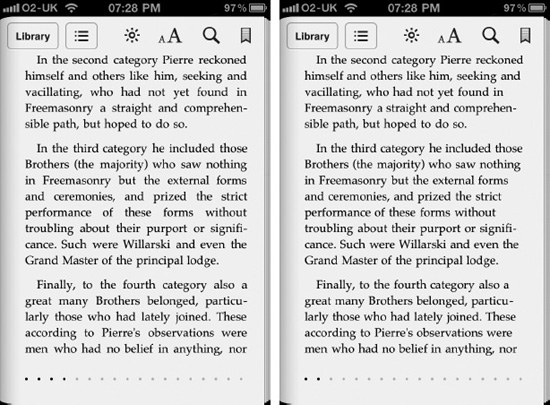
Figure 11–40. The same page with full justification on (left) and full justification off (right)
Auto-hypenation: When this is set to ON, iBooks will automatically hyphenate words, allowing more words to be displayed on a single page.
Tap Left Margin: You can set this to Previous Page or Next Page. If you set it to Next Page, tapping the left margin of a book will advance you to the next page in a book instead of taking you back one page. This setting might be nice while reading a book on the iPhone at odd angles, like in bed. With Next Page selected, the only way to go back one page in your book is by using the page scrubber bar at the bottom of the page.
Sync Bookmarks: When set to ON, this will sync a book’s bookmarks, highlights, and notes between devices. This is nice if you are using iBooks on an iPad and iPhone. When you create a note or bookmark in the book on one device, it will appear on the other.
Sync Collections: When set to ON, this will sync your iBooks collections. This is nice if you are using iBooks on an iPad and iPhone. When you create or modify a collection on one device, it will appear the exact same on the other.
Newsstand
Newsstand is a new feature of iOS 5 that allows you to view and manage all your magazine and newspaper subscriptions in one place. We call it a feature because Newsstand isn’t technically an app. It looks like an app, but it’s actually a folder that resides on your home screen and holds all your subscriptions.
You can see the Newsstand icon in Figure 11–41. The icon on the left shows you what Newstand looks like with no subscriptions. When you start download subscriptions they appear in the icon (right).
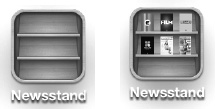
Figure 11–41. The Newsstand icon.
Unlike books in iBooks, magazines and newspapers in Newsstand aren’t actually text-based ePub files. Each magazine or newspaper subscription is its own individual app. What this means is that, unlike with books in iBooks, each magazine you download and view can look and act differently. Again, this is because all subscriptions are just individual apps, they all happen to just be contained in the dedicated Newsstand folder.
To open Newsstand, simply tap it, and your home screen splits to display the Newsstand shelf filled with all of your subscriptions (Figure 11–42).
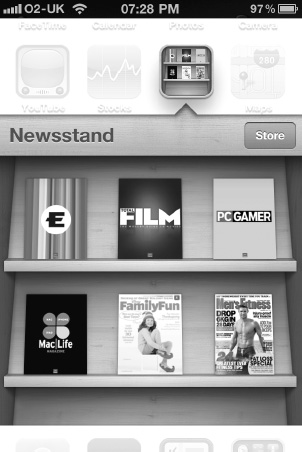
Figure 11–42. The Newsstand shelf
The Newsstand store is part of the App Store, and it’s where you’ll find all of the magazine and newspaper subscriptions you can buy. To quickly get to the Newsstand section of the App Store from your Newsstand shelf, tap the Store button, and you’ll be instantly taken there.
Once you have subscribed to the magazines or newspapers of your choice, the newest issues are automatically downloaded as they become available and are placed in your Newsstand. The cover of the most recent issue or the front page of the most recent newspaper is displayed at the top of that periodicals subscription stack on your Newsstand shelf.
To read an issue, tap it, and that periodical’s app will open as a normal app would.
Summary
In addition to doing so many other things, the iPhone is also a breakthrough e-book and PDF reader. iBooks, the all-in-one application that lets you buy books and read, search, and mark them up, is an elegant yet powerful tool for discovering new titles and taking your entire book library with you and Newstand allows you to subscribe to and automatically download the latest issues of your favorite magazines and newspapers. Here are a few key tips for you to carry away with you:
- You aren’t limited to buying books from the iBookstore. Many web sites sell books in the ePub format that you can download and sync to the iPhone. A great place to start is
www.gutenberg.org. Also, Googling free e-books will return a host of results of sites that let you download e-books for free. - iBooks has a powerful dictionary-lookup feature that gives you the definition of a word right on the screen.
- iBooks bookshelf has many views and a search function to help you navigate your books library.
- No audiobook? No problem. You can use the iPhone’s built-in VoiceOver technology to read any book out loud to you.
- Choose different colors for your notes and highlighting. Maybe use blue for passages you like and green for something you want to reference later. See all your bookmarks, notes, and highlights in one easy place (the Bookmarks page, of course!), and tap any one to instantly jump to it in the book.
- iBooks isn’t limited to reading e-books. It’s also a PDF reader. Now you can organize, view, and easily navigate all your PDFs—even while on the go!
- Newsstand automatically downloads your latest subscriptions in the background, so when you wake up in the morning the day’s paper will be there waiting for you.