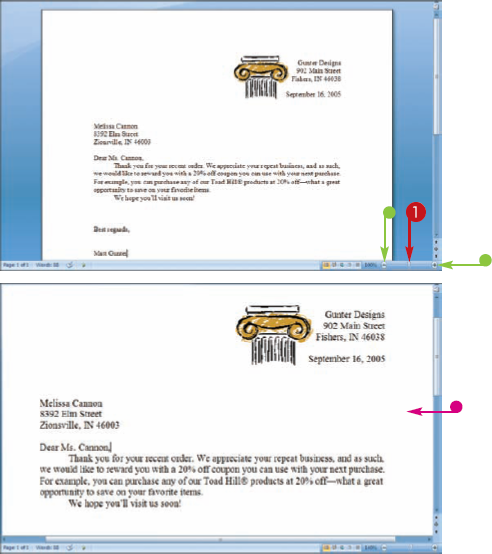
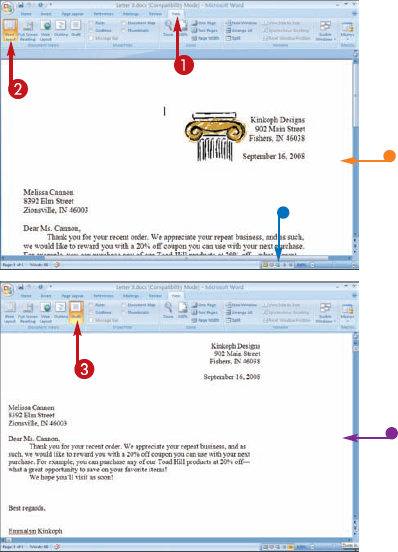
As you work with Word, you can choose several ways to view your documents. For example, you can use the Zoom tool to control the magnification of your document. You can also choose from five different layout views: Print Layout, Outline, Web Layout, Full Screen Reading Layout, and Draft.
Print Layout view shows margins, headers, and footers. Outline view shows the outline levels in a document. Web Layout view displays a Web page preview of your document. Full Screen Reading Layout view optimizes your document for easier reading. Draft view shows a draft version of your document.

Change Word's Views
USE THE ZOOM TOOL
SWITCH LAYOUT VIEWS


Word immediately displays the new view.


Tip
How do I move through a Word document?
You can use the scroll bars to move up and down a document page, or you can use the keyboard keys. For example, you can press the arrow keys to move up, down, left, and right in the document, or you can press the Page Up and Page Down keys to move up and down in the document.

What can I do in the Outline view?
If you create documents built on a structure such as headings, subheadings, and body text, you can use the Outline view to see and make changes to the document structure. When you activate the Outline view, the Outlining toolbar appears. You can use the buttons on the toolbar to change heading styles and levels to modify your document's structure.

When you launch Microsoft Word, a blank document appears, ready for you to start typing text. Whether you want to write a letter, a memo, or a report, you can use Word to quickly type and edit text for your project.
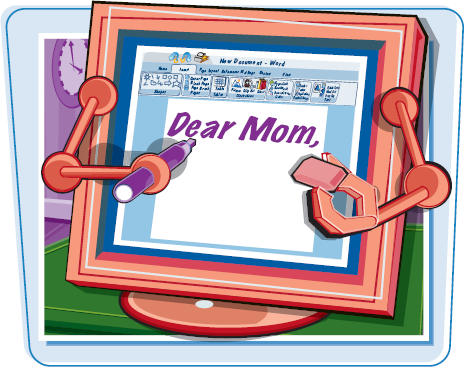
Type and Edit Text
TYPE Text
You can also delete selected text.
Note
See the next task to learn how to select characters, words, and paragraphs in Word.
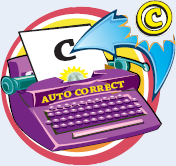
If you make a spelling mistake, Word's AutoCorrect feature either corrects the mistake or underlines it in red.
Tip
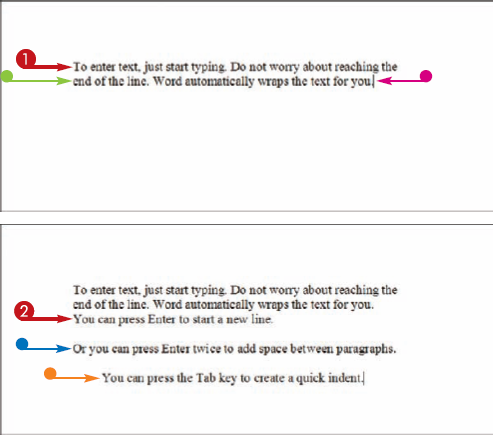
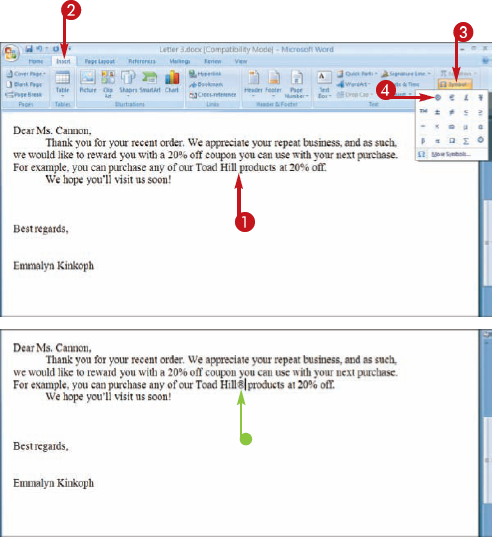
How do I add lines to my Word documents?
If you type three or more special characters and press
Character | Line Style |
|---|---|
* | Dotted line |
= | Double line |
~ | Wavy line |
# | Thick decorative line |
_ | Thick single line |

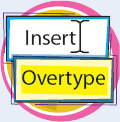
What is the difference between Insert and Overtype mode?
By default, Word is set to Insert mode, which means that anywhere you insert the cursor and start typing, the existing text moves over for any new text that you type. If you switch to Overtype mode, any existing text is overwritten with the new text. To use the Insert key to toggle between modes, you must set the option in the Word Options dialog box. Click the Office button, and then click the Word Options button. Click the Advanced tab and view the Editing options. Click the Use the Insert key to control Overtype mode check box (
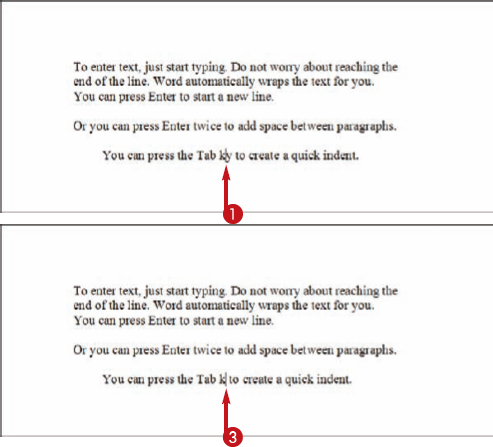
You can select text in your document to perform different tasks, such as editing and formatting. For example, you can select a word and make it italicized, or select a paragraph to remove it from the document. Word offers several different selection techniques that you can apply to select a single character, a word, a sentence, a paragraph, or the entire document.
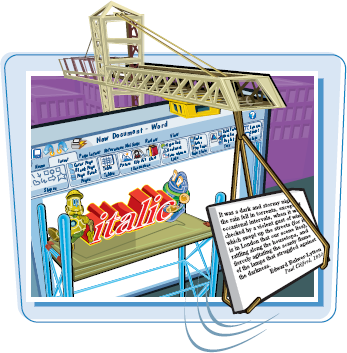
Select Text
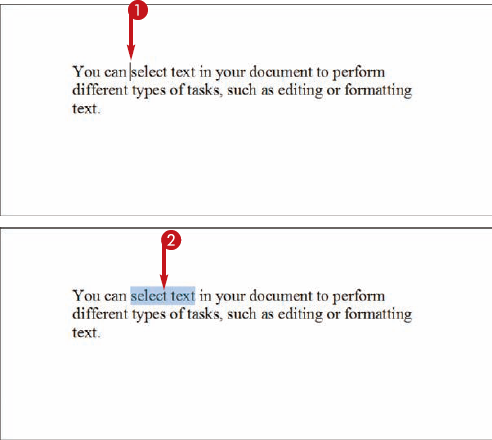
CLICK AND DRAG TO SELECT TEXT
Word selects any characters that you drag across.
You can use this technique to select characters, words, sentences, and paragraphs.
To deselect selected text, simply click anywhere outside the text or press any keyboard arrow key.
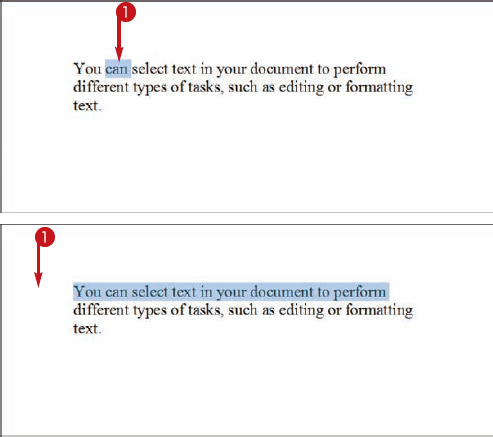
SELECT TEXT WITH A MOUSE CLICK
Word selects the text.
You can also triple-click anywhere inside a paragraph to select a paragraph.
SELECT TEXT USING THE MARGIN
Word selects the entire line of text.
You can double-click inside the left margin to select a paragraph.
You can triple-click inside the left margin to select all of the text in the document.
Tip
Can I also use my keyboard to select text?
Yes. You can use keyboard shortcuts to select text in your document. You can use
To select a single word, press
To select a paragraph, press
To select all of the text from the cursor onward, press
To select all of the text above the current cursor location, press
To select the entire document, press

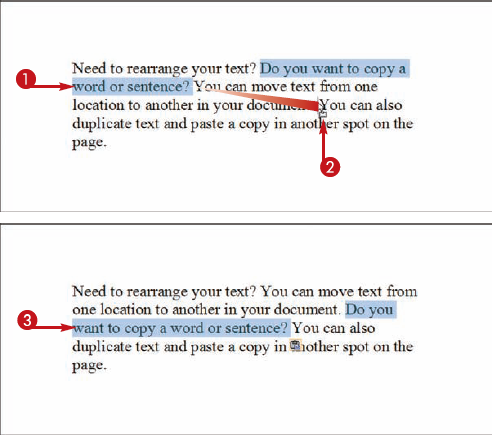
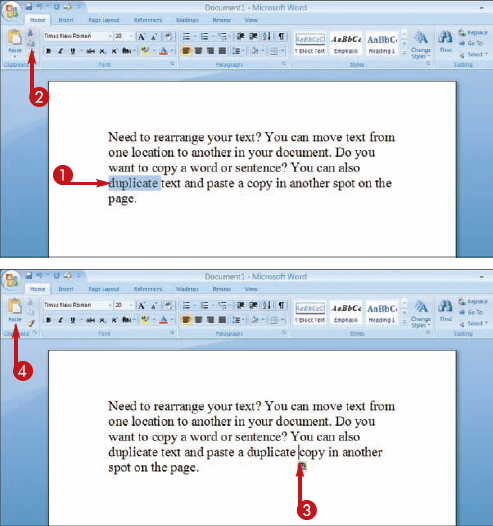
You can move text from one location to another in your document. You can also duplicate text and paste a copy in another spot on the page. You can use the Cut, Copy, and Paste commands to move or copy a single character, a word, or an entire paragraph.
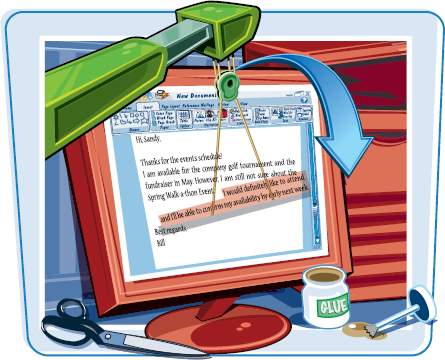
Move and Copy Text
Note
See the previous task to learn how to select text.
To copy the text, press

Word moves or copies the text.
MOVE OR COPY TEXT WITH BUTTONS

Word pastes the text in place.
Tip
How do I use the smart tag to paste text?
As soon as you finish pasting text into place, Word displays a smart tag icon (

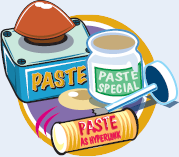
What does the Paste button do?
You can click the Paste button on the Ribbon to reveal the three Paste commands: Paste, Paste Special, and Paste as Hyperlink. The Paste command simply pastes the data, while the Paste Special command opens the Paste Special dialog box, where you can specify a format for the pasted data. The Paste as Hyperlink command allows you to turn the pasted data into a link to the original data.
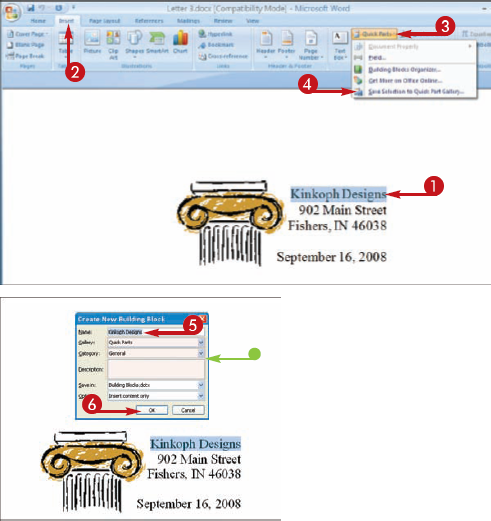
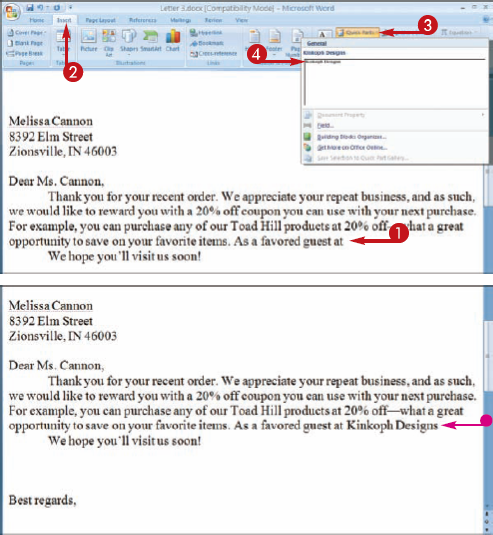
You can speed up your text entry tasks by using the new Quick Parts tool. For example, if you repeatedly type the same company name in your documents, then you can add the name to the list of Quick Parts entries. The next time you begin to type the name, you can reuse the entry from the Quick Parts Gallery.
Quick Parts are a part of Word's Building Blocks — preformatted content that you can add to your documents. Word installs with a wide variety of preset phrases that you can use, or you can create your own.
Insert Quick Parts
ADD A QUICK PARTS ENTRY
Note
See the "Select Text" task, earlier in this chapter, to learn how to select text.
The Create New Building Block dialog box appears.


Tip
Where can I find Word's preset building blocks?
You can insert building blocks from the Building Blocks Organizer. The dialog box keeps a full list of entries, including watermarks, pull quotes, and more. Building Blocks and Quick Parts are organized into galleries and categories. To display the dialog box, click the Quick Parts button on the Insert tab, and then click Building Blocks Organizer. To insert an entry, simply click it and click the Insert button.

How do I remove a Quick Parts entry?
You can remove a Quick Parts entry that you no longer need. Click the Insert tab, click Quick Parts, and then click Building Blocks Organizer to open the Building Blocks Organizer dialog box. Next, scroll through the list and select the entry that you want to remove. Click Delete to remove the entry, and then click OK to close the dialog box.

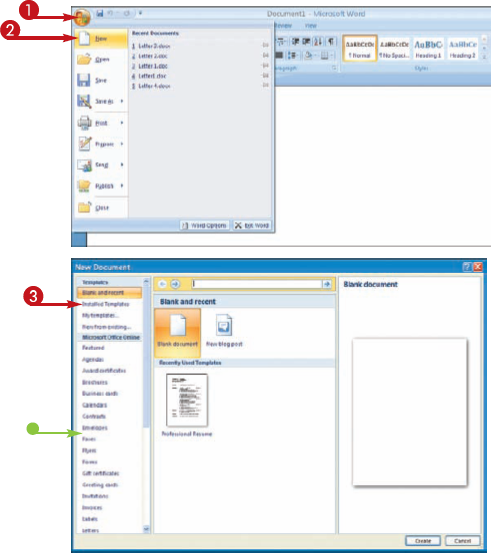
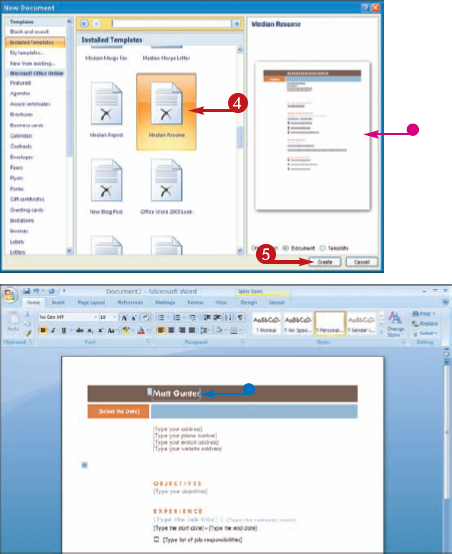
You can use Word templates to speed up your document creation. Templates are ready-made documents that you can use to quickly assemble memos, letters, faxes, and more. Templates contain preformatted placeholder text. All you need to do is replace the placeholder text with your own.
Word installs with a variety of templates that are stored in the Templates folder, a subfolder found in the Microsoft Office folder on your computer. You can also download additional templates from the Microsoft Office Web site.
The New Document dialog box appears.

Word applies the template to a new document.
When you finish filling in the template, you can save the file just like any other Word document.
Tip
Can I create a custom template in Word?
Yes. You can turn any template into a customized template by saving the document as a template file type, which uses the .dot file extension. For example, you might want to save a memo with your department name and contact information as a template and reuse it for future memos. The easiest way to create a custom template is to base it on an existing template. In the New Document dialog box, click a template, and then click the Template option (
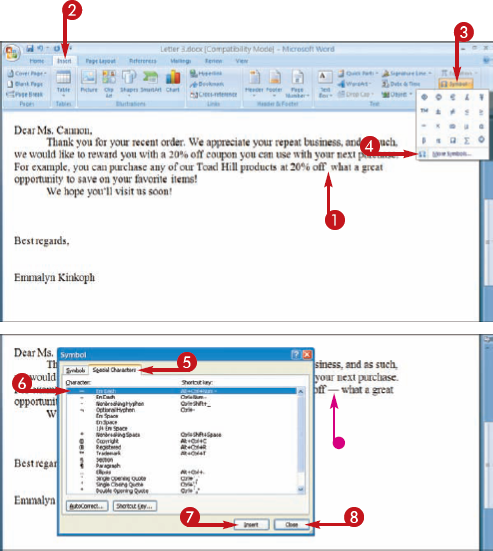
From time to time, you might need to insert a special symbol or character into your Word document, such as a trademark symbol or an em-dash character. The Symbol palette displays several common symbols and recently used symbols that you can quickly reinsert. You can also use the Symbol dialog box to access a wide range of special characters and symbols, including mathematical and Greek symbols, architectural symbols, and more.

Insert Symbols
INSERT A SYMBOL
Tip
How do I change the display of listed symbols in the Symbols tab in the Symbol dialog box?
In the Symbol dialog box, you can click the Font

When I type some special characters on the keyboard, Word inserts a symbol for me. Why does this happen?
Word's AutoCorrect feature automatically inserts common symbols for certain keyboard combinations. For example, if you type (c), AutoCorrect immediately changes it to the copyright symbol, ©. To undo the occurrence, simply click the Undo button (
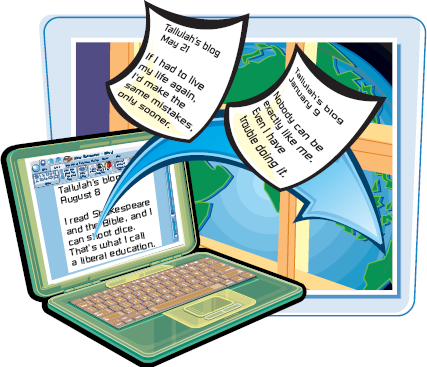
You can use Word to help you create a document to post on your online blog. When you create a blog document, Word changes the Ribbon to display only the tools that are associated with creating a blog post document. You can take advantage of Word's many proofing and formatting tools to help you create your HTML page.
Create a Blog Post
The New Document dialog box appears.
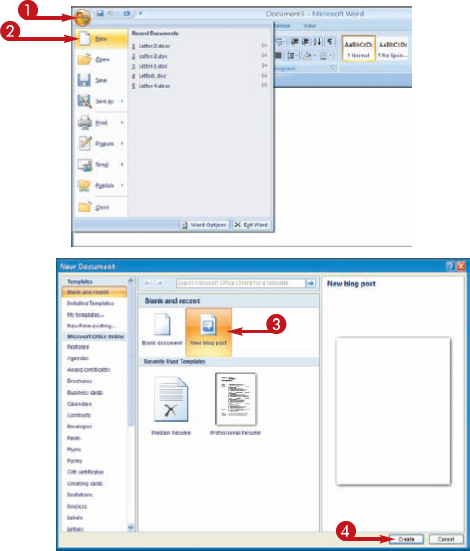
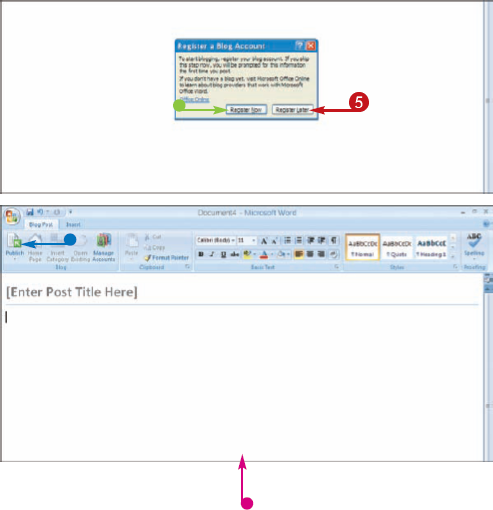
The first time that you use the blog feature, Word prompts you to register a blog account.
Tip
How do I edit my blog accounts?
You can click the Manage Accounts button on the Blog Post tab when viewing a blog page in Word. This opens the Blog Accounts dialog box where you can edit an existing account, add a new account, or delete an account that you no longer use.

Can I turn an existing Word document into a blog post?
Yes. If you create a text document first and then decide to use it as your blog post document, you can easily turn it into a blog page for publishing on the Web. To do so, click the Office button, click Publish, and then click Blog. Word immediately turns it into a blog file, and you can publish it to your online blog account.