You can use Word's themes to quickly add a professional look to your documents. Themes are predesigned sets of formatting that include backgrounds, color schemes, and fonts. Because themes are shared among the Office programs, you can use a theme in your Word document to match the same theme in worksheets that you create with Excel, or slides that you create in PowerPoint.
If you assign Word's styles, such as headings and subtitles, you can see the difference that an applied theme can make. The theme is even more pronounced when you assign a background color to a page.
Assign a Theme
APPLY A THEME


The Save Current Theme dialog box appears.


Word saves the theme and adds it to the list of available themes.

Tip
How do I apply a background color to my document?
To add a background color, click the Page Layout tab on the Ribbon and then click the Page Color button in the Page Background group of controls. When you click a color from the palette, Word immediately assigns it to the page.

Where can I find more themes to use with my Word documents?
You can visit the Office Web site to look for more themes that you can download onto your computer. Click the Page Layout tab, click Themes, and then click Search Office Online. If you are connected to the Internet, your browser opens and displays your default Web page to the Office Web site. You can then download any themes that you find and add them to the Document Themes folder, which is the default folder for all of the Office themes.

You can add borders to your document text to add emphasis or make the document aesthetically appealing. For example, you can add a border to a paragraph to bring attention to the text. You can also add a border to the entire document page.
You should not add too many effects, such as borders, to your document because it will become difficult to read.

Add Borders
ADD A BORDER
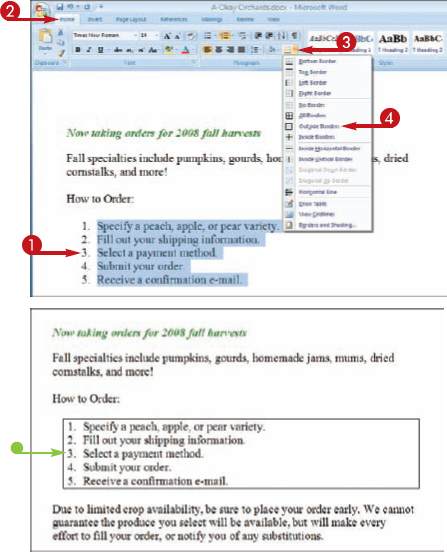
ADD A PAGE BORDER

Tip
How do I add shading to my text instead of a border?
To add shading behind a block of text, you can use the Shading tool (

How do I create a custom border?
You can use the Custom setting in the Borders and Shading dialog box to create a custom border. For example, you might make each border line a different color or line thickness, or you might apply two different line styles to a border. To create a custom border, click the Borders button (
You can create columns in Word to present your text in a format similar to a newspaper or magazine. For example, if you are creating a brochure or newsletter, you can use columns to make text flow from one block to the next.

Create Columns
CREATE QUICK COLUMNS
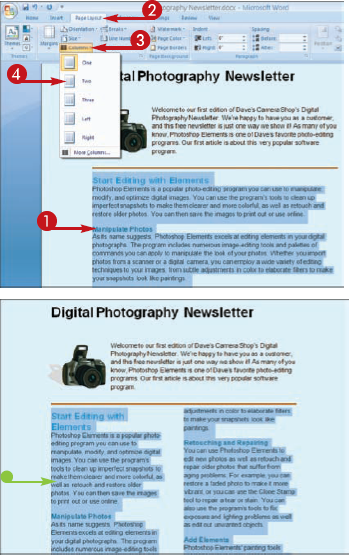
The Columns dialog box appears.


Word applies the column format to the selected text.

Tip
How do I wrap column text around a picture?
You can control the text wrap for any object that you place in a Word document. To do so, right-click the picture or other object that you want to wrap, click the Text Wrapping command, and then click the type of wrapping that you want to apply. For example, Tight wrapping allows column text to flow neatly around the image, regardless of where you move the image in the column area. You can also control text wrapping for a selected object by using the Text Wrapping button on the Format tab.

How do I create a break within a column?
You can add a column break by first clicking where you want the break to occur and then pressing

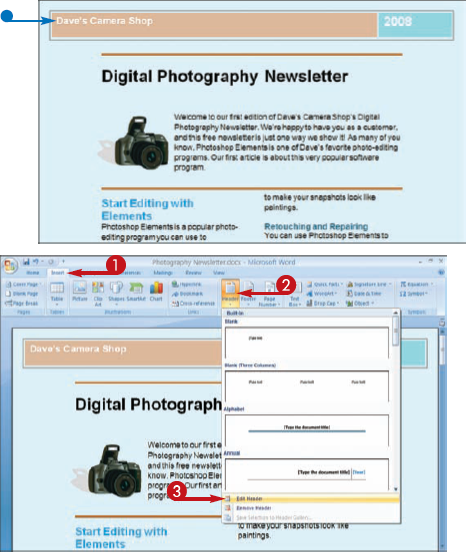
You can use headers and footers to add text that appears at the top or bottom of every page. Headers and footers are useful for ensuring that every page prints with a page number, document title, author name, or date. Header text appears at the very top of the page outside the text margin. Footers appear at the very bottom of the page.
Headers and footers are built with fields that hold places for information that updates, such as page numbers or dates.

Add Headers and Footers
ADD A HEADER OR FOOTER
This example creates header text.

Word closes the Header and Footer tools.
EDIT A HEADER OR FOOTER
Word displays the Header and Footer tools, and you can now edit the header or footer text.
Tip
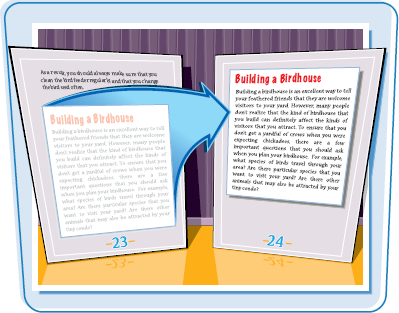
Can I remove a header or footer from the first page and keep it for the remaining pages?
Yes. To do so, click the Header or Footer button on the Insert tab, and then click Edit Header or Edit Footer. Next, click the Different First Page check box in the Options group (

How do I remove a header or footer that I no longer want?
Click the Insert tab on the Ribbon and click either the Header or Footer button. Then click the Remove Header or Remove Footer command at the bottom of the menu. Word immediately removes the header or footer from your document.

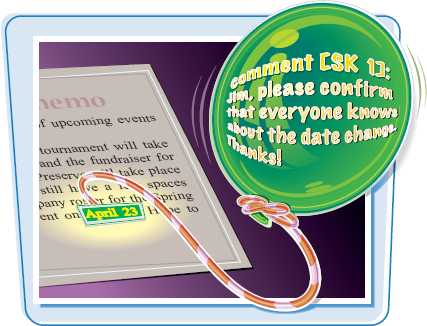
You can add comments to your documents to make a note to yourself about a particular section or task, or as a note for other users to see. For example, if you share your documents with other users, you can use comments to leave feedback about the text without typing directly in the document. Word displays comments in a balloon or in the Reviewing pane.
Comments are especially important if you and your colleagues use Word's tracking and revision features. To learn more about tracking and reviewing document changes, see Chapter 8.
Insert Comments
ADD A COMMENT
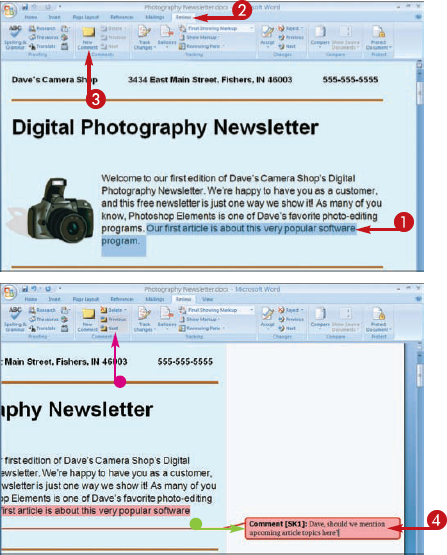
VIEW COMMENTS IN THE REVIEWING PANE
You can click the Reviewing Pane button again to hide the pane.
DELETE A COMMENT
You can also right-click over a comment and click Delete.
Word deletes the comment.

Tip
How do I change the name used in my comments?
Click the Review tab on the Ribbon, and then click the Track Changes button. Click the Change User Name command to display the Word Options dialog box. Click to display the Personalize tab, click in the User Name text box, and then type a new name for your comments. Click OK to apply the change.

How do I respond to a comment?
You can respond to a comment by typing a new comment adjacent to the existing comment. Navigate to the comment using the Previous or Next buttons on the Review tab, and then click the New Comment button. Word inserts a new comment.

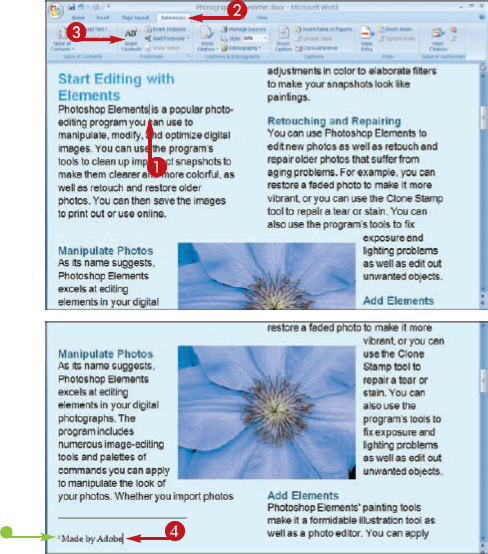
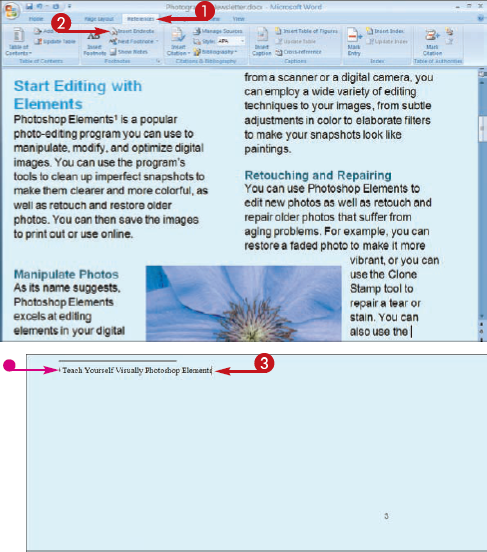
You can add footnotes and endnotes to your document to include additional information. Footnotes and endnotes help identify sources or references to other materials. Footnotes appear at the bottom of a page, while endnotes appear at the end of the document.
Insert Footnotes and Endnotes
INSERT A FOOTNOTE
You can repeat these steps to add more footnotes.
INSERT AN ENDNOTE
To return to the reference mark in the document, you can double-click the endnote number.
Tip
How can I reset the footnote number in my document?
If you need to reset the number, perhaps for a new chapter in the document, you can open the Footnote and Endnote dialog box and specify a start number. Click the References tab on the Ribbon and click the Footnote & Endnote Dialog button (

What other referencing tools can I use in Word?
The References tab offers several other referencing tools that you can apply to your documents, such as indexing features, citation and bibliography tools, captioning tools, and cross-reference features. For example, you can use the Insert Caption button to set a caption for a figure or table in your document. See the Word Help files to learn more about the other available referencing tools.

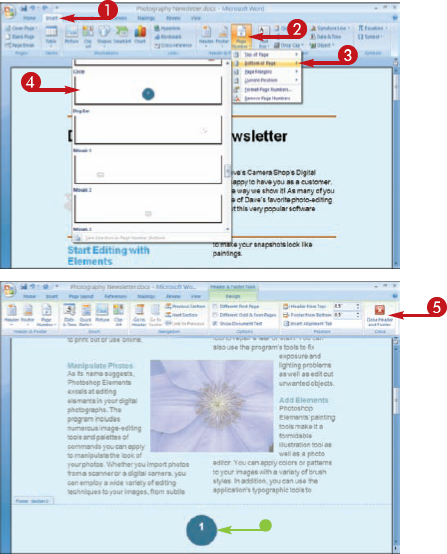
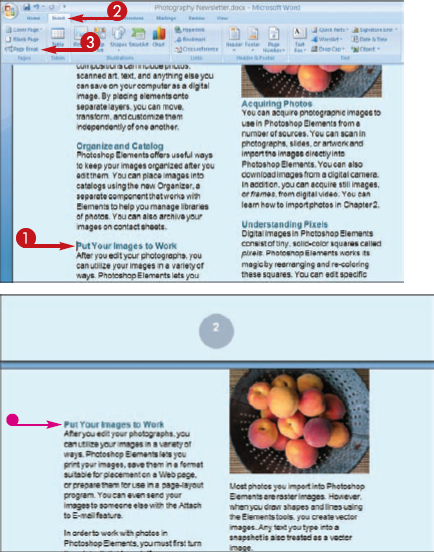
You can add page numbers and page breaks to your documents to make the pages more manageable. For example, adding page numbers to longer documents can help you keep the pages in order after printing. Adding page breaks can help you control which text appears on which page of the document. Page numbers are added to the header or footer area of the document.
Insert Page Numbers and Page Breaks
INSERT PAGE NUMBERS
Note
See the "Add Headers and Footers" task to learn more.
Tip
Is there a faster way to insert a page break?
Yes. You can use keyboard shortcuts to quickly insert a page break as you type in your document. You can insert a manual page break by pressing
Can I change the number style that is used in my document's page numbers?
Yes. Click the Page Number button on the Insert tab, and then click Format Page Numbers. This opens the Page Number Format dialog box. You can change the number style to Roman numerals, alphabetical numbering, and more. You can also include chapter numbers with your page numbers.
You can add a watermark to your document pages to appear faintly behind the text of your printed documents. For example, you might add a watermark to your memo that reads CONFIDENTIAL or URGENT. Watermarks can be text or pictures.
Add a Watermark
APPLY A WATERMARK
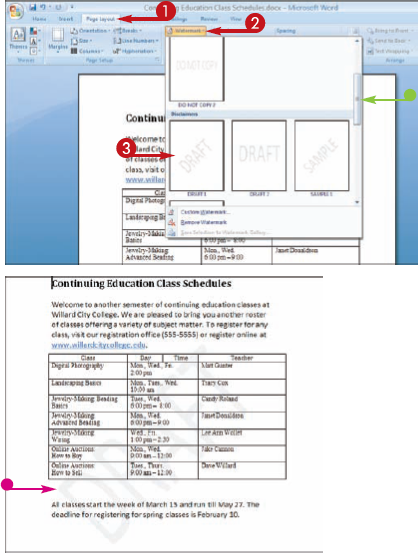
CREATE A CUSTOM WATERMARK
The Printed Watermark dialog box appears.

Tip
How do I remove a watermark that I no longer want?
Click the Page Layout tab on the Ribbon and then click the Watermark button. Click Remove Watermark. Word removes the watermark from the document.

How do I assign a picture as a watermark?
To set a picture watermark instead of a text watermark, click the Picture watermark option (
