You can use the Access Form Wizard to help you create and customize a form for entering records into your database. The wizard guides you through each of the necessary steps for creating a form. You can choose exactly which fields the form contains.

Create a Form Using a Wizard


The Form Wizard opens.


Depending on the database template that you used to create the file, you may see one or several tables from which to choose.


Tip
Can I select fields from different tables for my form?
Yes. If you have more than one table in your database, you can choose fields from the different tables to use in a single form. Simply select a table from the Tables/Queries drop-down list in Step 4, and choose a different table.

Is there a way that I can create a blank form?
Yes. You can click the Blank Form button on the Create tab to open a blank form and a field list containing all of the fields from all of the tables in the database. You can populate the form with as many fields as you need. You can also create a new form based on the fields in a selected table. See the next task, "Create a Quick Form," for more information.

When creating a form, you can choose a layout and a design style, and assign a unique name to the form. After you create a new form with the wizard, you can begin entering records using the form.


Access adds the form name to the list of form objects in the database window.
Note
See the "Add a Record" task to learn how to use a form to add data to your database.

Tip
What kinds of layouts are available for my form?
You can choose from four different layouts. The table below describes the appearance of each layout format.
Format | Appearance |
|---|---|
Columnar | Sets up your form fields in a column |
Tabular | Presents your fields much like a table |
Datasheet | Makes the form look just like a datasheet |
Justified | Presents your fields so that they line up with both the left and right sides of the form |

You can create an instant form based on any table in your database and use it to enter data into the database. Access inserts fields into the form for each field in the selected table.

Create a Quick Form

Access saves the form.

Tip
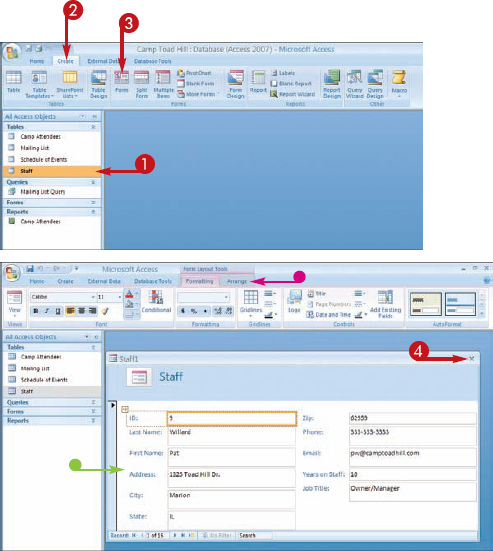
How do I access my forms?
The Navigation pane keeps a list of all of the database objects in your file. To change the view of the list, click the drop-down arrow (
How do I delete a form that I no longer need?
To remove a form, display the forms on the Navigation pane and click the one that you want to delete. You can then press

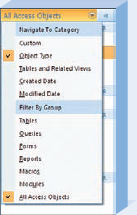
You can use forms to quickly add records to your Access databases. Forms present your record fields in an easy-to-read format. The form window presents each field in your table as a box that you can use to enter data.

Add a Record
Access moves to the next field in the form.
Access displays another blank record, ready for data.
Note
See the task, "Navigate Records," to learn how to move among records using a form.

Tip
Are there other ways to insert a new record?
Yes. You can click the New button on the Home tab of the Ribbon to open a new, blank record in your form. The Home tab features a group of tools that you can use to work with records in your form. You can also click the New Record button (

How do I edit a record?
You can reopen the form, navigate to the record that you want to change, and make your edits directly to the form data. When you save your changes, Access automatically updates the data in your table. To learn how to display a particular record in a form, see the next task, "Navigate Records."

You can navigate your table records using a form. The Form window includes a navigation bar for viewing different records in your database. You may find it easier to read a record using a form rather than reading it from a large table containing other records.

Navigate Records
Note
See the "Create a Form Using a Wizard" task, earlier in this chapter, to learn how to build a form.

You can remove records that you no longer need by using a form. Removing old records can reduce the overall file size of your database and make it easier to manage. When you delete a record, all of the data within its fields is permanently removed.

Delete a Record
Access permanently removes the record.

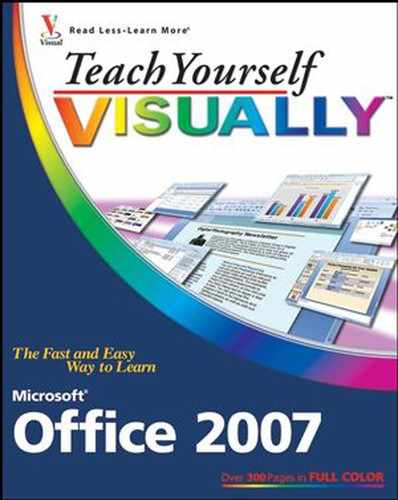
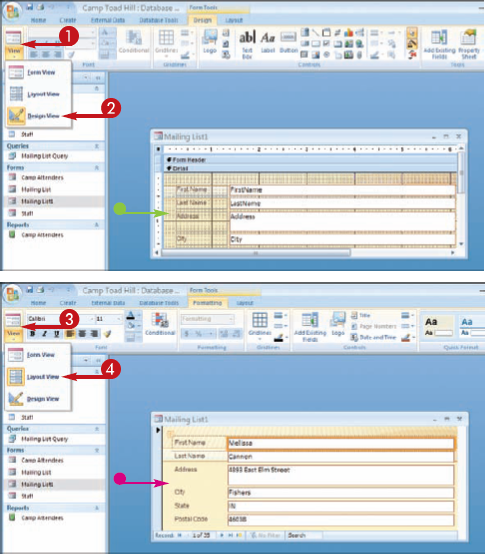
You can customize your form using Design view and Layout view. In Design view, each object appears as a separate, editable element in the form. For example, you can edit both the field box that contains the data as well as the field label that identifies the data. In Layout view, you can rearrange the form controls and adjust their sizes directly on the form. You can use the View button to toggle between views.

To return to Form view, you can click the View button and then click Form View.
You can move a field to another location on your form. When you select a field for editing, the field label is also selected, making it easy to move both the field and the label at the same time.
Although you can move a field in Design view or in Layout view, you might find it easier to make changes to your form in Layout view. This is because Layout view is more intuitive to use.

Move a Field
Note
See the previous task, "Change Form Views," to learn how to switch to Layout view.
To move both the field and the associated label, press and hold

The

Access repositions the field.

You can delete a field that you no longer need in a form. When you remove a field, you need to remove both the data box and the field label. Removing a form field does not remove the field from the table upon which the form is originally based.

Delete a Field
Note
See the "Change Form Views" task, earlier in this chapter, to learn how to switch to Layout view.
To move both the field and the associated label, press and hold


You can add new fields to your form by selecting from a list of available table fields. After you add a field, you can place it where you want in the form.
See the "Move a Field" task, earlier in this chapter, to learn how to reposition fields in Layout view.

Add a Field
Note
See the "Change Form Views" task, earlier in this chapter, to learn how to switch to Layout view.
The


You can reposition the field, if needed.
Note
See the "Move a Field" task, earlier in this chapter, to learn how to move a field in Layout view.

You can add formatting to your fields and field labels by using the formatting buttons on the Formatting tab on the Ribbon. For example, you can change the font, size, style, alignment, or color of the text. The Formatting tab appears only when you view the form in Layout view.
Note
See the "Change Form Views" task to learn how to switch to Layout view.
Access applies the formatting to the field.

You can change the design of a form to give it a different appearance. You can use the Quick Format feature to choose another design theme. This feature includes a variety of preset designs, fonts, and colors that you can apply to the form.

Apply a Quick Format
Note
See the "Change Form Views" task to learn how to switch to Layout view.
The full palette of formats appears.
