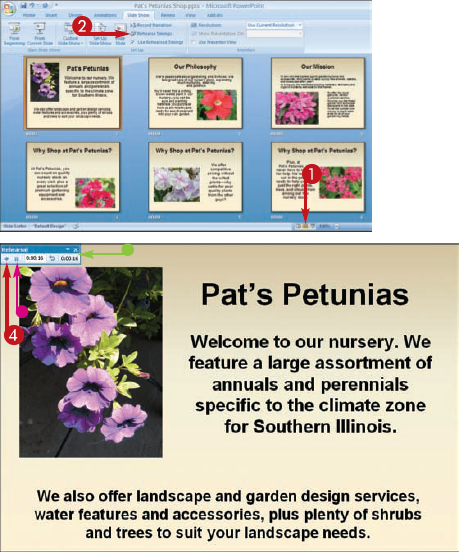
You can time exactly how long each slide displays during a presentation using PowerPoint's Rehearse Timings feature. When rehearsing a presentation, you should rehearse what you want to say during each slide, as well as allow the audience time to read the entire content of each slide. After you record the timings, PowerPoint saves them.
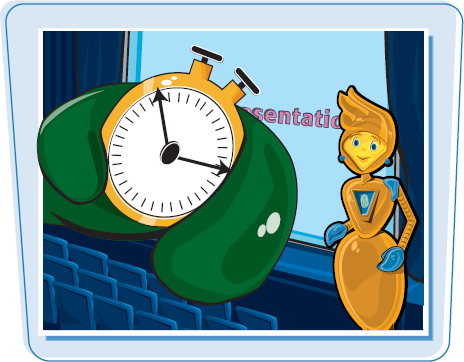
Rehearse a Slide Show


If you need to restart the timing, you can click


PowerPoint displays the next slide.


Tip
Can I set up preferences for a presentation?
Yes. You can use the Set Up Show dialog box to specify a show type, looping options, and more. Follow these steps:
The Set Up Show dialog box appears.

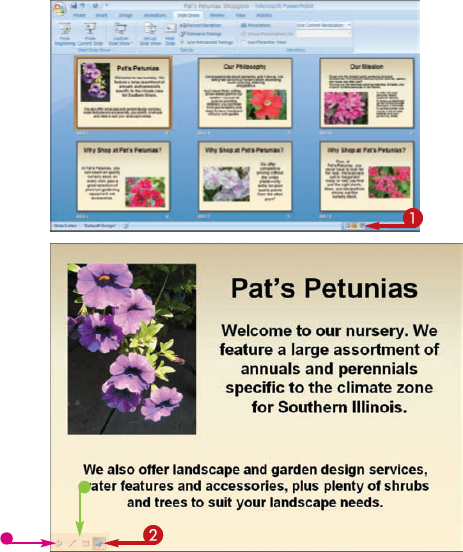
You can view a presentation using PowerPoint's Slide Show view. Slide Show view displays full-screen images of your slides. You can advance each slide manually, or instruct PowerPoint to advance the slides for you.
Run a Slide Show
Note
To learn more about PowerPoint views, see Chapter 14.
PowerPoint switches to Slide Show mode and displays the first slide.

Note
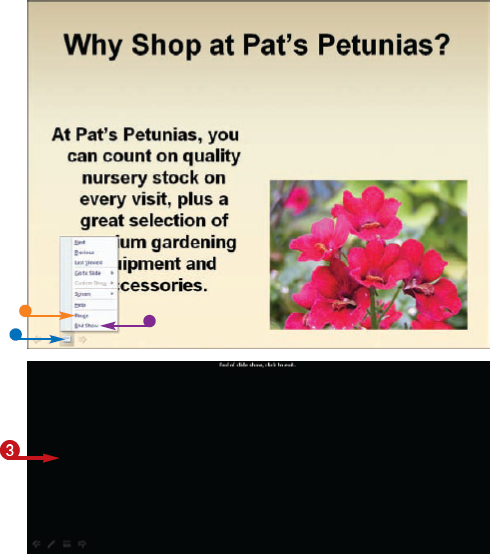
You can end a slide show at any time by pressing

PowerPoint closes the presentation.
Tip
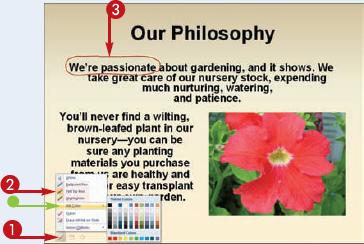
Can I draw on my slides as I present the show?
Yes. You can use PowerPoint's pointer options to draw directly on the screen using the mouse. You can choose from several pen tools and colors. Follow these steps:
To erase your markings, press

At the end of the slide show, PowerPoint asks if you want to save any of your markings.
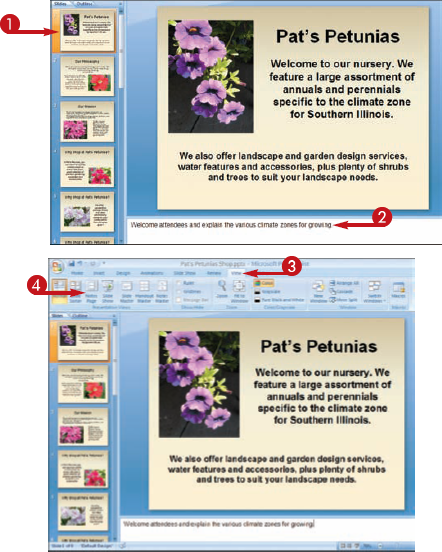
You can create speaker notes for your presentation. Speaker notes, also called notes pages, are notations that you add to a slide and that you can print out and use to help you give a presentation. You can also use speaker notes as handouts for your presentation. When creating notes pages, PowerPoint includes any note text that you add, as well as a small picture of the actual slide.
Create Speaker Notes
Note
To learn more about PowerPoint views, see Chapter 14.
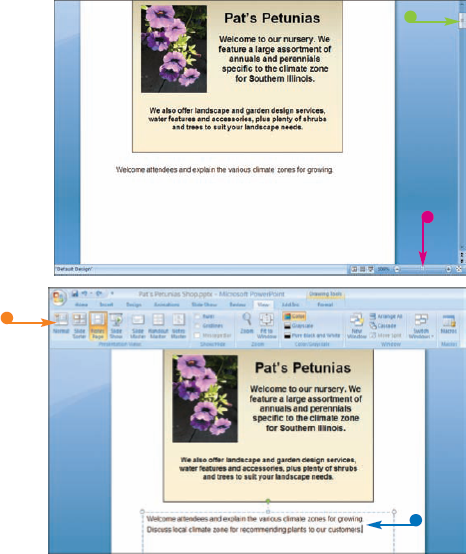
You can repeat Step 2 for other slides to which you want to add notes.
The Notes Page view opens and displays the first page in your slide show.
Tip
How do I print my notes?
To print your speaker notes, follow these steps:
The Print dialog box appears.
PowerPoint prints the notes.
You can also print out your presentation as single slides or as handouts, which print multiple slides on a printed page. To learn more about printing Office files, see Chapter 2.

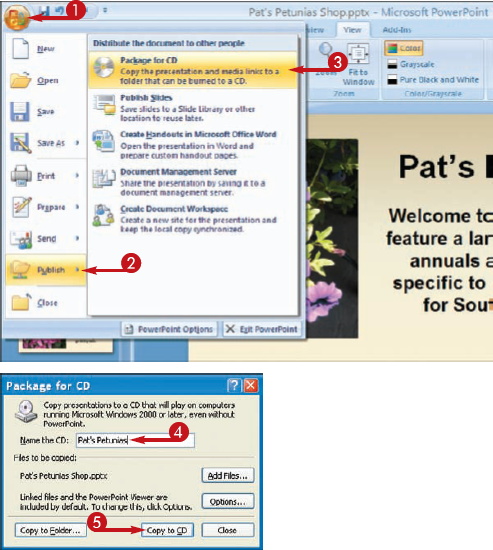
PowerPoint can help you save your slide show to a CD to take with you for presentations on the go. With the Package for CD feature, PowerPoint bundles the presentation along with all of the necessary clip art, multimedia elements, and other items needed to run your show.
Package Your Presentation on a CD
The Package for CD dialog box appears.
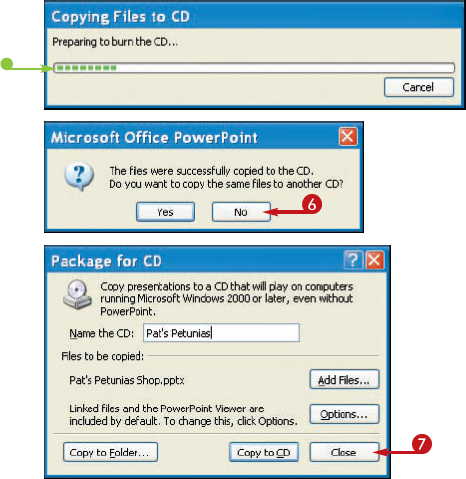
Depending on the size of the presentation, the copying process can take a few minutes.
When the copying process is complete, a dialog box appears.
If you want to continue packing additional copies of the presentation, you can click Yes.

The Package for CD dialog box closes.
Tip
What if I want to give the presentation to someone who does not have PowerPoint?
The Package for CD feature automatically includes a PowerPoint Viewer with the file in case the recipient does not have PowerPoint installed on his computer. The PowerPoint Viewer allows users to view slide shows without all of the extra PowerPoint tools and features found in the full program.

How do I view information about a presentation file?
By default, when you save a presentation, PowerPoint stores information about the author as well as the date the file is created. To view the information, click the Office button, click Finish, and then click Properties. This opens the Document Information panel, which you can use to add more information, such as company name, subject, comments, and more. To view more information, click the Property Views and Options button and then click Advanced to open the File Properties dialog box to view additional properties.