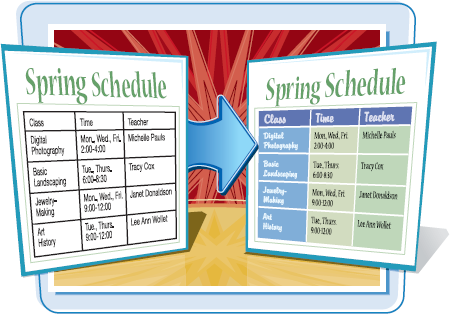
You can use tables to present data in an organized fashion. For example, you can add a table to your document to display a list of items or a roster of classes. Tables are built with columns and rows that intersect to form cells. You can insert all types of data in table cells, including text and graphics.
After you create a table, you can use
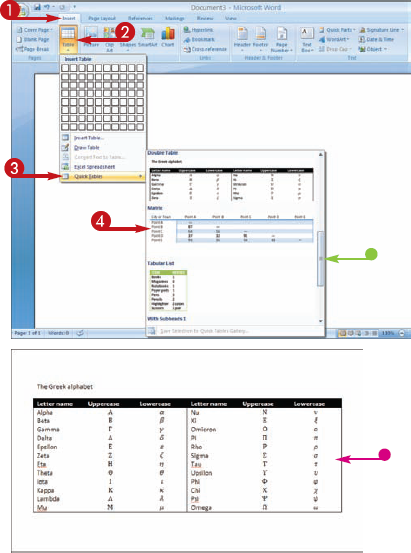
Insert a Table
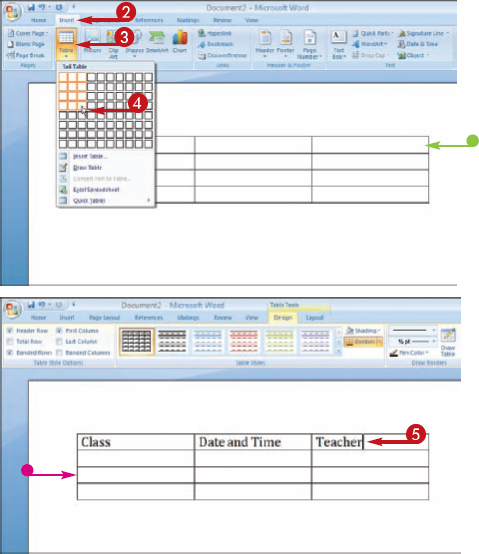
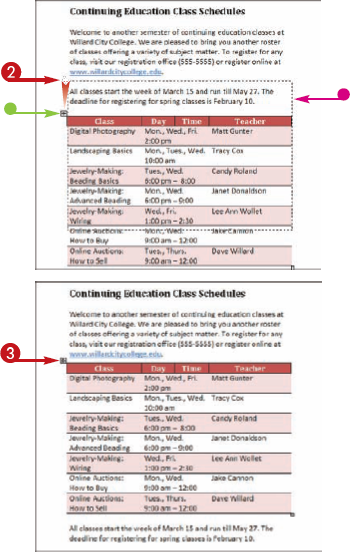
Word installs with a selection of preset tables that you can use in your documents. For example, you can insert a tabular-list style table, complete with subheadings, or a double table.
Insert a Quick Table


You can click inside a cell and replace the data with your own text.
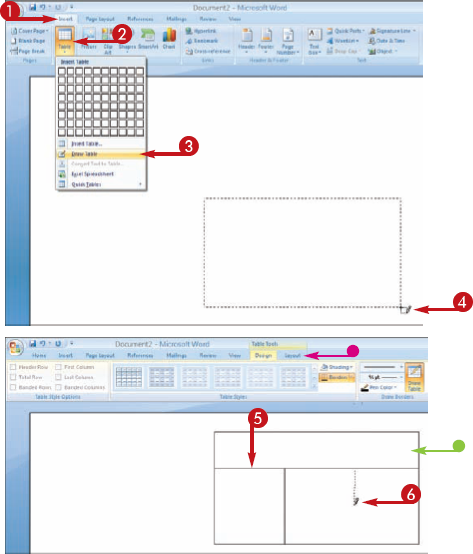
You can create a customized table by drawing the table size and controlling how the rows and columns appear in your table. Using the Table and Borders toolbar buttons, you can customize the line style, line thickness, and line color of the borders that you draw for your table cells.
Draw a Table
Note
You can find more drawing tools on the Design tab that appears after you create a table.
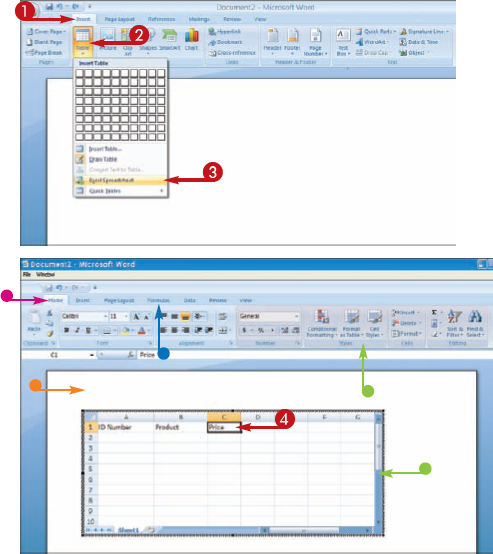
If Excel is installed on your computer, you can insert an Excel spreadsheet into your Word document. When adding an Excel spreadsheet, you can use Excel's features to add table data, including formulas and cell formatting controls.

Insert an Excel Spreadsheet
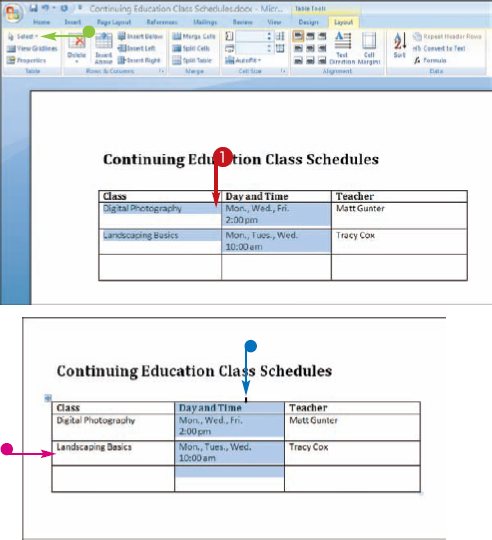
You can select table cells, rows, and columns in a table to perform editing tasks and apply formatting to all of the selected areas of the table. For example, you might select an entire column to apply bold formatting to all of the text in that column.
Select Table Cells
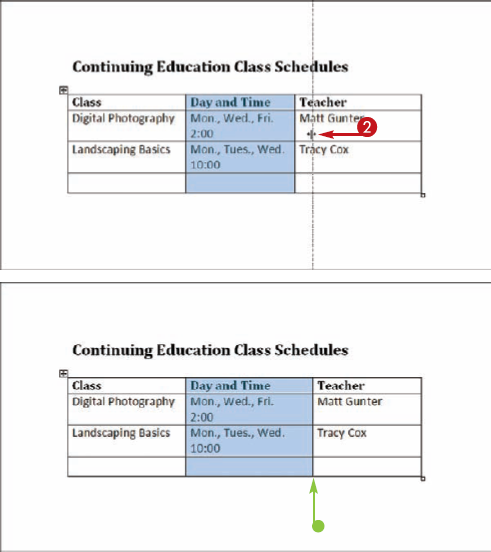
After you create a table, you can control the sizing of the inner cells by adjusting the column width or row height. For example, you may need to make a cell wider to accommodate a long line of text, or you may need to make a cell large enough in depth to hold a particular graphic or chart.

Adjust the Column Width or Row Height
The

If you drag the top or bottom border of a cell, the row height adjusts as you drag.
If you drag the left or right border of a cell, the column width adjusts as you drag.
Word adjusts the column width or row height.
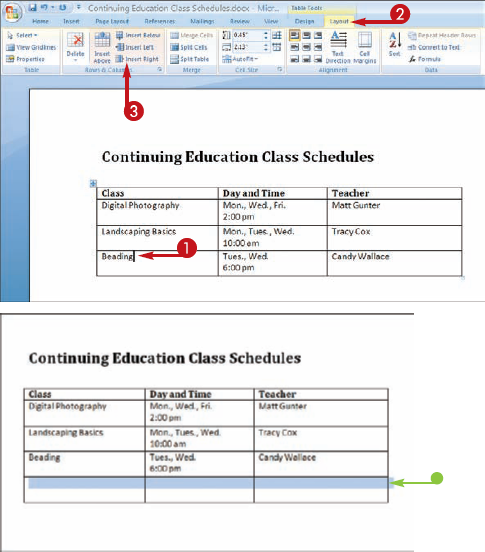
You can add columns and rows to your Word tables to add more data. For example, you can insert a row to add another item to a list, or insert a column to add another header to a table.
Add Columns and Rows
If you select more than one row or column, Word duplicates the number when you activate the Insert command.
You can click Insert Above or Insert Below to add new rows.
You can click Insert Left or Insert Right to add new columns.
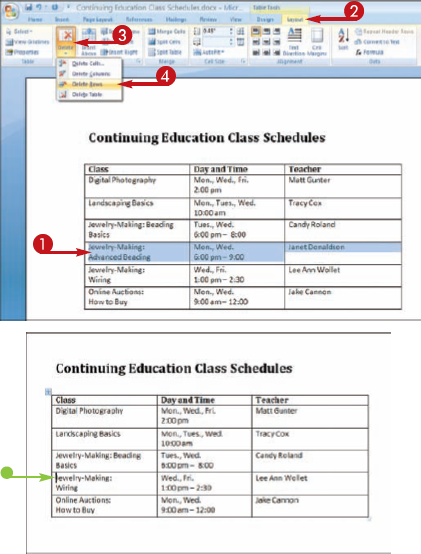
You can remove a column or row that you no longer need in your table. When you remove a column or row, Word restructures the remaining cells to fill the void.
You can also right-click the column or row that you want to remove, and then click the Delete command.
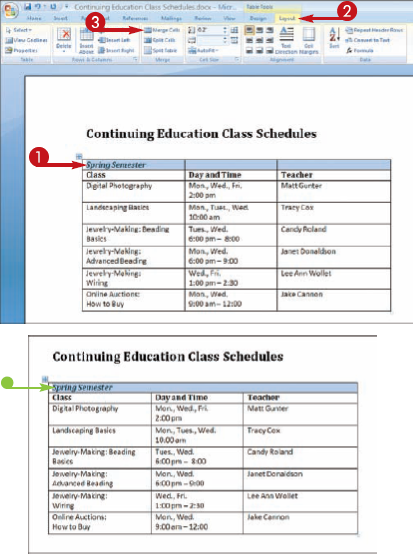
You can combine two or more table cells to create a larger cell. For example, you might merge cells to create a title across the top of your table, or you may merge two interior cells to create one large cell for a graphic or chart.
Merge Table Cells
Note
See the "Select Table Cells" task, earlier in this chapter, to learn how to select cells.
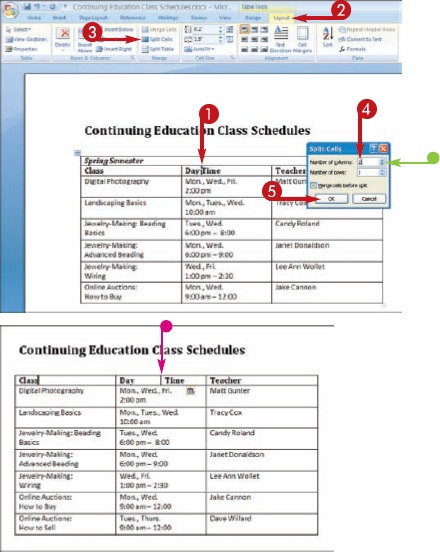
You can split table cells to create additional cells within your table. For example, you might split a cell in order to show two different choices in a column or row.
Split Table Cells
Note
See the "Select Table Cells" task earlier in this chapter, to learn how to select cells.

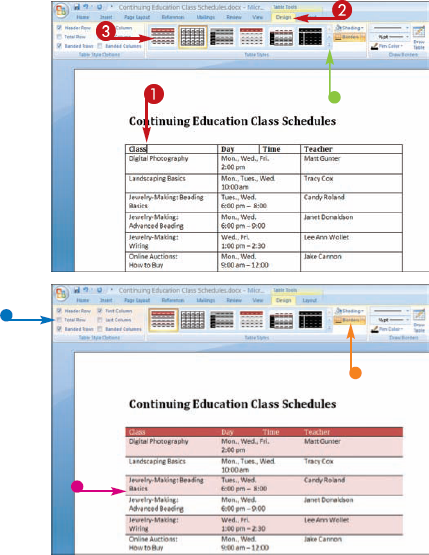
You can add instant formatting to your Word tables by assigning one of the many formatting styles that are designed specifically for tables. Table styles offer a variety of designs that include shading and color, borders, and fonts.
Apply Table Styles
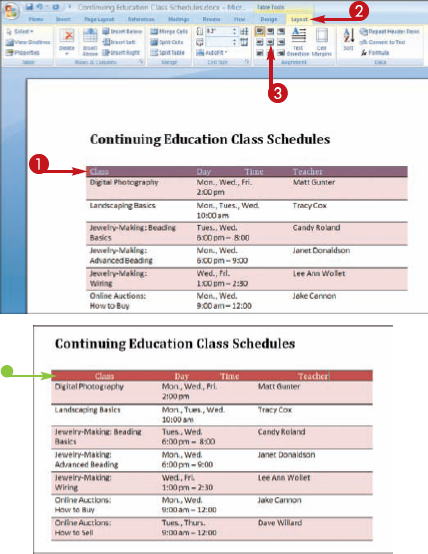
You can control the positioning of text within your table cells by using the alignment commands. For example, you may want to change the alignment for the column headings in a table. Word's table alignment options include the basic left, right, center, and justify alignments, as well as vertical alignments, such as bottom center or top right. By default, Word aligns your table text to the left, inside each cell.
Change Cell Alignment
Word applies the alignment.
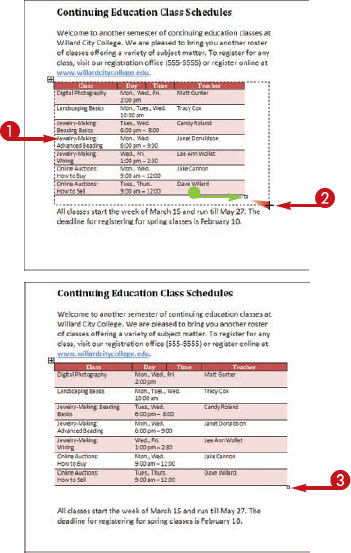
You can move a table around your document to better position it on a page. For example, you might position a smaller table off to the side of your document, or move a table to the top of a page.
Reposition a Table
The changes to

Word moves the table.
Note
You can control the text wrap around a table using the Table Properties dialog box. With the table selected, click the Properties button on the Layout tab to open the dialog box. Click the Table tab to view the text-wrapping options.
You can resize a table to adjust its appearance in a Word document. For example, you may need to enlarge a table to make it more legible, or you may need to reduce the table size to fit it in with other text on the page.
Resize a Table
The

Note
If you make the table too small, Word shortens the table width but tries to fit all of the text in each cell by increasing the table depth.
Word resizes the table.
Note
You can control the text wrap around a table using the Table Properties dialog box. With the table selected, click the Properties button on the Layout tab to open the dialog box. Click the Table tab to view text-wrapping options.