
6
Following the Rhythms of TDD
We’ve seen how individual unit tests help us explore and capture design decisions about our code and keep our code defect-free and simple to use, but that’s not all they can do. TDD has rhythms that help us with the whole development cycle. By following the rhythms, we have a guide on what to do next at each step. It is helpful to have this technical structure that allows us to think deeply about engineering good code and then capture the results.
The first rhythm was covered in the last chapter. Inside each test, we have a rhythm of writing the Arrange, Act, and Assert sections. We’ll add some detailed observations on succeeding with this next. We’ll go on to cover the larger rhythm that guides us as we refine our code, known as the red, green, refactor (RGR) cycle. Together, they help us craft our code to be easy to integrate into the broader application and made of clean, simple-to-understand code. Applying these two rhythms ensures that we deliver high-quality code at pace. It provides us with several small milestones to hit during each coding session. This is highly motivating, as we gain a sense of steady progress toward our goal of building our application.
In this chapter, we’re going to cover the following topics:
- Following the RGR cycle
- Writing our next tests for Wordz
Technical requirements
The final code in this chapter can be found at https://github.com/PacktPublishing/Test-Driven-Development-with-Java/tree/main/chapter06. It is recommended to follow along with the exercise by typing the code in yourself – and thinking about all the decisions we will be making as we go.
Following the RGR cycle
We saw in the previous chapter how a single unit test is split into three parts, known as the Arrange, Act, and Assert sections. This forms a simple rhythm of work that guides us through writing every test. It forces us to design how our code is going to be used – the outside of our code. If we think of an object as being an encapsulation boundary, it makes sense to talk about what is inside and outside that boundary. The public methods form the outside of our object. The Arrange, Act and Assert rhythm helps us design those.
We’re using the word rhythm here in an almost musical sense. It’s a constant, repeating theme that holds our work together. There is a regular flow of work in writing tests, writing code, improving that code, and then deciding which test to write next. Every test and piece of code will be different, but the rhythm of work is the same, as though it were a steady beat in an ever-changing song.
Once we have written our test, we turn to creating the code that is inside our object – the private fields and methods. For this, we make use of another rhythm called RGR. This is a three-step process that helps us to build confidence in our test, create a basic implementation of our code, and then refine it safely.
In this section, we will learn what work needs to be done in each of the three phases.
Starting on red

Figure 6.1 – The red phase
We always start with the first phase called the red phase. The goal of this phase is to use the Arrange, Act and Assert template to get our test up and running and ready to test the code we will write next. The most important part of this phase is to make sure that the test does not pass. We call this a failing test, or a red test, due to the color that most graphical test tools use to indicate a failing test.
That’s rather counter-intuitive, isn’t it? We normally aim to make things work right the first time in development. However, we want our test to fail at this stage to give us confidence that it is working correctly. If the test passes at this point, it’s a concern. Why does it pass? We know that we have not yet written any of the code we are testing. If the test passes now, that means we either do not need to write any new code or we have made a mistake in the test. The Further reading section has a link to eight reasons why a test might not be running correctly.
The most common mistake here is getting the assertion wrong. Identify the error and fix it before moving on. We must have that red test in place so that we can see it change from failing to passing as we correctly add code.
Keep it simple – moving to green

Figure 6.2 – The green phase
Once we have our failing test, we are free to write the code that will make it pass. We call this the production code – the code that will form part of our production system. We treat our production code as a black-box component. Think of an integrated circuit in electronics, or perhaps some kind of mechanical sealed unit. The component has an inside and an outside. The inside is where we write our production code. It is where we hide the data and algorithms of our implementation. We can do this using any approach we choose – object-oriented, functional, declarative, or procedural. Anything we fancy. The outside is the Application Programming Interface (API). This is the part we use to connect to our component and use it to build bigger pieces of software. If we choose an object-oriented approach, this API will be made of public methods on an object. With TDD, the first piece we connect to is our test, and that gives us fast feedback on how easy the connection is to use.
The following diagram shows the different pieces – the inside, outside, test code, and other users of our component:

Figure 6.3 – The inside and outside a black-box component
Because our implementation is encapsulated, we can change our minds about it later as we learn more without breaking the test.
There are two guidelines for this phase:
- Use the simplest code that could possibly work: Using the simplest code is important. There can be a temptation to use over-engineered algorithms, or perhaps use the latest language feature just for an excuse to use it. Resist this temptation. At this stage, our goal is to get the test to pass and nothing more.
- Don’t overthink the implementation details: We don’t need to overthink this. We don’t need to write the perfect code on our first attempt. We can write a single line, a method, several methods, or entirely new classes. We will improve this code in the next step. Just remember to make the test pass and not go beyond what this test is covering in terms of functionality.
Refactoring to clean code
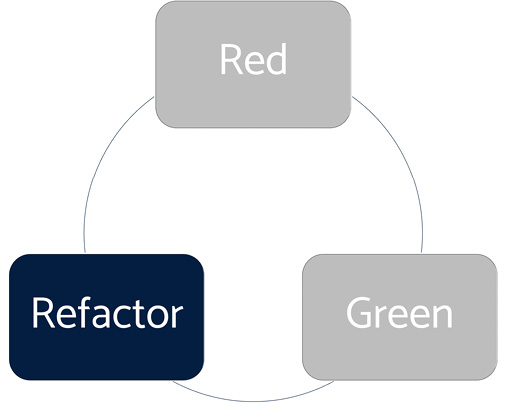
Figure 6.4 – The refactor phase
This is the phase where we go into software engineering mode. We have some working, simple code with a test that passes. Now is the time to refine that into clean code – meaning code that will be easy to read later. With the confidence that a passing test provides, we are free to apply any valid refactoring technique to our code. Some examples of refactoring techniques we can use during this phase include the following:
- Extracting a method to remove duplicated code
- Renaming a method to express what it does better
- Renaming a variable to express what it contains better
- Splitting a long method into several smaller ones
- Extracting a smaller class
- Combining a long parameter list into its own class
All these techniques have one goal: to make our code easier to understand. This will make it easier to maintain. Remember to keep that green test passing throughout these changes. By the end of this phase, we will have a unit test covering a piece of production code that we have engineered to be easy to work with in the future. That’s a good place to be.
Now we’re familiar with what to do in each phase of the RGR cycle, let’s apply that to our Wordz application.
Writing our next tests for Wordz
So, what should we write for our next tests? What would be a useful and small-enough step so that we do not fall into the trap of writing beyond what our tests can support? In this section, we will continue building out the Wordz application scoring system using TDD. We will discuss how we choose to move forward at each step.
For the next test, a good choice is to play it safe and move only a small step further. We will add a test for a single correct letter. This will drive out our first piece of genuine application logic:
- Let’s start on red. Write a failing test for a single, correct letter:
@Test
public void oneCorrectLetter() {var word = new Word("A");var score = word.guess("A");assertThat(score.letter(0))
.isEqualTo(Letter.CORRECT);
}
This test is intentionally similar to the one before. The difference is that it tests for a letter being correct, rather than being incorrect. We have used the same word – a single letter, "A" – intentionally. This is important when writing tests – use test data that helps to tell the story of what we are testing and why. The story here is that the same word with a different guess will lead to a different score – obviously key to the problem we are solving. Our two test cases completely cover both possible outcomes of any guess of a single-letter word.
Using our IDE auto-completion features, we quickly arrive at changes to class Word.
- Now let’s move to green by adding the production code to make the test pass:
public class Word {private final String word;
public Word(String correctWord) {this.word = correctWord;
}
public Score guess(String attempt) {var score = new Score(word);
score.assess( 0, attempt );
return score;
}
}
The goal here is to get the new test to pass while keeping the existing test passing. We don’t want to break any existing code. We’ve added a field called word, which will store the word we are supposed to be guessing. We’ve added a public constructor to initialize this field. We have added code into the guess() method to create a new Score object. We decide to add a method to this Score class called assess(). This method has the responsibility of assessing what our guess should score. We decide that assess() should have two parameters. The first parameter is a zero-based index for which letter of the word we wish to assess a score. The second parameter is our guess at what the word might be.
We use the IDE to help us write class Score:
public class Score {
    private final String correct;
    private Letter result = Letter.INCORRECT ;
    public Score(String correct) {
        this.correct = correct;
    }
    public Letter letter(int position) {
        return result;
    }
    public void assess(int position, String attempt) {
        if ( correct.charAt(position) == attempt.            charAt(position)){
            result = Letter.CORRECT;
        }
    }
}
To cover the new behavior tested by the oneCorrectLetter() test, we add the preceding code. Instead of the assess() method always returning Letter.INCORRECT as it did previously, the new test has forced a new direction. The assess() method must now be able to return the correct score when a guessed letter is correct.
To achieve this, we added a field called result to hold the latest score, code to return that result from the letter() method, and code into the assess() method to check whether the first letter of our guess matches the first letter of our word. If we have got this right, both of our tests should now pass.
Run all the tests to see how we are doing:

Figure 6.5 – Two tests passing
There’s a lot to review here. Notice how both of our tests are passing. By running all the tests so far, we have proven that we have not broken anything. The changes we made to our code added the new feature and did not break any existing features. That’s powerful. Take note of another obvious aspect – we know our code works. We do not have to wait until a manual test phase, wait until some integration point, or wait until the user interface is ready. We know our code works now. As a minor point, note the time duration of 0.103 seconds. The two tests were completed in one-tenth of one second, much faster than testing this manually. Not bad at all.
Design-wise, we have moved on. We have moved past the hard-coded Letter.INCORRECT result with code that can detect both correct and incorrect guesses. We have added the important design concept of an assess() method into class Score. This is significant. Our code now reveals a design; the Score object will know the correct word and will be able to use the assess() method against the guess, attempt. The terminology used here forms a good description of the problem we are solving. We want to assess a guess to return a word score.
Now that the test passes, we can move on – but an important part of TDD is continuously improving our code and working toward a better design, guided by tests. We now enter the refactor phase of the RGR cycle. Once again, TDD hands control back to us. Do we want to refactor? What things should we refactor? Why? Is it worth doing this right now or can we defer this until a later step?
Let’s review the code and look for code smells. A code smell is an indication that the implementation may need improving. The name comes from the idea of the smell that food has once it starts to go off.
One code smell is duplicated code. Alone, a little duplicated code might be okay. But it is an early warning that perhaps too much copy-and-paste has been used, and that we have failed to capture an important concept more directly. Let’s review our code to eliminate duplication. We can also look for two other common code smells – unclear naming, and blocks of code that would be easier to read if they were extracted out into their own method. Obviously, this is subjective, and we will all have different views on what to change.
Defining code smells
The term code smell originally appeared on the C2 wiki. It’s worth a read to see the given examples of code smells. It has a helpful definition that notes a code smell is something that needs review but may not necessarily need to be changed:
https://wiki.c2.com/?CodeSmell.
Let’s reflect on the inside of the assess() method. It just seems cluttered with too much code. Let’s extract a helper method to add some clarity. We can always revert the change if we feel it doesn’t help.
- Let’s refactor. Extract an isCorrectLetter() method for clarity:
public void assess(int position, String attempt) {if (isCorrectLetter(position, attempt)){result = Letter.CORRECT;
}
}
private boolean isCorrectLetter(int position,
String attempt) {return correct.charAt(position) ==
attempt.charAt(position);
}
Once more, we run all the tests to prove this refactoring has not broken anything. The tests pass. In the preceding code, we have split out a complex conditional statement into its own private method. The motivation was to get a method name into the code. This is an effective way of commenting on our code – in a way that the compiler helps us keep up to date. It helps the calling code in the assess() method tell a better story. The if statement now says “if this is a correct letter” more or less in English. That is a powerful aid to readability.
Readability happens during writing not reading
A common question from coding beginners is “How can I improve my ability to read code?”
This is a valid question, as any line of code will be read by human programmers many more times than it was written. Readability is won or lost when you write the code. Any line of code can be written either to be easy to read or hard to read. We get to choose as writers. If we consistently choose ease of reading over anything else, others will find our code easy to read.
Badly written code is hard to read. Sadly, it is easy to write.
There are two more areas I want to refactor at this stage. The first is a simple method to improve test readability.
Let’s refactor the test code to improve its clarity. We will add a custom assert method:
@Test
public void oneCorrectLetter() {
    var word = new Word("A");
    var score = word.guess("A");
    assertScoreForLetter(score, 0, Letter.CORRECT);
}
private void assertScoreForLetter(Score score,
                  int position, Letter expected) {
    assertThat(score.letter(position))
          .isEqualTo(expected);
}
The preceding code has taken the assertThat() assertion and moved it into its own private method. We have called this method assertScoreForLetter() and given it a signature that describes what information is needed. This change provides a more direct description of what the test is doing while reducing some duplicated code. It also protects us against changes in the implementation of the assertion. This seems to be a step toward a more comprehensive assertion, which we will need once we support guesses with more letters. Once again, instead of adding a comment to the source code, we have used a method name to capture the intent of the assertThat() code. Writing AssertJ custom matchers are another way of doing this.
The next refactoring we may want to do is a little more controversial, as it is a design change. Let’s do the refactoring, discuss it, then possibly revert the code if we don’t like it. That will save hours of wondering about what the change would look like.
- Let’s change how we specify the letter position to check in the assess() method:
public class Score {private final String correct;
private Letter result = Letter.INCORRECT ;
private int position;
public Score(String correct) {this.correct = correct;
}
public Letter letter(int position) {return result;
}
public void assess(String attempt) {if (isCorrectLetter(attempt)){result = Letter.CORRECT;
}
}
private boolean isCorrectLetter(String attempt) {return correct.charAt(position) == attempt. charAt(position);
}
}
We’ve removed the position parameter from the assess() method and converted it into a field called position. The intention is to simplify the usage of the assess() method. It no longer needs to explicitly state which position is being assessed. That makes the code easier to call. The code we have just added will only work in the case where the position is zero. This is fine, as this is the only thing required by our tests at this stage. We will make this code work for non-zero values later.
The reason this is a controversial change is that it requires us to change the test code to reflect that change in the method signature. I am prepared to accept this, knowing that I can use my IDE-automated refactoring support to do this safely. It also introduces a risk: we must ensure that position is set to the correct value before we call isCorrectLetter(). We’ll see how this develops. This may make the code more difficult to understand, in which case the simplified assess() method probably will not be worth it. We can change our approach if we find this to be the case.
We are now at a point where the code is complete for any single-letter word. What should we attempt next? It seems as though we should move on to two-letter words and see how that changes our tests and logic.
Advancing the design with two-letter combinations
We can proceed to add tests aimed at getting the code to handle two-letter combinations. This is an obvious step to take after getting the code to work with a single letter. To do this, we will need to introduce a new concept into the code: a letter can be present in the word, but not in the position we guessed it to be:
- Let’s begin by writing a test for a second letter that is in the wrong position:
@Test
void secondLetterWrongPosition() {var word = new Word("AR");var score = word.guess("ZA");assertScoreForLetter(score, 1,
Letter.PART_CORRECT);
}
Let’s change the code inside the assess() method to make this pass and keep the existing tests passing.
- Let’s add initial code to check all the letters in our guess:
public void assess(String attempt) {for (char current: attempt.toCharArray()) {if (isCorrectLetter(current)) {result = Letter.CORRECT;
}
}
}
private boolean isCorrectLetter(char currentLetter) {return correct.charAt(position) == currentLetter;
}
The main change here is to assess all of the letters in attempt and not assume it only has one letter in it. That, of course, was the purpose of this test – to drive out this behavior. By choosing to convert the attempt string into an array of char, the code seems to read quite well. This simple algorithm iterates over each char, using the current variable to represent the current letter to be assessed. This requires the isCorrectLetter() method to be refactored for it to accept and work with the char input – well, either that or converting char to a String, and that looks ugly.
The original tests for single-letter behaviors still pass, as they must. We know the logic inside our loop cannot possibly be correct – we are simply overwriting the result field, which can only store a result for one letter at most. We need to improve that logic, but we won’t do that until we have added a test for that. Working this way is known as triangulation – we make the code more general-purpose as we add more specific tests. For our next step, we will add code to detect when our attempted letter occurs in the word in some other position.
- Let’s add code to detect when a correct letter is in the wrong position:
public void assess(String attempt) {for (char current: attempt.toCharArray()) {if (isCorrectLetter(current)) {result = Letter.CORRECT;
} else if (occursInWord(current)) {result = Letter.PART_CORRECT;
}
}
}
private boolean occursInWord(char current) {return
correct.contains(String.valueOf(current));
}
We’ve added a call to a new private method, occursInWord(), which will return true if the current letter occurs anywhere in the word. We have already established that this current letter is not in the right place. This should give us a clear result for a correct letter not in the correct position.
This code makes all three tests pass. Immediately, this is suspicious, as it shouldn’t happen. We already know that our logic overwrites the single result field and this means that many combinations will fail. What has happened is that our latest test is fairly weak. We could go back and strengthen that test, by adding an extra assertion. Alternatively, we can leave it as it is and write another test. Dilemmas such as this are common in development and it’s not usually worth spending too much time thinking about them. Either way will move us forward.
Let’s add another test to completely exercise the behavior around the second letter being in the wrong position.
- Add a new test exercising all three scoring possibilities:
@Test
void allScoreCombinations() {var word = new Word("ARI");var score = word.guess("ZAI");assertScoreForLetter(score, 0, Letter.INCORRECT);
assertScoreForLetter(score, 1,
Letter.PART_CORRECT);
assertScoreForLetter(score, 2, Letter.CORRECT);
}
As expected, this test fails. The reason is obvious upon inspecting the production code. It’s because we were storing results in the same single-valued field. Now that we have a failing test for that, we can correct the scoring logic.
- Add a List of results to store the result for each letter position separately:
public class Score {private final String correct;
private final List<Letter> results =
new ArrayList<>();
private int position;
public Score(String correct) {this.correct = correct;
}
public Letter letter(int position) {return results.get(position);
}
public void assess(String attempt) {for (char current: attempt.toCharArray()) {if (isCorrectLetter(current)) {results.add(Letter.CORRECT);
} else if (occursInWord(current)) {results.add(Letter.PART_CORRECT);
} else {results.add(Letter.INCORRECT);
}
position++;
}
}
private boolean occursInWord(char current) {return
correct.contains(String.valueOf(current));
}
private boolean isCorrectLetter(char
currentLetter) {return correct.charAt(position) ==
currentLetter;
}
}
This took a couple of attempts to get right, driven by failures in the test we just added. The preceding end result passes all four tests, proving it can correctly score all combinations in a three-letter word. The main change was to replace the single-valued result field with an ArrayList of results and change the letter(position) implementation method to use this new collection of results. Running that change caused a failure, as the code could no longer detect an incorrect letter. Previously, that had been handled by the default value of the result field. Now, we must do that explicitly for each letter. We then need to update the position within the loop to track which letter position we are assessing.
We’ve added a test, watched it go red and fail, then added code to make the test go green and pass, so now it is time to refactor. There are things about both the test and the production code that don’t seem quite right.
In the production code class Score, it is the loop body of the assess() method that seems unwieldy. It has a long loop body with logic in it and a set of if-else-if blocks. It feels as though the code could be made clearer. We can extract the loop body into a method. The method name then gives us a place to describe what is happening to each thing. The loop then becomes shorter and simpler to grasp. We can also replace the if-else-if ladders with a simpler construct.
- Let’s extract the logic inside the loop body into a scoreFor() method:
public void assess(String attempt) {for (char current: attempt.toCharArray()) {results.add( scoreFor(current) );
position++;
}
}
private Letter scoreFor(char current) {if (isCorrectLetter(current)) {return Letter.CORRECT;
}
if (occursInWord(current)) {return Letter.PART_CORRECT;
}
return Letter.INCORRECT;
}
This reads far more clearly. The body of the scoreFor() method is now a concise description of the rules for scoring each letter. We replaced the if-else-if construction with a simpler if-return construction. We work out what the score is, then exit the method immediately.
The next job is to clean up the test code. In TDD, test code is given equal priority to production code. It forms part of the documentation about the system. It needs to be maintained and extended alongside the production code. We treat test code readability with the same importance as production code.
The code smell with the test code is around the asserts. Two things could be improved. There is an obvious duplication in the code that we could eliminate. There is also a question about how many assertions should be made in one test.
- Let’s remove the duplicated assertion code by extracting a method:
@Test
void allScoreCombinations() {var word = new Word("ARI");var score = word.guess("ZAI");assertScoreForGuess(score, INCORRECT,
PART_CORRECT,
CORRECT);
}
private void assertScoreForGuess(Score score, Letter…
for (int position=0;
position < expectedScores.length;
position++){Letter expected = expectedScores[position];
assertThat(score.letter(position))
.isEqualTo(expected);
}
}
By extracting the assertScoreForGuess() method, we create a way to check the scores for a variable number of letters. This eliminates those copy-pasted assert lines that we had and raises the level of abstraction. The test code reads more clearly as we now describe tests in terms of the order of INCORRECT, PART_CORRECT, CORRECT that we expect the score to be in. By adding a static import to those enums, syntax clutter is also beneficially reduced.
The earlier tests can now be manually modified to make use of this new assertion helper. This allows us to inline the original assertScoreForLetter() method, as it no longer adds value.
- Now, let’s take a look at the final set of tests following our refactoring:
package com.wordz.domain;
import org.junit.jupiter.api.Test;
import static com.wordz.domain.Letter.*;
import static org.assertj.core.api.Assertions.assertThat;
public class WordTest {@Test
public void oneIncorrectLetter() {var word = new Word("A");var score = word.guess("Z");assertScoreForGuess(score, INCORRECT);
}
@Test
public void oneCorrectLetter() {var word = new Word("A");var score = word.guess("A");assertScoreForGuess(score, CORRECT);
}
@Test
public void secondLetterWrongPosition() {var word = new Word("AR");var score = word.guess("ZA");assertScoreForGuess(score, INCORRECT,
PART_CORRECT);
}
@Test
public void allScoreCombinations() {var word = new Word("ARI");var score = word.guess("ZAI");assertScoreForGuess(score, INCORRECT,
PART_CORRECT,
CORRECT);
}
private void assertScoreForGuess(Score score,
Letter... expectedScores) {for (int position = 0;
position < expectedScores.length;
position++) {Letter expected =
expectedScores[position];
assertThat(score.letter(position))
.isEqualTo(expected);
}
}
}
This appears to be a comprehensive set of test cases. Every line of production code has been driven out as a direct result of adding a new test to explore a new aspect of behavior. The test code seems easy to read and the production code also seems clearly implemented and simple to call. The test forms an executable specification of the rules for scoring a guess at a word.
That’s achieved everything we set out to at the start of this coding session. We have grown the capability of our Score class using TDD. We have followed the RGR cycle to keep both our test code and production code following good engineering practices. We have robust code, validated by unit tests, and a design that makes this code easy to call from our wider application.
Summary
In this chapter, we have applied the RGR cycle to our code. We’ve seen how this splits the work into separate tasks, which results in confidence in our test, a rapid path to simple production code, and less time spent to improve the maintainability of our code. We’ve looked at removing code smells from both the production code and the test code. As part of our work in this chapter, we’ve used ideas that help us move ahead and decide what tests we should write next. The techniques in this chapter enable us to write multiple tests and incrementally drive out the detailed logic in our production code.
In the next chapter, we’re going to learn about some object-oriented design ideas known as the SOLID principles, enabling us to use TDD to grow our application still further.
Questions and answers
- What are the two key rhythms of TDD?
Arrange, Act, Assert, and RGR. The first rhythm helps us write the body of the test while designing the interface to our production code. The second rhythm works to help us create and then refine the implementation of that production code.
- How can we write tests before code?
Instead of thinking about how we are going to implement some code, we think about how we are going to call that code. We capture those design decisions inside a unit test.
- Should tests be throwaway code?
No. In TDD, unit tests are given equal weight to the production code. They are written with the same care and are stored in the same code repository. The only difference is that the test code itself will not be present in the delivered executable.
- Do we need to refactor after every test pass?
No. Use this time as an opportunity to decide what refactoring is needed. This applies to both the production code and the test code. Sometimes, none is needed and we move on. Other times, we sense that a larger change would be beneficial. We might choose to defer that larger change until later once we have more code in place.
Further reading
- Getting Green on Red
An article by Jeff Langr describing eight different ways a test can pass for the wrong reasons. If we’re aware of these issues, we can avoid them as we work.
https://medium.com/pragmatic-programmers/3-5-getting-green-on-red-d189240b1c87
- Refactoring: Improving the design of existing code, Martin Fowler (ISBN 978-0134757599)
The definitive guide to refactoring code. The book describes step-by-step transformations of code that preserve its behavior but improve clarity. Interestingly, most transformations come in pairs, such as the pair of techniques known as Extract Method and Inline Method. This reflects the trade-offs involved.
- AssertJ documentation for custom matchers
This chapter briefly mentioned AssertJ custom matchers. These are very useful ways of creating reusable customized assertions for your code. These assertion classes are themselves unit-testable and can be written using test-first TDD. For that reason alone, they are superior to adding a private method to handle a customized assertion.
The following link provides many examples provided by the AssertJ distribution on github.