Chapter 2. the EV3 programming environment
This chapter explores the EV3 programming environment and presents a few simple programs. We’ll start with the basics by looking at sample programs that use the EV3 Intelligent Brick without any motors or sensors. Chapter 4 covers programming motors, and Chapter 5 explains how to use sensors.
a tour through the MINDSTORMS software
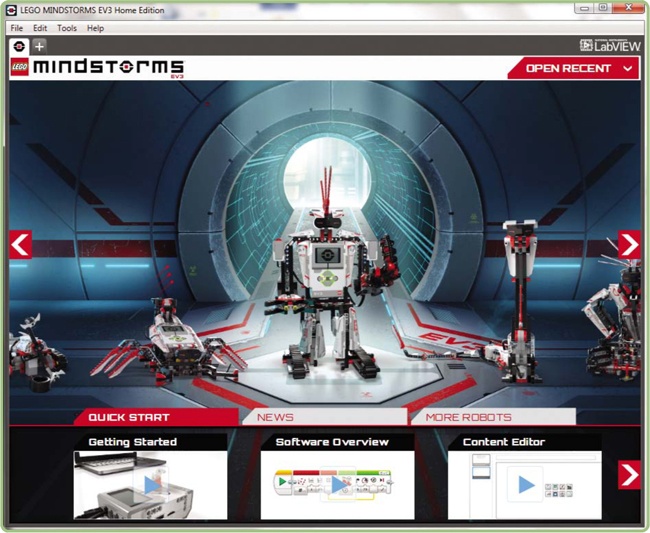
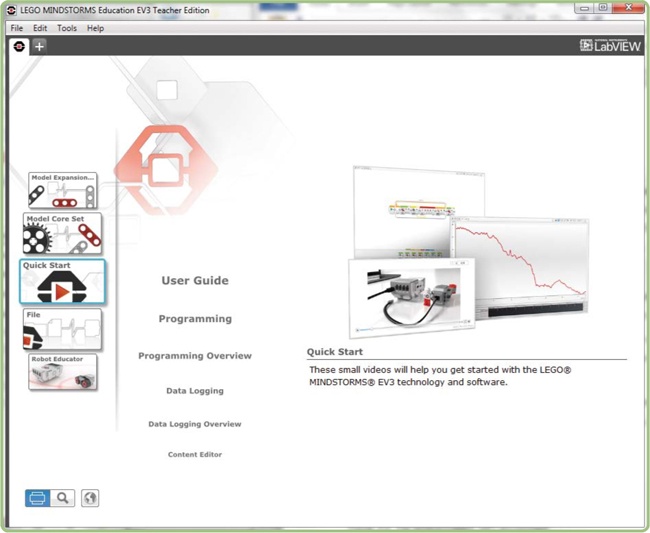
When you start the MINDSTORMS EV3 software, the Lobby appears. The Home and Education Editions have different Lobby screens, but they function in the same way. In the Lobby, you can create or open a project, access the user guide and help file, and read instructions for building example robots. The Lobby for the Home Edition is shown in Figure 2-1, and Figure 2-2 shows the Lobby for the Education Edition.
Before writing our first program, let’s take a look at the main areas of the MINDSTORMS EV3 environment. Select File▸New Project (File▸New Project▸Program for the Education Edition) to create a new project. A screen like the one shown in Figure 2-3 appears.
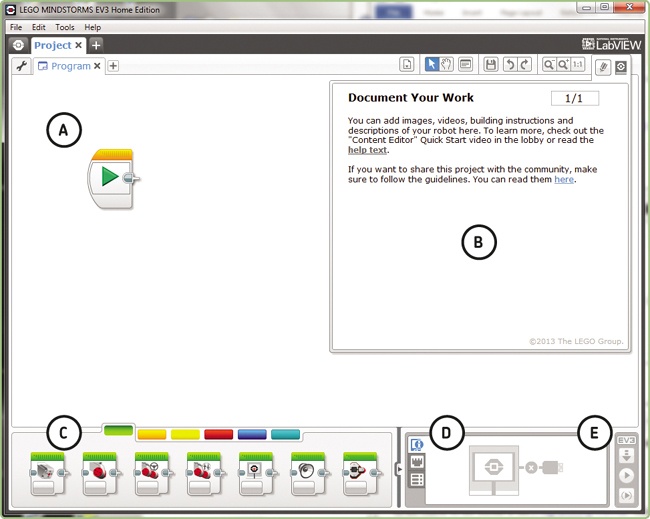
A: the programming canvas
The main part of the screen is the Programming Canvas, which is where you build your program. You can use the tabs at the top of the window to navigate among open projects. Figure 2-3 shows one open project, named Project. The tab to the left of the Project tab, which has a small MINDSTORMS icon, takes you back to the Lobby screen.
A project can contain multiple programs. Below the project tab is another group of tabs that you can use to select a program. Figure 2-3 shows one open program, named Program. We’ll talk about how to rename programs and projects later in this chapter. The tab with the small wrench icon opens the Project Properties page, which is also described later.
B: the content editor
The Content Editor allows you to document your project by creating a presentation that includes text, images, and videos. You could include a description of how the program works, instructions for building the robot, or a video showing the robot in action. The presentation is saved with the project, so you don’t need to keep track of a separate file.
When you are not using the Content Editor, you can close it by clicking the small tab with the MINDSTORMS icon in the top right corner. This will give you more space on the Programming Canvas to build your program.
C: the programming palettes
The Programming Palettes appear at the bottom of the Programming Canvas. They contain the blocks that you will use to create your programs. To keep things simple, the blocks are organized into six color-coded palettes. You can use the colored tabs to navigate among them. Going from left to right, the six groups of blocks are Action (green), Flow Control (orange), Sensor (yellow), Data Operations (red), Advanced (blue), and My Blocks (cyan).
D: the hardware page
The Hardware page displays information about the EV3 Brick. This information is divided into three sections, which you can select using the tabs on the left side (shown in Figure 2-4). The top tab, Brick Information, shows the battery level, firmware version, and how much EV3 memory you’ve used. The middle tab, Port View, shows which sensors and motors are attached to the Brick. The bottom tab, Available Bricks, connects your brick to the EV3 software.
E: the download and run buttons
The Download and Run buttons (shown in Figure 2-5) let you transfer the program from your computer to the EV3 Brick and run it. The process of transferring the program to your brick is called downloading. The middle button, Download and Run, will download and run your program immediately. The top button, Download, will download your program to the Brick but not run it. You can then start your program using the buttons on the Brick itself. This is useful if you need to move or unplug your robot before running the program. The bottom button, Run Selected, will download and run only the blocks you have selected, which can be helpful for finding and fixing problems in your program.


writing an EV3 program
When you create a new project, the Programming Canvas will already contain a Start block (shown in Figure 2-6). Create your program by dragging blocks from the Programming Palettes onto the Programming Canvas and connecting them in a line, beginning with the Start block. Each block has a number of different options, and its behavior will depend on how you configure them. When you run the program, the EV3 executes each block in the arranged order, from left to right. Usually, the blocks run one at a time—meaning that each block must finish its operation before the next block starts—but as you’ll see, there are some exceptions to this, where multiple blocks can run simultaneously. The program ends after executing the last block.

general layout of a block
Before writing our first program, let’s look at how to set the options for a block, known as parameters. At the bottom of each block, you will see a group of controls that can tell the block how to behave. Each block’s parameters are unique, but there is a consistent look and feel to the configuration options, which is one of the features that make EV3 easy to use.
Let’s take a look at the controls for the Sound block. This is a fairly typical block, so all the ideas discussed here apply to most other blocks. Figure 2-7 shows how the Sound block’s parameters look when you first add the block to a program, before you make any changes.
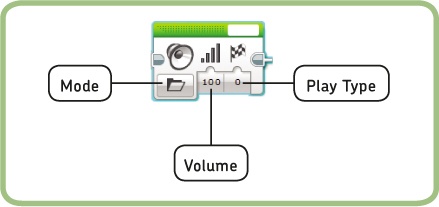
The first control, Mode, selects the mode of the block. A block’s mode determines the main function of the block. The four modes of the Sound block allow you to play a sound file, play a note, play a tone, and stop a sound that is already playing. When you select the mode for a block, the remaining options change to match the selected mode. Figure 2-7 shows the Sound block with the Play File mode selected. In this mode, you can set the volume and Play Type, which tells the program how to play the sound—it can be played just once while the program waits for it to complete, played once while the program continues to the next block, or played over and over until the program ends or encounters a Sound block in Stop mode.
Other modes have different options. Figure 2-8 shows the Sound block with the Play Tone mode selected. In this mode, you can set the frequency and duration of the tone to be played.
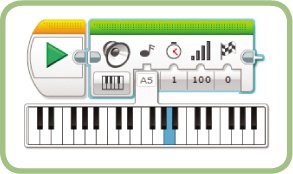
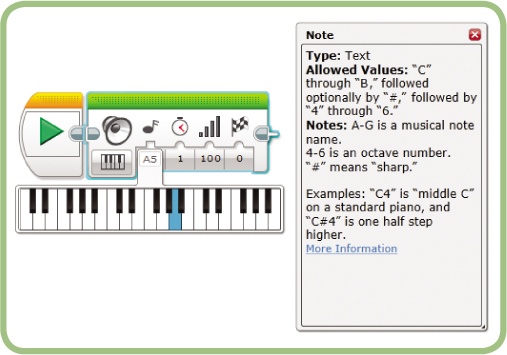
To change a mode or setting, click the current value. The way in which you enter a new value depends on the option type. For some parameters, you just enter a number. For others, you might use a list or a slider to select a value. In the Play Note mode, you use a small keyboard to select the note for the Sound block, as shown in Figure 2-9.

your first program
For your first program, you’ll use the Sound block to make the EV3 say “Hello.” To begin, start the MINDSTORMS EV3 software and create a new project. You won’t be using the Content Editor, so you can close it to make more space for the Programming Canvas. Follow these steps to add a Sound block to your new program:
Select the Sound block from the Action Palette, as shown here:
Drag the block onto the Programming Canvas. Place the Sound block just to the right of the Start block, which should already be on the canvas.
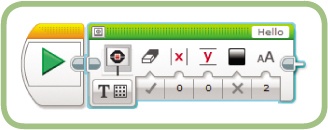
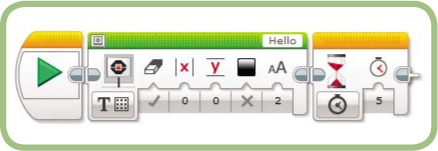
Your program should look like this:
If you accidentally grab the wrong block or drop it in the wrong place, select Edit▸ Undo and start again.

You can leave most of the Sound block settings at their defaults. All you need to do is select the sound file you want the block to play. The EV3 software comes with a large selection of sound files, which are arranged in a folder structure similar to the ones on computer hard drives.
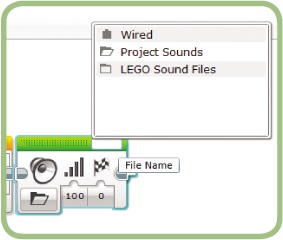
Click the white box in the top right corner of the Sound block. A box containing a list of sound files appears.
Click the LEGO Sound Files folder to open it and then select the Communications folder. Scroll down and select the Hello file. The white box at the top right of the Sound block should now contain the word
Hello.

saving your work
Before continuing, name your program and save the project. In this book, I generally use one project for each chapter, named Chapter2, Chapter3, and so on. Each project contains all the programs developed in that chapter. Let’s change the name of this program to Hello and save the project as Chapter2.
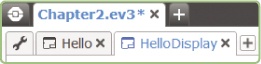
To change the name, double-click the program name tab. Type the new name, Hello, over the highlighted text. The tabs should look like this:

Now save the project by selecting File▸Save Project. When you first save a project, a dialog appears to let you select the location and name for the project file. Type the name Chapter2 and click Save to create the Chapter2.ev3 file. This file contains all the information about your program, including the configuration and arrangement of the blocks you used. The .ev3 file format is unique to the MINDSTORMS environment; you won’t be able to edit it using other programs.
running your program
After you save your program, it’s time for a test run. The first step is to make sure the EV3 is turned on and connected to your computer with either a USB cable or a Bluetooth or Wi-Fi connection. The USB connection is easier to set up (just plug in the cable between the EV3 and your computer) but requires that you keep your EV3 Brick nearby. A Bluetooth or Wi-Fi connection can be more difficult to set up, but it allows your robot to roam free. The EV3 help file, available from Help ▸ Show EV3 Help, provides instructions for connecting the Brick to your computer.
Click the center Download and Run button to download and run your program. Your EV3 should respond by saying “Hello.”
project properties
An EV3 project can contain multiple programs, and each program can use numerous sound or image files. The Project Properties page gives you an overview of your project and lets you manage all of the resources it uses. Click the small wrench icon to the left of the program name to open the Project Properties page. Figure 2-10 shows the Project Properties for the Chapter 2 project, with a few of the items filled in.

In the Project Properties page, you can give your project a title and description, and see all of its programs, images, sound files, and My Blocks. Later in this book, I’ll show you how to import and export programs and My Blocks using this window so you can share them between projects.
your second program
Your second program, HelloDisplay, is similar to the Hello program, except that you’ll use the Display block instead of the Sound block to write Hello on the EV3 display. Your first attempt at making this program won’t work, which gives you a chance to see what happens when a program doesn’t run as expected and to learn how to fix it. Use the following steps to create the initial version of the program:
Select File▸New Program. This adds a new program to the project.
Change the name of the program to HelloDisplay. The tabs at the top of the Programming Canvas area should look like this:
Drag the Display block from the Action palette, as shown here:
Place the Display block next to the Start block. Your program should look like this:

The next step is to set the Display block to print the text “Hello.” The Display block has several options, which are described in Chapter 14. By default, the block is set to display an image, so the first thing you need to do is configure it to display text.

The default display text is “MINDSTORMS,” so the next step is to change this to “Hello.”
Click the text in the white box in the top right corner of the Display block, and change MINDSTORMS to Hello.
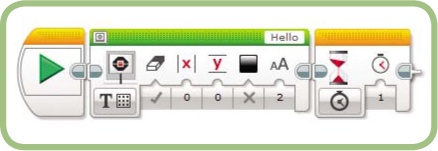
The complete program should now look like Figure 2-11.
Now download and run your program. The EV3 should make a noise to let you know it has downloaded a program, but Hello does not appear on the display. What happened?
To put it simply, this program has a bug. A bug is a program error. Debugging is the process of finding and fixing errors. Like all programmers, you’ll spend a lot of your time debugging. In fact, it’s very rare to write a program on the first try without any. Running your program, finding out what’s wrong, and fixing those problems are all normal parts of the programming process. Fixing a bug can be frustrating, but it can also be incredibly rewarding. Think of it as solving a puzzle, and remember that you should always have fun!
One way to fix this program is by adding a Wait block after the Display block. You can use the Wait block to tell the program to pause for five seconds before ending, which will give you enough time to read the display.
The Wait block is on the Flow Control Palette, which you select by clicking the orange tab at the top of the Programming Palettes area. Figure 2-12 shows the Flow Control blocks, with the Wait block circled.

Follow these steps to fix the program:
Drag a Wait block to the right of the Display block. Your program should look like Figure 2-13.
By default, the Wait block pauses for one second. To have a little more time to read the display, change the value under the small clock face icon from 1 to 5. This causes the program to wait five seconds before ending. Figure 2-14 shows the Wait block with the change.
Now when you download and run the program, the display should show Hello for five seconds before clearing, which is the behavior you want. Adding the Wait block is a successful solution to this bug.
Note
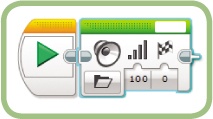
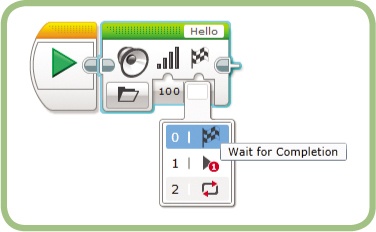
Why didn’t the first program have the same problem? Unlike the Display block, the Sound block enables the Wait for Completion option by default (see Figure 2-15). This makes the program wait until the sound plays before continuing. If you select the Play Once option instead of the Wait for Completion option, the first program fails in the same way that the second one did.
comments
Programmers use comments to add descriptive text to their programs; these explain how the program works or why the programmers made certain decisions while they were building it. For example, you could add a comment to the previous program that explains why you added the Wait block.
In the previous chapter, I mentioned that a good program should be easy to modify and understandable to other programmers. Good comments are important in achieving both of these goals. It can be very difficult to figure out how a program works just by looking at the settings for each block. A short description in plain English will make your program much easier to understand. Think of how you might describe your program to a friend. You wouldn’t just list the blocks you use; instead, you’d describe what the program does as a whole, perhaps explaining the more complicated parts in depth. Comments also help you remember why you wrote a program in a particular way, making it easier to reuse your own programs.
Comments do not affect how a program runs; the EV3 will completely ignore them. It only needs to know about the arrangement and configuration of the blocks making up your program.
adding a comment
Try adding a comment to the HelloDisplay program to explain why you added the Wait block. A reasonable comment is Wait 5 seconds before ending the program to give the user time to read the display. To add comments to your program, use the Comment tool (![]() ) on the Toolbar.
) on the Toolbar.
Follow these steps to add the comment:
Click the Programming Canvas above the Wait block. The new comment will appear here when you select the Comment tool.
Click the Comment tool on the Toolbar. A small comment box will appear where you clicked in the above step, as shown in Figure 2-16.
Start typing the comment Wait 5 seconds before ending the program to give the user time to read the display. Press the ENTER key to move to the next line when the text gets wider than the block (it’s easier to read if the comment does not extend too far past the block).
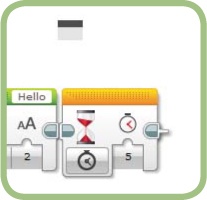
Figure 2-17 shows the program with the comment added. Now, anyone who looks at this program will know why the Wait Time block is there.

tips for working with comments
Keep the following tips in mind when writing comments:
Pressing ENTER while typing a comment makes it continue on the next line.
Clicking a comment selects the comment.
When a comment is selected, clicking the text of a comment lets you change the comment.
You can delete a selected comment by pressing the DELETE key.
You can resize a comment box using the handles on the edge of the box. The handles appear when you move your mouse over the comment.
You can move a selected comment by dragging it with your mouse.
context help
Having so many blocks with so many options gives us the power to build a wide variety of robotic creations. However, learning what all these blocks and options do can be a daunting task. The EV3 software has a useful feature to help with this: context help. To access it, select Help▸Show Context Help. A small window appears and displays brief but useful information about any item that you hover over with your cursor. Every topic contains a link to More Information in case you need more details about it. Keeping this little window open is a great way to quickly come up to speed on all the choices you have while creating programs. Figure 2-18 shows the help that is displayed when you select the note for the Sound block in Play Note mode.
conclusion
This concludes the introductory tour of the MINDSTORMS environment. Next, you’ll build a simple robot, called the TriBot, to use with the example programs in the following chapters. Then I’ll introduce the multitude of blocks available in the EV3 software and show you how to combine them to make the TriBot perform a variety of tasks.