
![]()
Installing MongoDB
In Chapter 1, you got a taste of what MongoDB can do for you. In this chapter, you will learn how to install and expand MongoDB to do even more, enabling you to use it in combination with your favorite programming language.
MongoDB is a cross-platform database, and you can find a significant list of available packages to download from the MongoDB website (www.mongodb.org). The wealth of available versions might make it difficult to decide which version is the right one for you. The right choice for you probably depends on the operating system your server uses, the kind of processor in your server, and whether you prefer a stable release or would like to take a dive into a version that is still in development but offers exciting new features. Perhaps you’d like to install both a stable and a forward-looking version of the database. It’s also possible you’re not entirely sure which version you should choose yet. In any case, read on!
Choosing Your Version
When you look at the Download section on the MongoDB website, you will see a rather straightforward overview of the packages available for download. The first thing you need to pay attention to is the operating system you are going to run the MongoDB software on. Currently, there are precompiled packages available for Windows, various flavors of the Linux operating system, Mac OS, and Solaris.
![]() Note An important thing to remember here is the difference between the 32-bit release and the 64-bit release of the product. The 32-bit and 64-bit versions of the database currently have the same functionality, with one exception: the 32-bit release is limited to a total dataset size of approximately 2GB per server. The 64-bit version does not carry this restriction, however, so it’s generally preferred over the 32-bit version for production environments. Also, the differences between these versions are subject to change.
Note An important thing to remember here is the difference between the 32-bit release and the 64-bit release of the product. The 32-bit and 64-bit versions of the database currently have the same functionality, with one exception: the 32-bit release is limited to a total dataset size of approximately 2GB per server. The 64-bit version does not carry this restriction, however, so it’s generally preferred over the 32-bit version for production environments. Also, the differences between these versions are subject to change.
You will also need to pay attention to the version of the MongoDB software itself: there are production releases, previous releases, and development releases. The production release indicates that it’s the most recent stable version available. When a newer and generally improved or enhanced version is released, the prior most recent stable version will be made available as a previous release. This designation means the release is stable and reliable, but it usually has fewer features available in it. Finally, there’s the development release. This release is generally referred to as the unstable version. This version is still in development, and it will include many changes, including significant new features. Although it has not been fully developed and tested yet, the developers of MongoDB have made it available to the public to test or otherwise try out.
Understanding the Version Numbers
MongoDB uses the “odd-numbered versions for development releases” approach. In other words, you can tell by looking at the second part of the version number (also called the release number) whether a version is a development version or a stable version. If the second number is even, then it’s a stable release. If the second number is odd, then it’s an unstable, or development, release.
Let’s take a closer look at the three digits included in a version number’s three parts, A, B, and C:
- A, the first (or leftmost) number: Represents the major version and only changes when there is a full version upgrade.
- B, the second (or middle) number: Represents the release number and indicates whether a version is a development version or a stable version. If the number is even, the version is stable; if the number is odd, the version is unstable and considered a development release.
- C, the third (or rightmost) number: Represents the revision number; this is used for bugs and security issues.
For example, at the time of writing, the following versions were available from the MongoDB website:
- 2.4.3 (Production release)
- 2.2.4 (Previous release)
- 2.5.0 (Development release)
Installing MongoDB on Your System
So far, you’ve learned which versions of MongoDB are available and—hopefully—were able to select one. Now you’re ready to take a closer look at how to install MongoDB on your particular system. The two main operating systems for servers at the moment are based on Linux and Microsoft Windows, so this chapter will walk you through how to install MongoDB on both of these operating systems, beginning with Linux.
Installing MongoDB under Linux
The Unix-based operating systems are extremely popular choices at the moment for hosting services, including web services, mail services, and, of course, database services. In this chapter, we’ll walk you through how to get MongoDB running on a popular Linux distribution: Ubuntu.
Depending on your needs, you have two ways of installing MongoDB under Ubuntu: you can install the packages automatically through so-called repositories, or you can install it manually. The next two sections will walk you through both options.
Installing MongoDB through the Repositories
Repositories are basically online directories filled with software. Every package contains information about the version number, prerequisites, and possible incompatibilities. This information is useful when you need to install a software package that requires another piece of software to be installed first because the prerequisites can be installed at the same time.
The default repositories available in Ubuntu (and other Debian-based distributions) contain MongoDB, but they may be out-of-date versions of the software. Therefore, let’s tell apt-get (the software you use to install software from repositories) to look at a custom repository. To do this, you need to add the following line to your repository-list (/etc/apt/sources.list):
deb http://downloads-distro.mongodb.org/repo/ubuntu-upstart dist 10gen
Next, you need to import 10gen’s public GPG key, used to sign the packages, ensuring their consistency; you can do so by using the apt-key command:
$ sudo apt-key adv --keyserver keyserver.ubuntu.com --recv 7F0CEB10
When that is done, you need to tell apt-get that it contains new repositories; you can do so using apt-get’s update command:
$ sudo apt-get update
This line made aptitude aware of your manually added repository. This means you can now tell apt-get to install the software itself. You do this by typing the following command in the shell:
$ sudo apt-get install mongodb-10gen
This line installs the current stable (production) version from MongoDB. If you wish to install any other version from MongoDB instead, you need to specify the version number. For example, to install the current unstable (development) version from MongoDB, type in the following command instead:
$ sudo apt-get install mongodb-10gen=2.5.0
That’s all there is to it. At this point, MongoDB has been installed and is (almost) ready to use!
![]() Note Running apt-get update on a system running an older version of MongoDB will upgrade the software to the latest stable version available. You can prevent this from happening by running this command:
Note Running apt-get update on a system running an older version of MongoDB will upgrade the software to the latest stable version available. You can prevent this from happening by running this command:
echo "mongodb-10gen hold" | sudo dpkg --set-selections
Installing MongoDB Manually
Next, we’ll cover how to install MongoDB manually. Given how easy it is to install MongoDB with aptitude automatically, you might wonder why you would want to install the software manually. For starters, not all Linux distributions use apt-get. Sure, many of them do (including primarily the ones that are based on Debian Linux), but some don’t. Also, the packaging remains a work in progress, so it might be the case that there are versions not yet available through the repositories. It’s also possible that the version of MongoDB you want to use isn’t included in the repository. Installing the software manually also gives you the ability to run multiple versions of MongoDB at the same time.
You’ve decided which version of MongoDB you would like to use, and you’ve downloaded it from their website, http://mongodb.org/downloads, to your Home directory. Next, you need to extract the package with the following command:
$ tar xzf mongodb-linux-x86_64-latest.tgz
This command extracts the entire contents of the package to a new directory called mongodb-linux-x86_64-xxxx-yy-zz; this directory is located under your current directory. This directory will contain a number of subdirectories and files. The directory that contains the executable files is called the bin directory. We will cover which applications perform which tasks shortly.
However, you don’t need to do anything further to install the application. Indeed, it doesn’t take much more time to install MongoDB manually—depending on what else you need to install, it might even be faster. Manually installing MongoDB does have some downsides, however. For example, the executables that you just extracted and found in the bin directory can’t be executed from anywhere except the bin directory by default. Thus, if you want to run the mongod service, you will need to do so directly from the aforementioned bin directory. This downside highlights one of the benefits of installing MongoDB through repositories.
Installing MongoDB under Windows
Microsoft’s Windows is also a popular choice for server software, including Internet-based services.
Windows doesn’t come with a repository application like apt-get, so you’ll need to download and extract the software from the MongoDB website to run it. Yes, the preceding information is correct. You do not need to walk through any setup process; installing the software is a simple matter of downloading the package, extracting it, and running the application itself.
For example, assume you’ve decided to download the latest stable version of MongoDB for your 64-bits Windows 2008 server. You begin by extracting the package (mongodb-win32–x86_64-x.y.x.zip) to the root of your C: drive. At this point, all you need to do is open a command prompt (Start ➤ Run ➤ cmd ➤ OK) and browse to the directory you extracted the contents to:
> cd C:mongodb-win32–x86_64-x.y.z
> cd bin
Doing this brings you to the directory that contains the MongoDB executables. That’s all there is to it: as I noted previously, no installation is necessary.
Running MongoDB
At long last, you’re ready to get your hands dirty. You’ve learned where to get the MongoDB version that best suits your needs and hardware, and you’ve also seen how to install the software. Now it’s finally time to look at running and using MongoDB.
Before you can start the MongoDB service, you need to create a data directory for MongoDB to store its files in. By default, MongoDB stores the data in the /data/db directory on Unix-based systems (such as Linux and OS X) and in the C:datadb directory on Windows.
![]() Note MongoDB does not create these data directories for you, so you need to create them manually; otherwise, MongoDB will fail to run and throw an error message. Also, be sure that you set the permissions correctly: MongoDB must have read, write, and directory creation permissions to function properly.
Note MongoDB does not create these data directories for you, so you need to create them manually; otherwise, MongoDB will fail to run and throw an error message. Also, be sure that you set the permissions correctly: MongoDB must have read, write, and directory creation permissions to function properly.
If you wish to use a directory other than /data/db or C:datadb, then you can tell MongoDB to look at the desired directory by using the --dbpath flag when executing the service.
Once you create the required directory and assign the appropriate permissions, you can start the MongoDB core database service by executing the mongod application. You can do this from the command prompt or the shell in Windows and Linux, respectively.
Surveying the Installation Layout
After you install or extract MongoDB successfully, you will have the applications shown in Table 2-1 available in the bin directory (in both Linux and Windows).
Table 2-1. The Included MongoDB Applications
Application |
Function |
|---|---|
| -- bsondump | Reads contents of BSON-formatted rollback files. |
| -- mongo | The database shell. |
| -- mongod | The core database server. |
| -- mongodump | Database backup utility. |
| -- mongoexport | Export utility (JSON, CSV, TSV), not reliable for backup. |
| -- mongofiles | Manipulates files in GridFS objects. |
| -- mongoimport | Import utility (JSON, CSV, TSV), not reliable for recoveries. |
| -- mongooplog | Pulls oplog entries from another mongod instance. |
| -- mongoperf | Check disk I/O performance. |
| --mongorestore | Database backup restore utility. |
| --mongos | Mongodb shard process. |
| --mongosniff | Sniff/traces MongoDB database activity in real time, Unix-like systems only. |
| --mongostat | Returns counters of database operation. |
| --mongotop | Tracks/reports MongoDB read/write activities. |
| -- mongorestore | Restore/import utility. |
Note: All applications are within the --bin directory.
The installed software includes 15 applications (or 14, under Microsoft Windows) that you will be using in conjunction with your MongoDB databases. The two “most important” applications are the mongo and mongod applications. The mongo application allows you to use the database shell; this shell enables you to accomplish practically anything you’d want to do with MongoDB.
The mongod application starts the service or daemon, as it’s also called. There are also many flags you can set when launching the MongoDB applications. For example, the service lets you specify the path where the database is located (--dbpath), show version information (--version), and even print some diagnostic system information (with the --sysinfo flag)! You can view the entire list of options by including the --help flag when you launch the service. For now, you can just use the defaults and start the service by typing mongod in your shell or command prompt.
Using the MongoDB Shell
Once you create the database directory and start the mongod database application successfully, you’re ready to fire up the shell and take a sneak peak at the powers of MongoDB.
Fire up your shell (Unix) or your command prompt (Windows); when you do so, make sure you are in the correct location, so that the mongo executable can be found. You can start the shell by typing mongo at the command prompt and hitting the Return key. You will be immediately presented with a blank window and a blinking cursor (see Figure 2-1). Ladies and gentlemen, welcome to MongoDB!

Figure 2-1. The MongoDB shell
If you start the MongoDB service with the default parameters, and start the shell with the default settings, you will be connected to the default test database running on your local host. This database is created automatically the moment you connect to it. This is one of MongoDB’s most powerful features: if you attempt to connect to a database that does not exist, MongoDB will automatically create it for you. This can be either good or bad, depending on how well you handle your keyboard.
![]() Tip There’s an on-line demo shell available on the MongoDB website where you can try out any of the commands listed.
Tip There’s an on-line demo shell available on the MongoDB website where you can try out any of the commands listed.
Before taking any further steps, such as implementing any additional drivers that will enable you to work with your favorite programming language, you might find it helpful to take a quick peek at some of the more useful commands available in the MongoDB shell (see Table 2-2).
Table 2-2. Basic Commands within the MongoDB Shell
Command |
Function |
|---|---|
| show dbs | Shows the names of the available databases. |
| show collections | Shows the collections in the current database. |
| show users | Shows the users in the current database. |
| use <db name> | Sets the current database to <db name>. |
![]() Tip You can get a full list of commands by typing the help command in the MongoDB shell.
Tip You can get a full list of commands by typing the help command in the MongoDB shell.
Installing Additional Drivers
You might think that you are ready to take on the world now that you have set up MongoDB and know how to use its shell. That’s partially true; however, you probably want to use your preferred programming language rather than the shell when querying or otherwise manipulating the MongoDB database. 10gen offers multiple official drivers, and many more are offered in the community that let you do precisely that. For example, drivers for the following programming languages can be found on the MongoDB website:
- C
- C++
- C#
- Erlang
- Java
- JavaScript
- Node.js
- Perl
- PHP
- Python
- Ruby
- Scala
In this section, you will learn how to implement MongoDB support for two of the more popular programming languages in use today: PHP and Python.
![]() Tip There are many community-driven MongoDB drivers available. A long list can be found on the MongoDB website, www.mongodb.org.
Tip There are many community-driven MongoDB drivers available. A long list can be found on the MongoDB website, www.mongodb.org.
PHP is one of the most popular programming languages in existence today. This language is specifically aimed at web development, and it can be incorporated into HTML easily. This fact makes the language the perfect candidate for designing a web application, such as a blog, a guestbook, or even a business-card database. The next few sections cover your options for installing and using the MongoDB PHP driver.
Getting MongoDB for PHP
Like MongoDB, PHP is a cross-platform development tool, and the steps required to set up MongoDB in PHP vary depending on the intended platform. Previously, this chapter showed you how to install MongoDB on both Ubuntu and Windows; we’ll adopt the same approach here, demonstrating how to install the driver for PHP on both Ubuntu and Windows.
Begin by downloading the PHP driver for your operating system. Do this by firing up your browser and navigating to www.mongodb.org. At the time of writing, the website includes a separate menu option called Drivers. Click this option to bring up a list of currently available language drivers (see Figure 2-2).
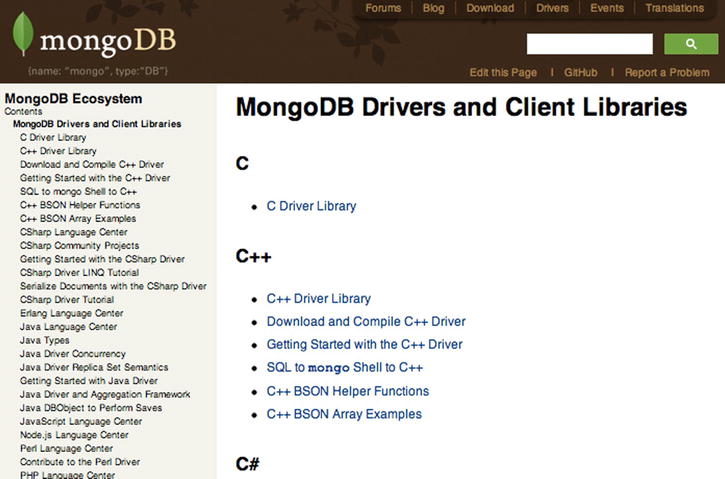
Figure 2-2. A short list of currently available language drivers for MongoDB
Next, select PHP from the list of languages and follow the links to download the latest (stable) version of the driver. Different operating systems will require different approaches for installing the MongoDB extension for PHP automatically. That’s right; just as you were able to install MongoDB on Ubuntu automatically, you can do the same for the PHP driver. And just as when installing MongoDB under Ubuntu, you can also choose to install the PHP language driver manually. Let’s look at the two options available to you.
Installing the PHP Driver on Unix-Based Platforms Automatically
The developers of PHP came up with a great solution that allows you to expand your PHP installation with other popular extensions: PECL. PECL is a repository solely designed for PHP; it provides a directory of all known extensions that you can use to download, install, and even develop PHP extensions. If you are already acquainted with the package-management system called aptitude (which you used previously to install MongoDB), then you will be pleased by how similar PECL’s interface is to the one in aptitude.
Assuming that you have PECL installed on your system, open up a console and type the following command to install the MongoDB extension:
$ sudo pecl install mongo
Entering this command causes PECL to download and install the MongoDB extension for PHP automatically. In other words, PECL will download the extension for your PHP version and place it in the PHP extensions directory. There’s just one catch: PECL does not automatically add the extension to the list of loaded extensions; you will need to do this step manually. To do so, open a text editor (vim, nano, or whichever text editor you prefer) and alter the file called php.ini, which is the main configuration file PHP uses to control its behavior, including the extensions it should load.
Next, open the php.ini file, scroll down to the extensions section, and add the following line to tell PHP to load the MongoDB driver:
extension=mongo.so
![]() Note The preceding step is mandatory; if you don’t do this, then the MongoDB commands in PHP will not function. To find the php.ini file on your system, you can use the grep command in your shell: php –i | grep Configuration.
Note The preceding step is mandatory; if you don’t do this, then the MongoDB commands in PHP will not function. To find the php.ini file on your system, you can use the grep command in your shell: php –i | grep Configuration.
The “Confirming That Your PHP Installation Works” section later in this chapter will cover how to confirm that an extension has been loaded successfully.
That’s all, folks! You’ve just installed the MongoDB extension for your PHP installation, and you are now ready to use it. Next, you will learn how to install the driver manually.
Installing the PHP Driver on Unix-Based Platforms Manually
If you would prefer to compile the driver yourself or for some reason are unable to use the PECL application as described previously (your hosting provider might not support this option, for instance), then you can also choose to download the source driver and compile it manually.
To download the driver, go to the github website (http://github.com). This site offers the latest source package for the PHP driver. Once you download it, you will need to extract the package, and make the driver by running the following set of commands:
$ tar zxvf mongodb-mongdb-php-driver-<commit_id>.tar.gz
$ cd mongodb-mongodb-php-driver-<commit_id>
$ phpize
$ ./configure
$ sudo make install
This process can take a while, depending on the speed of your system. Once the process completes, your MongoDB PHP driver is installed and ready to use! After you execute the commands, you will be shown where the driver has been placed; typically, the output looks something like this:
Installing '/ usr/lib/php/extensions/no-debug-zts-20060613/mongo.so'
You do need to confirm that this directory is the same directory where PHP stores its extensions by default. You can use the following command to confirm where PHP stores its extensions:
$ php -i | grep extension_dir
This line outputs the directory where all PHP extensions should be placed. If this directory doesn’t match the one where the mongo.so driver was placed, then you must move the mongo.so driver to the proper directory, so PHP knows where to find it.
As before, you will need to tell PHP that the newly created extension has been placed in its extension directory, and that it should load this extension. You can specify this by modifying the php.ini file’s extensions section; add the following line to that section:
extension=mongo.so
Finally, a restart of your web service is required. When using the Apache HTTPd service, you can accomplish this using the following service command:
sudo /etc/init.d/apache2 restart
That’s it! This process is a little lengthier than using PECL’s automated method; however, if you are unable to use PECL, or if you are a driver developer and interested in bug fixes, then you would want to use the manual method instead.
Installing the PHP Driver on Windows
You have seen previously how to install MongoDB on your Windows operating system. Now let’s look at how to implement the MongoDB driver for PHP on Windows.
For Windows , there are precompiled binaries available for each release of the PHP driver for MongoDB. You can get these binaries from the previously mentioned github website (http://github.com). The biggest challenge in this case is choosing the correct package to install for your version of PHP (a wide variety of packages are available). If you aren’t certain which package version you need, you can use the <? phpinfo(); ?> command in a PHP page to learn exactly which one suits your specific environment. We’ll take a closer look at the phpinfo() command in the next section.
After downloading the correct package and extracting its contents, all you need to do is copy the driver file (called php_mongo.dll) to your PHP’s extension directory; this enables PHP to pick it up.
Depending on your version of PHP, the extension directory may be called either Ext or Extensions. If you aren’t certain which directory it should be, you can review the PHP documentation that came with the version of PHP installed on your system.
Once you place the driver DLL into the PHP extensions directory, you still need to tell PHP to load the driver. Do this by altering the php.ini file and adding the following line in the extensions section:
extension=php_mongo.dll
When done, restart the HTTP service on your system, and you are now ready to use the MongoDB driver in PHP. Before you start leveraging the magic of MongoDB with PHP, however, you need to confirm that the extension is loaded correctly.
Confirming That Your PHP Installation Works
So far you’ve successfully installed both MongoDB and the MongoDB driver in PHP. Now it’s time to do a quick check to confirm whether the driver is being loaded correctly by PHP. PHP gives you a simple and straightforward method to accomplish this: the phpinfo() command . This command shows you an extended overview of all the modules loaded, including version numbers, compilation options, server information, OS information, and so on.
To use the phpinfo() command, open a text or HTML editor and type the following:
<? phpinfo(); ?>
Next, save the document in your webserver’s www directory and call it whatever you like. For example, you might call it test.php or phpinfo.php. Now open your browser and go to your localhost or external server (that is, go to whatever server you are working on) and look at the page you just created. You will see a good overview of all PHP components and all sorts of other relevant information. The thing you need to focus on here is the section that displays your MongoDB information. This section will list the version number, port numbers, hostname, and so on (see Figure 2-3).
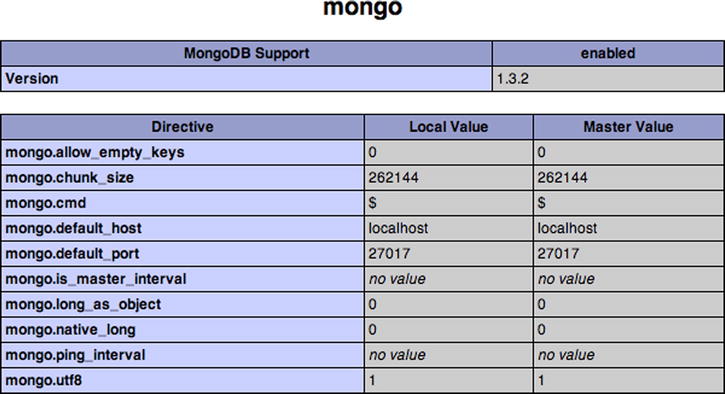
Figure 2-3. Displaying your MongoDB information in PHP
Once you confirm that the installation was successful and that the driver loaded successfully, you’re ready to write some PHP code and walk through a MongoDB example that leverages PHP.
Connecting to and Disconnecting from the PHP Driver
You’ve confirmed that the MongoDB PHP driver has been loaded correctly, so it’s time to start writing some PHP code! Let’s take a look at two simple yet fundamental options for working with MongoDB: initiating a connection between MongoDB and PHP, and then severing that connection.
You use the Mongo class to initiate a connection between MongoDB and PHP; this same class also lets you use the database server commands. A simple yet typical connection command looks like this:
$connection = new Mongo();
If you use this command without providing any parameters, it will connect to the MongoDB service on the default MongoDB port (27017) on your localhost. If your MongoDB service is running somewhere else, then you simply specify the hostname of the remote host you want to connect to:
$connection = new Mongo(" example.com ");
This line instantiates a fresh connection for your MongoDB service running on the server and listening to the example.com domain name (note that it will still connect to the default port: 27017). If you want to connect to a different port number, however (for example, if you don’t want to use the default port, or you’re already running another session of the MongoDB service on that port), you can do so by specifying the port number and hostname:
$connection = new Mongo(" example.com:12345 ");
This example creates a connection to the database service. Next, you will learn how to disconnect from the service. Assuming you used the method just described to connect to your database, you can call $connection again to pass the close() command to terminate the connection, as in this example:
$connection->close();
The close doesn’t need to be called, except in unusual circumstances. The reason for this is that the PHP driver closes the connection to the database once the Mongo object goes out of scope. Nevertheless, it is recommended that you call close() at the end of your PHP code; this helps you avoid keeping old connections from hanging around until they eventually time out. It also helps you ensure that any existing connection is closed, thereby enabling a new connection to happen, as in the following example:
$connection = new Mongo();
$connection->close();
$connection->connect();
The following snippet shows how this would look like in PHP:
<?php

// Establish the database connection
$connection = new Mongo()

// Close the database connection
$connection->close();

?>
Python is a general-purpose and easy-to-read programming language.
These qualities make Python a good language to start with when you are new to programming and scripting. It’s also a great language to look into if you are familiar with programming, and you’re looking for a multi-paradigm programming language that permits several styles of programming (object-oriented programming, structured programming, and so on). In the upcoming sections, you’ll learn how to install Python and enable MongoDB support for the language.
Installing PyMongo under Linux
Python offers a specific package for MongoDB support called PyMongo . This package allows you to interact with the MongoDB database, but you will need to get this driver up and running before you can use this powerful combination. As when installing the PHP driver, there are two methods you can use to install PyMongo: an automated approach that relies on setuptools or a manual approach where you download the source code for the project. The following sections show you how to install PyMongo using both approaches.
Installing PyMongo Automatically
The pip application that comes bundled with the python-pip package lets you automatically download, build, install, and manage Python packages. This is incredibly convenient, enabling you to extend your Python modules installation even as it does all the work for you.
![]() Note You must have setuptools installed before you can use the pip application. This will be done automatically when installing the python-pip package.
Note You must have setuptools installed before you can use the pip application. This will be done automatically when installing the python-pip package.
To install pip, all you need to do is tell apt-get to download and install it, like so:
$ sudo apt-get install python-pip
When this line executes, pip will detect the currently running version of Python and installs itself on the system. That’s all there is to it. Now you are ready to use the pip command to download, make, and install the MongoDB module, as in this example:
$ sudo pip install pymongo
Again, that’s all there is to it! PyMongo is now installed and ready to use.
![]() Tip You can also install previous versions of the PyMongo module with pip using the pip install pymongo= x.y.z command. Here, x.y.z denotes the version of the module.
Tip You can also install previous versions of the PyMongo module with pip using the pip install pymongo= x.y.z command. Here, x.y.z denotes the version of the module.
Installing PyMongo Manually
You can also choose to install PyMongo manually . Begin by going to the download section of the site that hosts the PyMongo plugin (http://pypi.python.org/pypi/pymongo). Next, download the tarball and extract it. A typical download and extract procedure might look like this in your console:
$ wget http://pypi.python.org/packages/source/p/pymongo/pymongo-2.5.1.tar.gz
$ tar xzf pymongo-2.5.1.tar.gz
Once you successfully download and extract this file, make your way to the extracted contents directory and invoke the installation of PyMongo by running the install.py command with Python:
$ cd pymongo-2.5.1
$ sudo python setup.py install
The preceding snippet outputs the entire creation and installation process of the PyMongo module. Eventually, this process brings you back to your prompt, at which time you’re ready to start using PyMongo.
Installing PyMongo under Windows
Installing PyMongo under Windows is a straightforward process. As when installing PyMongo under Linux, Easy Install can simplify installing PyMongo under Windows as well. If you don’t have setuptools installed yet (this package includes the easy_install command), then go to the Python Package Index website (http://pypi.python.org) to locate the setuptools installer.
![]() Caution The version of setuptools you download must match the version of Python installed on your system.
Caution The version of setuptools you download must match the version of Python installed on your system.
For example, assume you have Python version 2.7.5 installed on your system. You will need to download the setuptools package for v2.7.x. The good news is that you don’t need to compile any of this; rather, you can simply download the appropriate package and double-click the executable to install setuptools on your system! It is that simple.
![]() Caution If you have previously installed an older version of setuptools, then you will need to uninstall that version using your system’s Add/Remove Programs feature before installing the newer version.
Caution If you have previously installed an older version of setuptools, then you will need to uninstall that version using your system’s Add/Remove Programs feature before installing the newer version.
Once the installation is complete, you will find the easy_install.exe file in Python’s Scripts subdirectory. At this point, you’re ready to install PyMongo on Windows.
Once you’ve successfully installed setuptools, you can open a command prompt and cd your way to Python’s Scripts directory. By default, this is set to C:Pythonxy Scripts, where xy represents your version number. Once you navigate to this location, you can use the same syntax shown previously for installing the Unix variant:
C:Python27Scripts> easy_install PyMongo
Unlike the output that you get when installing this program on a Linux machine, the output here is rather brief, indicating only that the extension has been downloaded and installed (see Figure 2-4). That said, this information is sufficient for your purposes in this case.

Figure 2-4. Installing PyMongo under Windows
Confirming That Your PyMongo Installation Works
To confirm whether the PyMongo installation has completed successfully, you can open up your Python shell. In Linux, you do this by opening a console and typing python. In Windows, you do this by clicking Start ➤ Programs ➤ Python xy ➤ Python (commandline). At this point, you will be welcomed to the world of Python (see Figure 2-5).
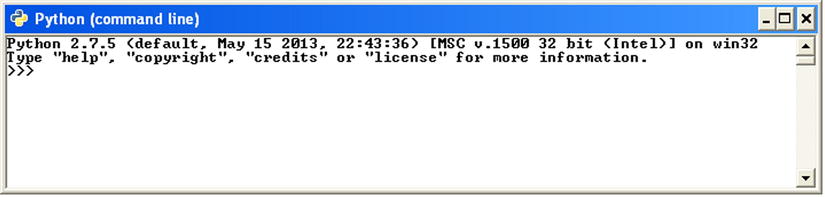
Figure 2-5. The Python shell
You can use the import command to tell Python to start using the freshly installed extension:
>>> import pymongo
>>>
![]() Note You must use the import pymongo command each time you want to use PyMongo.
Note You must use the import pymongo command each time you want to use PyMongo.
If all went well, you will not see a thing, and you can start firing off some fancy MongoDB commands. If you received an error message, however, something went wrong, and you might need to review the steps just taken to discover where the error occurred.
Summary
In this chapter, we examined how to obtain the MongoDB software, including how to select the correct version you need for your environment. We also discussed the version numbers, how to install and run MongoDB, and how to install and run its prerequisites. Next, we covered how to establish a connection to a database through a combination of the shell, PHP, and Python.
We also explored how to expand MongoDB so it will work with your favorite programming languages, as well as how to confirm whether the language-specific drivers have installed correctly.
In the next chapter, we will explore how to design and structure MongoDB databases and data properly. Along the way, you’ll learn how to index information to speed up queries, how to reference data, and how to leverage a fancy new feature called geospatial indexing.