
We'll use Vagrant (https://www.vagrantup.com/) to create a local VM. Please install it if you do not have it already.
The Vagrantfile we'll use is already available inside the vfarcic/k8s-specs (https://github.com/vfarcic/k8s-specs). It's in the cd/docker-build directory, so let's go there and take a quick look at the definition.
 1  cd cd/docker-build
 2
 3  cat Vagrantfile
The output of the latter command is as follows.
# vi: set ft=ruby :

Vagrant.configure("2") do |config|
    config.vm.box = "ubuntu/xenial64"

    config.vm.define "docker-build" do |node|
        node.vm.hostname = "docker-build"
        node.vm.network :private_network, ip: "10.100.198.200"
        node.vm.provision :shell, inline: "apt remove -y docker docker-engine docker.io"
        node.vm.provision :shell, inline: "apt update"
        node.vm.provision :shell, inline: "apt install apt-transport-https ca-certificates curl software-properties-common"
        node.vm.provision :shell, inline: "curl -fsSL https://download.docker.com/linux/ubuntu/gpg | apt-key add -"
        node.vm.provision :shell, inline: "add-apt-repository "deb [arch=amd64] https://download.docker.com/linux/ubuntu $(lsb_release -cs) stable""
        node.vm.provision :shell, inline: "apt update"
        node.vm.provision :shell, inline: "apt install -y docker-ce"
        node.vm.provision :shell, inline: "sudo apt install -y default-jre"
    end
end
That Vagrantfile is very simple. Even if you never used Vagrant, you should have no trouble understanding what it does.
We're defining a VM called docker-build, and we're assigning it a static IP 10.100.198.200. The node.vm.provision will install Docker and JRE. The latter is required for establishing the connection between Jenkins and this soon-to-be VM.
Next, we'll create a VM based on that Vagrantfile definition.
1 vagrant up
Now that the VM is up and running, we can go back to Jenkins and add it as a new agent node.
1 open "http://$JENKINS_ADDR/computer/new"
Please type docker-build as the Node name, select Permanent Agent, and click the OK button.
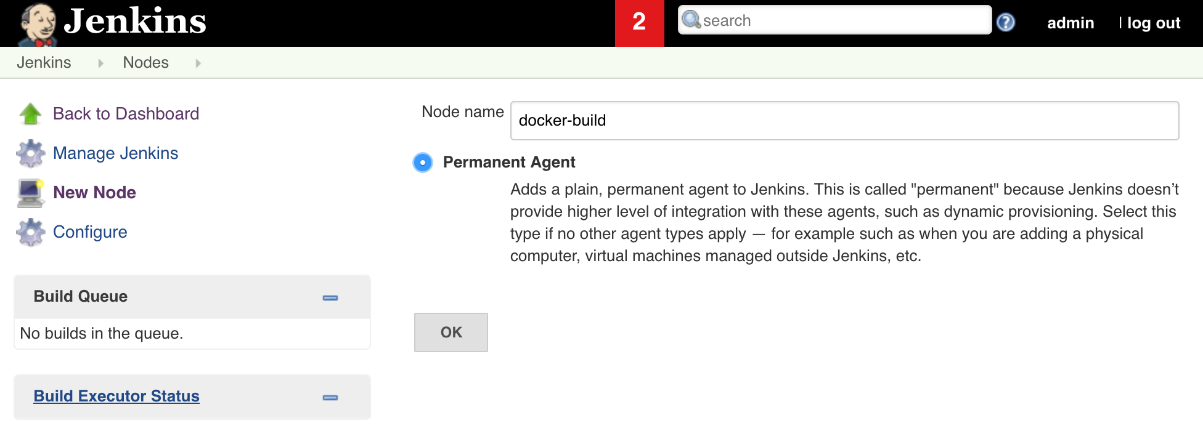
You are presented with a node configuration screen.
Please type 2 as the # of executors. That will allow us to run up to two processes inside this agent. To put it differently, up to two builds will be able to use it in parallel. If there are more than two, the new builds will wait in a queue until one of the executors is released. Depending on the size of your organization, you might want to increase the number of executors or add more nodes.
As a rule of thumb, you should have one executor per CPU. In our case, we should be better of with one executor, but we'll roll with two mostly as a demonstration.
Next, we should set the Remote root directory. That's the place on the node's file system where Jenkins will store the state of the builds. Please set it to /tmp or choose any other directory. Just remember that Jenkins will not create it, so the folder must already exist on the system.
We should set labels that define the machine we're going to use as a Jenkins agent. It is always a good idea to be descriptive, even if we're sure that we will use only one of the labels. Since that node is based on Ubuntu Linux distribution and it has Docker, our labels will be docker ubuntu linux. Please type the three into the Labels field.
There are a couple of methods we can use to establish the communication between Jenkins and the newly created node. Since it's Linux, the easiest, and probably the best method is SSH. Please select Launch slave agents via SSH as the Launch Method.
The last piece of information we'll define, before jumping into credentials, is the Host. Please type 10.100.198.200.
We're almost finished. The only thing left is to create a set of credentials and assign them to this agent.
Please click the Add drop-down next to Credentials and select Jenkins.
Once in the credentials popup screen, select SSH Username with private key as the Kind, type vagrant as the Username, and select Enter directly as the Private Key.
We'll have to go back to the terminal to retrieve the private key created by Vagrant when it generated the VM.
1 cat .vagrant/machines/docker-build/virtualbox/private_key
Please copy the output, go back to Jenkins UI, and paste it into the Key field. Type docker-build as the ID, and click the Add button.
The credentials are generated, and we are back in the agent configuration screen. However, Jenkins did not pick the newly credentials automatically, so we'll need to select vagrant in the Credentials drop-down list.
Finally, since we used the private key, we'll skip verification by selecting Non verifying Verification Strategy as the Host Key Verification Strategy.

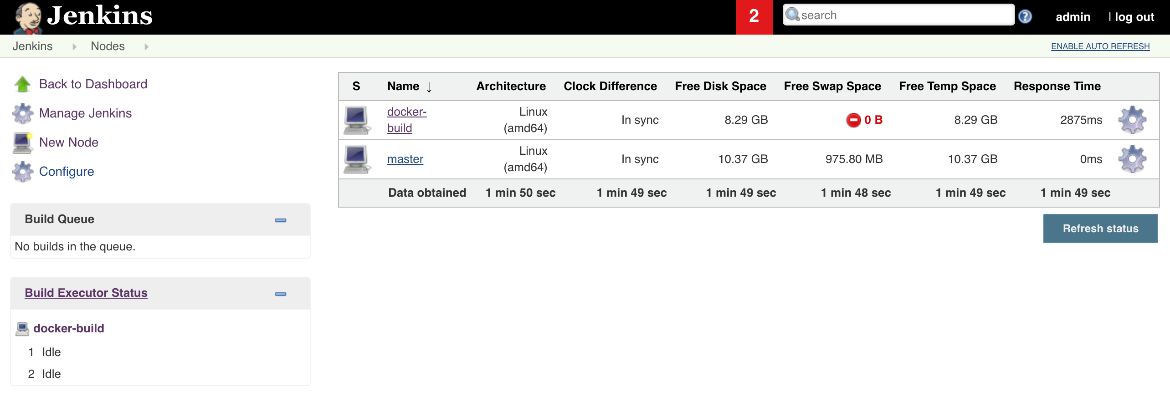
Do not forget to click the Save button to persist the agent information.
You'll be redirected back to the Nodes screen. Please refresh the screen if the newly created agent is red.
All that's left is to go back to the k8s-specs root directory.
 1  cd ../../
 2
 3  export DOCKER_VM=true
We'll use the newly created agent soon. Feel free to skip the next two sections if this was the way you're planning to create agents for building container images.