
50. ENABLING THE PEOPLE FEATURE IN LIGHTROOM
![]()
IN LIGHTROOM YOU have the option to allow the software to search through your entire catalog, an individual folder, or a collection to create a database of faces and names that you can use to find individuals in your pictures. To enable this feature, click on the People button (face icon) in the toolbar at the bottom of the center workspace (Figure 50.1).
You will be presented with two options: Start Finding Faces in Entire Catalog, or Only Find Faces As-Needed (Figure 50.2). When you choose Only Find Faces As-Needed, this option will only be available when you select the People view feature for the currently selected folder or collection.
All of this will happen in the background mode in Lightroom (Figure 50.3). It’s not going to slow you down drastically, but there is some processing that will be going on in the background.

Figure 50.1 Enabling the People view in Lightroom.

Figure 50.2 Lightroom gives you two options for detecting faces.

Figure 50.3 Lightroom runs all of the facial detection in the background so you can continue to work on your images.
Lightroom will start going through your pictures and looking for faces to add to the People view. You will see that you have two distinct sections: Named People and Unnamed People. Lightroom will try to group pictures of the same person together. Of course, you will most likely have multiple groups of the same person because they don’t always look exactly the same in each picture. You can see how many pictures there are in each group in the upper-left corner of the thumbnail that’s on top of the stack (Figure 50.4).
At this point the process is pretty simple. All you have to do is select one of the unnamed people and type in a name (Figure 50.5). Lightroom will continue to aggregate pictures to that thumbnail when it finds pictures that it believes are a match for that name.
After you’ve added a name to a thumbnail, that person will go into the Named People section (Figure 50.6). If Lightroom continues to process pictures that are similar, you will be prompted with the name for that person. For example, I’ve created a tag for my daughter Sabine, and in the Unnamed People section in Figure 50.7, you can see that I’m starting to get more options asking me, is this person “Sabine?”

Figure 50.4 Lightroom attempts to group pictures of the same person together. The number in the upper-left corner of each thumbnail tells you how many pictures are in that group.

Figure 50.5 Adding my daughter’s name, Sabine, to the pictures.

Figure 50.6 There is now a tag for my daughter Sabine in the Named People section.

Figure 50.7 As Lightroom gets smarter about finding faces, your job matching them gets a lot easier.
I can single-click on the checkmark in the lower-right corner of a thumbnail, or I can select multiple thumbnails and click on one of the checkmarks, and Lightroom will move those thumbnails to the Named People section. You can also add images to a named person by dragging thumbnails from the Unnamed People section onto a name in the Named People section (Figure 50.8).
If you want to eliminate any faces from being sorted by Lightroom, you can always click on the X in the lower-left corner of the thumbnail (Figure 50.9).
As you scroll down through the Unnamed People thumbnails and find an image that matches a named person, single-click on the text field and you’ll notice that as you start typing, Lightroom will prefill the already existing name (Figure 50.10). This is a great time saver.
There will be times when you’re not quite sure what Lightroom is looking at because the thumbnail doesn’t really show a face (Figure 50.11). In this case, you can double-click on the thumbnail and Lightroom will open a full view of the image with a white square around the area that was shown in the thumbnail (Figure 50.12). Simply grab the square and drag it over the facial area, and then type in the appropriate name (Figure 50.13).
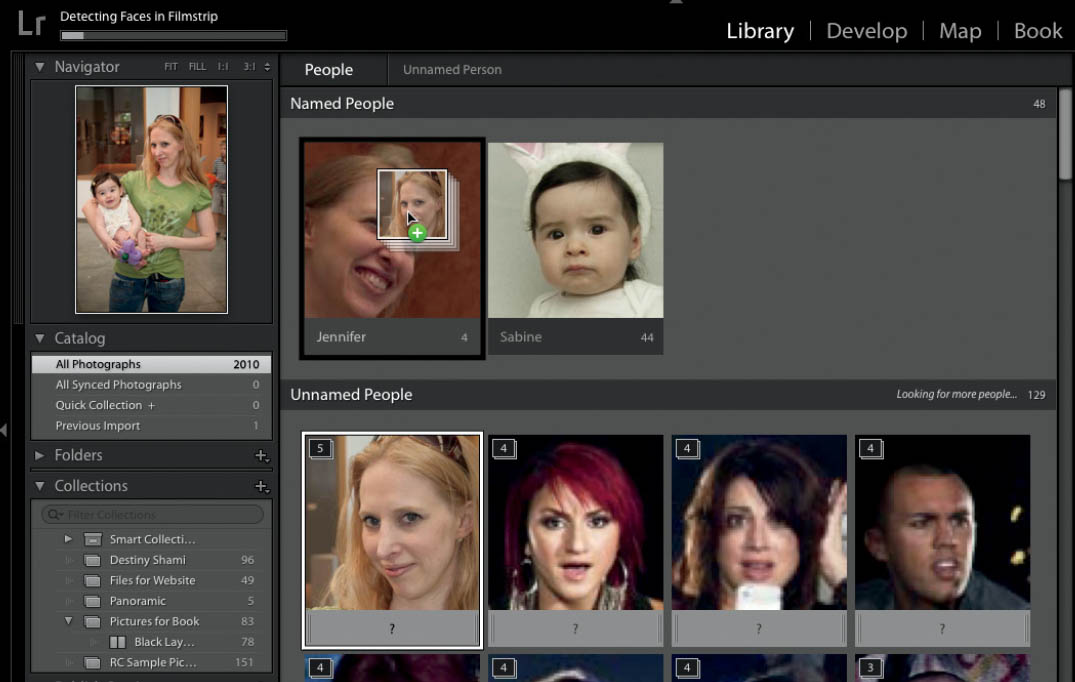
Figure 50.8 You can add multiple thumbnails to a named person by dragging them onto that name in the Named People section.

Figure 50.9 I have absolutely no idea who the person in the third image really is. Let’s remove him from this list.

Figure 50.10 Lightroom will prefill an already existing name when you start to type it.

Figure 50.11 I know that’s Sabine, but the thumbnail only shows her shirt.

Figure 50.12 When I double-click on the thumbnail, Lightroom opens a full view of the image with a square around the area used for the thumbnail.

Figure 50.13 I’ll move the square so that it surrounds Sabine’s face, and then type her name into the text field.
There will also be thumbnails for images that have more than one person in them, but only one person is identified. For example, Figure 50.14 shows a picture of my wife’s grandfather Poppy, and my daughter. However, Lightroom has identified that there is only one face (Poppy). I’d like to tag another face in the image, so I’ll drag out a new box for Sabine on the left. Now I can type in both names and both people will be tagged in the image (Figure 50.15).
One of my favorite parts about using this feature is that I can scroll through my library and reconnect with some pictures that I haven’t seen in awhile, all in the process of working to add names to faces.

Figure 50.14 One of my favorite pictures of Sabine and her great-grandfather Poppy. May he rest in peace.

Figure 50.15 Both Sabine and Poppy are tagged in the image.