

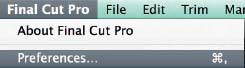
Setting up Preferences is not the most exciting place to start, however, it can save you a lot of hassle later on by getting it right from the beginning. The Preferences in Final Cut Pro X are relatively sparse compared to the myriad of choices offered in some editing programs.
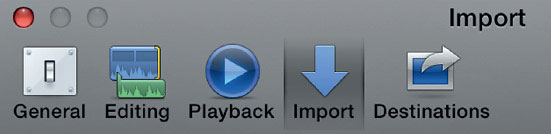
There are five separate panes:
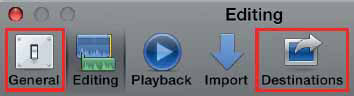
General, Editing, Playback, Import and Destinations. The most important of these for setting up your system are Editing, Playback and Import.

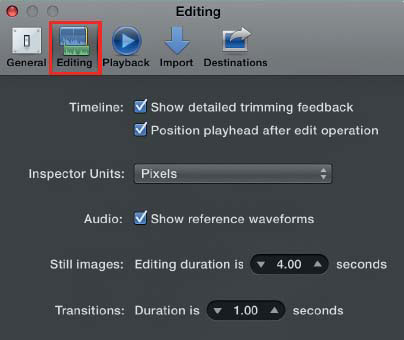
For the most part, the Editing Preferences can be left at their defaults. I suggest making sure the two following options are checked: Show Detailed Trimming Feedback and Position Playhead after Edit Operation.
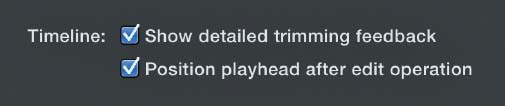
To active Detailed Trimming Feedback means when using the Trim mode while editing, the feedback display will be that of two windows: one showing the outgoing clip and the other showing the incoming clip. You can precisely fine-tune edits by watching the dual display. This functionality will be useful once we begin the editing process.


Selecting Position Playhead after Edit Operation means that each time you perform an edit, then what is known as the Playhead—the point which defines where you are in the Timeline, will be left in position immediately after where the edit has taken place.
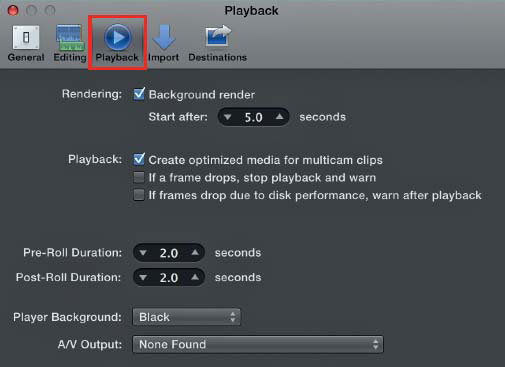
As with the Editing Preferences, most of the Playback Preferences can be left at the default settings; however, it is worth understanding the key options in front of you as what you choose will affect the performance of your system. We will work our way down from the top.
Choose whether you wish to have Background Rendering switched on or off. With Background Rendering switched on this means that when you are not working, the computer will render the frames of your movie in full pristine quality for you to view. If you leave Background Rendering switched on, after the defined time, then the computer will kick in and render any media in the Timeline which needs to be processed.
![]()
It may be that you don’t want the computer to do the rendering while you are working, in which case switch Background Render off. Render files consume hard drive space, and while these can be easily deleted, there are times when one may wish to avoid rendering until you are ready.
![]()
My preference is to leave Background Rendering switched off. I like to define when rendering takes place and do not wish to generate render files until I need content rendered in the Timeline.
![]()
If you plan on working with Multicam clips in your work then you may wish to check the Create optimized media for multicam clips. This means if the footage is difficult for Final Cut Pro X to work then the footage will be converted to another format (ProRes) which Final Cut Pro X can easily work with. Beware that the conversion process can take some time.
I do work with Multicam frequently. I choose to leave this option unchecked. I would rather manually convert my footage, if needed. Otherwise you may find a great deal of hard drive consumed due to the conversion process. However, if you are just starting out I suggest leaving this option checked. You can always go back into Preferences and switch this off if you choose.
The rest of the Playback Preferences you can leave at the defaults. Note the AV Output if you are working with external monitoring.
![]()
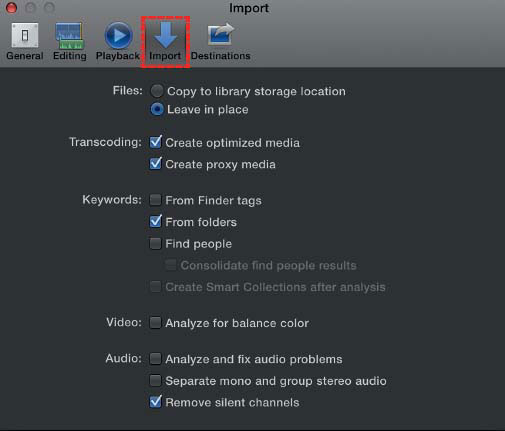
Several of the Import Preferences are crucial to defining how you work with Final Cut Pro X. The first option is very important: Copy to Library Storage Location or Leave in Place. If you leave this option checked, then every media file used in the project will be copied into an area known as the Library. A Library is stored on hard drive, wherever you define, and you have a choice of whether to include all of your media internal, within the Library, or external, which means elsewhere on hard drive wherever you define.
If you choose to Copy files to Library Storage Location this is referred to as a Managed Library. Effectively you are handing control to Final Cut Pro X to take care of managing your media for you. You need to be careful defining where you store the Library, on hard drive, as all your media will then be copied into the Library. You therefore need to make sure you store the Library on a hard drive with plenty of room to store the media (avoid using your boot drive if possible). Effectively, using Copy to Library Storage Location means that you are leaving it to Final Cut Pro X to do all the media management for you (Note: when importing camera originals from media card these files will need to be imported to the Library Storage Location, unless you plan on leaving the media card online while editing!)
![]()
The downside to choosing Copy to Library Storage Location is that you will consume a lot of hard drive space as the media will exist in its original location and also within the Library you are working with. While you could remove the original files, once copied, this is risky, in case something goes astray.
Rather than allow Final Cut Pro X to copy all the media to the Library Storage Location, the alternative is to choose Leave in Place. This applies when importing media which already exists on hard drive. These media files will then remain on hard drive in the location where you have defined, and Final Cut Pro X will then reference to these files. This means the files are not copied from one location to another location - rather they remain wherever you have chosen to store them.
![]()
As the name implies, Leave in Place means Final Cut Pro X works with the files wherever you have chosen to store them on hard drive.
Therefore, when working with a Library which you choose to manage yourself, using Leave files in place, as opposed to a Managed Library, where Final Cut Pro X copies the files into the Library, it is important to be aware that if the original media is moved or deleted, then your project will no longer work. You can cause irreparable damage. Provided you are careful and go to the effort of putting the media in a folder, somewhere safe, then you should have no trouble.
You therefore need to define whether you wish to work with a Managed Library or if you wish to manually decide where your media will be stored. The fact is, even when you choose to Leave in place, much of the time some of the media will end up being copied to the Library if files need to be Transcoded.
Furthermore, as already mentioned, files imported from memory card or other devices will be copied to the Current Library. It is only media, already stored on hard drive, which does not need transcoding that can be external to the Library.
Note the next choice in the Import Preferences which is Transcoding.

In most cases I leave Create Optimized Media checked. This means any media which Final Cut Pro X decides is difficult to work with, such as AVCHD or H.264, will automatically be transcoded to ProRes on import. If the media can be easily worked with in its current form, then it will be left in its original state. Regardless, when transcoding files Final Cut Pro X always retains the original media for future use, so nothing is lost!
It is important to be aware that if media is transcoded it will be stored within the Library, even if you have chosen to Leave in place. Anytime Final Cut Pro X needs to transcode, generate media or render files, then these files will be stored within the Library. You will get a much better sense of how Libraries work once we get onto organization and editing. For now, just know that the Library is the place where everything is stored for the editing process, be it media files, render files, graphics, audio or anything else—with the proviso being that external media files will be referenced to, if you select Leave files in place, providing they do not need to be transcoded.
![]()
You don’t need to leave Create optimized media checked—however, it is advisable to do so. Final Cut Pro X is pretty good at determining if media needs to be transcoded for fluid playback and trouble-free editing. Regardless, you can choose to work with this option unchecked—which some do, as optimizing media, when required, will take time and use up hard drive space. You can always choose to optimize media, at a later time, after Import.
You can also choose to work with Proxy media.
Working with Proxy media provides the ability to switch between full-resolution media and low-resolution ProRes Proxy files. For this to take place, the media must be transcoded. By leaving the option Create Proxy Media checked on import, the low-resolution Proxy files will automatically be generated.
![]()
I tend to leave this option switched off. Working with smaller proxy files will undeniably provide for better performance, the expense is that these files need to be generated, which takes up time, system resources, and hard drive space.
While in general I leave the Create Proxy Media option switched off, if you find your system is choking or stuttering whilst playing or outputting video, or if you have plenty of time and wish to experiment, then let Final Cut Pro X build the Proxies and you will get a feel for the result. Because the Proxies run at a low data rate, rendering will be quicker and the speed of the system will feel more responsive and fine tuned. You can then, at any point switch between the low resolution Proxy files or full resolution camera original media or transcoded media.

Like optimized media you can choose to generate Proxy files later. This does not need to be done on import. This will be covered later in the editing chapter.

I always leave the option checked—Keywords: From folders. The importance of Keyword Collections will become clear when we begin editing and filing media. For this moment, be aware that naming the folder on hard drive before you import, will result in the name of that folder being applied to the collection of the clips in what is known as a Keyword Collection.
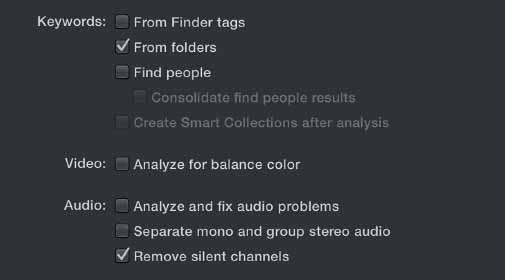
The other options in Import Preferences I usually leave switched off. For my editing, I do not want the computer to analyze my footage for color balance on import or to look for audio problems. These are tasks I would prefer to do manually myself. I do, however, leave the option switched on in the Audio settings to Remove silent channels.
Note: Leaving these options unchecked does not mean you lose the ability to perform these tasks. Each of the processes can be done later during editing.
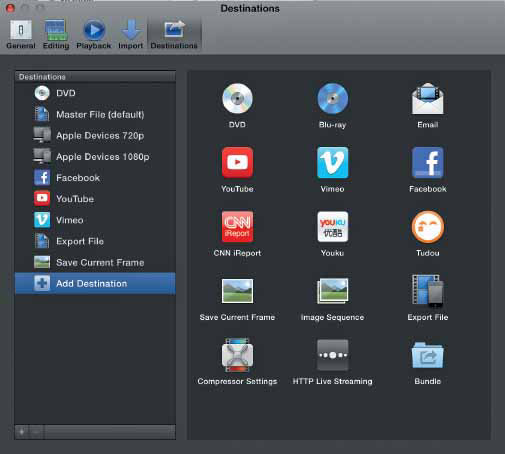
Note: The two options I haven’t covered in Preferences: General and Destinations. Leave these at their defaults.
The Destinations are to do with distribution of your edited movies. Once you have completed the postproduction process, you can choose to output your Project to various formats such as DVD, Blu-ray, as a master file, or to encode to many different formats. This area in Preferences enables you to add several options for distribution output beyond those provided at the defaults.
What Apple gives you with Final Cut Pro X is a complete editing system. Do not underestimate the power of Final Cut Pro X. Compared to the suites of yesterday, this is a tremendously capable editing system with features we couldn’t have even dreamed of.