
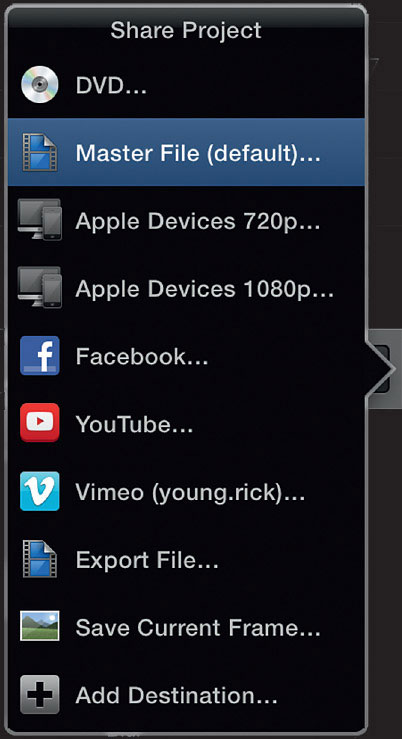
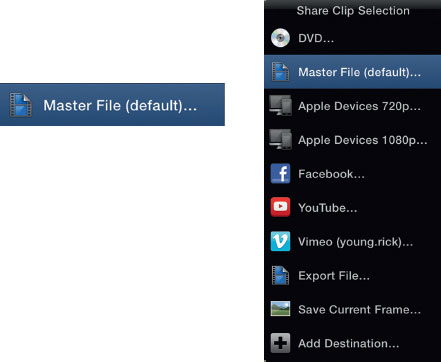
When you have finished your movie, the time has come to output. Using the Share facility in Final Cut Pro X you can output to produce a master file, a DVD, Blu-ray, or you can upload direct to YouTube, Facebook or Vimeo. Think of Share as being the output and distribution area within Final Cut Pro X. Share is the final part of the process and enables you to get your edit in front of its intended audience.
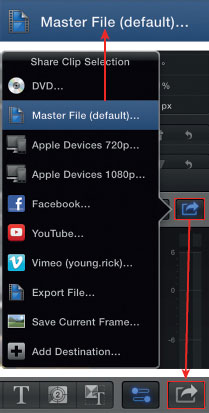
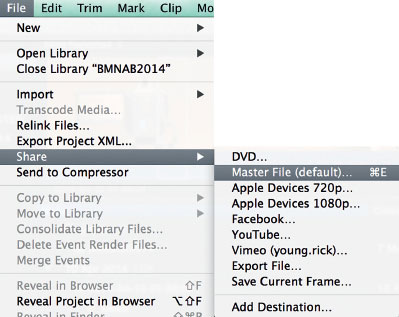
By far the most important part of Share, for the professional editor, is the means to create a Master file. This can be created with the same properties as the project, or there are other output settings you can choose from. The Share command is accessed by pressing the Share icon, located center right of the interface, or Share can be selected from the File Menu.
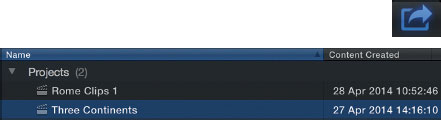
You can export your movie direct from the Timeline—or select the Project in the Browser, and then choose Share.
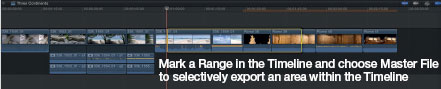
If you wish to selectively export a section of the Timeline, as opposed to everything in the Timeline/Project, first mark a Range in the Timeline, and then choose Master File.
Follow the procedure described, making sure you define the codec and destination for the encoded file. The result will be only the area of the Timeline you have defined will be exported.
Note: you can only export a section within the Timeline when working with the Project already open. If you choose to highlight the Project in the Browser, and then select Share, the result will be the entire Project will be exported.
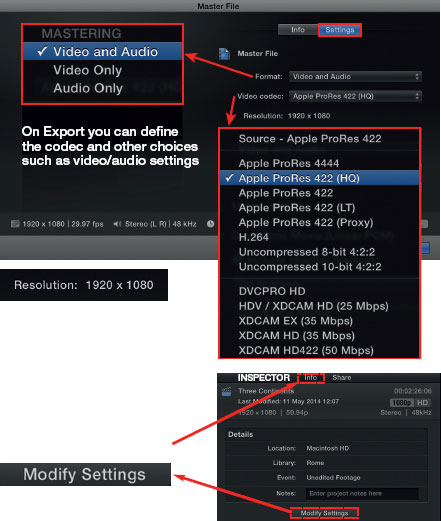
On export you can choose to Export Video & Audio, Video only or Audio Only. You can also choose any of the codecs offered in the list of options.

Note: the pixel Resolution is defined by the settings of the Project.
Should you wish to change the resolution this can be done by selecting the Project in the Browser and then, in the Inspector, choose Modify Settings—found in Info.
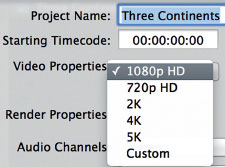
Here you can set the project to be anything from 720p to 1080p, 2K, 4K, 5K or you can even define a custom size.
Don’t be confused by this barrage of information about codecs and image resolution. All we are doing is exporting a file. The technical options simply define the image size, resolution and file type. The video properties applied in Info within the Inspector, will then apply on Export using Share. It is likely that you will seldom need to delve into this area.
In summary, to Export a Master File:
1 Highlight the project you wish to export in the Browser; or, open the Project so the Timeline is open in front of you.
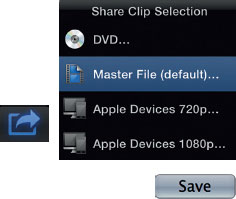
2 Open Share and choose Export Master File.
3 Choose Settings and then choose the codec and define video/audio settings. Much of the time these can be left at the defaults—regardless it is worth checking the settings are as you want them to be before exporting.
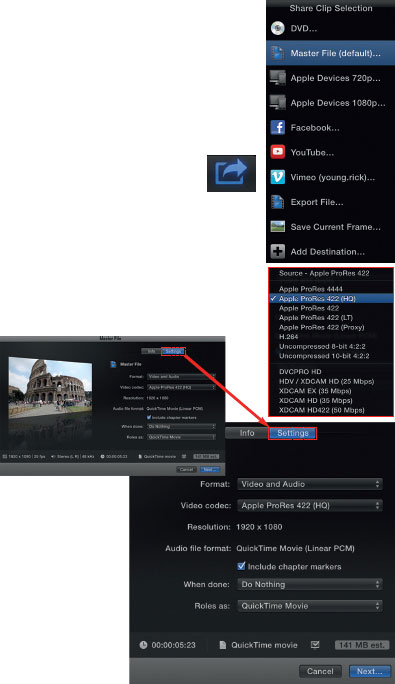
Choose settings to reveal the encoding details which you can modify before exporting.
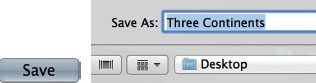
4 Name the file and define the destination where the file will be saved.
5 Choose Save.
To Export a Range within a Project Timeline involves the same procedure, however you need to:
1 Define a Range in the Timeline by marking “i” for in or “o” for out.
2 Choose Share—Master File.
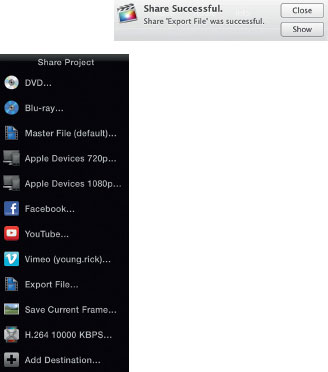
3 Check the codec and other settings are correct, define a destination and Save the file. Once the process is complete an alert will appear to let you know the Share process has been successful.
This one command, Create Master file, is crucial to creating a master for distribution and encoding and for creating a secure master of your finished movie.
There are many other export options accessible from within Share.
You can use the Share facility to export to Apple devices, meaning iPad, iPhone, and iPod. The file produced can then be viewed in iTunes on any Mac or on Apple devices.
You can upload to YouTube, Vimeo or Facebook direct from Share.
Of particular use to video editors is the ability to quickly and easily produce a DVD or a Blu-ray of an edit.
Simply choose DVD or Blu-ray from Share and you can then set various parameters to customize the disc. This isn’t designed to be a full-blown DVD or Blu-ray authoring system, but it does provide an easy means to produce DVDs or Blu-ray discs for client viewing or other purposes.
For those who use Compressor, Apple’s encoding application, you can access Compressor settings from within Share.
Note the Add Destination option at the bottom of Share. This opens the Destinations Preference which enables you to add options to Share beyond the default options. For example, you can add Export Still, Blue-ray, Custom Compressor settings, Image Sequence, Save Current Frame and other settings.
![]()
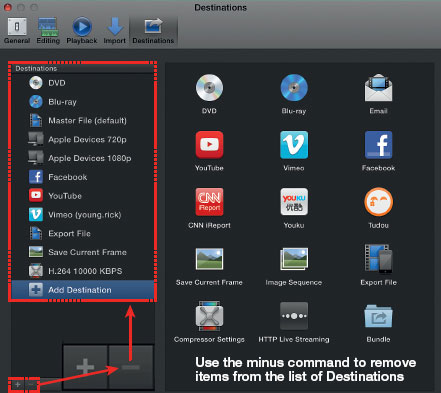
Choose the option within the Destinations window, drag this into the list of Destinations and release your mouse. You can then reorder items within Destinations as you wish. Furthermore, highlight an item and use the minus (–) control to remove items from the list.
Once you have made your changes, close the Destinations window and then open Share, and the changes you made are then reflected in the list of Export Options.
When you select an export option from Share you will be presented with choices in Settings. For example, to upload to Vimeo you need to enter account information; to create a DVD or Blu-ray you may wish to define a background image for the menu; to Save Current Frame allows you to save a still as a JPG, TIFF, PDF or PNG file.
Share gives the means to export your digital movie, or a portion of your digital movie; to create a high quality master; to encode the movie to different codecs; and to upload the movie for online digital distribution.
The key to getting effective results from Share is to check the Settings.
For example, you may choose to export a Still using Save Current Frame. Go into Settings, check the options, define the file type, then choose a location on drive to save the Still.
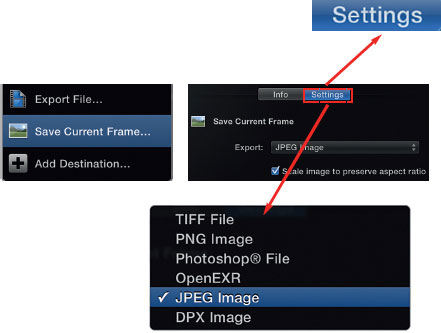
Choose the file type for the still you are to export.
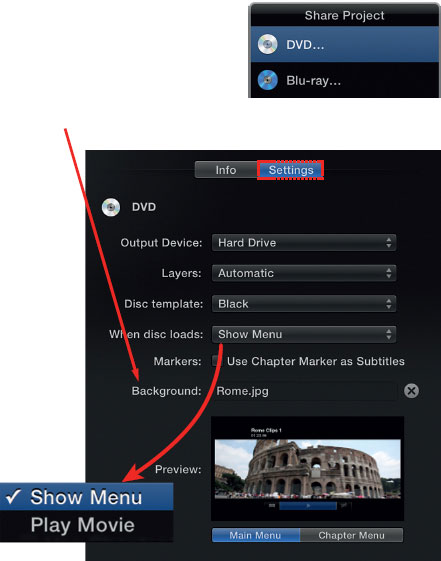
You may wish to build a DVD. Choose the DVD option from Share; select Settings and look at the options. You can define a still for the menu background, decide when the disc loads to Show Menu rather than to Play Movie straight away, plus there are other choices to consider.
The choices you make directly affect the output result, so take the time to explore these areas. If you are unsure about encoding options or some of the choices presented, then experiment! This is how you will learn. Most of my encoding knowledge has come from direct experience of seeing what works best in terms of quality versus file size.
Media management is something which happens when you set up your project, during importing media, and throughout the entire editing process. If done correctly, when you get to the end of the project, providing your media has been managed correctly, there isn’t a great to deal to do other than the very important task of effectively archiving the Library and all the Projects within it (dealt with next!)
In terms of Media Management there are a few tips to help you along the way.
Delete Render Files for Projects and Events
If you have Background Rendering switched on in Preferences—or if you choose to manually render while working, inevitably this will generate render files which will, at some point, no longer be needed. Furthermore, even Render files which are needed can easily be generated again if you choose to clear these from drive.

To delete render files from an Event:
1 Highlight the Event.
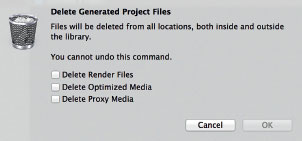
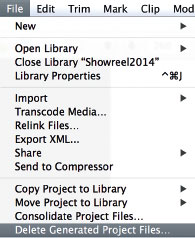
2 Choose the File Menu and scroll to Delete Generated Project Files. You will then be presented with a window presenting you with choices to Delete Render Files, or to Delete Optimized Media or you can Delete Proxy Media. Choose carefully! While the media can be regenerated this does take time.

3 Make your selection of which files you wish to delete and click OK.
To delete render files from a single or multiple Projects:
1 Highlight the Project or Projects in the Browser which you wish to delete the render files from.
2 Choose File—Delete Generated Event Files.
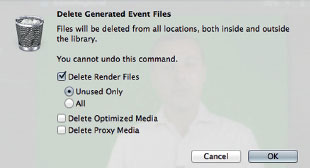
3 A window will open providing you with options—choose Delete Render Files.
4 With Delete Render Files selected—then decide if you wish to Delete Unused Only or All the Render Files on hard drive.
The main reason to render content in the Timeline is for smooth playback of video at full resolution. The main reason to delete render files is to free up hard drive space.
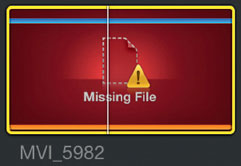
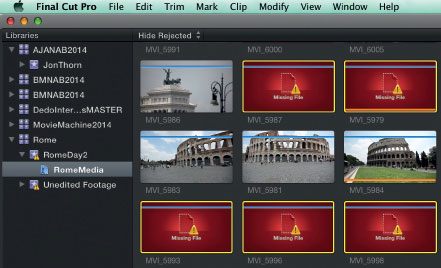
Sometimes Final Cut Pro X and the media in the Browser and/or Timeline can become disconnected. This is usually due to human error, when files are copied, moved or deleted from hard drive. When the link is broken between Final Cut Pro X and the project media, a yellow warning will appear in each of the Event headings, and red icons will indicate missing files in the Browser and also the Timeline.
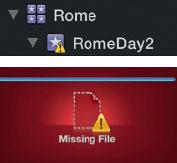
Both the yellow triangle and red icons indicate missing files.
The solution to the missing files is to Relink to the media. Once this is done the red offline warnings in the clips will disappear and the yellow triangle in the Event titles. You can then access the media.
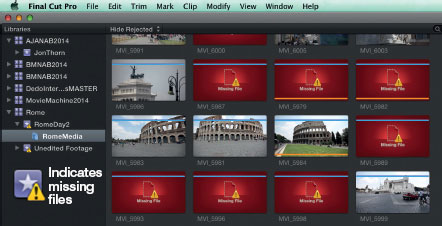
Above: Missing files in Icon View in the Browser.
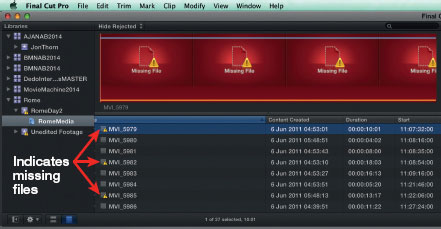
Above: Missing files in List View in the Browser.
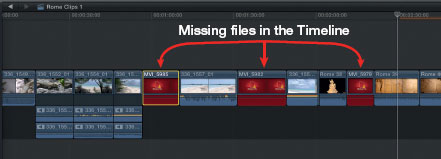
Above: Missing files in the Timeline.
To relink to media requires you to know where that media is. The Relink command enables you to relink to media, however, it doesn’t find the media for you.
The easiest way to locate media is to do a Search for it. Look at the clip names on the missing media—you can even click on the name of a missing clip within an event, highlight this and copy the information. Then click on the Mac Desktop—or select Finder from the dock, invoke the Apple Search Facility (Command + F) and enter the information of the missing media. Once you have located this—then you can relink to it. If you highlight several or many clips you can then relink to media in bulk.
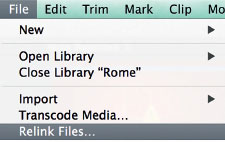
1 Highlight the Missing Files which you wish to relink to.
2 At the top of the Final Cut Pro X interface choose the menu File—Relink Files.
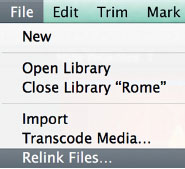
3 A window will open giving you the option to Relink to Missing Files or All Files. I suggest relinking only to Missing Files.
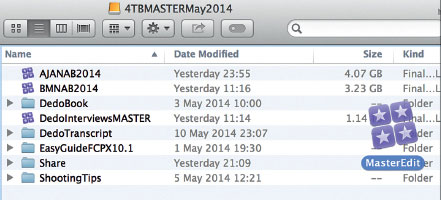
4 Press the Locate All button.
5 Navigate to the folder on hard drive which contains the missing files. Click Choose to select from the folder.
![]()
6 Press the Relink Files button to Relink the missing media.
![]()
Once relinked, the yellow and red warning will disappear and the media is available for you to work with.

Archive or Backing Up of your entire Library is very different to creating a Master File. On one level, creating a Master File is archiving the edited movie, however there are times when we need more than this.
In addition to needing the edited movie archived, we also need the entire Library and all the Projects contained within the Library to be backed up and archived—so at any time we can return to the master edit and change this, re-edit it as necessary, perhaps create foreign language versions, promos, shorter or longer versions … Essentially, we must be able to return to the master edit at any time, and we also must protect the edit! Which means storing all of the content on at least 2 hard drives.
Archiving of your entire Library and all of the Projects, media, proxy files, and anything else within the Library, is delightfully simple.
You simply copy the Library from one hard drive to another.
Let me repeat that—You simply copy the Library from one hard drive to another.
Make sure that the hard drive you are copying to is large enough to contain the Library being copied and all media associated with it!
Once the process of copying the Library from drive to drive is complete, you need to select the command Consolidate Media from the File Menu in Final Cut Pro X.
Once the Consolidate Media command has been selected, any media which is external to the Library you are working with will then be copied into this Library. The result is all media within the Library is internal—nothing is external!
This is the key to successful archiving. Let me repeat the fundamental steps:
1 Copy the Library you wish to archive from one drive to another.
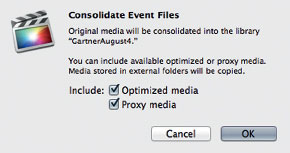
2 Once the copy process has taken place, open Final Cut Pro X. Highlight the Library in the Browser and choose File—Consolidate Library Files.
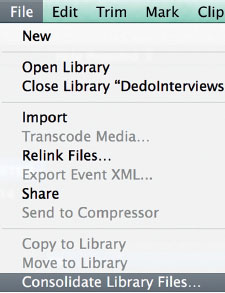
3 You can choose to include Optimized Media and Proxy Media. Click OK and the media will then be written to hard drive within the Library you have chosen to consolidate.
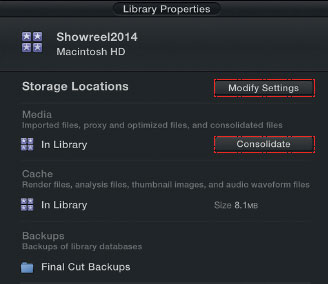
Let the process Consolidate Library Files take place. This may take some time if there is a lot of media to copy.
A Consolidated Library can get quite large, particularly if there are many different Projects with hours upon hours of media within the Library.
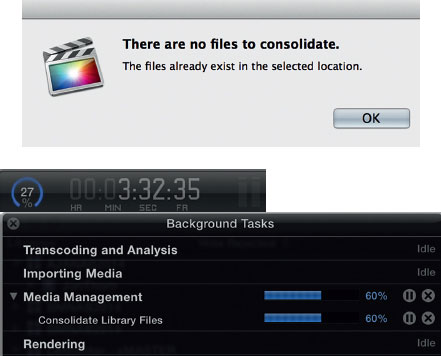
If you try to consolidate a Library which already has all media internal, then there will be nothing to consolidate. You will get a message to let you know that the files already exist in the selected location.
Click in the Dashboard to view progress
Once the Consolidate Media process is complete, I then quit Final Cut Pro X, disconnect all hard drives from the Mac and restart. I then connect up the drive with the copied Library, which now has had the media consolidated into the single Library. I then open this Library. Providing there are no yellow triangles or red missing media symbols within any of the Events or project timelines, then you know that the Library is intact with everything in place.
You now have a master backup of the Library with Projects and Media. You can then choose to back this up to a third hard drive, or solid state solution such as Blu-ray, or a long-term tape archive solution such as LTO.
Do not underestimate the importance of this final archiving stage, as doing this will protect the Projects, the Library and all of the master media so you can return at any stage for further postproduction work.
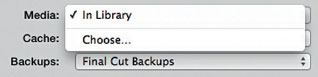
Note: when you click on a Library in the Browser, you are then presented with some important choices within the Inspector. In the image below you can see that you can Modify Settings or you can Consolidate Media.
![]()
Choosing to Consolidate opens the same window and gives you the same choices which you are given when choosing the command Consolidate Library Files from the File menu.
If you choose Modify Setting you can then define: where media files will be stored—you can choose somewhere other than the Library; you can choose where Cache files will be stored; and very important, you can also choose where the Backups will be located.
While you can well and truly leave these settings at their defaults, it can be advantageous to manually define these Storage Locations. Before you start messing about too much, make sure you know what you’re doing and exactly where your media will be stored.