

For many years, the Windows GUI version was the superstar in the IDA stable. Since the release of IDA version 6.0 this is no longer the case, as Linux and OS X users can now enjoy GUI versions of IDA for their platforms. However, this new version in no way changes the fact that there are several alternative ways to use IDA. The original version of IDA was actually an MS-DOS console application, and the console version remains available on all platforms to this day. With built-in remote debugging capabilities, IDA is a powerful multiplatform analysis and debugging tool.
Beyond its interactive capabilities, IDA offers a batch-processing mode in all of its versions to facilitate automated processing of large numbers of files. The key to effective batch processing with IDA is to understand what each version can and cannot do and choose the appropriate version of IDA to suit your requirements. In this chapter we discuss IDA’s console version and how to make the most of IDA’s batch-processing facilities.
The heart of all console versions of IDA is a Borland-developed, console I/O library called TVision that has been ported to several platforms, including Windows, Linux, and Mac OS X, among others. Hex-Rays makes the source code for its current TVision port available to paying IDA customers on its IDA download page.[65]
The use of a common library across all platforms keeps the user interface consistent on all of the console versions. There are a few annoyances to deal with in moving from platform to platform, however, such as varying degrees of support for the mouse, resizing, and the ability to pass hotkeys to the IDA application. We discuss some of the problems and, when available, workarounds in the platform-specific sections that follow.
As the term console mode implies, the text-based versions of IDA all run within a terminal or shell of some sort. These consoles may have varying degrees of support for resizing and the use of a mouse, resulting in limitations that you will need to learn to live with. The types of limitations depend on which platform and terminal program you are using.
The console user interface consists of a menu bar across the top line of the display to show menu options and status and a common operations bar across the bottom line of the display that’s similar to a text-based toolbar. Available operations are activated using hotkeys or, when supported, by clicking the mouse. Virtually every command available in the GUI version is available in some form in the console version, and most of the hotkey associations are preserved as well.
The IDA display windows consume the space between the upper menu bar and the lower command bar. However, a common limitation, regardless of which terminal program you happen to use, is that there is little display room when the screen is limited to roughly 80 by 25 characters and no graphics. Therefore, console versions of IDA typically open only two display windows by default: the disassembly window and the messages window. In order to approximate the tabbed display windows found in the GUI version, IDA uses the TVision library’s overlapping windowing capability for text windows and assigns the F6 key (in lieu of window title tabs) to cycle through available open windows. Each window is numbered sequentially, and the window ID is present in the upper left-hand corner.
When mouse support is available in your console, it is possible to resize an IDA display window by clicking and dragging the lower right corner of the display window to the desired size. To repositioxsn a display window, you click and drag the display’s top border. Lacking mouse support, you can move and resize individual displays via Window ▸ Resize/Move (ctrl-F5) and then use your arrow keys to move and shift-arrow keys to resize the active window. If your terminal program can be resized using the mouse, IDA recognizes the new terminal size and expands (or shrinks) to fill it as appropriate.
Without graphics capability, the integrated graph-based disassembly mode is not available, and no control-flow arrows are displayed in the left margin of the disassembly listing window. However, all subviews available in the GUI version are available in the console versions. As in the GUI version, the majority of subviews are accessible via the View ▸ Open Subviews menu. The one major difference in available displays is that hex dumps are not available as a unique subview. Instead, you can toggle a disassembly to a hex dump and back using Options ▸ Dump/Normal View (ctrl-F4). In order to have both a disassembly and a hex view open simultaneously, you must open a second disassembly window (View ▸ Open Subviews ▸ Disassembly) and toggle the new view to a hex dump. Unfortunately, there is no way to synchronize the new hex dump to the existing disassembly view.
With mouse support, navigating your way around the disassembly remains much the same as the GUI version, where double-clicking any name takes you to the corresponding address. Alternatively, positioning the cursor on a name and pressing enter causes the display to jump to the corresponding named location (this also happens to work in the GUI version). Pressing enter while the cursor is positioned on the name of a stack variable opens the detailed stack frame view for the associated function. Without mouse support, the menus work similarly to many other console applications, employing the alt-x method of menu navigation, where x is a highlighted character on the current screen.
The Windows cmd.exe (command.exe on the Windows 9x family) terminal is not terribly flexible, but it is fairly well supported by IDA’s console version. The Windows console version of IDA is named idaw.exe, while the GUI version is named idag.exe. The corresponding versions for 64-bit binaries (available with the advanced version of IDA) are named idaw64.exe and idag64.exe, respectively.
In order for IDA’s mouse support to work in Windows, you must ensure that QuickEdit mode is disabled for the terminal in which you are running IDA. To configure QuickEdit mode as one of the terminal’s properties, right-click the terminal’s title bar and select Properties; then deselect QuickEdit mode on the Options tab. You must do this prior to launching IDA, as the change will not be recognized while IDA is running.
Unlike Linux terminals running under X Windows, cmd.exe cannot be expanded by using the mouse to enlarge the window. On Windows only, IDA’s console version offers the Window ▸ Set Video Mode menu option to resize cmd.exe to one of six fixed terminal sizes, up to a maximum of 255 by 100.
While no graph mode is available in the disassembly window, IDA’s external graphing options are available. Selections from the View ▸ Graphs menu will cause IDA to launch the configured graph viewer (such as qwingraph) to display the resulting graph. For Windows versions of IDA, it is possible to open several graphs at once and continue to use IDA while the graphs are open.
The Linux console version of IDA is named idal (or idal64 for analyzing 64-bit binaries). Prior to IDA 6.0, Linux and OS X console versions were included as standard components of your IDA distribution. As such, when you copy these console versions to your Linux or OS X platform, you must also copy your IDA key file (ida.key) so that your console version will run properly. Note that this requires that you install IDA on a Windows machine at least once, even if you never intend to run the Windows version. On Unix-style systems you may alternatively copy your key file to $HOME/.idapro/ida.key. If you do not create it, IDA automatically creates the IDA personal settings directory ($HOME/.idapro) the first time you launch IDA.
IDA 6.x installations are much simpler. Because IDA 6.x is purchased for a specific platform, the installation procedure on your platform takes care of installing the GUI version, the console version, and your IDA key file to suitable locations.
Basic navigation in the Linux version is similar to navigation in the Windows console version; several Linux specifics are addressed in this section. Users’ tastes for Linux terminal programs are as varied as their tastes for Linux distributions in general. IDA includes a file named tvtuning.txt that offers some details on how to configure various terminal types, including remote Windows terminal clients such as SecureCRT and PuTTY.
One of the biggest challenges that you will face when using Linux terminal programs is making sure that your hotkey sequences are passed all the way to IDA and not captured by the terminal program itself. For example, will alt-F open IDA’s File menu or your console’s File menu? The two options for dealing with this problem are to find a terminal program whose hotkey sequences don’t overlap IDA’s (or that can be configured not to overlap) or to edit IDA’s configuration file to remap commands to hotkeys that are not used by your terminal. If you choose to remap the hotkeys, you may want to update the hotkey mappings on every computer on which you use IDA so that you don’t have to remember which mapping is in effect at each location. You may also find it difficult to interact with other IDA users who are using the default mappings.
If you choose to use the standard Linux text display, the dimensions of your IDA console will be fixed, and your mouse support will be dependent on your use of GPM (the Linux console mouse server). If you are not using GPM for mouse support, you should specify the noGPM option for TVision when you launch IDA, as shown here:
# TVOPT=noGPM ./idal [file to disassemble]
Color choices are quite limited in console mode, and you may need to adjust your color settings (Options ▸ Colors) to ensure that all text is visible and does not blend into the background. Four predefined color palettes are available, with the option to customize the colors (a choice of 16) used for various parts of the disassembly.
If you are running X, then you may be running KDE’s konsole, Gnome’s gnome-terminal, a straight xterm, or some other variation on a terminal. Other than xterm, most terminals offer their own menus and associated hotkeys that may or may not overlap IDA’s hotkey assignments. Consequently, xterm is not a bad choice for running IDA, although it is not necessarily the most visually appealing. KDE’s konsole is our preferred Linux console as it offers the best appearance, fewest hotkey collisions, and smoothest mouse performance.
In order to address some of the problems surrounding keyboard and mouse use within various X Windows consoles, Jeremy Cooper developed a native X11 port[66] of the TVision libraries. Using this modified version of TVision allows you to launch IDA in its own X window rather than consume an entire console. Compiling Cooper’s TVision port yields a drop in replacement for libtvision.so, the shared TVision library used by idal. After installing the new library, you may receive an error message stating that a VGA font can’t be loaded when you attempt to run IDA. If this happens, you will need to install a VGA font and let your X server know where to find it. A suitable VGA font is available at http://gilesorr.com/bashprompt/xfonts/ (download both vga and sabvga). Another interesting feature of using the native X11 port is that you can forward the X11 window to another machine. Thus, you can run IDA on Linux but forward the X11 window (over ssh of course) to a Mac.
For remote access to your Linux-based IDA installation using the Hex-Rays–supplied TVision libraries, we recommend that you configure your terminal software to emulate an xterm (consult tvtuning.txt and your terminal emulator’s documentation for more information) and then launch IDA according to the instructions contained in tvtuning.txt. For example, you must specify TVOPT=xtrack in order for the mouse to work with IDA when using SecureCRT as your terminal emulator.
You can, of course, choose to export your TVOPT settings, eliminating the need to specify them every time you launch IDA. For a full overview of available TVision options, refer to linux.cpp in the TVision source distribution.
External graph views on Linux are available from the console version only if you happen to be running IDA in a windowing environment, and you have configured the GRAPH_VISUALIZER variable in ida.cfg to point to a suitable graph rendering program.[67] IDA versions prior to 6.0 are only capable of generating graphs using GDL. You may install a GDL viewer such as aiSee[68] and configure IDA to launch the new application by editing IDA’s main configuration file, <IDADIR>/cfg/ida.cfg. The configuration option GRAPH_VISUALIZER specifies the command to be used to view IDA’s GDL graphs (all legacy mode graphs). The default setting looks something like this:
GRAPH_VISUALIZER = "qwingraph.exe -remove -timelimit 10"
The remove option asks qwingraph to delete the input file, which is useful when you are displaying temporary files. The timelimit option specifies the number of seconds to spend attempting to generate a pretty graph. If the graph cannot be laid out neatly within this time, qwingraph switches to a “fast and ugly”[69] layout algorithm. Beginning with IDA 6.0, the GRAPH_VISUALIZER option is enclosed in a conditional block to provide separate settings for Windows and non-Windows platforms. If you are editing ida.cfg on a non-Windows platform, make sure that you are editing the correct portion of the file. If you have installed a GDL viewer such as aiSee, then you need to edit GRAPH_VISUALIZER to point to your viewer of choice. For a typical installation of aiSee, this might result in the following:
GRAPH_VISUALIZER = "/usr/local/bin/aisee"
Note that it is always best to specify the full path to your GDL viewer to ensure that it is found when IDA attempts to launch it. Finally, since qwingraph is open source software, users of older versions of IDA are free to download the source for qwingraph from Hex-Rays (see Chapter 9), build it, and integrate qwingraph into their IDA installations.
IDA’s console versions for OS X are named the same as the Linux versions (idal and idal64). As with the Linux and Windows console versions, the OS X versions rely on the TVision library to support console I/O.
The fact that the Mac keyboard has a different layout than a PC keyboard presents a few challenges when running the Mac version of IDA, primarily because the Mac’s option/alt key does not behave like the PC’s alt key where application menus are concerned.
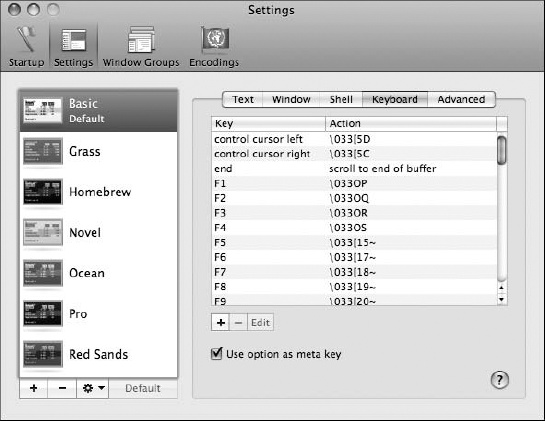
The obvious choice for attempting to run IDA is the Mac’s Terminal application. When launching IDA using Terminal, be sure to configure the option key as an alt key for use within IDA. Doing so allows keyboard access to IDA alt key shortcuts, such as all of the main IDA menus (alt-F for the File menu, for example). If you don’t select this option, you’ll have to use the esc key in lieu of alt; thus, esc-F brings up the File menu. Since esc has back or close-window functionality in IDA, this approach is not recommended. Figure 10-1 shows the Terminal Inspector dialog, which is accessed via Terminal ▸ Preferences when Terminal is active. Select the Use option key as meta key checkbox to make the option key behave as an alt key.
One potential alternative to Terminal is iTERM,[70] which allows the alt functionality of the option key and enables mouse sup-port as well. Another terminal that many developers seem to like is the gnome terminal, which has been ported[71] to X11 on OS X. Since this requires the installation of XCODE and X11, we won’t do more than mention the existence of the port. Using the default Terminal or iTERM should be sufficient for most users.
An alternative way to run IDA on OS X is to install X11 (available on your OS X installation disks as an optional package) and Jeremy Cooper’s modified TVision library (libtvision.dylib for OS X) to run IDA as a native X11 application. You may wish to add /usr/X11R6/bin to your system PATH (edit PATH in /etc/profile) for easier access to X11-related binaries.
In this configuration, IDA may be launched from an xterm, and it will execute in its own window with full mouse functionality. The problem with the option/alt key will remain, however, as X11 views this key as Mode_switch and fails to pass the key to IDA. Fortunately, X11 allows you to remap keys through the use of the xmodmap utility. One solution is to create (or edit) a file named .Xmodmap in your home directory (something like /Users/idabook/.Xmodmap) containing the following commands:
clear Mod1
keycode 66 = Alt_L
keycode 69 = Alt_R
add Mod1 = Alt_L
add Mod1 = Alt_R
The default X11 startup script (/etc/X11/xinit/xinitrc) contains commands to read .Xmodmap whenever you launch X11. If you have created your own .xinitrc file, which overrides the default xinitrc, you should make sure that it contains a command such as the following; otherwise your .Xmodmap file will not be processed.
xmodmap $HOME/.Xmodmap
Finally, you need to modify the default settings for X11 to prevent the system from overriding your modified key map. Figure 10-2 shows the X11 Preferences dialog.
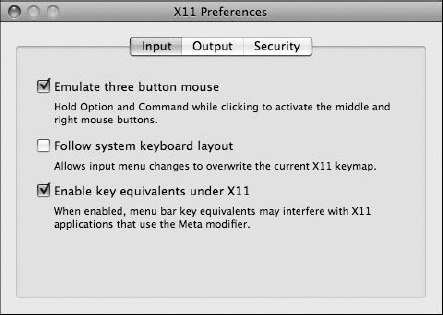
To prevent the system from overriding your keyboard mappings, you must deselect the middle option: Follow system keyboard layout. Once you have made this change, restart X11, and your modified keyboard settings should take effect, making the alt key available to access IDA’s menus. You can verify that X11 recognizes the alt key by using xmodmap to print the current list of keyboard modifiers, as follows:
idabook:~ idabook$ xmodmap xmodmap: up to 2 keys per modifier, (keycodes in parentheses): shift Shift_L (0x40), Shift_R (0x44) lock Caps_Lock (0x41) control Control_L (0x43), Control_R (0x46)mod1 Alt_L (0x42), Alt_R (0x45) mod2 Meta_L (0x3f) mod3 mod4 mod5
If mod1 does not list Alt_L and Alt_R, as shown at ![]() , then your key map has not been updated, in which case you should rerun the
, then your key map has not been updated, in which case you should rerun the xmodmap command listed at ![]() in the previous code.
in the previous code.
[67] Refer to IDA Graphing in IDA Graphing.
[68] The GDL viewer aiSee is available for many platforms and is free for noncommercial use. It can be found at http://www.aisee.de/.
[69] See timelm.c in the wingraph32 or qwingraph source distribution.
[70] See http://iterm.sourceforge.net/.
[71] See http://www.macports.org/.