
Chapter 3. Getting Started with Ubuntu
![]() Adding and Removing Programs and Packages
Adding and Removing Programs and Packages
![]() Upgrading to the Next Ubuntu Release
Upgrading to the Next Ubuntu Release
![]() Customizing Ubuntu’s Look and Feel
Customizing Ubuntu’s Look and Feel
With ubuntu installed and ready to go, it’s time to get started using your new operating system. Unlike other operating systems, such as Microsoft Windows or Mac OS X, Ubuntu includes everything you need to get started: an office suite, media tools, a Web browser, an e-mail client, and more. Now that the installation is complete, you are up and running without having to install any additional software.
Different people use their computers in different ways, and every user has his or her own personal preference for look and feel. Recognizing this desire, Linux has the capability to use any of a number of different graphical interfaces. This flexibility, combined with the ballooning popularity of Linux and open source software, has resulted in literally hundreds of different graphical environments springing up, each covering these different types of users and ways of working.
Even though there is a huge range of environments available, there are two clear leaders: KDE and GNOME. Both of these environments provide a good-looking, comprehensive, and easy-to-use desktop, but they differ in how that desktop is used as well as in how further personalization can take place.
The KDE system aims for complete control and configurability of the desktop. Any desktop configuration options that exist are available to the user, who has easy access and can change the behavior and look of almost everything.
The competing GNOME desktop takes its inspiration from both Windows and Mac OS X and sets a priority on simplicity and ease of use. GNOME is also easy to customize, but the less common options are either eliminated or well hidden to prevent user overload.
Ubuntu users are blessed with the choice of either desktop, along with several other options. Many of these environments are mentioned in Chapter 9.
The Ubuntu desktop is called Unity. The intention behind Unity was to create a user interface that would be similar in design terms between different devices: desktop, phone, tablet, and TV. This will help with the ultimate purpose of Ubuntu—that is, achieving convergence between all of these devices.
In this chapter, we help you get started with Unity, the default desktop for Ubuntu, and show how you can use it to do the normal things you face every day with your computer and a few not-so-normal things. This includes opening and running applications, managing your files, adjusting the look and feel, using applications, managing your media, and more.
Getting Acquainted with Unity
When you start your Ubuntu system, you are presented with a list of users. Once you select your name from the list, you are asked for a password to log in with. In the last chapter, you specified a user account when installing the system, so use that account to log in. First select your name, and then type your password and press Enter. Your password will appear as a series of asterisks (*). This is a security feature.
After a few seconds you will see the Ubuntu desktop appear. Your desktop will look like Figure 3-1.

You may have noticed that, unlike with other operating systems, there are no icons on the Unity desktop. The reason for this is that desktop icons typically are presented by applications, and, as such, you can’t get at them.
Finding and Running Applications with the Launcher
To find or run an application, you use the Launcher. The Launcher sits on the left of the screen. This icon bar shows icon links for applications and indicates with a small arrow which applications are currently open. The Launcher also has a few other handy features.
To find an application in Unity, click the Ubuntu logo at the top of the Launcher at the left side of the desktop (Figure 3-2) or press the Super (Windows) key.

This opens the Dash, which is the main method for finding programs, folders, and files on your computer, as well as many other things such as music files, videos, or Wikipedia articles and other online sources. At the bottom of the Dash is a row of icons called Lenses. Each Lens helps you focus your search in a different way. Any time the Dash is open, you can begin to type the name of a program, folder, or file, and it will automatically search for matches as you type (Figure 3-3). You don’t even have to know the exact name because the search also looks for near matches and similar names; it even does some semantic matching by searching program descriptions and some file contents.

Some of the Dash Lenses include predefined filters to further narrow your search (Figure 3-4). Click Filter Results at the upper right of the Dash Lens to view the available filters.

Other Lenses are available beyond those installed by default. Later in this chapter, you will learn how to use the Ubuntu Software Center. You can find additional Lenses there by searching with the terms unity lens.
Other Icons in the Launcher
In addition to the Ubuntu logo icon described earlier, the Launcher includes several useful entries by default. Most are obvious in their intent and use. Even so, they deserve a quick mention. They are listed here in the order they appear in the Launcher from top to bottom, albeit skipping some more obvious entries.
![]() Home Folder: This icon opens your home folder using the file manager, which is described next. Your home folder is where all of your personal files and folders should be placed.
Home Folder: This icon opens your home folder using the file manager, which is described next. Your home folder is where all of your personal files and folders should be placed.
![]() GNOME Software Center: This icon opens your primary software management system for Ubuntu, which is described later in the chapter.
GNOME Software Center: This icon opens your primary software management system for Ubuntu, which is described later in the chapter.
![]() Workplace Switcher: Once enabled, this tool allows you to have four different screens open on your desktop, with different programs active in each, and switch between them. This feature is very helpful if you tend to have many things open at once and run out of space on your screen. Click it to show all of your desktop workspaces (it also shows you what is open in each, which is convenient). As an example, you may be using your Web browser and e-mail client while talking to your friends in a chat client on the first desktop and working on a document on the second desktop. You can just click each virtual desktop to switch to it to access your different applications. Click the desktop you want to use. Essentially, this expands the screen real estate you have available and creates an easy way to keep many programs open without their blocking one another. To enable workspaces on your system, go to the Dash and search for Appearance. On the behavior tab, click the checkbox for Enable Workspaces.
Workplace Switcher: Once enabled, this tool allows you to have four different screens open on your desktop, with different programs active in each, and switch between them. This feature is very helpful if you tend to have many things open at once and run out of space on your screen. Click it to show all of your desktop workspaces (it also shows you what is open in each, which is convenient). As an example, you may be using your Web browser and e-mail client while talking to your friends in a chat client on the first desktop and working on a document on the second desktop. You can just click each virtual desktop to switch to it to access your different applications. Click the desktop you want to use. Essentially, this expands the screen real estate you have available and creates an easy way to keep many programs open without their blocking one another. To enable workspaces on your system, go to the Dash and search for Appearance. On the behavior tab, click the checkbox for Enable Workspaces.
![]() Trash: This is where files you throw away go until you empty the Trash to remove them permanently. Files dragged onto this icon or right-clicked and moved to trash are destined to be deleted. To fully delete these files, right-click the Trash and select Empty Trash.
Trash: This is where files you throw away go until you empty the Trash to remove them permanently. Files dragged onto this icon or right-clicked and moved to trash are destined to be deleted. To fully delete these files, right-click the Trash and select Empty Trash.
Using Applications
When applications are loaded, the window border has three buttons on the top on the left-hand side:
![]() Orange button with a black X: This button closes the application.
Orange button with a black X: This button closes the application.
![]() Gray button with a black –: This button minimizes the application, taking it off of your screen, and puts it in the Launcher for easy access when you need it again.
Gray button with a black –: This button minimizes the application, taking it off of your screen, and puts it in the Launcher for easy access when you need it again.
![]() Gray button with a black square: This button is used to maximize the window so that it takes up the full desktop area. Not all application windows use this button, so don’t be surprised if you don’t see it for an application that has a small window.
Gray button with a black square: This button is used to maximize the window so that it takes up the full desktop area. Not all application windows use this button, so don’t be surprised if you don’t see it for an application that has a small window.
Every application that is currently in use has an entry in the Launcher on the left of the desktop. You can click these entries to minimize or restore the application, and you can right-click to see some other options, such as one to keep the program icon listed in the Launcher at all times. This is available so that you simply need to click the icon to start the program rather than search for it in the Dash, which makes it convenient for frequently used programs.
Any menus with options that exist for a program currently in use in the foreground will appear in the top panel of the desktop. When you switch programs, the contents of the top panel will change accordingly. Hover over the name of the program at the top of a screen and wait for a list of menus to appear. Click any one to see a drop-down list of options.
Managing Files and Folders
When using your computer, you often need to open and save files and folders, move them around, and perform other tasks. Click the Home Folder icon from the Launcher to open the file manager. Here are some of the main folders you will find contained in your home folder by default (Figure 3-5):

![]() Desktop: This folder contains files that visually appear on your desktop as icons. If you drag a file onto your desktop, it appears in the Desktop folder. Similarly, moving a file out of this folder or deleting it removes it from your desktop.
Desktop: This folder contains files that visually appear on your desktop as icons. If you drag a file onto your desktop, it appears in the Desktop folder. Similarly, moving a file out of this folder or deleting it removes it from your desktop.
![]() Documents: This folder is intended to contain word processing files and other documents you create.
Documents: This folder is intended to contain word processing files and other documents you create.
![]() Downloads: This folder is intended to contain items you download from the Internet.
Downloads: This folder is intended to contain items you download from the Internet.
![]() Music: This folder is intended to contain music files.
Music: This folder is intended to contain music files.
![]() Pictures: This folder is intended to contain image files.
Pictures: This folder is intended to contain image files.
![]() Public: This folder holds files that you want other users on your system or network to be able to access. The permissions on this folder are set differently, as by default all the other folders and their contents may be accessed and opened only by you.
Public: This folder holds files that you want other users on your system or network to be able to access. The permissions on this folder are set differently, as by default all the other folders and their contents may be accessed and opened only by you.
![]() Templates: This folder is intended to contain templates for applications like your word processor.
Templates: This folder is intended to contain templates for applications like your word processor.
![]() Videos: This folder is intended to contain visual media files.
Videos: This folder is intended to contain visual media files.
To the left of the file manager is a menu with several options. Most are repeats of commonly used folders listed previously. These deserve further mention:
![]() Computer: Allows you to browse the other files and folders on your system that are not contained in your home folder and that you have permission to view.
Computer: Allows you to browse the other files and folders on your system that are not contained in your home folder and that you have permission to view.
![]() Trash: Where files you throw away go, until you empty the Trash to remove them permanently.
Trash: Where files you throw away go, until you empty the Trash to remove them permanently.
![]() Connect to Server: Runs a wizard to create a connection to a network server; you will need to know the name of the server you want to connect to, and some details about it like the port being used. Use this feature to add an icon to the desktop that, when clicked, provides a list of remote files in the desktop file manager. You can then treat this window like any other file manager window and drag files back and forth. This is really useful for copying files to and from other computers.
Connect to Server: Runs a wizard to create a connection to a network server; you will need to know the name of the server you want to connect to, and some details about it like the port being used. Use this feature to add an icon to the desktop that, when clicked, provides a list of remote files in the desktop file manager. You can then treat this window like any other file manager window and drag files back and forth. This is really useful for copying files to and from other computers.
Adding Additional Users
Many computers these days are used by more than one person. Rather than forcing everyone to use the same desktop settings or making the computer less secure by allowing everyone who uses it to have access to administrative functions, it is easy and recommended to create an account for every person who will use the computer. This allows each user to customize how the computer works and looks without interfering with anyone else’s preferences, and it allows you to grant administrator privileges to only certain users to prevent others from accessing functions that may affect everyone or even damage the installation if used incorrectly.
Open the Dash and search for User Accounts. The dialog box that appears contains a list of current users. Click Unlock at the upper-right corner of the window to make changes. Next, click the “+” symbol at the bottom of the user list or Add to create a new account, as in Figure 3-6.

You must now provide a full name for the new user and a short username that will be used by that user to log in. Click OK, and in the next dialog box, enter a password for that user, confirm the password by entering it a second time, and click OK again.
Once your user account is created, you may customize your login options and click the Password field to set a password, allow the user to log in without a password, or enable the account without setting a password. Allowing a user to log in without a password or automatically is not generally a good idea but can be useful. For example, if the users are small children who are not expected to perform administrative tasks, the children could have an account that automatically logs in at boot time, and the administrator would have an additional account, accessed by a password, to perform changes and updates when necessary.
Finally, now that the account is created, you can customize its settings. To do so, highlight the account name in the list, and click the field at the right next to Account Type.
If you prefer to do this from the terminal, use the adduser command while logged in to an account with administrative privileges:
matt@laptop:~$ sudo adduser corey
After you enter your password, this command will add a new user named corey. You will be asked several questions in this process. Answer them, and at the end, the account will be created.
To delete a user from the command line, use the deluser command in place of adduser in the preceding example. You will learn more about dealing with users from the command line in Chapter 7.
The Notification Area
On the right-hand side of the top of the desktop is the notification area and the clock. The notification area is similar to the Windows system tray in that it provides a series of small icons that indicate something specific. A good example of this is Network Manager, which looks after your network connections—both wired and wireless—for you.
You can adjust the notification area items by right-clicking them to view a context menu. Some icons (such as the volume control) allow you to left-click on them to view them. As an example, try clicking the little speaker icon and adjusting the slider.
Network Manager Network Manager is a network interface that helps you manage your network devices and connections; it is accessed using the network manager applet. The goal is to make networking “just work” easily and without requiring users to know how to hand-configure the settings (although that functionality is still available for those who want to do so). A left-click of the mouse on the applet shows you the dialog box and enables quick changes between network types. It even provides an easy way to set up access through a virtual private network (VPN), such as many of us are required to use to securely access files from work or school. You can also enable or disable both wired and wireless networking, see information about your current connection, and edit connections quickly and easily (Figure 3-7).

The Clock Next to the notification area is the clock. Click on the clock to view a calendar.
The Gear Menu Click the Gear at the top right of the screen to access these options (Figure 3-8):

![]() About This Computer: This button displays a window that provides information about your computer, such as the Ubuntu version it runs, its RAM size, processor, OS type, and more.
About This Computer: This button displays a window that provides information about your computer, such as the Ubuntu version it runs, its RAM size, processor, OS type, and more.
![]() Ubuntu Help: Here you will find the Ubuntu Desktop Guide, which provides help guides for most system applications.
Ubuntu Help: Here you will find the Ubuntu Desktop Guide, which provides help guides for most system applications.
![]() System Settings: This option opens a window from which you can adjust your computer according to your needs or preferences. Options include Keyboard Layouts, Screen and Display settings, Printers, Power, Sound, and much more.
System Settings: This option opens a window from which you can adjust your computer according to your needs or preferences. Options include Keyboard Layouts, Screen and Display settings, Printers, Power, Sound, and much more.
![]() Log Out: This option lets you log out of the current session and go back to the main login screen.
Log Out: This option lets you log out of the current session and go back to the main login screen.
![]() Suspend: If your computer supports it, this option will be included in the list, and you can click it to save the current state of your system in RAM. Then, the next time your computer is turned on, the desktop session will be resumed at the point where you left off. This option continues to use power, but only a minimal amount.
Suspend: If your computer supports it, this option will be included in the list, and you can click it to save the current state of your system in RAM. Then, the next time your computer is turned on, the desktop session will be resumed at the point where you left off. This option continues to use power, but only a minimal amount.
![]() Restart: Click this to restart your computer.
Restart: Click this to restart your computer.
![]() Shut Down: Click this to shut down your computer.
Shut Down: Click this to shut down your computer.
Using Applications
Now that you have become familiar with the desktop, let’s explore some of the many applications included on your new system. By default, Ubuntu comes with a wide range of popular and established applications to listen to music, watch videos, create documents, browse the Web, manage your appointments, read your e-mail, create images, and much more. These applications have been vetted by the developers to ensure they are the best-of-breed Linux applications available.
Although Ubuntu includes a range of software applications, it is likely you will want to install extra applications and explore other available software. Fortunately, the Ubuntu system is built on a powerful foundation that makes software installation as simple as pointing and clicking in the Ubuntu Software Center, covered later in this chapter.
Browsing the Web with Firefox
Firefox is the default Ubuntu Web browser and provides you with a simple, safe, and powerful browsing experience. Firefox was developed by Mozilla and has become one of the most successful open source projects in the world; it continues to garner huge popularity. With hundreds of millions of downloads and rapidly increasing browser share, Firefox has been an unparalleled success.
Click the Firefox icon in the Launcher or open the Dash and search for Firefox to begin. This will open the main Firefox window (Figure 3-9).
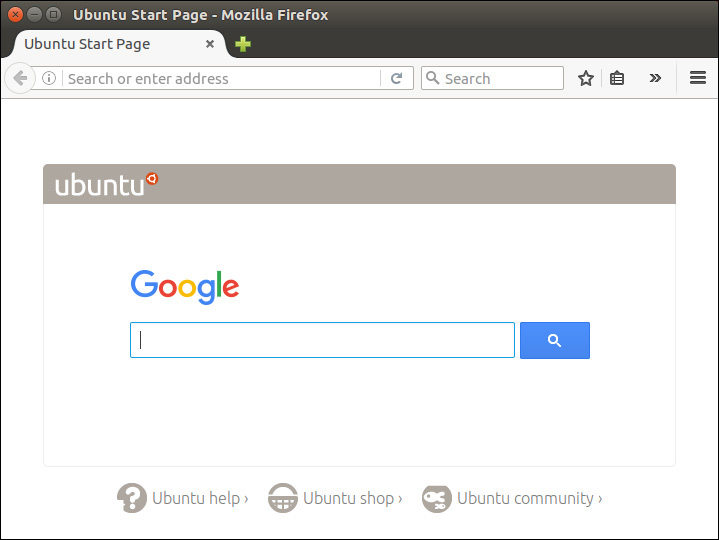
Firefox looks similar to most Web browsers and includes the usual back, forward, reload, and stop buttons; an address bar; and some menus. These familiar-looking elements help you become acquainted with Firefox. If you have used Internet Explorer, Opera, Chrome, or Safari before, you will have no problems using Firefox.
Navigating your way around the Internet is no different in Firefox than in any other browser: just type the Web address into the address bar and press Enter. Firefox also has a few nice features that make it easy to access your favorite sites. As an example, if you want to visit the Ubuntu Web site, you can just enter www.ubuntu.com (you can leave off http://). Alternatively, you can just type in Ubuntu, and Firefox will do the equivalent of going to the Google Web site, entering Ubuntu as the search term, and taking you to the first result for the search. This feature is incredibly handy for popular sites that are likely to appear at the top of the search results page.
Bookmarking Your Favorite Sites To bookmark the page you are viewing, hover over Firefox Web Browser to display the menu. Click Bookmarks > Bookmark This Page or press Ctrl-D. In the drop-down box that pops up, use the combo box to select the folder to store the bookmark in. You also have the option to add “tags” to your bookmark, which are like keywords that can be used to sort and search for your bookmarks in the future. When you have finished naming and tagging your bookmark, click Done to save the bookmark.
Bolt It on, Make It Cool Although Firefox is already a powerful and flexible Web browser, it can be extended even further using special plug-in extensions. These extensions cover not only typical browsing needs but also other more specialized extras that extend the browser itself.
If you visit a site that requires a normal Web plug-in, a pop-up will appear, indicating that you are missing a plug-in necessary to take full advantage of the page you are visiting. Click the Install Missing Plug-ins button to grab the required plug-in. For example, Ubuntu does not come with the Adobe Flash plug-in because it does not live up to Ubuntu software freedom requirements. As a result, you will have the option to install either Adobe Flash or the free software version Gnash if you want to use Flash.
To extend the browser itself with additional features, go to https://addons.mozilla.org and browse for an extension that you are interested in. When you find something you would like to install, select Add to Firefox and then click the Install Now button. A dialog box will pop up, asking you to confirm the installation. Click Install Now. Your new extension will be downloaded and installed automatically. Typically, after you restart Firefox, your new extension is available.
Creating Documents with LibreOffice
Included with Ubuntu is a full office suite called LibreOffice. This comprehensive collection contains applications for creating word processing documents, spreadsheets, and presentations installed by default with the ability to easily manipulate and create databases, drawings, and mathematical equations—all just a click away. The suite provides an extensive range of functionality, including reading and writing Microsoft Office file formats, and can also export documents as Web pages, PDF files, and even animations.
Let’s give LibreOffice a whirl by creating a letter with it. Start LibreOffice’s word processor, LibreOffice Writer, by clicking Dash Home in the Launcher and then searching for LibreOffice. When it has loaded, you will be presented with the interface shown in Figure 3-10.

Figure 3-10 LibreOffice looks similar to Microsoft Office, so if you are familiar with Office, you will find it quite a simple matter to adjust to the LibreOffice interface.
If you have used a word processing program before, you will notice that many of the interface elements, such as the buttons for setting font type and size, bold, italic, underline, and alignment, look and behave the same as in other programs. The LibreOffice developers have designed the suite to be easy to migrate to if you have used a program like Microsoft Office in the past. After a few minutes spent playing with LibreOffice, you will be confident that you can find the functions you need.
Start your letter by first choosing a nice font. In the font combo box, you should see Liberation Serif (which is a free-as-in-liberty font similar to Times) selected as the default. You can click the box and choose another font if you prefer, such as the lovely DejaVu Sans or the Ubuntu font. Change the font size by clicking the combo box to the right of the font box and selecting 10 (points) as the size. With the cursor on the left side of the page, add your home address to the letter.
Now press Enter to leave a blank line under the address, and click the Align Right toolbar button (the icon looks like some lines aligned to the right). If you are unsure of what a button does, hover your mouse over it to pop up a tool tip. Now add the address of the recipient to your letter.
Press Enter again to leave a blank line, and type the main body of the letter. Feel free to use the bold, italic, and underline buttons to add emphasis to your words. You can also use other toolbar buttons to add items such as bullet points and numbered lists and to change the color of the font. If you want to add features such as graphics, tables, special characters, and frames, click the Insert menu and select the relevant item. You can customize each item added to the page by right-clicking the item and using the options shown in the context menu.
When your letter is complete, you can save it by selecting File > Save, by clicking the floppy disk toolbar icon, or by pressing Ctrl-S. The default file format used by LibreOffice is the OpenDocument Format. This file format is an official open standard that is used across the world. The file format is slightly different for different types of applications (.odt for word processor [Writer] files, .ods for spreadsheets [Calc], and so on), but each format provides an open standard free from vendor lock-in. You can also save your files in a variety of other formats, including the default formats for Microsoft Office.
Another useful feature wedged into LibreOffice is the capability to save your documents in the Adobe PDF format. PDF files have become increasingly used in the last few years and are useful for sending people documents that they should not change (such as invoices). PDF files provide a high-quality copy of the document and are well supported across all operating systems. This makes PDFs ideal for creating catalogs, leaflets, and flyers. To save a document as a PDF file, click the PDF button on the main toolbar (next to the printer icon). Click the button, enter a filename, and you are done. Simple.
Managing Your E-Mail with Thunderbird
Thunderbird is a traditional desktop e-mail client created by Mozilla, the same people responsible for the Firefox Web browser. It is the default choice in Ubuntu and works the same as the Thunderbird versions for other operating systems. Here is how you set it up.
Open the Dash and search for Thunderbird to get started. When it opens for the first time, you are presented with an opportunity to create a new e-mail address using specific services. If you already have an e-mail account you want to use, select Skip this. A wizard will appear to help you configure Thunderbird (Figure 3-11).

Enter your name, e-mail address, and password to begin. Thunderbird performs a search of a Mozilla database of Internet service providers (ISPs) and attempts to set up the technical aspects for you (Figure 3-12). Click Create Account.

If all goes well, you won’t need to do anything else. If Thunderbird does not find your ISP, you will need to know your mail server information, available from your service provider, so that you can configure Thunderbird manually.
From here on, Thunderbird works as e-mail clients have worked for the last 15 years or so. You can download your e-mail, reply to messages or send new messages, sort messages into folders, configure multiple accounts, and so on, all using a clear, standard interface (Figure 3-13).

Using Ubuntu in Your Language
When you installed Ubuntu, you were asked which language the system should use. Although this sets the initial language for the system, you may want to change the language at a later date. To do this, search the Dash for Language Support.
Ubuntu supports a huge range of different languages, and many applications include a Translate This Application menu option in the Help menu so that all Ubuntu users can contribute translations in their language(s). If you would like to help with this effort, it is a fantastic contribution to the Ubuntu project.
When the language selector first loads, it may ask you to update your language packs. Just click Yes to continue. Inside the dialog box, you will find a list of the currently installed language packs. Also, a number of languages are available for installation. To install or remove language packs, click the Install/Remove Languages button. You will then see a list of languages, each of which has a Support checkbox listed next to it. For each language that you want to install/remove on the system, check the relevant boxes.
When you have selected the boxes, click the Apply button, and the appropriate language packs are downloaded and installed. Now, choose the language you want to use as a default from the list, and click Apply System-Wide. You need to log out and log back in for the changes to take effect.
Configuring a Printer
In the Linux world, configuring a printer has traditionally been a challenge. For years, newcomers to Linux have been repeatedly challenged and even bludgeoned with scary terms, commands, and phrases that sound like a language from another planet. Users often had to edit fairly complex text files by hand and spend a good deal of time learning how to insert arcane instructions just to get a printer to work. However, things have changed with Ubuntu.
Most of the time it is possible to add or configure a printer easily and quickly. Even better, printers are sometimes configured automatically when plugged in to the system. The one caveat is that not all printer manufacturers provide Linux drivers for their devices. While the Linux community works very hard to write drivers, often the newest printer models do not have adequate software to interact with Linux. Most printer models that are older than 6 or 9 months seem to work quite well, though.
To get started installing your printer, click on the Dash and search for Printers. This option brings up the Printers window, as shown in Figure 3-14.

The Printer configuration window lets you add printers and modify their settings. In the upcoming example, you will add a new printer and then view its settings.
Gathering Information
The most important thing to remember when configuring a printer is to not get ahead of yourself. Before you start clicking on icons and running anything, make sure you have completed the following steps.
1. Note the make and model of the printer. This information is usually printed clearly on the hardware itself. In our example, we add an HP Photosmart C4700.
2. Plug the printer in to your computer or to the network, and turn it on.
Launching the Wizard
Once you have properly prepared to install your printer, click Add to bring up the New Printer window. The system automatically searches for any new connected printers and launches a New Printer wizard, shown in Figure 3-15.

In most cases, the wizards can detect an attached printer automatically and will include it in a list of devices on the left. If your printer is plugged directly into a router, you can have the printer wizard look for it by selecting Find Network Printer.
Select the device with your printer’s name, and then click Forward.
At this point, you must choose a printer manufacturer. If your printer has been automatically detected, the wizard will choose a manufacturer. Click Forward.
In the next screen, you are asked to choose both a model and a driver. For autodetected printers, both should be automatically selected and the default driver should work. You can always change these choices later. If no driver is selected, scroll through the list of options, which is organized by manufacturer.
Sometimes you may not find the exact model or driver for your specific printer. Generally, if the driver does not exist for your exact model, choose the closest one and then test it. If that doesn’t work, you can try other drivers intended for printers from the same manufacturer.
Click Forward to proceed with the installation. If you need to install a custom driver, click the Install Driver button.
Finally, you can enter a description and location for your printer, as shown in Figure 3-16. Click Apply to complete the process and set up your printer.

Mission Accomplished!
After you click Apply, you will see your printer’s name under the Local Printers heading. You can click on it and then print out a test page. Do so, and make sure the page prints correctly. If you find that the page prints well, you are finished. You can now print from the applications you have installed, such as LibreOffice.
Remote Printing
You can also configure your Ubuntu system to send print jobs to a remote print server. If, for example, you have a Windows system with a printer attached on your network, simply choose the Network Printer radio button during configuration and specify the hostname or IP address of the Windows system. You will then have to specify a connection protocol.
If your Windows system is sharing a printer, you will have to specify Samba, which is the standard way to get Linux and Windows systems to communicate with each other. You will still have to specify a print driver, as described earlier.
Keeping Your Computer Updated
While Ubuntu already includes the things most people need, sometimes you want or need something extra, such as a desktop publishing application for school or a game to pass the time. The easiest way to add these applications is with GNOME Software Center, which is extremely simple to use but has a few limitations. This section also highlights a couple of other options. Work done using one tool to add or remove software is recognized by the related tools, so it is okay to mix and match which ones you use.
Using the GNOME Software Center
Like the other tools discussed later in this chapter, the GNOME Software Center installs software from the online Ubuntu software repositories.
To launch the GNOME Software Center, click the Ubuntu Software Center icon in the Launcher. When it is run for the first time, and occasionally afterward, it will take a few moments to initialize itself and the list of available and installed applications. Once this is complete, you will see the main screen, shown in Figure 3-17.

Scroll down and click a category to help you refine the listing of available software for specific applications, or use the search box at the top center to find programs using keywords or program names.
The icons at the top of the window give you access to other features or information. You can sort software by source by changing All Software to one of the other options, such as Installed. Click Installed to list all installed software.
You can change your software sources by using the menu in the top panel and selecting Software > Software Sources.
By default, the GNOME Software Center shows all applications that are supported by Ubuntu, including those supported by community volunteers called MOTUs—short for Masters of the Universe (more on them in Chapter 11). Although using the GNOME Software Center to install new applications from both the officially supported Ubuntu-provided repositories and the community repositories is perfect for most users, sometimes a more conservative approach to software choices may be appropriate. In this case, you can limit the number of applications shown from the View menu by selecting Canonical-Maintained Applications to see only those pieces of software that are actively watched over and updated by Canonical, the company behind Ubuntu. This restriction is sometimes preferred in corporate environments that desire or require a stronger guarantee of support.
For many people, this is all you need to know to install or uninstall software. Chapter 4 goes into a bit more detail for those individuals who are interested in the technological aspects.
Adding and Removing Programs and Packages
No operating system or piece of software is perfect. In addition, new features may be added that users want or need. Because of this, Ubuntu developers periodically release security and other updates to software. These updates are placed into the Ubuntu repositories and are easy to install.
Most of the updates to your machine will be security related. In other words, the developers have found a weakness in a particular program in Ubuntu and have released a fix for it. A small number of updates also are released to fix some critical bugs. For a home user, there is generally no reason not to install these updates right away, as not installing them might leave your computer open to security breaches.
When problems are discovered that could lead to security issues, like buffer overflows or remote exploits, they are fixed and the updates are released as quickly as possible, even though the danger is usually remote. Ubuntu developers also have a very strict policy about not putting newly released versions of programs with significant and untested function changes or new features into stable versions of Ubuntu. This practice keeps your system more stable by not introducing new problems.
Installing Updates
Ubuntu checks the Ubuntu repositories once a day to see if there are any new versions of software you have installed, and it tells you when you need to update your machine. If security updates exist, a pop-up window will appear. If other updates are found, they will also be made available. You can check whether updates are available by using the Software Updater application, which can be found on the Dash. The entry there either will say “Software Up to Date” or will inform you of available updates.
Ubuntu 16.04 handles package updates by launching Software Updater. Users are notified of security updates on a daily basis and are also notified when new Ubuntu versions are released. Because 16.04 is a Long-Term Support (LTS) release, by default it notifies users about only new LTS releases, meaning that it will likely remain silent until April 2018. This behavior may be changed by clicking Settings at the bottom left of the Software Updater window.
Learning about What Was Updated
The update window, shown in Figure 3-18, shows you what will be changed. In the details pane, it indicates what got fixed and how. It might also list a Common Vulnerabilities and Exposures (CVE) number. The CVE number is a unique identifier for a security vulnerability. You can look it up on http://cve.mitre.org to see what the exact flaw was. However, most people don’t need to worry (and really don’t care) about these details.

Installing an Application That Is Not in the Repositories
Although the repositories contain a huge selection of packages, sometimes the package you need is not available there. The first thing you should check is that you have enabled the additional repositories such as universe and multiverse. You can do this from Software Updater by searching for these repositories on the Dash. Hover over the GNOME Software Center to view its menu. Under Software, select Software Sources to ensure that the boxes are checked for main, universe, restricted, and multiverse. (See help.ubuntu.com/community/Repositories/Ubuntu for more details.)
If you have enabled these extra repositories and your package is still not there, do a quick hunt with a search engine to see if you can find a repository (known as a Debian or APT repository) for your package. If you find one, use the Repositories dialog box you have just played with to add the new repository, and then use Synaptic to install the package.
One common type of extra repository you may encounter is called a personal package archive (PPA). Good information about using PPAs is available at https://help.launchpad.net/Packaging/PPA/InstallingSoftware.
If no repository is available, look for a Debian package (.deb) for the application, most likely available from the software company’s Web site. For example, as Adobe provides a Debian package for its Reader software on its Web site, and Skype does the same for its VOIP software. If you find such a .deb package, download it and double-click it to install.
Finally, if all else fails, you may need to download the source code and compile it using instructions found at https://help.ubuntu.com/community/CompilingSoftware.
Upgrading to the Next Ubuntu Release
One of the original goals for Ubuntu was to have frequent releases. With only one notable exception (the 6.06 LTS release, which was delayed by two months), six months has separated each release since 4.10.
This book has been revised to match the latest version—16.04—but another release will be along soon. Release 16.04, like the earlier 14.04, 12.04, 10.04, 8.04, and 6.06, is an LTS version of Ubuntu; it will be supported for five years on both the desktop and the server.
All other versions, such as 15.10, are supported for nine months, yet also superseded by a new version every six months. Essentially, if you are running the LTS version, you might not be too interested in moving to the latest and greatest release until the next LTS version comes out. In contrast, if you are running a regular release version, you might be the sort of person who is more interested in the latest and greatest software updates. In either case, this is how you perform the upgrade.
Doing the Actual Upgrade
A graphical tool called Software Updater tells you when a new version of Ubuntu is available and walks you through the upgrade process. Note that if you already know or want to learn the manual method, that is fine, too. Both means will achieve the same result.
When a new release is available, Software Updater alerts you, as shown in Figure 3-19. All you need to do is click on the Upgrade button to start the process. You are first shown the release notes, which mention new features or any outstanding bugs. After you click the Upgrade button on this screen, the necessary changes to your software repositories are made, and then the program downloads and installs the new distribution. You may be prompted if you have changed any configuration files. After the actual installation is complete, you are told which, if any, packages are no longer officially supported by Ubuntu (i.e., have moved to the universe repository). All you need to do is restart your computer when prompted, and you will begin enjoying the new release.

Ubuntu and Multimedia
In recent years, multimedia capabilities have become an essential part of computing. Watching DVDs and Web videos and listening to music have become an integral part of modern computer use. These multimedia capabilities have been further bolstered by the huge popularity of legal music downloading. With a range of online stores for a variety of music, it is not uncommon to listen to most of your music without ever seeing a little shiny silver disk.
Installing Codecs
Multimedia files and disks come in a variety of different types, and each type uses a special codec, or coder/decoder software, to compress the content to a smaller size while retaining a particular level of quality. To play such media, you need to ensure that you have the relevant codecs installed. Ubuntu now makes this easier by suggesting packages that provide a suitable codec when you open a file that isn’t supported by the codecs that are currently installed. Simply double-click the file you want to open, and you should be provided with a list of packages that you can install to enable support for the file you have tried to open. Select the packages that seem appropriate, and click Install.
Codecs remain a problem for open source software because of the legal restrictions placed upon them. Certain codecs (including MP3, Windows Media Format, QuickTime, and RealMedia) are proprietary and, as such, have restrictions placed on their use, distribution, and licensing.
Although developers in the open source community have created free implementations of some of these codecs, the licensing issues that surround them conflict with the legal and philosophical position that Ubuntu has taken. These codecs are excluded not only because they are legally dubious, but also because they disagree with Ubuntu’s ethic of creating a distribution that consists entirely of free software in the most free sense of the word.
To work toward resolving these problems, a number of developers are working on free codecs, such as Ogg Vorbis and Ogg Theora, that provide high-quality results and open licensing. The Ogg Vorbis codec is used for audio files and can provide better results than MP3 at a smaller file size. The Ogg Theora codec is used for video files and competes with the MPEG-4 codec. Ubuntu includes the Ogg Vorbis and Ogg Theora codecs by default, and you can encode and play back any media that use those codecs out of the box.
Although the world would be a better place if all codecs were free, the reality is different, and many Ubuntu users still want to play media compressed with proprietary codecs. Table 3-1 shows the most typical codecs used to encode and play back media and lists their support in Ubuntu.

Listening to Audio Files
Ubuntu includes a powerful music player called Rhythmbox Music Player to organize and play your music file collection. By default, Ubuntu will look for music in the Music directory accessible in the Places menu.
Using Rhythmbox Load Rhythmbox (Figure 3-20) by searching the Dash to find Rhythmbox Music Player. You can also access Rhythmbox quickly using the Sound icon in the Notification area at the right of the top panel. Click the icon for quick access to open or minimize the Rhythmbox window, where you will find volume controls, playlists, and the Sound Settings menu.

The Rhythmbox window is split into a number of different panes, each displaying different details about your music collection. The left pane (Source) lets you select the source of the music, such as your media library, podcasts, and Internet radio. Each of these options has a browser pane available to display the source of the content.
Listening to Podcasts Podcasts are audio shows that you can subscribe to, and they are increasingly becoming the new way to listen to audio files and music. When you subscribe to a podcast, each new release is automatically downloaded for you. This makes it extremely convenient to regularly listen to audio shows.
Rhythmbox has good support for podcast feeds, and subscribing to a feed is simple. In the sidebar, right-click the Podcasts entry and click New Podcast Feed. Paste in the feed by right-clicking the box and selecting Paste. The files are automatically downloaded, and you can listen to them by double-clicking on them. Each time you start Rhythmbox, a check is made to see if any new episodes exist; if so, those podcasts are downloaded.
Playing and Ripping CDs
If you insert a music CD into your computer, Ubuntu will respond by displaying a pop-up box that gives you the option to rip (copy) the music to your hard drive or play the CD. If you rip the CD, you can adjust the metadata during the process, such as the song titles or artist names.
Interacting with Photos
Shotwell is a photo management program that you can use to import your pictures, organize them, and perform basic touch-ups like removing red eye, cropping, or simple color adjustment. When Shotwell imports photos, it reads the metadata embedded in the image file and then sorts the images by date. Once done, it creates a timeline that allows you to view photos easily as a group, individually, and even as a full-screen slideshow. You can export your photos individually or in groups directly from Shotwell to well-known Web services like Flickr or Google’s Picasa, to a folder, or even to a CD you could give to a friend or family member.
Watching Videos
To watch videos in Ubuntu, you need to ensure that you have the correct codecs installed. As discussed earlier, some of these codecs are available separately due to the legal implications of including them with the Ubuntu system. Although the new process for suggesting and installing codecs should cover the most popular types of files, you should refer to the Ubuntu Wiki at http://wiki.ubuntu.com for details of how to install ones that are not recognized.
Using Videos To watch videos in Ubuntu, you use Videos (Figure 3-21). Load it by clicking Dash Home from the Launcher and searching for Videos.

To watch a video on your hard disk, click Movie > Open, and select the file from the disk.
Videos also supports video streams. To watch a stream, click Movie > Open Location, and enter the Internet address for the stream. The video feed is then loaded and displayed.
Getting DVDs to Work Ubuntu comes with DVD support for unencrypted DVDs. With the DVD industry being what it is, the majority of DVDs come encrypted. If you want to watch them, you need to ensure that a software library that can decrypt these DVDs is installed. Unfortunately, this software library needs to be installed separately and is not included with Ubuntu. Refer to the Ubuntu restricted formats page at https://help.ubuntu.com/community/RestrictedFormats for details.
With the library installed, insert a disk into your computer, and Ubuntu will automatically start Movie Player to view the disk. Alternatively, fire up Movie Player and then click Movie > Play Disk to play the DVD. Movie Player doesn’t support DVD menus but you can still use it to play a DVD.
If you are settling down to watch a movie, you may want to configure a few other settings. First click View > Aspect Ratio to select the correct aspect ratio for your screen, and then select View > Fullscreen to switch to full-screen mode. To exit full-screen mode, just move your mouse, and some on-screen controls will appear.
Backing Up
Everyone who has used a computer for any length of time has heard the advice, “Back up, back up often, test the backups, repeat.” Few people actually follow this advice, but ignoring it is dangerous and can cause the loss of important documents, files, pictures, and more.
To prevent this loss, prudent computer users, regardless of which operating system they use, pick a method of copying their files to a safe location for storage and use that method on a regular basis. To help you devise the strategy that best suits you, we have come up with a few options to consider. This topic is a big one, and how you deal with it is a very personal decision. Rather than give step-by-step instructions, we mention a few options to consider and leave it to you to research them further and decide on one that looks appropriate and inviting.
Some users find that the easiest thing for them to do is buy an external hard drive and copy all of their files to it every week or two. Others look at this and think to themselves, “There has to be a better way.” Perhaps they noticed that these methods require every single file to be copied every time, even if the file has not changed in ages. In these cases, an incremental backup is ideal, where the computer is told to compare the files in the original location with stored files in a backup location (like an external hard drive) and copy only new or changed files.
Several GUI programs for backing up are available from the Ubuntu repositories. Each comes with a basic and useful graphic interface that is easy to figure out and use, and each can be configured to allow you to do full or incremental backups. A backup program is installed by default and can be found by searching for backups in the Dash. The program lets you configure automatic or manual backups, specify the location for those backups, specify what will be backed up, set scheduling for automatic backups, restore files from the backup, and more (Figure 3-22).

For those users who are a little more advanced (or a little braver) and who love the raw power available from a command-line program, the best two programs for backups are rar and rsync, which are both available from the Ubuntu repositories. Once they are installed, you can read the manual pages and learn how to use them by typing man rar or man rsync from a terminal. Although rar and rsync are complicated, they are also fast and amazingly effective at both making the backups and restoring them.
Unfortunately, this quick mention in a small section of a very diverse chapter can merely get you thinking about the need for good backups and help guide you in your search for the perfect method for you. However you decide to back up your data, we strongly encourage you not to ignore the need to do so, but rather to find a way that works for you. If you have any questions about this or other topics, the Ubuntu community has a large number of very helpful people you can ask for advice, and we recommend you start by searching or asking questions in Ask Ubuntu at http://askubuntu.com.
Customizing Ubuntu’s Look and Feel
Click the Gear icon at the right of the top panel and select System Settings to configure and customize your system. You can find other settings in the Dash using the Applications Lens and the System filter. Feel free to customize anything you like, but pay attention to what you are doing so you know how to change it back if you don’t like the result. Chapter 5 has more information on customizing Ubuntu.
Unity in Other Devices
As mentioned earlier on this chapter, one of the main design goals in Unity was having a user interface that was similar between devices, allowing convergence as a final goal.
Unity is currently featured across four devices. Its form changes on each device, but the visual concept is the same. As an example, the Launcher is always on the left side of the screen. Unity also features the Dash, Lenses, and Scopes.
Information on other device forms that use Unity can be found here:
![]() Phone: www.ubuntu.com/phone
Phone: www.ubuntu.com/phone
![]() Tablet: www.ubuntu.com/tablet
Tablet: www.ubuntu.com/tablet
Summary
In this chapter, you learned how to start using the core features of your new desktop. These concepts should allow you to perform most of the day-to-day tasks when using your computer and provide a base from which to explore the other applications installed on your system. This solid grounding in the desktop paves the way for you to meander through the rest of the book, learning about the more advanced uses of your new system and exploring the enormous flexibility that Ubuntu provides.
A wealth of help and documentation is available online. If you ever find yourself stuck, take a look at the Ubuntu Web site at www.ubuntu.com or the Ubuntu documentation at http://help.ubuntu.com and make use of the community assistance available, as described in Chapter 11.