One of the most common problems I’ve seen with old photos is that they’re too dark. When this happens, it detracts from the entire photo because all anyone can really concentrate on is how dark it is instead of the memory inside of it. Using these techniques though, you can lighten them and make them much more pleasing to view.
Method 1: Overall Lightening
Use this technique if your entire photo is too dark.
Open a photo that is too dark. Then duplicate the Background layer by pressing Ctrl-J (Mac: Command-J). You’ll now have two copies of that layer in the Layers palette.
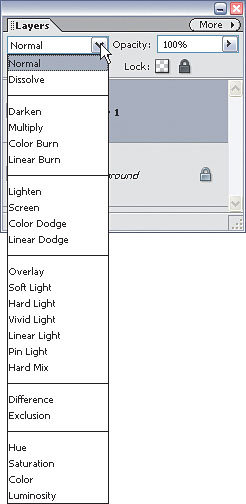
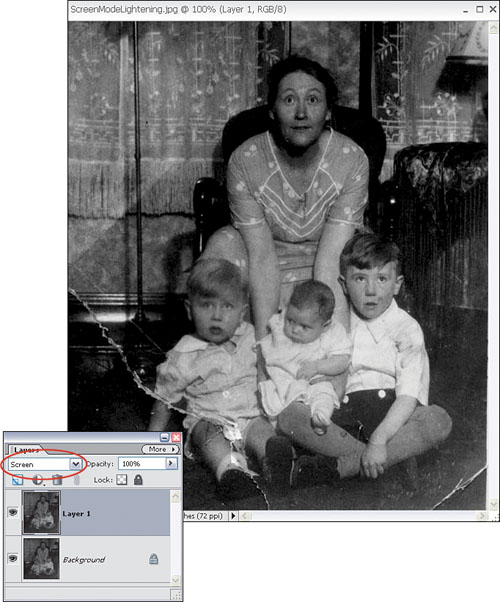
Click once on the copy of the Background layer (Layer 1) to make sure it is selected. Then, click on the blend mode pop-up menu in the top left of the Layers palette.
By default, the blend mode should be set to Normal. Change this to Screen, and you should instantly see the photo is lighter.
If it’s not light enough, then duplicate the top layer by pressing Ctrl-J (Mac: Command-J). Feel free to do this two or three more times until the details in the photo start to become visible.


Method 2: Fixing Uneven Darkness
Use this technique if you’ve got a photo with uneven darkened areas.
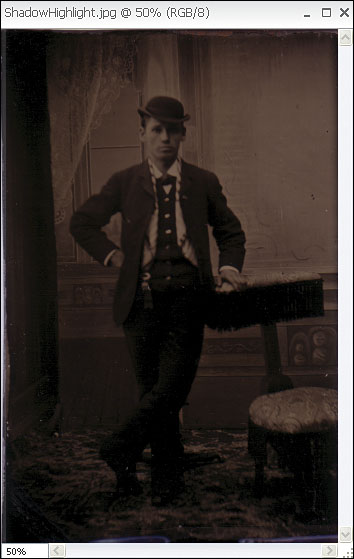
Open a photo that is too dark. However, the difference between this technique and the previous one is that this photo is darker in the bottom-left corner than it is in the top-right corner. The method we just used will lighten the entire photo and probably make this photo appear too bright in the top-right corner.
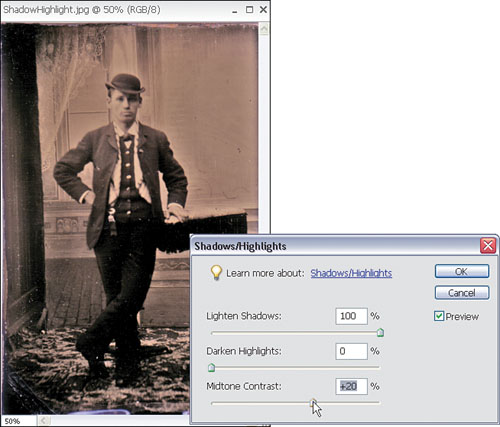
Choose Enhance>Adjust Lighting> Shadows/Highlights to open the Shadows/Highlights adjustment dialog.
In the Shadows/Highlights adjustment dialog, start dragging the Lighten Shadows slider over to the right until the photo becomes light enough to see the details. It’s okay to drag it way over (even to 100%, if needed) if that makes your photo look better. We looked at this adjustment in Chapter 1 to lighten photos, and I suggested not to go too high. However, here we’re trying anything possible to bring back some life to this photo, so you may need to bend the rules a bit.
To further improve the photo, try moving the Midtone Contrast slider to the right to about 20%. This should improve the overall look of the photo by bringing some of the areas that became too bright back down.


I figured it was only a matter of time before you saw the previous tutorials and asked, “But what if only part of my photo is too dark?” So I figured I’d beat you to it. This technique is great for fixing just a small area of an old photo without applying an adjustment to the entire image.
Open a photo that only has a small area suffering from being too dark.
Go to the top of the Layers palette and click on the little half-black/half-white Create Adjustment Layer icon, and select Levels from the pop-up menu.
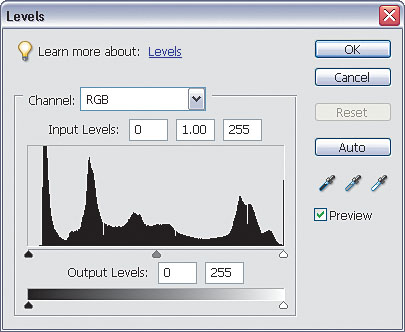
The Levels dialog will open. Take a quick look at the little mountainous area that appears in the middle of the dialog. This is called a histogram. You may have seen one in your camera at some point as well. This histogram shows us the lightness and darkness information that is in our photo. The dark areas are on the left and the light areas are represented on the right.
Take the white Input Levels slider and move it toward the left to lighten the entire photo.
Don’t worry if too much of the photo starts to become too light. We really want to lighten the right side of the photo here, so you may make the other side look really bad for a moment. We’ll fix it in the next few steps, though. Click OK when you’re done dragging the white slider to close the dialog.
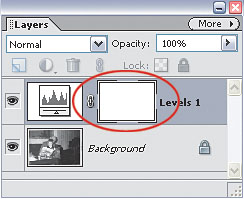
Great, now we need to bring the left side of the photo back to life since we lightened it too much. See the little white thumbnail that appears to the right of the Levels adjustment layer thumbnail in the Layers palette? That’s called a layer mask.
Right now it’s white, which means it’s showing the Levels adjustment we just applied. But if we paint on it with black, we’ll start to hide the adjustment and show the original layer below it. So, select the Brush tool (B) and choose a large, soft-edged brush from the Brush Picker.
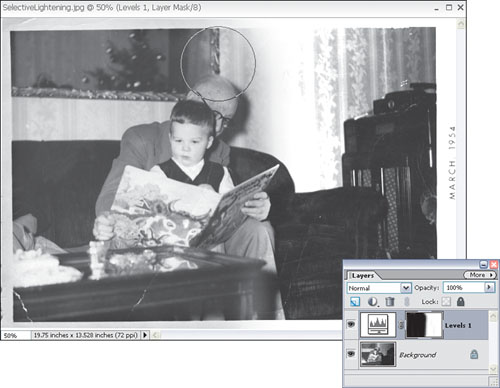
Click once on the Levels adjustment layer’s mask to make sure it is selected (you’ll see a thin black line around the corners). Press D, then X to set your Foreground color to black. Then, start to paint over the areas of the photo that became too light back in Step 5. You’ll start to see the original photo layer come back into view. Essentially, black is hiding the effects of the Levels adjustment and showing the layer right under it. This is called masking and it’s a great way to non-destructively apply changes to your images. To make sure the lightening is evenly applied across your photo, you’ll want to reduce your brush’s opacity (in the Options Bar) while painting the middle section.
So, what does this non-destructive stuff mean with these layer masks? Well, remember how we just painted with black? What happens if we went too far (like I did here)? Just press X to switch your Foreground color to white and start painting the Levels adjustment back in. You have total control and you’ve never officially “erased” anything in your photo.