Imagine the issues we face with color casts from today’s photos. Well it can be even worse with old photos. Older photos are notorious for having a color cast or haze over them. They come in many colors and severity but I’ve got a few good ways to fix them.
Method 1: The Easy Way
This method is almost automatic. There’s not much to it. Sometimes it works great and sometimes it doesn’t. It’s so simple though, that it’s worth a try.
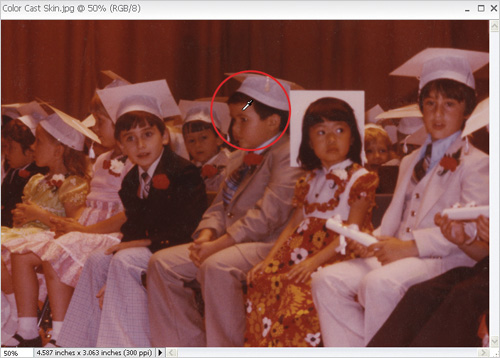
Open a photo with a color cast. Here, I’ve got a photo of me in my kindergarten class. I can primarily see a red cast to it. (Psssst...can anyone pick me out in the photo?)
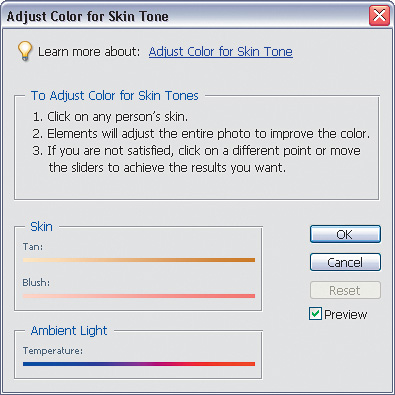
Go under the Enhance menu and choose Adjust Color>Adjust Color for Skin Tone. This will open the Adjust Color for Skin Tone dialog.
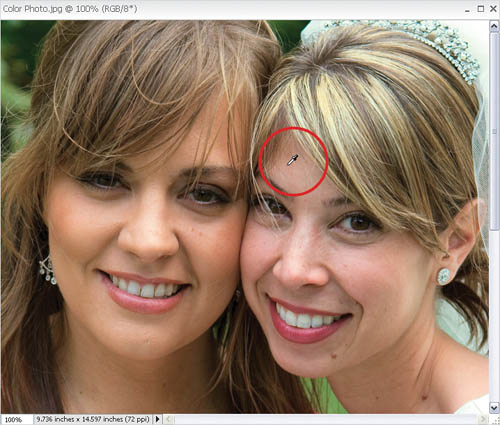
The only thing you really have to do here is click on the skin of someone in the photo. Here I’ve chosen the little boy next to the girl in the flowery dress. Now just click on his skin somewhere. I usually choose the forehead for a good skin color.
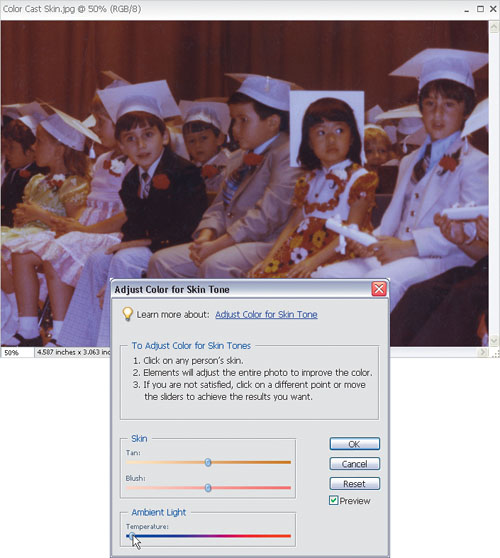
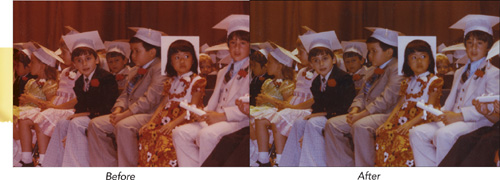
Elements will automatically adjust the photo. Here, it took away the red color cast and made the photo slightly bluish, but better than it was. If it’s too cool (aka: blue), then try adjusting the Temperature slider at the bottom of the dialog by moving it slightly (and I mean slightly) to the right. Go ahead and click OK when you’re done. Oh yeah, did you find me yet?

Method 2: A Levels Adjustment
This one works great when the first one doesn’t. It requires a little more work, but the results can look great.
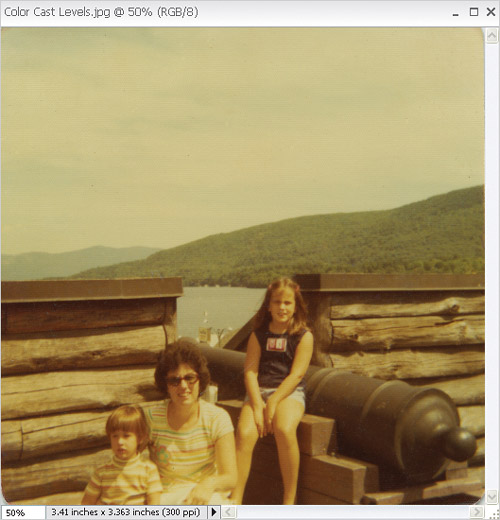
Open another photo that has a color cast to it. As you can see, this one has a heavy greenish/yellow haze to it.
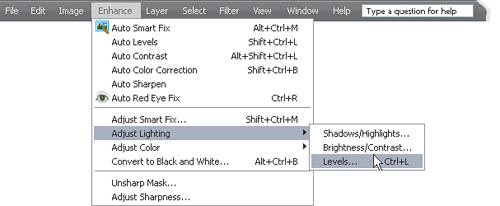
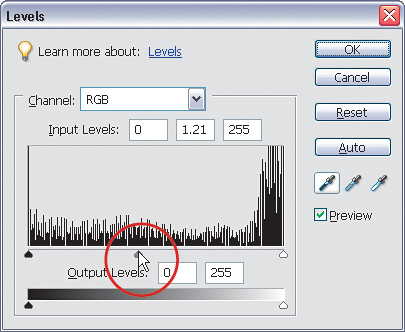
This time, go under the Enhance menu to Adjust Lighting>Levels, or press Ctrl-L (Mac: Command-L). This will open the Levels dialog.
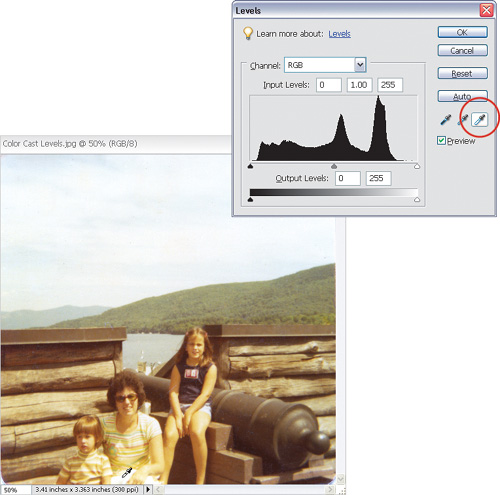
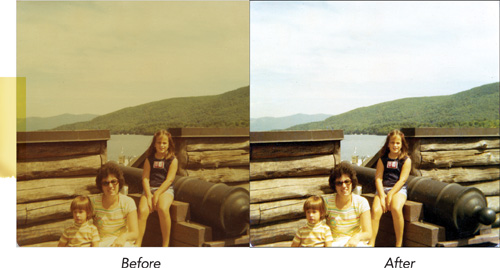
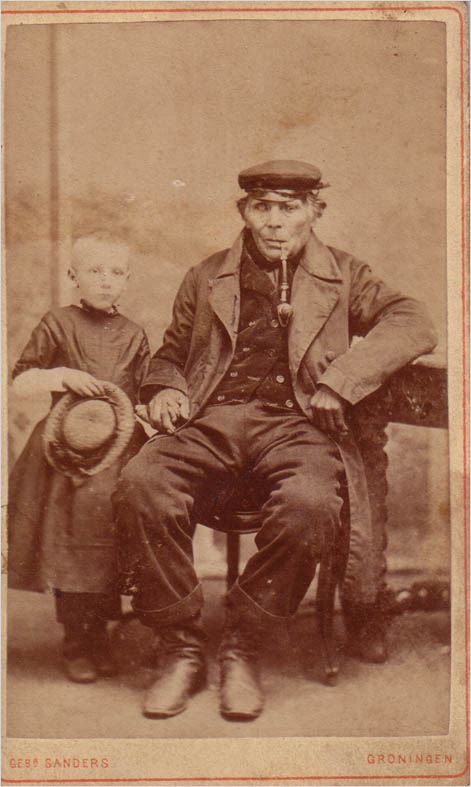
Click once on the white point Eyedropper in the center right to select it. Then click on an area of the photo that looks like it should be white. Here, I’m guessing that my mother’s pants are probably white, so I’ll click on them. The difference is extremely noticeable once I click. By the way, guess who she’s holding? I was a cute little guy, wasn’t I?
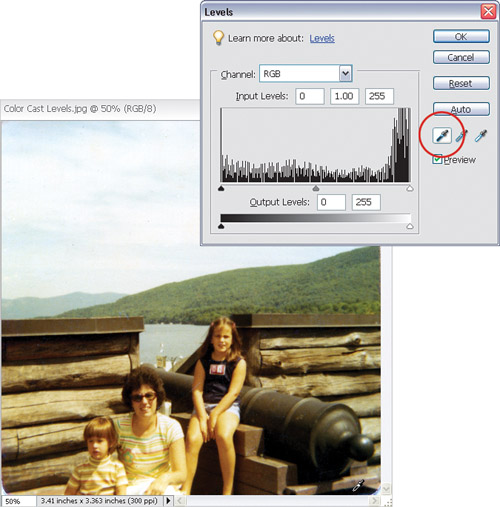
Now do the same with the black point Eyedropper. Click on it and then click on something in the photo that should be black. Here, I’ll click on a shadow area under the cannon. That adds some nice contrast to the photo as well.
You’re pretty much done. If the photo is too dark or too light, go ahead and try adjusting the middle gray slider under the histogram a little. Not too much though, but a small move to the left or right can do a nice job in lightening or darkening the photo.
This one is a little more advanced, but you get plenty of control along with it.
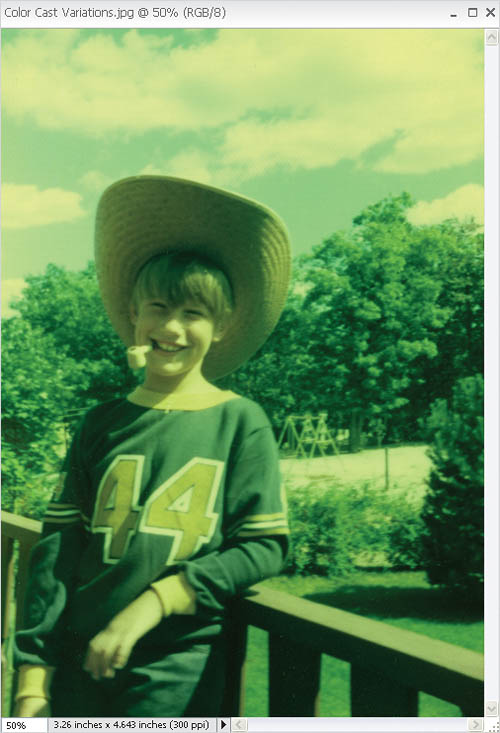
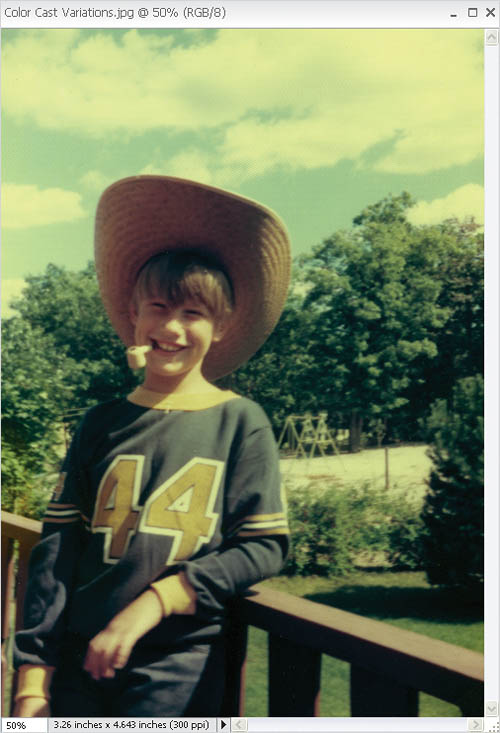
Open another photo with a color cast to it. As you can see, this problem is prevalent, as I have many of these photos to demonstrate with. Here, we’ve got a photo with a green cast to it.
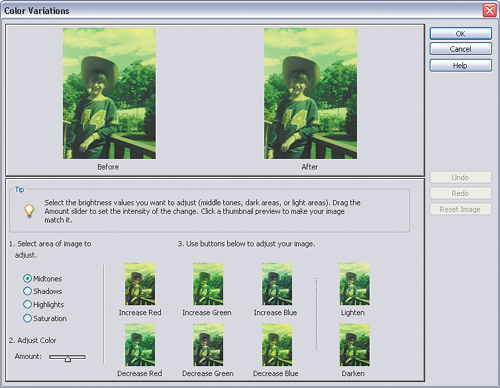
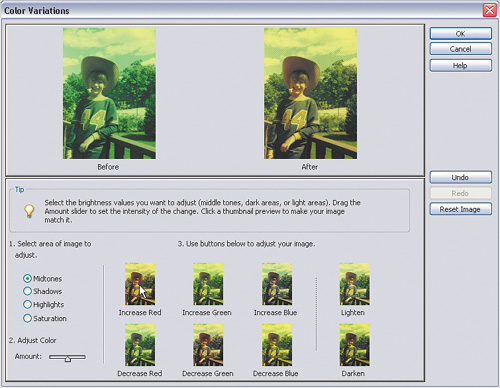
Go to Enhance>Adjust Color>Color Variations. This will open the Color Variations dialog.
Remember back in Chapter 1 when we looked at the ways we can neutralize color casts or hazes? Well, the same principles apply here. For example, the color cast here is primarily green. If you don’t believe me, try going to the Filter menu under Blur>Average. This filter creates one color that is the average of all colors in the photo. It looks pretty darn green to me.
Press Ctrl-Z (Mac: Command-Z) to Undo. Now that we’ve identified the color cast, we can use a color that is opposite it on the color wheel to fix the photo—in this example, red.
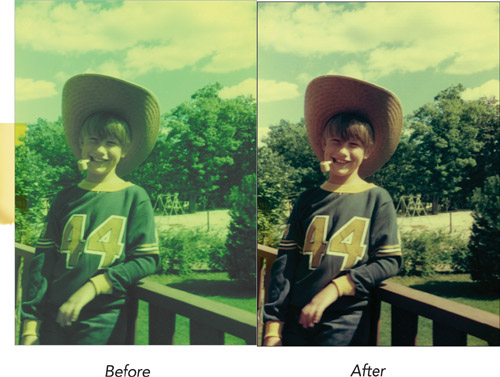
Okay, back to the Color Variations dialog. Notice how there are three colors listed and each has an Increase and Decrease thumbnail associated with it? By clicking Increase Red, we’re essentially telling Elements to add—you guessed it—more red color to the photo. So, try clicking on it twice. Keep an eye on the Before and After previews at the top.
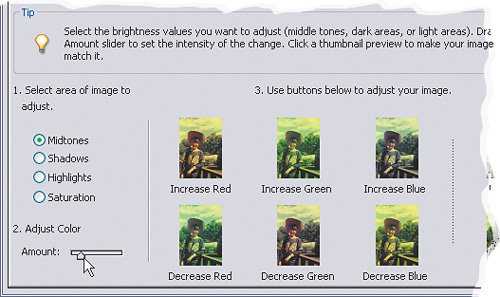
It’s looking better so far. However, it’s looking a little too red for my taste, so I’m going to click on Increase Blue once as well, to offset the red a bit.
Great. You can also move the Amount slider at the bottom left of the dialog. This affects the intensity of the colors you’re clicking on in the middle. So, for example, if I reduce the Amount slider and click on Increase Blue, I still get more blue in the photo but not as much as I would have if I left the slider in the middle. Feel free to continue to adjust the color for your own photo. I think we’ve neutralized the color cast pretty well here, so I’m just going to click OK to close the dialog.
Tip
You can always try to mix and match these three techniques. For example, try the Color Variations technique, and then try following it up with the quick Levels adjustment we used in Method 2. Remember, as Ansel Adams once said, “There are no rules for good photographs, there are only good photographs.” Use whatever works, and if combining two of these techniques gives you a nice-colored photo, then go for it.

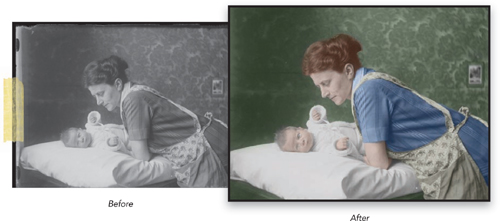
As you may have seen so far, there are plenty of things that we can do to restore old photos. However, none of them really breathes life into an old photo like adding color to it does.
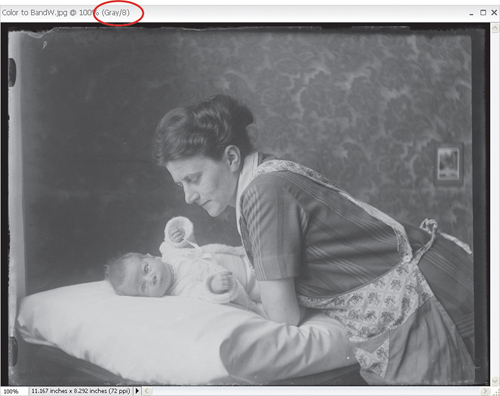
First open a photo to colorize. This technique requires that a photo be in the RGB Color mode to work. Since many old black-and-white photos start out as grayscale, take a look in your image’s title bar to see if it says “Gray” in it. If so, read Step 2. If not, skip to Step 3.
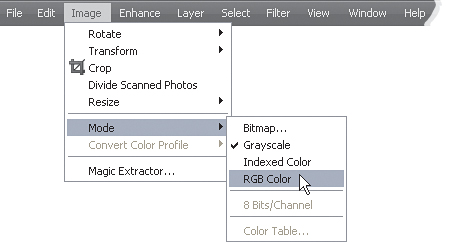
If your title bar does say “Gray,” then your image is in Grayscale mode. No worries though, to change this just go to the Image menu to Mode and choose RGB Color. See, that was easy, wasn’t it? Now you’re ready to move on.
The other thing you may run into is if your old photo has, well, that “old photo” look to it. This technique really requires that the photo be just black and white. If your photo looks like this, then try the next tutorial to get rid of that old photo look.
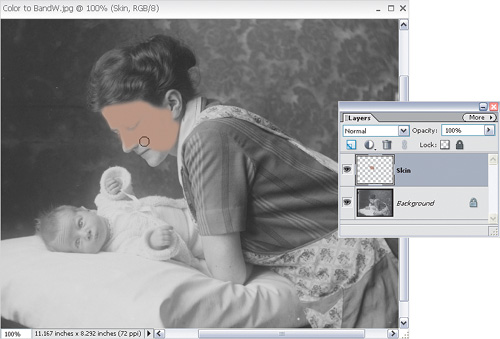
Okay, now we’re ready to start. First, let’s work on the skin since that’s one of the most important parts. Click on the Create a New Layer icon at the top of the Layers palette to create a new blank layer above the Background layer. Double-click on the layer’s name to rename it and call it “Skin.”
Open another color photo that has some people in it. We’re going to sample the skin color, so we have something to work from. Select the Eyedropper tool (I) and click once on the skin to set your Foreground color to the skin color. You can close the color photo now.
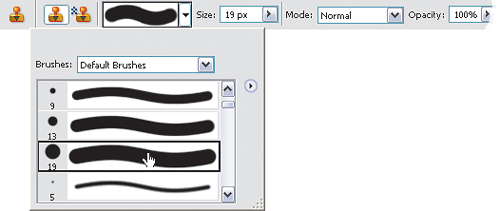
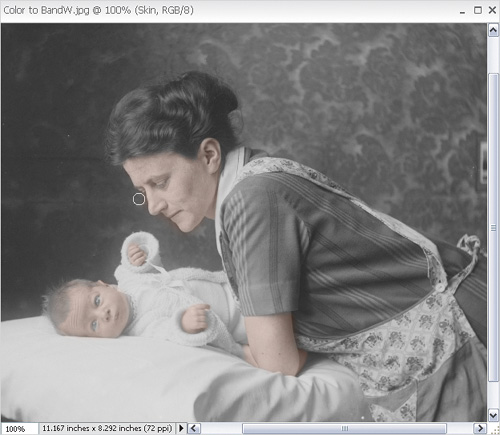
Click once on the Skin layer to select it. Then press B to select the Brush tool from the Toolbox. Choose a smaller, soft-edged brush and start painting over the skin areas in the photo. Yes, I know it looks really bad at this point, but bear with me.
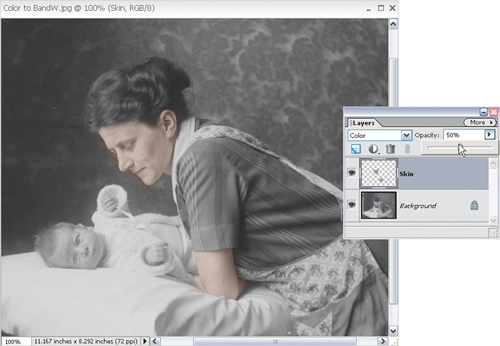
Once you’re done painting over the skin, change the layer’s blend mode (in the top left of the Layers palette) from Normal to Color. This mode shows the underlying details from the original photo (shadows and highlights), but tries to keep the color of the layer you just painted at the same time. It’s almost like tinting the black and white. Also, set the Opacity setting to around 50–60% to reduce the intensity.
Now you can see the details under the color. Cool, huh? If you need to add any areas, just use the Brush tool to continue adding skin tone to the photo. If you mess up, just press the letter E to switch to the Eraser tool and erase away those areas that don’t belong.
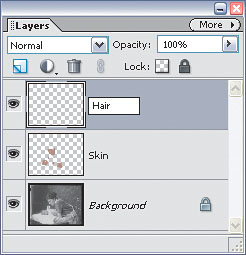
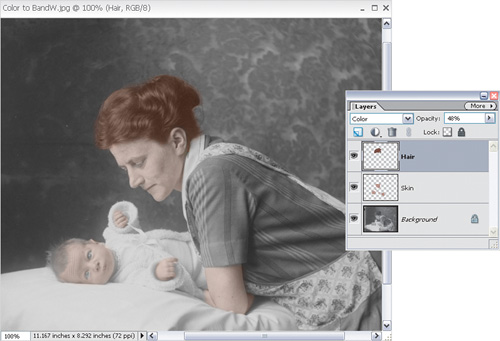
Now let’s work on her hair, since the people are really the most important parts of the photo here. First, create a new blank layer just like we did in Step 4. Name this layer “Hair.”
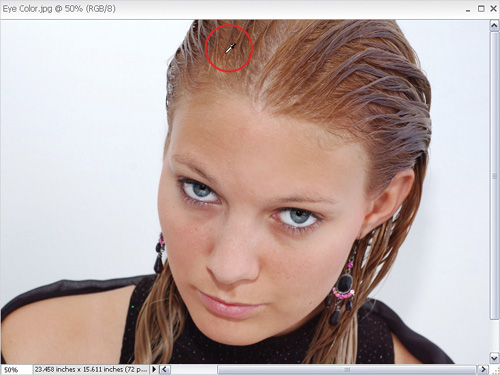
Again, open another photo and use the Eyedropper tool to sample the person’s hair. This works best if you know what color hair the person in the old photo had, so try to ask around in your family (or a client if you’re doing this for business purposes) to see what the original color was.
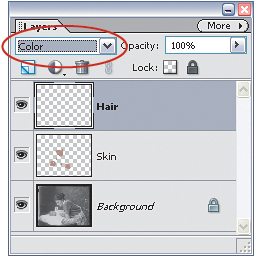
Click once on the Hair layer to select it. Back in Steps 6 and 7, we actually painted first and then changed the layer’s blend mode to Color. This time, try changing the blend mode to Color first.
Now, press B to select the Brush tool and start painting on the hair. When you’re done, you may want to reduce the opacity of the layer depending on how intense the hair color looks. Somewhere between 40–60% works well here.
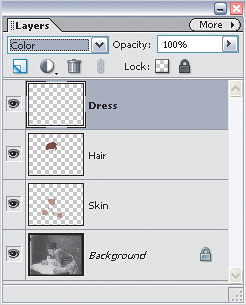
Okay, now let’s move to the dress. Create a new blank layer named “Dress” to hold the dress color. Change the blend mode from Normal to Color.
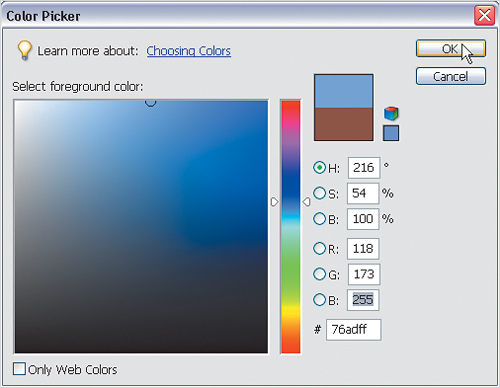
Click on the Foreground color swatch at the bottom of the Toolbox to bring up the Color Picker, and set your Foreground color to a blue color. I used R:118, G:173, B:255 here.
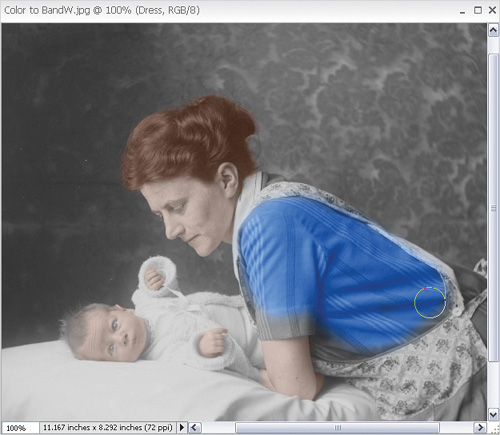
Start painting with the Brush tool on the dress to add some color. Remember, if you add paint outside the lines of the dress, you can always press E to switch to the Eraser tool and erase away those areas.
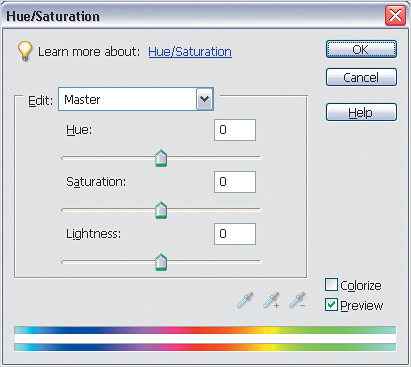
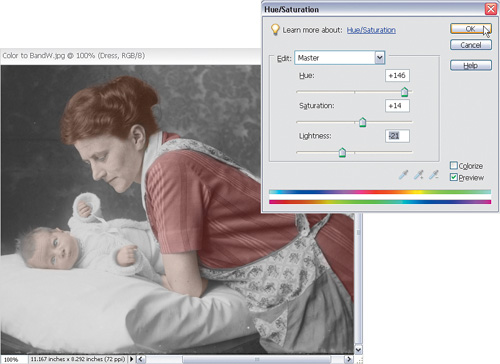
After you paint certain colors, you may think that another color would look better. Here’s a great trick, so you don’t have to go recoloring the whole area again. Click once on the layer that holds the color you’d like to change (in this case, the dress). Press Ctrl-U (Mac: Command-U) to open the Hue/Saturation dialog.
Adjust the Hue slider until you get the color that you are looking for. Always adjust the Saturation slider to make the color more or less intense. Finally, adjust the Lightness slider to make the color lighter or darker. When you do it this way, you can have total control over the color you’ve painted even after you’ve painted it. It saves a lot of time so you don’t have to go back and repaint the whole thing if you decide to change colors.
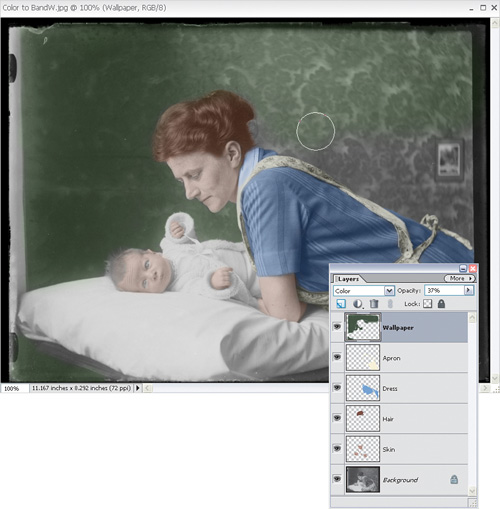
Finish the photo by creating a new layer for each area and adding color separately to each layer. When you’re done, you may have a lot of layers but it’s worth it in case you decide to change your mind and switch colors.


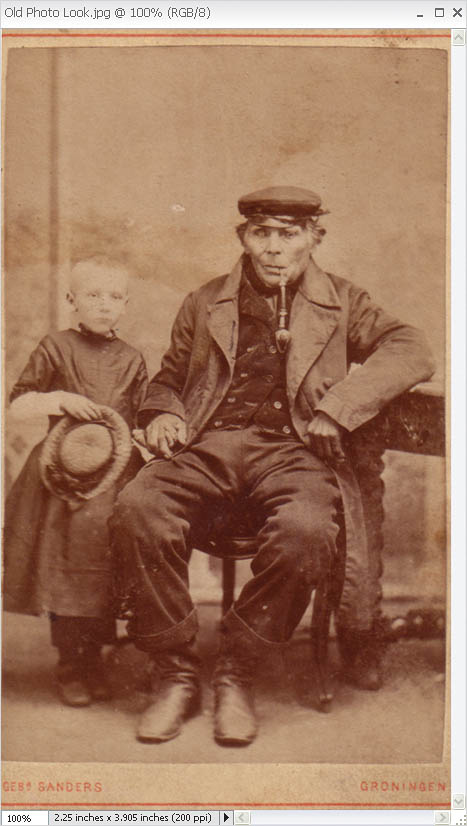
Read the title to this tutorial and you’ll probably know exactly what I mean. You know, that “old photo” look. You see, I can’t explain it. There is just a look to old photos that makes them look, well...old. They have a yellowish/brownish color to them from being exposed to the elements for 80 years and it’s not very appealing. Let’s take a look at how to remove it here.
Open an old photo that has that “old photo” look to it. Trust me, you’ll know it when you see it. By the way, if you were thinking of that yellowish color tint that photos from the ’70s tend to have, then you’re probably not alone. While this tutorial concentrates mostly on those really old photos, take a look at the first tutorial in this chapter for three ways to fix the color in those ’70s photos.
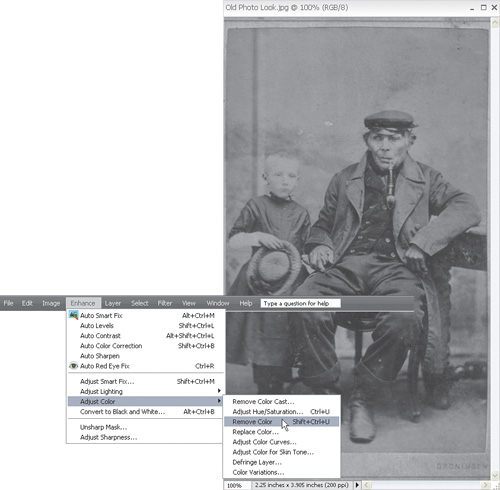
Go to the Enhance menu and choose Adjust Color>Remove Color, or press Ctrl-Shift-U (Mac: Command-Shift-U). This will take all of the color from the photo.
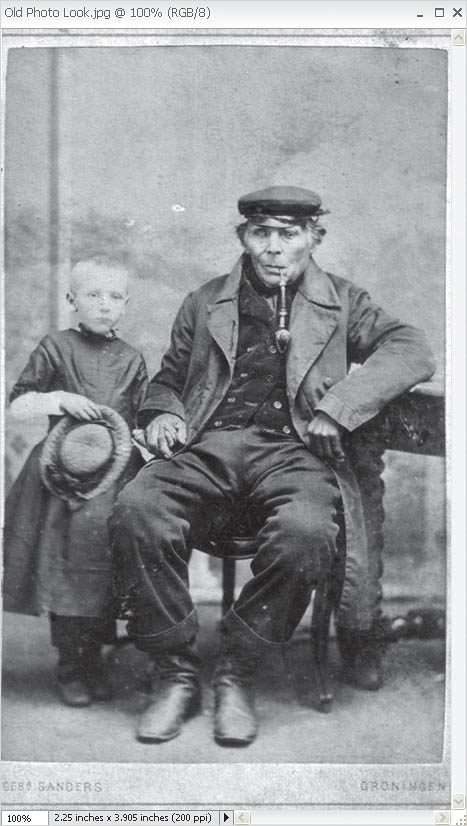
Now let’s add some contrast back into the photo. You can use the tutorial in Chapter 7 on page 183 for this or try the quick and dirty way under Enhance>Auto Contrast. There you have it. The old look is basically gone. You could stop here if you’re happy, but read on if you want a different way to finish this off.
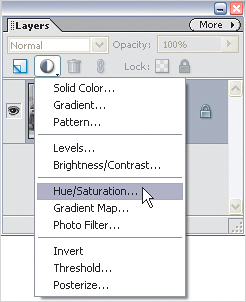
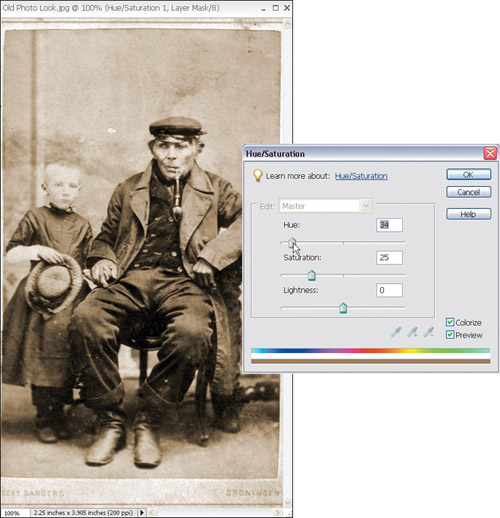
Many people tend to like the sepia tint that those old photos have. You see, that old photo look I was talking about tends to make everything look like a dull, brown mess—even the details in the photo. That’s why we converted it to black and white, and boosted the contrast a little. That makes the overall tone of the photo much better. However, I personally like the sepia tint, but I just don’t like the aged look of the original. I’m much happier when I can control the sepia tone, instead of it being forced on me as it was in the original. So, let’s add our own. Go to the top of the Layers palette and click on the Create Adjustment Layer icon. Select Hue/Saturation from the pop-up menu that appears.
In the Hue/Saturation dialog, click the Colorize checkbox in the bottom-right corner to turn it on. Then take the Hue slider and drag it to 34. That should add a nice sepia color to the photo.
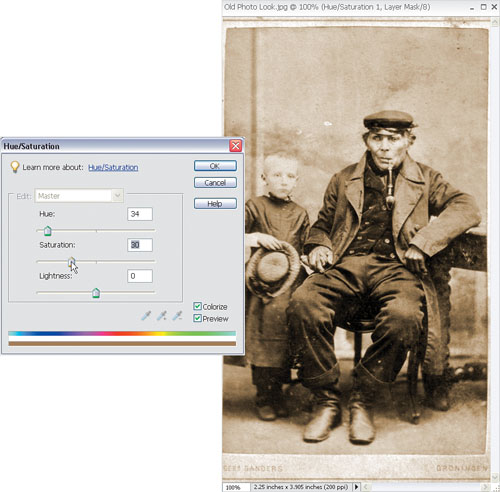
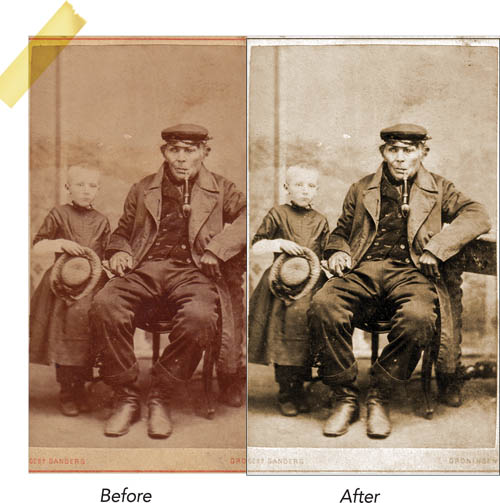
The best part about it is that you have control. You can change the color by adjusting the Hue slider. You can also change the saturation, or how strong the color is, by adjusting the Saturation slider. Notice how much richer the blacks are than the original photo was. Both versions have a brown color tint, but the Hue/Saturation version pops out much more.
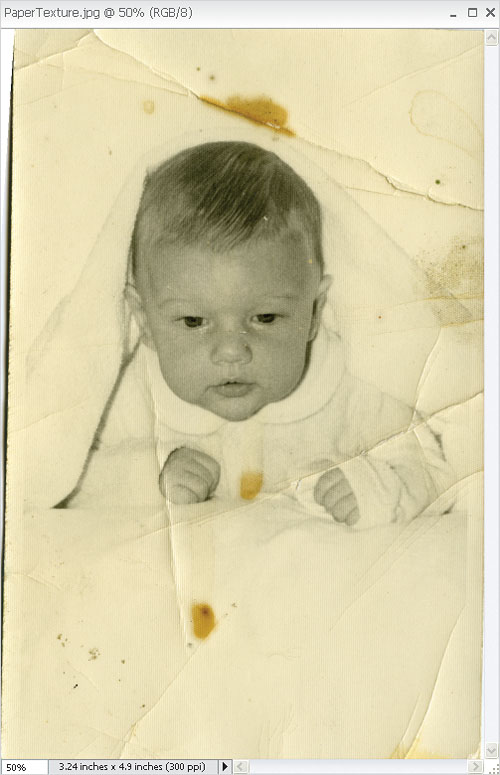
When you look closely at older photos, you’ll notice that many of the papers they were printed on have a certain pattern or texture to them. It’s usually not so bad when you’re looking at the real photo. However, once you scan that photo into your computer, those paper textures and patterns become a problem. Especially if you need to restore the photo, because now you not only have to worry about the details of the photo but you also need to keep the same paper texture. So, why not remove the texture altogether?
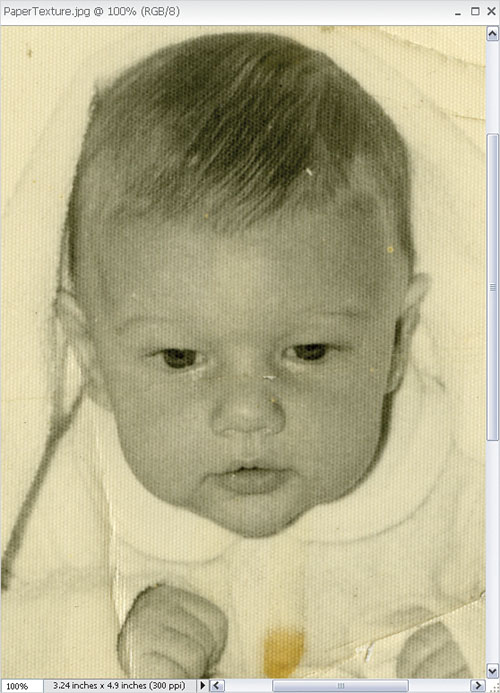
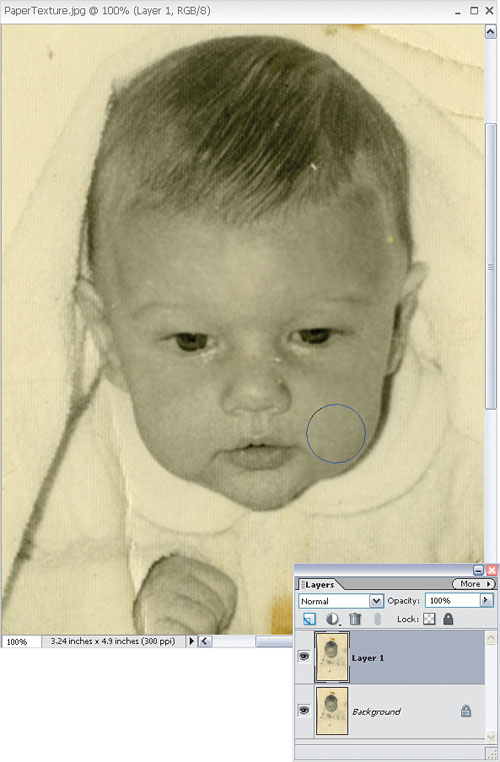
Here, I’ve opened a photo I scanned using my favorite scanner in the world, the Epson Perfection V750-M PRO. It’s so good that it actually picks up the texture on the paper.
Double-click the Zoom tool in the Toolbox to set your zoom percentage to 100%. This shows us exactly how the image looks when blown up to full size.
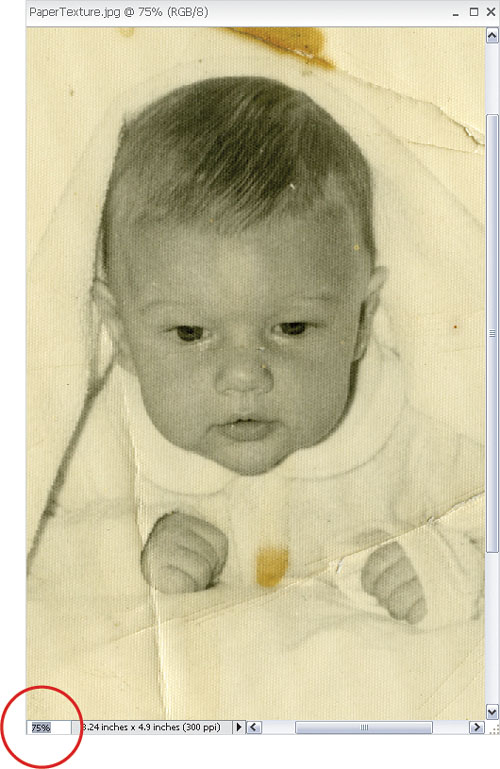
Let’s start zooming out until we don’t see the texture anymore. Double-click in the bottom-left field under your image to highlight the text that reads “100%.” Then type 75 and press the Enter (Mac: Return) key to zoom out to 75%. I can still see the texture, so go ahead and enter 50% and press the Enter key.
The texture is pretty much gone in the 50% view, so make a mental note of the percentage at which it disappears.
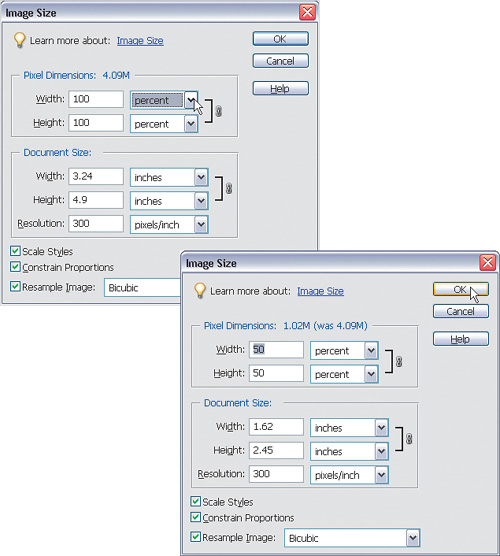
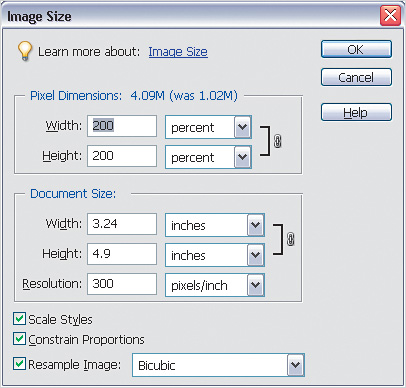
Now, go to the Image menu and choose Resize>Image Size, or press Ctrl-Alt-I (Mac: Command-Option-I). When the Image Size dialog opens, make sure both the Resample Image and Constrain Proportions checkboxes are turned on at the bottom left of the dialog. In the Pixel Dimensions section, choose Percent from the Width and Height pop-up menus. Actually, you should just need to change one and the other will change automatically.
Then, in the Width field, type in whatever percentage it was from Step 4 that made the texture disappear. The Height field should change automatically. In this case, I entered 50%. Press OK and the image will be resized.
Now, double-click on the Zoom tool again in the Toolbox to set the image view to 100%. You should no longer see the texture, and the photo should look just like it did in Step 4 when the texture disappeared.
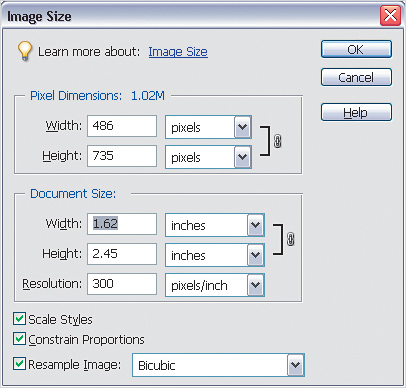
However, by resizing you’ve also made the image half its size. At this point, you need to make a decision. Go back to the Image Size dialog or just press Ctrl-Alt-I (Mac: Command-Option-I) to open it. Under Document Size, look at the Width and Height fields (they should be in inches; if not, choose Inches from the pop-up menus to the right of these fields) and see what they read. Decide for yourself if you’ll want to print the photo out at a larger size than this. At this point, the document size could be fine and you’re done with the tutorial. The texture is gone and everyone is happy, right?
If, however, the document size is too small and you need it back to the size it was before you resized in Step 6, then you need to do one more thing. While still in the Image Size dialog, change pixels to percent once again in the Pixel Dimensions section. Then use this formula to get the image back to the original size:
(100/percentage used in Step 4) × 100%
In this case, it would be: (100/50 = 2) × 100 = 200%. So, I would enter 200% for the Width and Height settings. Had I used 75% in Step 4 then it would be: (100/75 = 1.33) × 100 = 133%. I promise this is the most math that you’ll have to do in the entire book.
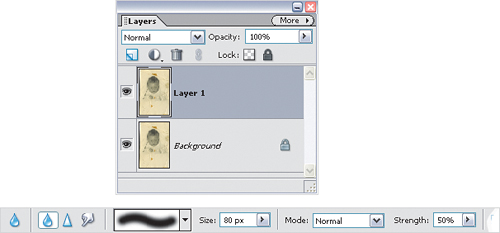
Okay, now press OK once you’ve entered your percentage. The photo is resized and will print out at the same size it would have when you first opened the image. If you still think there is too much texture, press Ctrl-J (Mac: Command-J) to duplicate the Background layer. Then press R to get the Blur tool, choose a soft-edged brush, and make sure the Strength is set to 50% up in the Options Bar.
With your new layer active, start painting with the Blur tool on the areas that have too much texture. Be careful to avoid any detail areas, such as the eyes and the mouth in the photo shown here. Since your brush is set to 50%, you can always paint a second time to build up the effect.
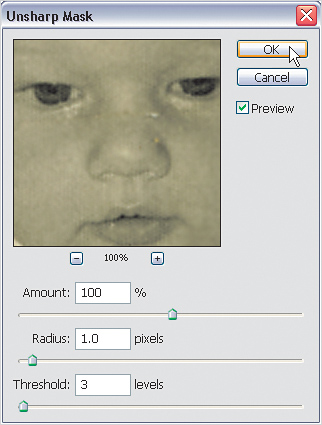
Now, some may argue that the photo may not be quite as sharp as it was in the beginning. If you’re not one of them and you think it looks fine, then by all means skip this part. But, if you do notice any blurring of the photo, you can fix it by choosing Enhance>Unsharp Mask to sharpen the photo (in Elements versions 3 and 4, Unsharp Mask is under Filter>Sharpen>Unsharp Mask—it’s the same filter, though). Enter an Amount setting of 100, Radius of 1 and Threshold of 3. Click OK and that’ll sharpen the photo to help offset any blurring effect we may have had when increasing the size of the image.


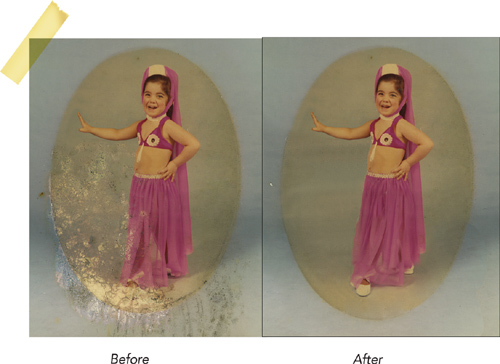
After Hurricane Katrina hit in 2005, many families lost everything—homes, cars, furniture, electronics, and even their family photos. Insurance companies hopefully cover the material losses, but you can’t put a price on losing memories. Fortunately, many folks rushed to the aid of those affected through a website called Operation Photo Rescue—a worldwide network of volunteers dedicated to trying to restore lost photos (mostly water damaged, in this case). Many of the techniques they use work perfectly in Elements, so let’s take a look at how to fix some water damage.
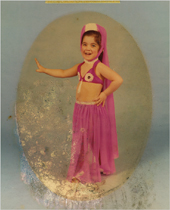
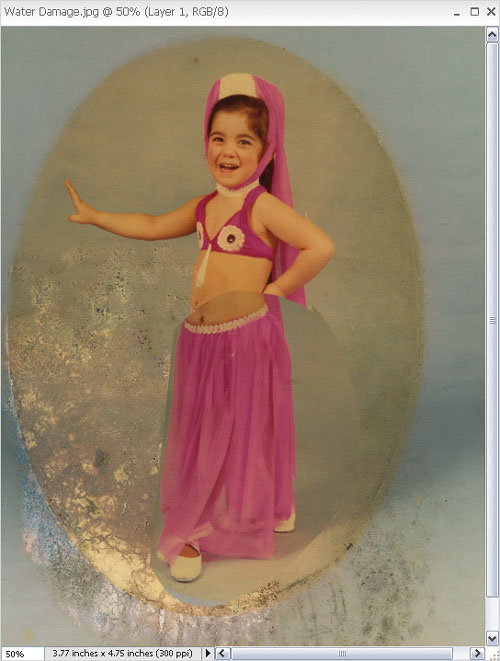
Open a photo with some water damage. Here, I’ve got a photo of one of our graphic designers, Jessica, who worked on this book. Isn’t she cute? However, you can see some pretty severe water damage through many parts of the photo.
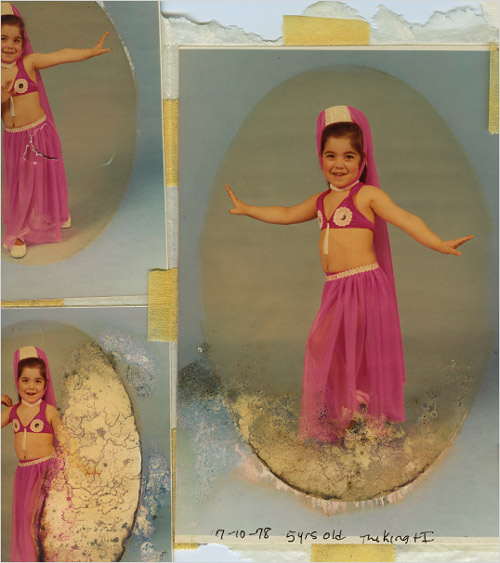
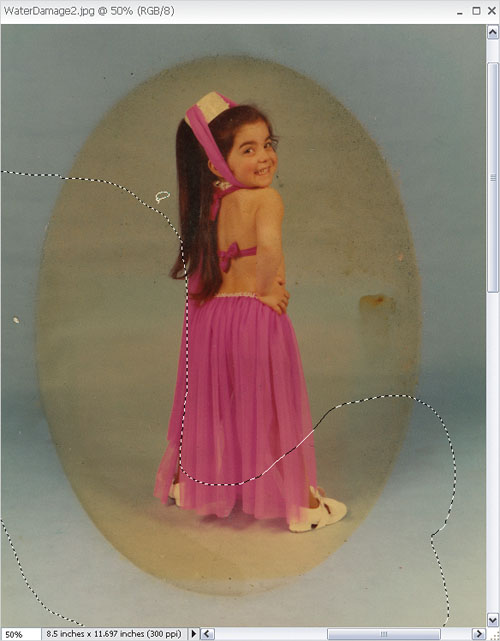
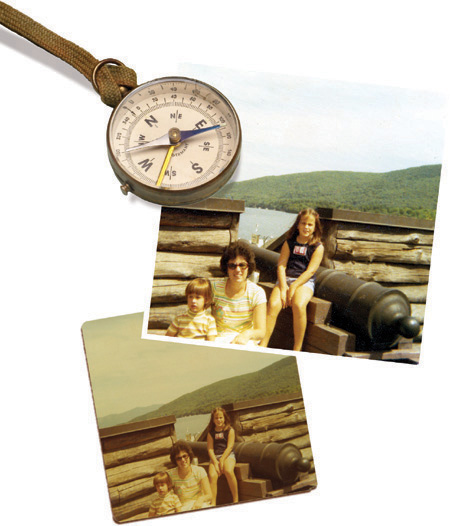
The first thing is to try to locate other photos that are similar to this one. I’m a big fan of Katrin Eismann and her retouching and restoration methods. She often tells people to beg, borrow, or steal from wherever they can to repair a photo, and I think that advice works perfectly here. Here I’ve got a scan of a few other shots of the same girl, and some of them include parts that we can utilize to fix our photo—namely the bottom of the dress near the feet.
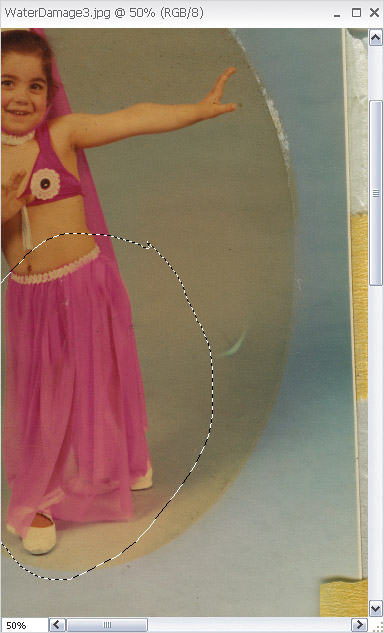
First, go to the photo that has the parts you want to steal. Press L to select the Lasso tool and draw a selection around that area. It’s okay to select more than you need, as we can always erase it later.
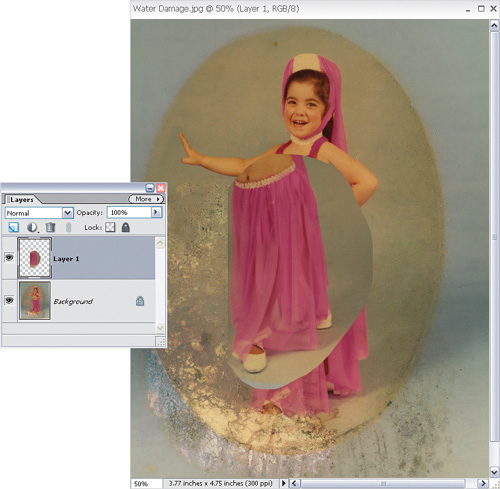
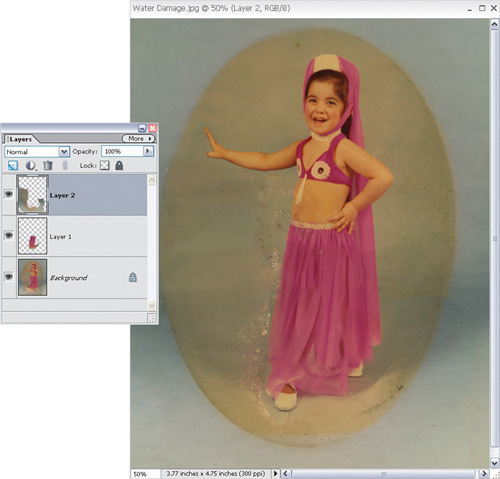
Press Ctrl-C (Mac: Command-C) to Copy this area from the source photo. Then click on the photo that you want to repair to move it to the front and press Ctrl-V (Mac: Command-V) to Paste the copied area in. You’ll see that it gets placed on a new layer above the original photo.
Press V to select the Move tool and move the new piece into place. You can always drop the opacity of the copied layer so you can see behind it and line it up correctly.
You’ll notice that some areas just don’t fit in. To fix this, press E to select the Eraser tool and choose one of the soft-edged brushes from the Brush Picker in the Options Bar. Start clicking-and-painting to erase in areas that don’t match up. If you go too far, then just press Ctrl-Z (Mac: Command-Z) to go back and try again.
Now, we need to fix the rest of the area around the dress. You’ve got a couple options here: first, if you can beg, borrow, or steal from another photo, then that’s the ideal method because it’s usually less work. Or, you can try the “Don’t Fix the Background—Move the Person” tutorial in Chapter 9 to move your subject to a brand new background. For my example, there is a background in another photo that isn’t damaged, so I’m going to select the Lasso tool from the Toolbox again and quickly select it.
Tip
If you do use the tutorial in Chapter 9 to change your background, keep in mind that your background color may not always match the one I used in the tutorial. A great trick is to follow the tutorial as stated to create the black-and-white background. Then go to Enhance>Adjust Color>Adjust Hue/Saturation and change the Hue setting. Be sure to turn on the Colorize checkbox in that dialog as well, so you can change colors to fit your photo.
Then, just like Step 4, copy-and-paste the background selection into the image you’re working on. Use the Move tool to position it into place and use the Eraser tool to erase away the areas that don’t fit. This takes care of most of the damage I had in the background, but it’ll typically still leave the edges of the people with some water damage—the chances that the person in the undamaged photo is in the same pose and spot as the damaged photo are pretty slim.
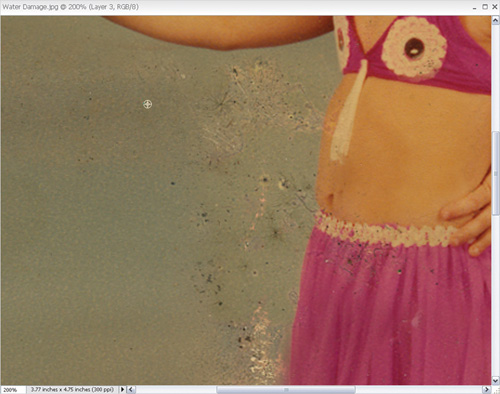
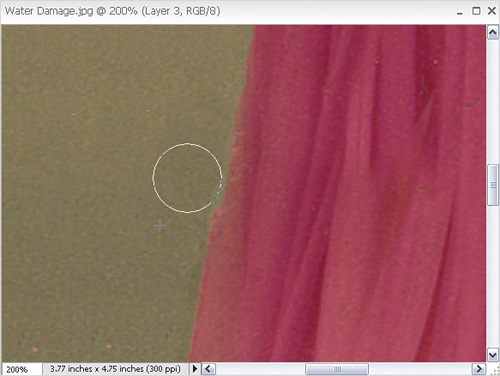
For the remaining areas, I’m going to click on the Create a New Layer icon at the top of the Layers palette to create a new blank layer. First, press Ctrl-+ (Mac: Command-+; plus sign) to zoom in to the area that needs to be fixed. Select the Clone Stamp tool (with the Sample All Layers checkbox turned on in the Options Bar) and Alt-click (Mac: Option-click) in a clean area of the background.
Then, while you’re still zoomed in, start to fill in those areas of water damage in the background. Typically, they’ll be around the edges of the people since that’s the area hardest to get perfect with Step 8. As you get closer to the edges of the dress, you’ll probably want to switch to a harder-edged brush in the Brush Picker (those are the brushes with the very crisp edges, not the soft ones). That’ll help you keep that clean edge between the person in the photo and the background.