Here’s where we do all of the things that I couldn’t fit into the previous four chapters. I know, you’d think I could come up with a better intro than that. But hey, do you want the truth or what? Seriously though, this chapter will cover some of the best ways to take your photos of people to that next level. We’ll look at everything from removing tan lines to adding a tan. You’ll learn some great body sculpting techniques, as well as ways to work with and enhance hair.
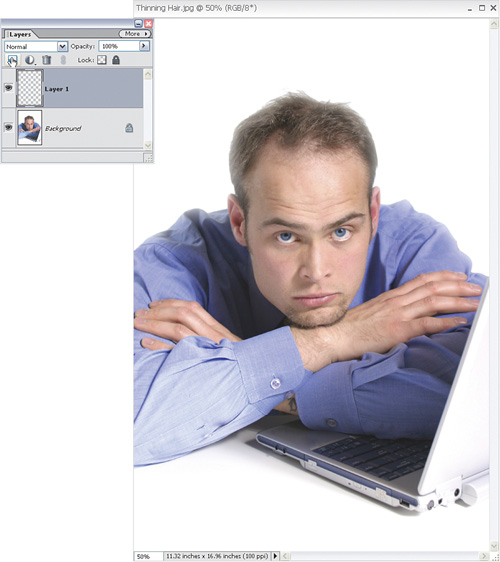
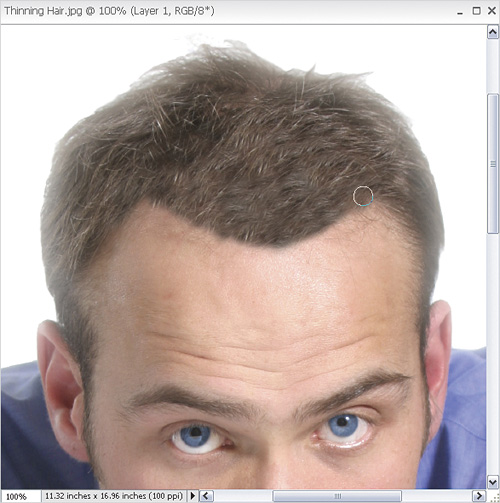
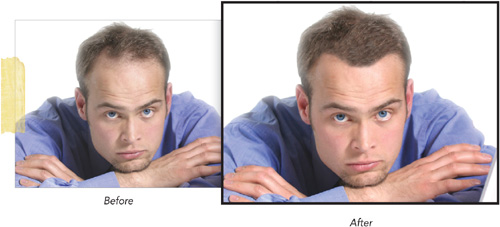
It happens to many people (mostly men) and there’s not much anyone can do about it—thinning hair. Here’s the thing I find about thinning hair, though—it’s often accentuated in a photo. For some reason, photos seem to be taken at just the right angle many times to make already thinning hair seem even worse. Fortunately, there’s a simple way to add some thickness back in and it doesn’t cost a thing (unlike other hair enhancement treatments).
Before you do a thing to try to thicken thinning hair, look around at your own photos or photos you see on websites or in magazines and study the hair (mostly men). Notice how most age 30 and up men’s hairlines are shaped. Remember this shape when you’re doing this tutorial, because making a person’s hair look like it did when they were 17 is probably not going to turn out well.
Okay, now let’s get going. Open a photo of a man that needs a little hair thickening. Then, click on the Create a New Layer icon at the top of the Layers palette to create a new blank layer.
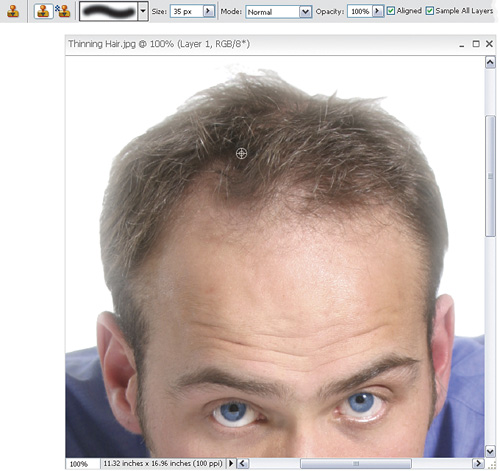
Select the Clone Stamp tool (S) from the Toolbox and be sure that the Sample All Layers checkbox is turned on in the Options Bar. Click once on the new blank layer you just created to target it and then press-and-hold the Alt (Mac: Option) key while you click to sample an area of existing hair.
Start painting with the Clone Stamp tool over the areas of thinning hair. In order to do this photo, I resampled by Alt-clicking (Mac: Option-clicking) very often because I wanted to keep the hair pattern random. Also note how I let the sides of the hair recede slightly and built most of the hair toward the middle, like a typical male his age.

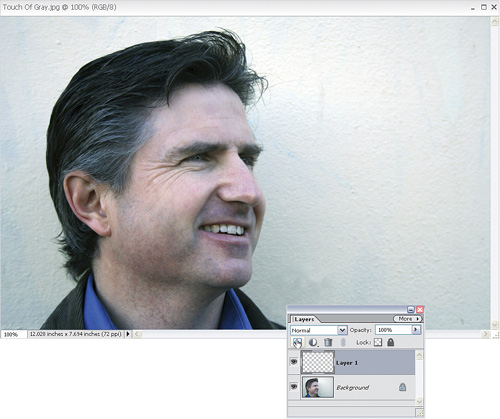
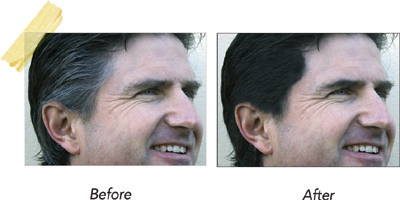
Notice that the name of this tutorial reads “...Areas of Gray Hair.” I’m not suggesting you turn a gray-haired person blond or brunette, but this is a great technique if a person has just a touch of gray in their hair that you want to make look like the rest.
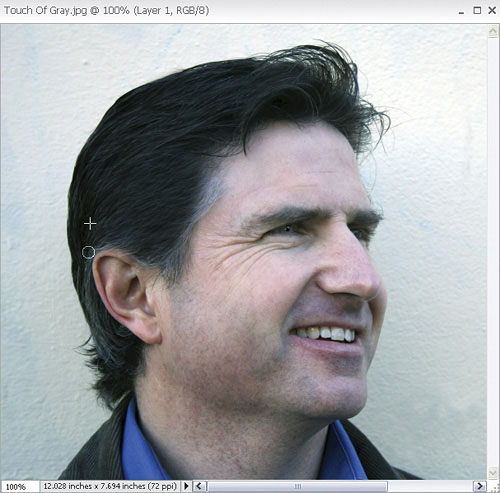
Start out with a photo of someone that has just a touch of gray in his or her hair. Typically this area will be on the side of the head.
Click on the Create a New Layer icon at the top of the Layers palette to create a blank layer on top of the original photo.
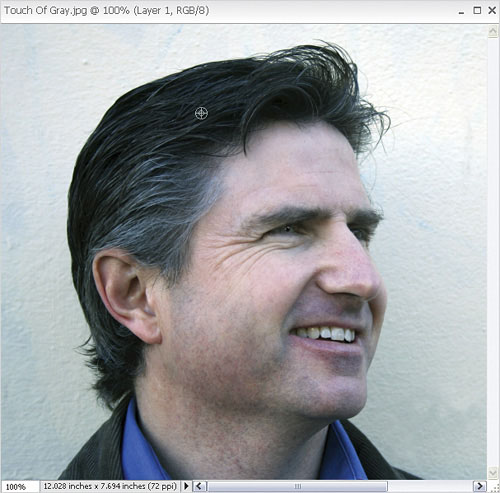
Press S to select the Clone Stamp tool. Set the Size setting fairly large at first to cover the bigger areas. Set the Mode setting to Darken, Opacity to 45%, and make sure the Aligned and Sample All Layers checkboxes are both turned on.
Make sure your blank layer (Layer 1) is selected, and then Alt-click (Mac: Option-click) on a darker area of hair with the Clone Stamp tool to sample the non-gray hair color.
Start painting with the Clone Stamp tool on the gray areas. Don’t forget to work with small brush strokes by clicking-and-dragging frequently across small areas. If you start to brush too long of a stroke, you’ll start to see your sample crosshair go over areas that aren’t hair.
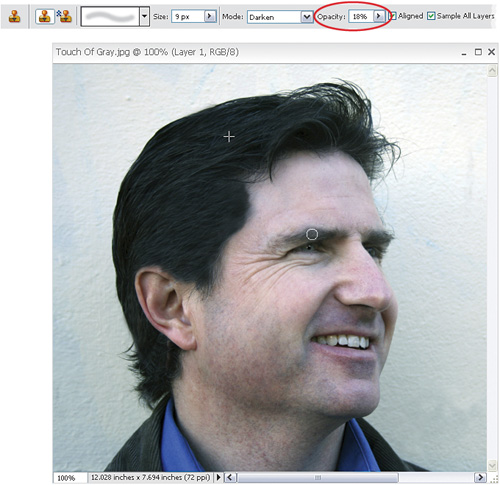
Reduce the size of the Clone Stamp tool’s brush to one that will fit in the smaller areas of gray near the ear and below. You can do this by picking a smaller brush in the Brush Picker (as shown here), or pressing the Left Bracket key ([) a few times.
Just like before, press-and-hold the Alt (Mac: Option) key while you click to sample a darker color of hair. Start painting again in those areas to fill in the remaining gray.
If you really want to finish things up, use the same technique on the eyebrows. However, since there’s a lot more skin around them, drop your Clone Stamp tool’s opacity (in the Options Bar) to 15–20% at the most. That’s a great way to complete the effect.


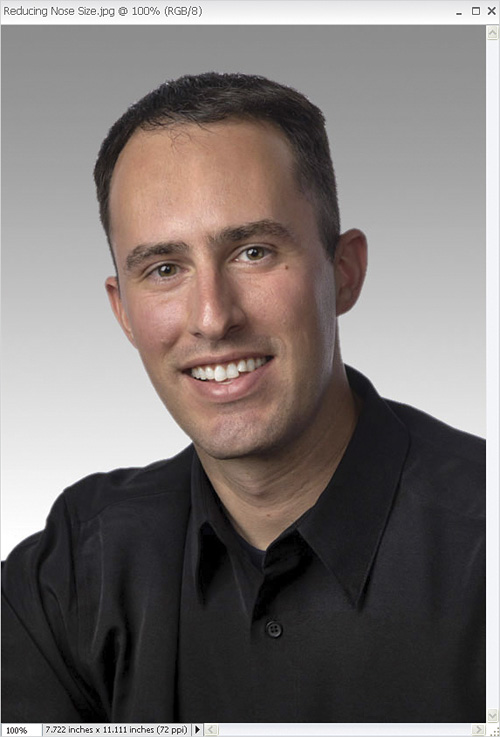
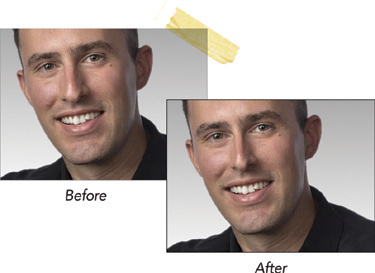
If you’re wondering who that handsome guy is in the picture in this tutorial, it’s me. Yep, I figured I can continue to use photos of unsuspecting people, or I can throw my own in there for a change, so that’s just what I did. I’ve always felt my nose was somewhat larger than most. It really strikes me more so when I see a photo of myself. Thankfully, there’s a cool filter called Liquify that comes to the rescue here.
Open a photo of, well, me if you want to follow along and practice. Come on... you know you want to do funny things to my face while you’re at it. Feel free to substitute a photo of someone you know instead.
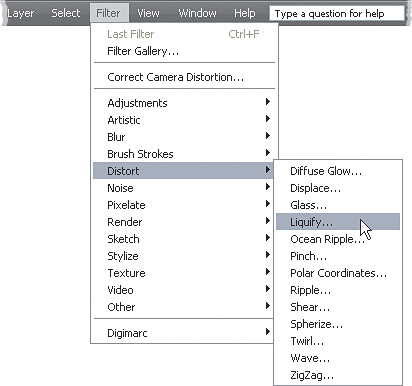
If you go under the Filter menu and look in the Distort submenu, you’ll see a filter that you may never have thought of when retouching people—it’s called Liquify. Usually it does just what it says—liquifies things and lets you distort them in weird, funny ways. However, it’s got some other great uses.
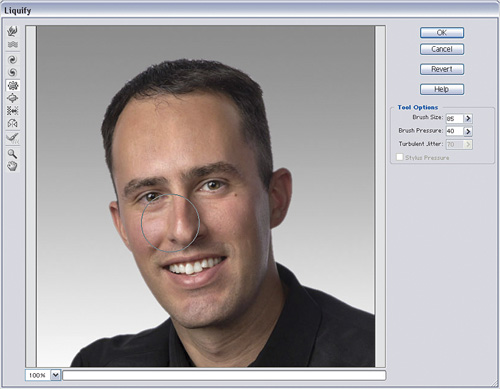
In the Liquify dialog, select the Pucker tool in the Toolbox on the left-hand side of the dialog (the fifth one from the top), or press P to get it. Put your cursor over the nose to see how big the brush is compared to the nose. Then go to the Brush Size setting on the right side of the dialog and increase the size until the bottom of the brush touches the bottom of the nose and the top of the brush is right between the eyes at the top of the nose. Then set the Brush Pressure to 40%.
Once you’ve sized your brush, move your cursor so the center of the brush is centered over the nose. Then click once to see it decrease the size of the nose.
Now, move your cursor so the center of the brush is over the outer left side of the nose. Click again to reduce that side of the nose.
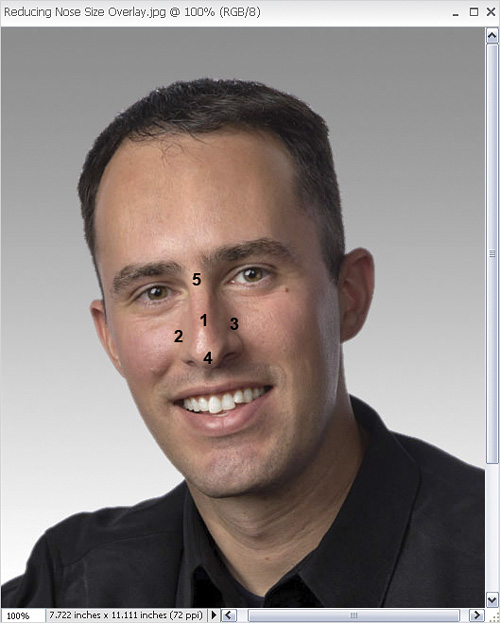
If you study how the brush is making the nose smaller, you’ll realize that most of the effect is being applied where the center of the brush is. That means that we’ve really got to “spread the love” here and resize all areas of the nose. You’ve already done the center and left side (1 and 2 in the graphic you see here). Now look at the accompanying image and position the center of the brush over the remaining areas to keep things as symmetrical as possible.
If you feel you can get away with it, go around once more with your brush and click on each numbered area to reduce the size even further. Remember, it’s always easier to add more than it is to take it away. So, go slowly and make it slightly smaller each time instead of clicking like crazy the first time around.


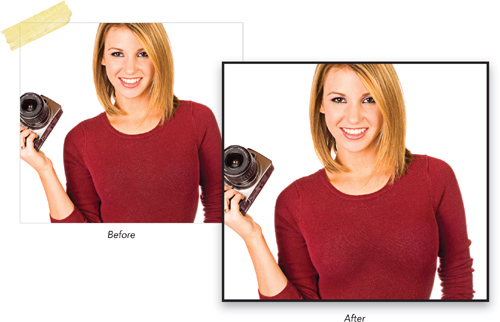
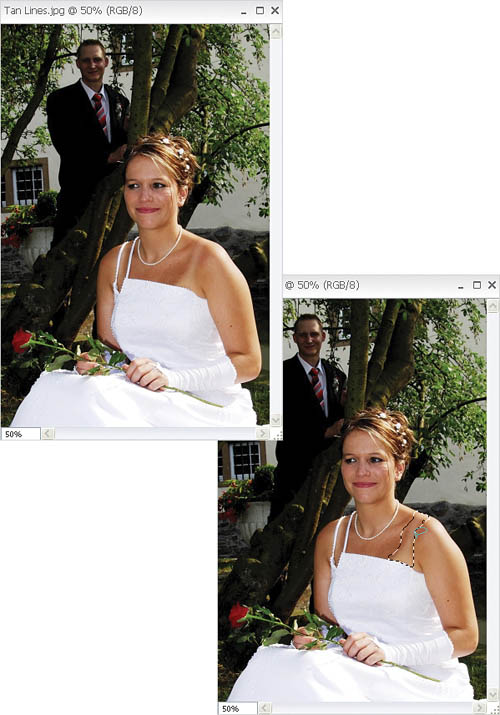
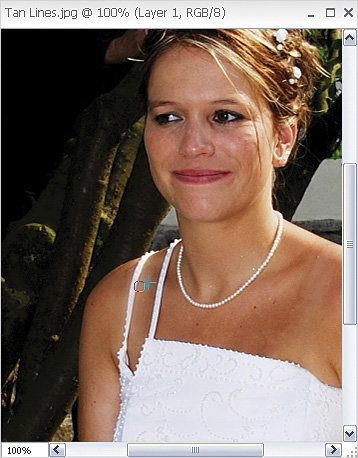
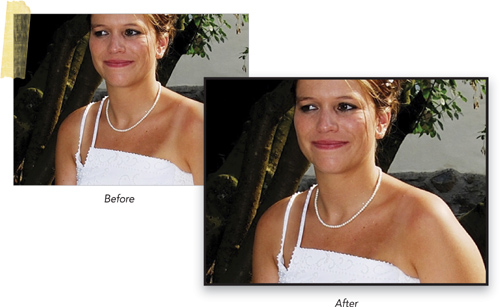
What’s the one thing that brides, bridesmaids, and prom-goers love to do before the big day? Go tanning, of course. Now, what’s the one thing that looks really, really bad in nice formal photos? Tan lines! It’s a vicious circle you see. They go tanning to look better but they forget about the tan lines that stick out like a sore thumb later when they look at their photos. Let’s take a look at a quick way to fix them.
Method 1: Large, Isolated Areas
This first technique works great for larger areas that are fairly isolated. It’s quick and flexible and allows you to get the skin color just right.
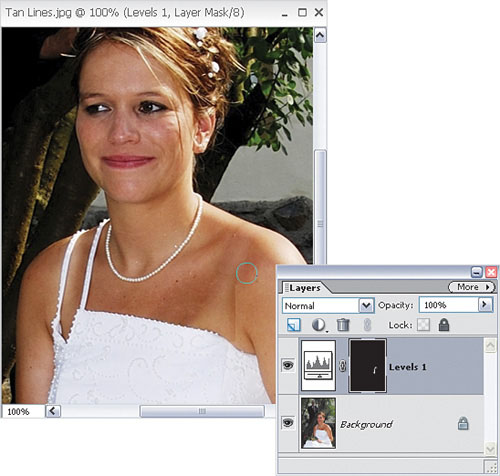
Open the photo that contains the tan lines. Most likely, they’ll be tan lines near the shoulders, back, or chest area. Notice the right shoulder area in this photo and how the tan lines are fairly isolated from the rest of the clothing.
Press the L key to select the Lasso tool. Drag a quick selection around the tan line area. Don’t worry if you go beyond it a little since we’ll remove that part later.
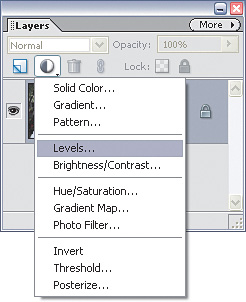
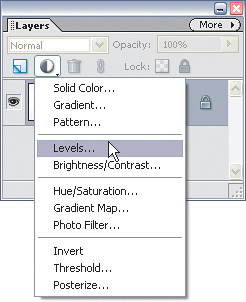
Go to the top of the Layers palette and click on the Create Adjustment Layer icon (the half-white/half-black circle). From the pop-up menu, choose Levels.
In the Levels dialog, drag the middle gray Input Levels slider over toward the right a little. It’s going to be hard to get this just right, but try to visually match the tan lined area with an area of skin outside the selection you made in Step 2. If you don’t get it perfect, then pack up and just forget about it—it’s a lost cause. Just kidding, if you don’t get it perfect, then just get it as close as you can. We can adjust it later, and most likely you will need to anyway. When you’re close, click OK to apply the adjustment layer.
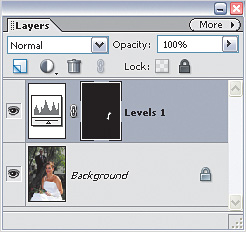
Notice the new layer in the Layers palette? That’s the Levels adjustment layer that we just added. Note that it’s got a black layer mask thumbnail right next to it.
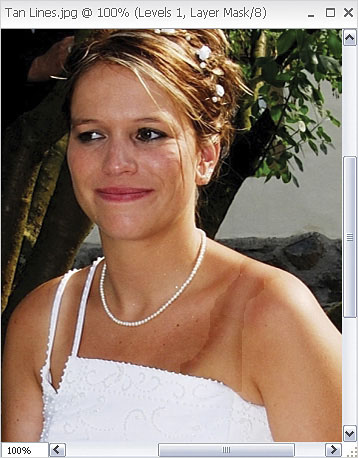
Select the Zoom tool (Z) and zoom in on the area you’re working on. Remember in Step 2 when we made a selection? If you look at the Levels adjustment we just made, you’ll see parts of it extend outside the tan line area.
Click on the layer mask on your Levels adjustment layer to make sure it is active (you will see a thin black line around the corners if it is). Then, press the letter D, and then X to set your Foreground color to black, and press the letter B to select the Brush tool. Choose a small, soft-edged brush about as wide as the tan line. Now click-and-paint with the Brush tool to start painting away the unwanted areas from the rough selection we made earlier. Notice how painting on that layer mask brings back the original photo from underneath the Levels adjustment layer in the Layers palette? Do this until your Levels adjustment only affects the actual tan line and not the area around it.
Once you’ve got your adjusted area only over the tan line, one of two things will happen: (a) you’ll realize you were dead on when doing the Levels adjustment in Step 4 and you’re done (a desirable, yet unlikely outcome), or (b) you’ll realize you need to tweak the Levels adjustment. Here, I’ll definitely need to do some tweaking. Double-click the Levels adjustment layer’s thumbnail, and in the Levels dialog, move the middle gray Input Levels slider again until the color matches better. The middle slider will typically change the color of the tan line area. You can even try adjusting the black slider on the left, as that will make an overall lighter or darker adjustment depending on which way you move it. The best part about this technique is that it’s flexible and you can rework it any way you want by either brushing with black or white on the Levels adjustment layer or by editing the Levels adjustment layer altogether.


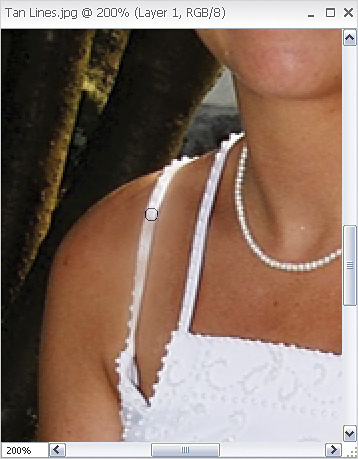
Method 2: More Intricate Areas
Use this technique if the area you’re working with is a little more intricate and not as wide open as the area seen in Method 1.
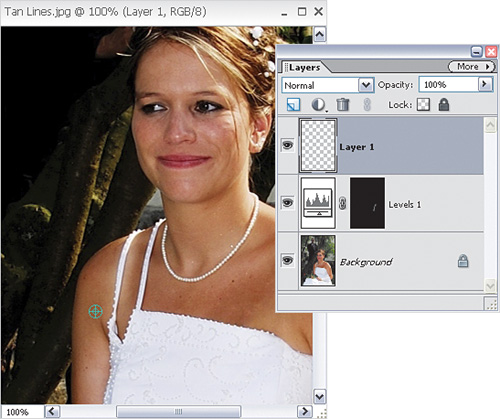
Let’s take a look at the other shoulder in the same photo from the previous technique. Notice how the strap is overlapping part of the tan line? This one is a little bit harder to fix using the Levels method so we’re going to try something different here.
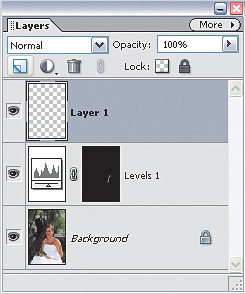
First off, click on the Create a New Layer icon at the top of the Layers palette to create a new blank layer.
Press S to select the Clone Stamp tool. Choose a brush size about the size of the tan line itself. In the Options Bar, set the Mode to Darken, Opacity to 25%, and make sure the Aligned and Sample All Layers checkboxes are both turned on.
With your blank layer active, press-and-hold the Alt (Mac: Option) key and click in a tan area of the skin at the base of the strap to sample the skin color.
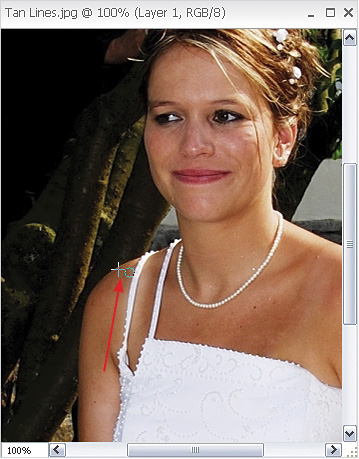
Now start painting upward along the strap line to match the tan line. If you sampled correctly the first time, you should be able to create one brush stroke from the bottom to the top and the small crosshair (which is what Elements is sampling from) will still stay within the skin. Don’t worry if your cloning bleeds onto the strap itself. We’ll fix that at the end.
Repeat the same process for the other side of the strap. Remember that we have the Clone Stamp tool’s opacity set very low (25%), so you can paint over the same area several times to build the effect as well as the color.
Finally, press E to select the Eraser tool. Set the brush to a soft-edged brush that is exactly the width of the strap. Now click-and-drag down along the strap to erase a small line where any of your cloning may have bled over. When you’re done, you should have a very even skin color with no tan lines. A combination of both of these techniques should give you great results for just about any photo.


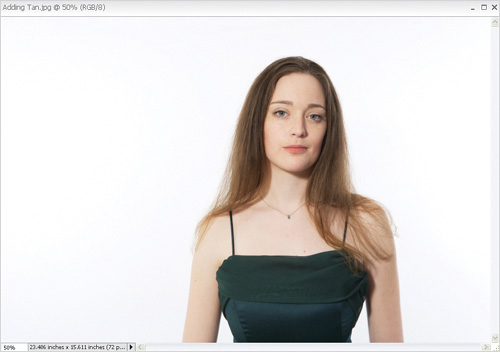
With the negative effects the sun can have on skin these days, I’m all for staying out of it. However, you can’t contest the fact that people look great when they have a little color in their skin. This is especially true in certain photos where pale skin just takes over and looks a little too pale. With Elements, though, you can get the benefit of a slight tan without ever going outdoors or spending a penny on a tanning booth.
You won’t have to look too hard for a photo that fits this tutorial. Trust me, when you see one, it’ll jump right out at you like the one I have here.
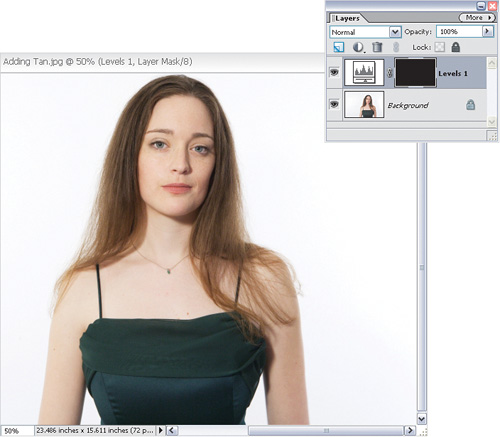
First, go to the top of the Layers palette and click on the Create Adjustment Layer icon. Select Levels to create a new Levels adjustment layer.
In the Levels dialog, take the gray Input Levels slider and move it slightly to the right, toward the white one. This should have the effect of darkening the entire photo. Stop at a point where you think her skin looks like it’s got more color, but is still realistic. Press OK to close the dialog.
Now press the letter D to set your Foreground and Background colors to white and black respectively. Then press Ctrl-Backspace (Mac: Command-Delete) to fill the layer mask next to the Levels adjustment layer’s thumbnail with black. This should totally hide the effects of the Levels adjustment layer we added in Step 3.
Tip
Here are two of my favorite shortcuts that I use every single day. Pressing Alt-Backspace (Mac: Option-Delete) will fill a layer or selection with whatever color your Foreground color swatch is set to. Pressing Ctrl-Backspace (Mac: Command-Delete) will fill with the Background color. Where the heck do they find these shortcuts anyway?
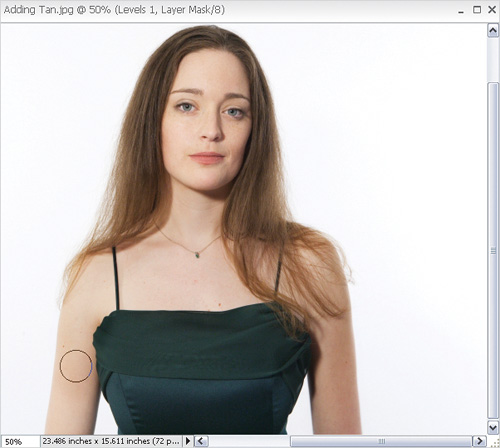
Select the Brush tool (B) and make sure your Foreground color is still set to white. Using a soft-edged brush, start painting with white on the girl’s skin to bring some of that darker color back. On the face and under the hair on the shoulders, you may want to lower your Brush tool’s opacity to 50%.
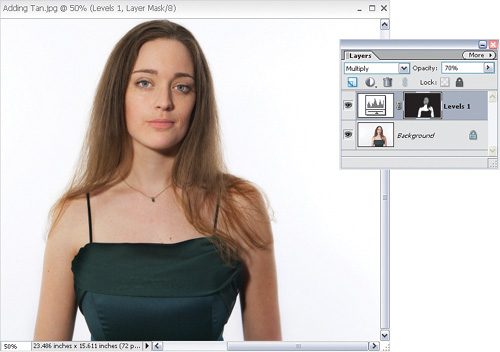
To finish things off, click on the blend mode pop-up menu in the top left of the Layers palette, and change the adjustment layer’s blend mode from Normal to Multiply. You may also want to drop the opacity of the layer to around 70–80% if the darkening effect is too harsh. Now the whiteness of her skin color isn’t so dramatic, and no skin cells were harmed in this tutorial.

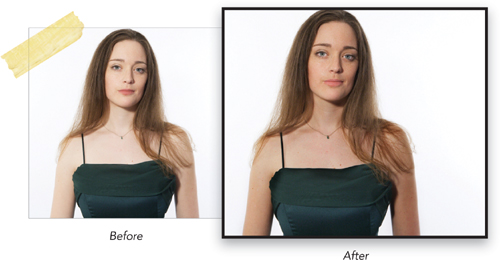
Let’s face it: we’re all going to turn gray at some point in our lives. I’m not quite there yet, but my two little maniac children are sure pushing me there fairly quickly. Once it happens, though, I hear it’s not so bad. However, all gray hairs are not created equal and the process of turning gray often leaves people’s hair an odd half-gray/half-dull color—especially in blond-haired men.
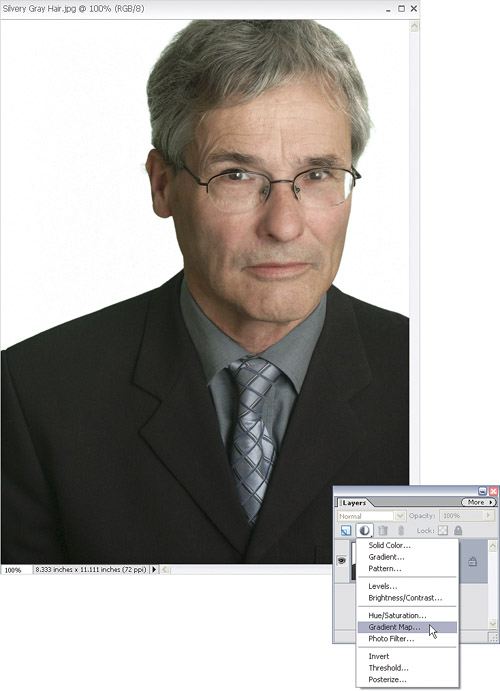
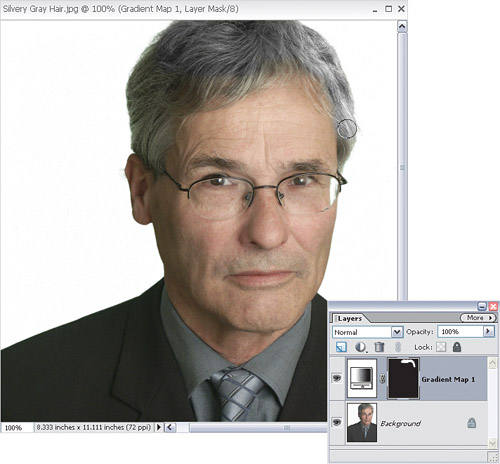
Open your photo of a gray-haired, or semi-gray-haired person. Folks that started out as blonds tend to work best for this technique, because blond hair turned gray usually tends to look very dull. It’s a great candidate for enhancing.
Click on the Create Adjustment Layer icon (the half-black/half-white circle) at the top of the Layers palette and select Gradient Map from the pop-up menu to open the Gradient Map dialog.
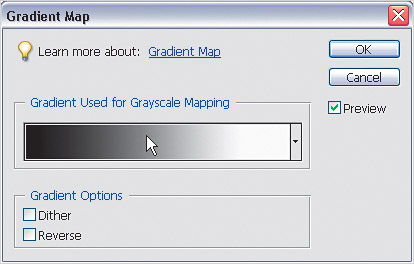
Once the Gradient Map dialog opens, click on the small down-facing arrow next to the gradient thumbnail in the center to get the Gradient Picker. Click on the third gradient from the left in the top row to choose the Black, White gradient.
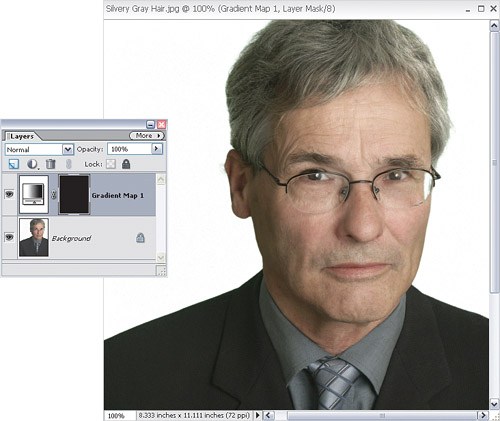
Click OK to close the dialog. Now your whole photo should have turned black and white. Go ahead and press D, then Ctrl-Backspace (Mac: Command-Delete) to fill the layer mask on the Gradient Map layer with black instead of its default white. This will hide the effects of the Gradient Map adjustment layer and the photo should be colorized again.
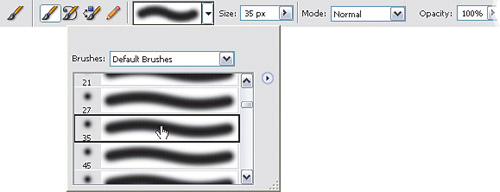
Now press B to select the Brush tool, and choose a soft-edged brush from the Brush Picker that is small enough to fit in the open areas of the hair near the top of the head.
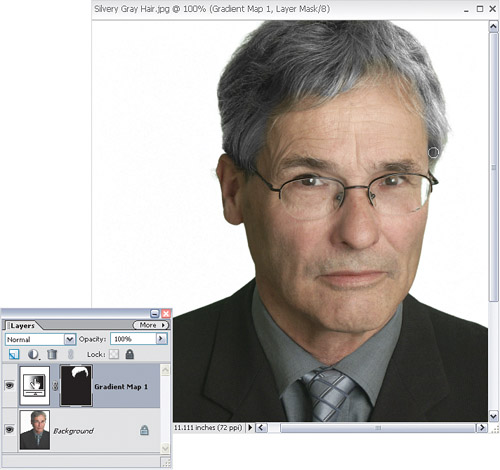
Make sure your Foreground color is still white and your Gradient Map adjustment layer’s mask is still active (you will see thin black lines around the corners of it), and start painting on the layer mask over the hair. This will show the black-and-white effects from the adjustment in only the places you paint with white.
Reduce the size of your brush and keep painting until you’ve covered all of the hair. This should leave nicely textured gray hair that doesn’t look dull like before.
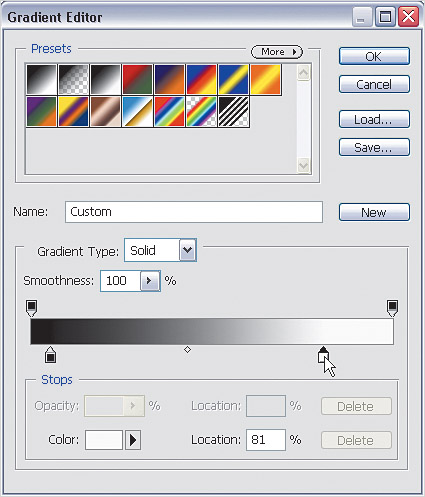
You can go ahead and stop here, or depending on the original hair color, you can take it one more step. Try double-clicking on the Gradient Map adjustment layer’s thumbnail in the Layers palette to reopen the Gradient Map dialog.
Then click once on the actual gradient itself to open the Gradient Editor.
In the bottom half of the dialog, try moving the bottom black color stop toward the right just a bit. Then try moving the white color stop back toward the left. Click OK to close each dialog. Now that should really bring out a nice salt-and-pepper gray color.


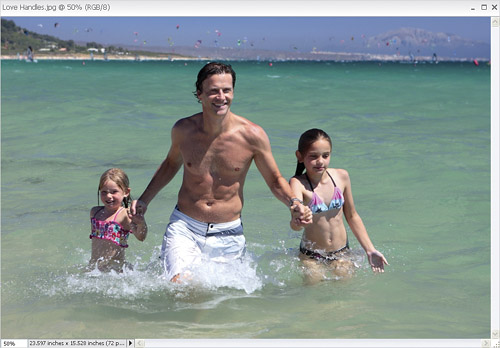
This tutorial is a great candidate for those beach shots where a person’s waist needs just a little thinning. The reasons for thinning can range anywhere from those pesky “love handles” that just won’t go away, to the appearance of their tummy when they were bending in an awkward direction. Regardless of the why, the waist needs thinning and I think you’re going to love the simplicity of the way to fix it here in Elements.
Open a photo of someone you’d like to do a little waist trimming to. You’ll find this technique works best on people with just a small area around the waist to trim. If there is too much to trim around the waist, then the photo is likely to look fake in the end.
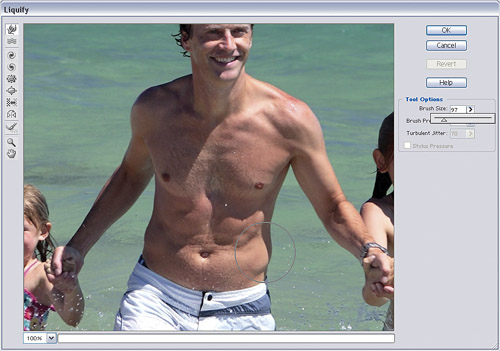
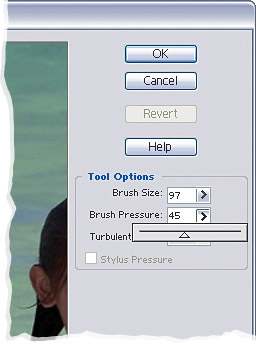
Choose Filter>Distort>Liquify. When the Liquify dialog opens, select the Warp tool (the first one in the Toolbox on the left). Then, in the Tool Options on the right side of the dialog, choose a Brush Size that is about double the size of the love handle that you’re removing.
Under the Brush Pressure setting, I usually start pretty low—somewhere around 30–45% will work well for this technique.
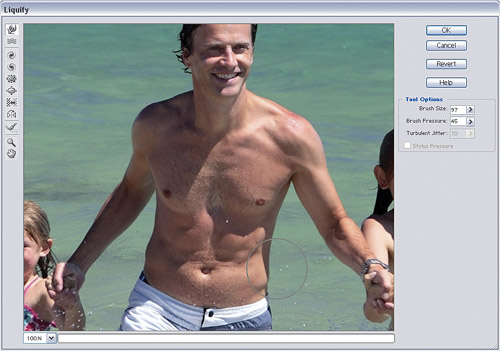
Now, position your cursor so the center of it falls just on the outside of the love handle. Half of it will most likely be over the man’s body and half of it will probably fall outside his body. Then click-and-drag inward to reduce the handle. Repeat the process on the other side and watch those extra few pounds disappear. Alas, if it were only that simple in real life.
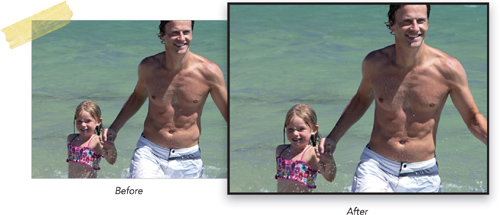
Here’s a great technique for taking existing muscle tone and enhancing it to make the person look more defined than he started out. It takes a bit of understanding muscle tone and where it appears, but heck, it sure beats the extra time in the gym when you’ve only got a minute.
Open a photo of a person just waiting to look like Arnold Schwarzenegger. As you can see here, this photo is just about there but it needs a little work in Elements. Okay, I’m obviously kidding. We can’t expect to take this photo and make him Arnold, but we can sure give him a little more muscle definition.
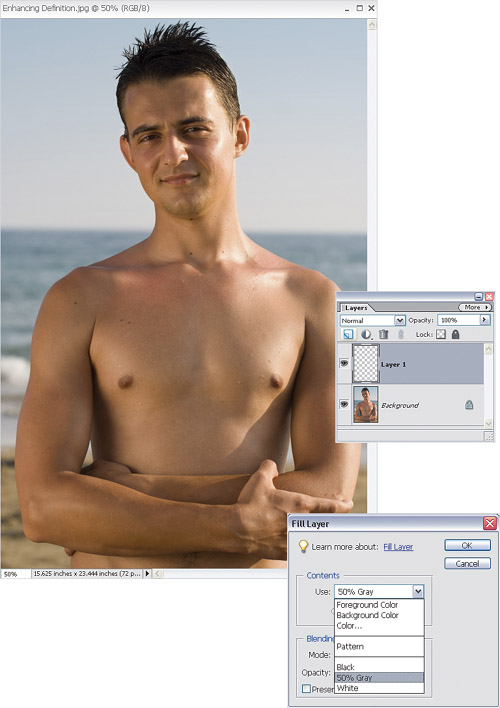
Click on the Create a New Layer icon at the top of the Layers palette to create a blank layer on top of the original photo. Then choose Edit>Fill Layer. When the Fill Layer dialog opens, from the Use pop-up menu choose 50% Gray, and click OK.
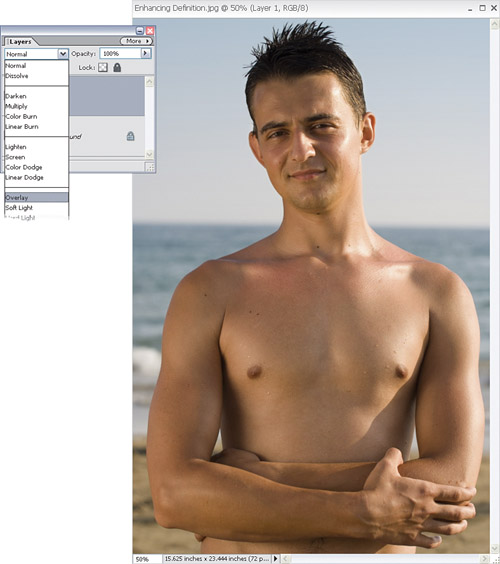
Your new layer in the Layer’s palette should be filled with gray. Change that layer’s blend mode in the top left of the Layers palette from Normal to Overlay. Now you should see only the original photo again.
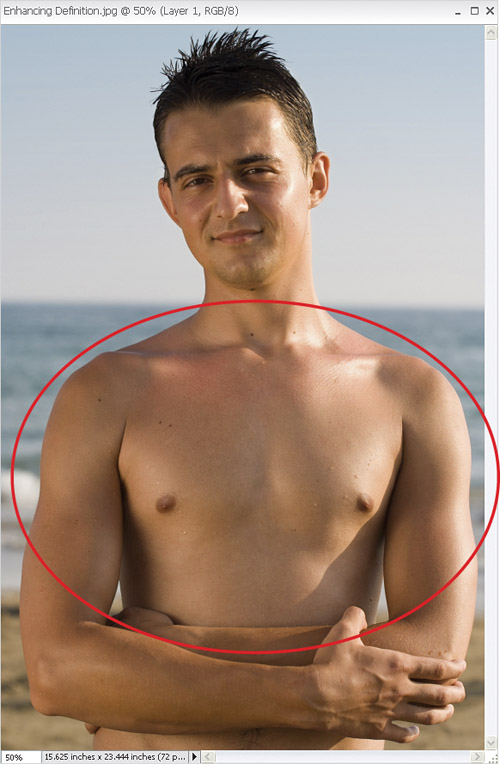
Now we need to step away from Elements for a moment and do some research. You’ll need to find a photo of a person with a good deal of muscular definition in the areas that you’d like to add to your subject. Study the well-defined areas for a moment and see where the key shadow/highlight areas appear. That’s the key here: definition isn’t necessarily built by bulk, it’s more a matter of strategic shadow and highlight areas created by the muscles that protrude out. Remember, we’re not trying to create Arnold, we’re just trying to enhance definition. Here, I’m mainly looking at the arms, chest, and abdominal area.
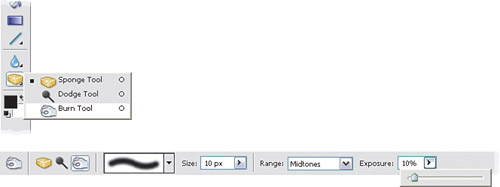
Select the Burn tool from the Toolbox (or press O until you have it), and in the Options Bar, set the Range to Midtones and the Exposure to 10%. Think of the Exposure setting as opacity. A low setting will apply very little burning to the areas you paint over.
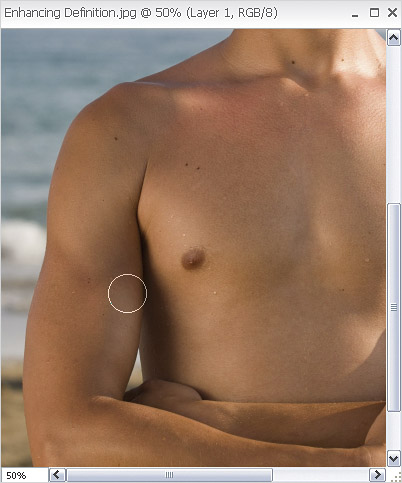
Let’s start out with the arms first. Select a thin brush—I used a 50-pixel brush for this photo. Click once on the gray layer you added in Step 2 to make sure it is active, and start painting on the arm. It should actually form a teardrop around the shoulder muscle.
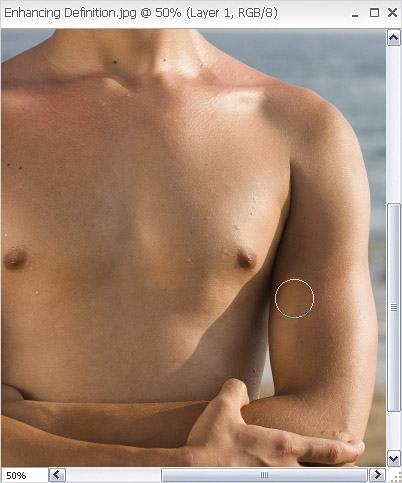
Now switch to the Dodge tool (press O until you have it). While the Burn tool is great for adding shadowy areas, the Dodge tool can be used to add highlights. Again, set the Range to Midtones, and Exposure to 10%. Now paint a very light and quick brush stroke on the outside of each stroke you just painted with the Burn tool. This will add a nice shadow/highlight area to the arm and enhance the definition.
Repeat the same steps for the other arm.
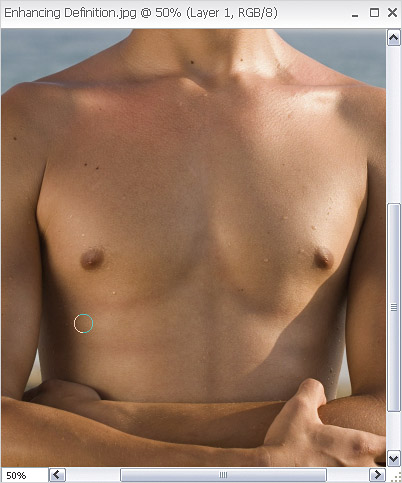
Now take a look at the reference photo to work on the chest and stomach area. Select the Burn tool to paint some shadows in the key areas. Do the same for the highlights with the Dodge tool.
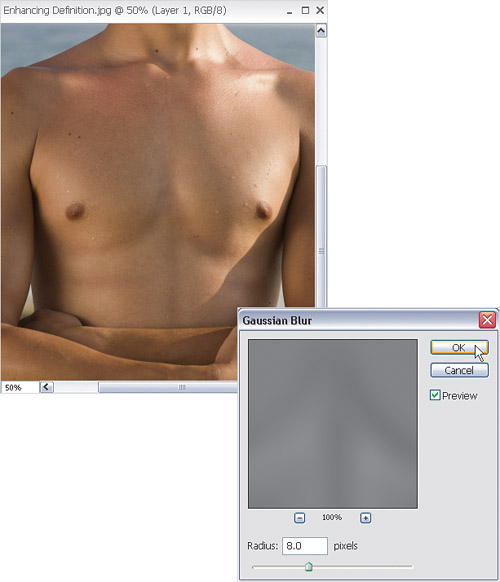
The last step is to help reduce some of the harshness of the areas we just burned and dodged. Make sure the gray layer is still active, and go under the Filter menu. Choose Blur>Gaussian Blur. Use a Radius setting of about 8 pixels to soften the definition you just added and click OK to apply the blur. That should soften it nicely but you can always drop the opacity of the layer as well to further lessen the effect.


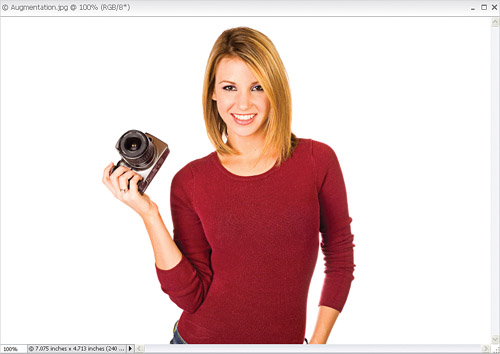
When I sat down to create the outline of tutorials in this book, I pulled a few of our editors, graphic designers, and other folks into a room and went through a list of possible topics. While I expected this tutorial to get cut from the list, everyone in the room (mostly made up of women) pretty much insisted that I keep it. They all talked about how there was no good tutorial for tastefully enhancing the chest area and they thought it would make a great addition to the book. So here it is—a tasteful way to simply enhance and bring out the chest area of a woman.
Open a photo of a woman that looks rather slim in the chest area.
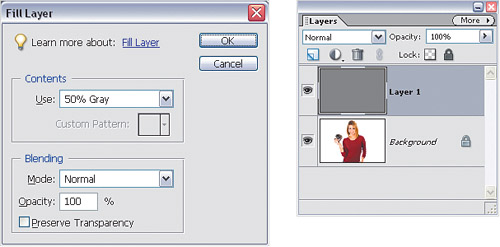
Click on the Create a New Layer icon at the top of the Layers palette to create a new blank layer. Then go to the Edit menu and choose Fill Layer. Set the Use setting to 50% Gray and click OK. This will fill the new layer with gray and hide the Background layer.
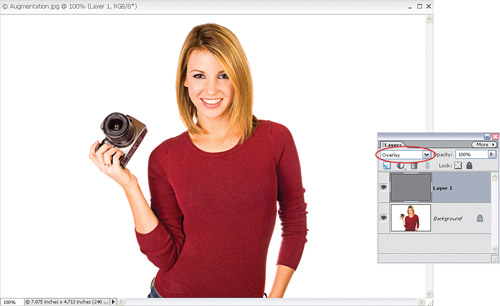
Change the blend mode of this new layer to Overlay. This will totally hide the gray color and make the photo look like it did in Step 1.
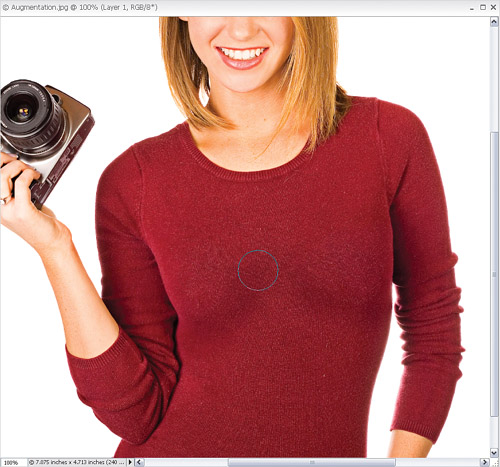
The first thing we need to do is add some shadows. After all, shadows and highlights are what add depth to all of the curves on our bodies. So, select the Burn tool from the Toolbox (or just press O until you have it). In the Options Bar, make sure Midtones is selected in the Range pop-up menu and set the Exposure setting to 10%.
Choose a fairly large soft-edged brush from the Brush Picker. With the gray layer selected, start painting with the Burn tool just below the breast area to add some soft shadows. Bring these shadows up into the middle of the chest and taper them off as you move toward the middle.
That takes care of the shadows. Now for some highlights. Select the Dodge tool from the Toolbox (or just press O until you have it). Again, make sure that the Range setting is set to Midtones and set the Exposure to 10%. Now just click over the top part of each breast to simulate highlights shining on that area. Don’t go too crazy here—just clicking with a large brush two or three times is plenty.
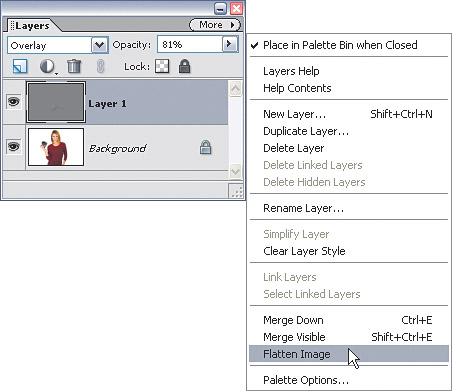
At the top right of the Layers palette, click the More button and choose Flatten Image to merge the two layers together.
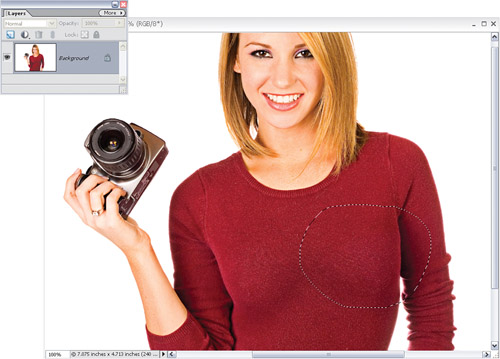
What we’ve done up to this point is added some depth. We’ve simulated light shining down on this person and bringing out a highlight, while adding a shadow to account for the curve of the chest area. Now all we need to do is enhance the curves a little. Press L to select the Lasso tool and draw a quick selection around one side of the breast area that you’d like to enlarge.
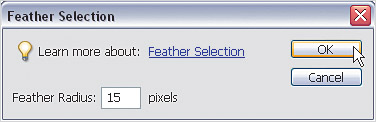
Go to the Select menu and choose Feather. Enter a setting of 15 pixels to soften the selection and click OK.
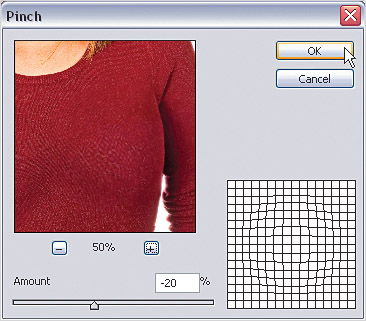
Now go to Filter>Distort>Pinch. Typically Pinch is used to make something smaller but you can use it in reverse. Basically, the Amount slider starts in the middle at 0. Instead of moving the slider to the right (which makes things smaller), try moving it to the left. This will proportionally enlarge whatever you have selected. In this case, I moved it to -20 and clicked OK. That added a very tasteful curve to the right side of her chest.
Just repeat the same step on the other side. I actually only used -15% for the Amount on that side because of the way her body is turned. Again, as in the tip above, adjusting the zoom percentage for the preview in the filter dialog really helps you dial in exactly the setting you need.