
Chapter 2. The Power of Gray

It seems that every time I work on a new picture there’s another great reason to make use of 50% gray in some way, be it for creating a special effect or for simply helping me to work nondestructively. It’s no understatement when I say that once I’d discovered how 50% gray can be used to create composite images, my portfolio was transformed!
In this chapter I take you through some of my favorite ways to use 50% gray in retouching. I cover techniques such as blend mode compositing, textures, dodging and burning, lens flares, and how to fake damage or dents.
Blend Mode Compositing
Compositing is becoming increasingly popular among photographers and retouchers as a way of creating images that range from the real to the surreal.
I became interested in creating composite images initially because of poor weather. Many times I would have a photo shoot organized, but on the day it was supposed to happen all plans would need to be changed because of rain. So I began photographing models in the nice warm studio and then using Photoshop to add them into new locations.
Here’s a technique that can give you instant composite images. You just photograph your model against a gray background and Photoshop helps with the rest, leaving you to concentrate on the creative side of retouching: lighting effects, color, special effects, and so on.
Studio Lighting
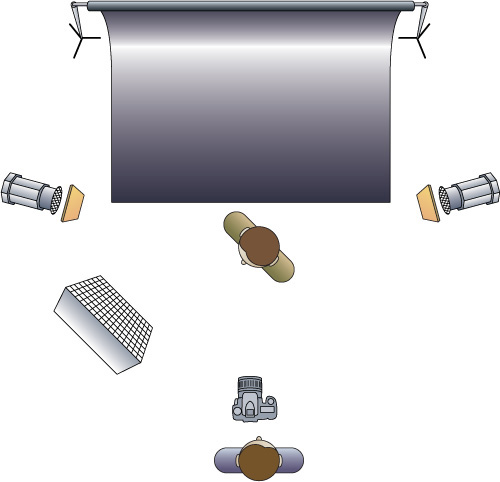
First of all let’s look at the lighting used when photographing the model. For this picture the idea was to make it seem as if our model had been captured, and was being kept under lock and key in a dungeon.
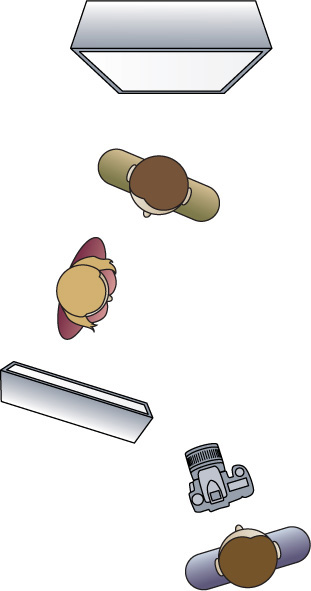
Figure 2.1 shows the lighting diagram I used. To make it appear as though two fire torches were on the walls on either side of the model, I used two spotlights fitted with a sheet of orange gel on each. To the front there was a 1-meter (100cm) square soft box fitted with a grid but with the outer diffusion panel removed; this gave a really interesting shadow effect on the floor area, almost looking like bars in the dungeon door (Figure 2.2).

Note
You can see in Figure 2.2 that the gray paper background isn’t evenly lit. Having dark and light areas and interesting shadows helps produce interesting pictures.
The Background
This blend mode compositing technique is used when adding solid backgrounds, such as walls and doors, as opposed to something like an outdoor scene.
A key element of a successful composite is perspective; the angle at which the background was photographed should match the angle at which the model was photographed. Getting this right is actually easier than you might think; it just requires that you be consistent.
Tip
Generally when I shoot a full-length photograph of a model in the studio I am down on one knee and using my go-to lens, a 70–200mm (Figure 2.3). Because I know that this is the position I use when photographing a full-length shot, when I’m out and about and see what I think would make a great background I adopt the same position, using the same lens with roughly the same focal length.

Doing this means that the perspective of the background (Figure 2.4) and model will match closely, and blend seamlessly when combined in the composite.

The Compositing
1. In Photoshop, go to File > Open and open a file that contains a model photographed on gray seamless paper. Then go to File > Place Embedded (File > Place in earlier versions of Photoshop), navigate to the file that you want to use as the new background, and click OK.
2. This places the file we wish to use as the background at the top of the layer stack and above the studio photograph of the model. Shift-Option/Alt-click any outer transform handle, and drag outward until the picture fills the layer. Press Return/Enter.
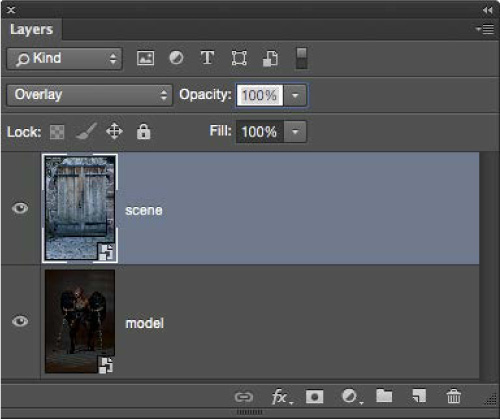
3. Rename this layer Scene, and then to create the composite change its blend mode from Normal to Overlay (Figure 2.5).
4. The new background scene has been added (Figure 2.6), but when you look closer you may notice that some darker parts of the background are showing through the lighter areas of the layer containing the model (Figure 2.7). This is easily fixed with a layer mask.

5. With the scene layer active, click the layer mask icon at the bottom of the Layers panel. Then with a normal medium soft-edged brush and a black foreground color, paint over areas of the image where the background is showing through (Figure 2.8).

Figure 2.8 Add a layer mask and paint with a black brush to hide areas where the background shows through.
Tip
Don’t use a brush that is totally soft (0% hardness), because when you get near the edges your brush strokes will spill over and remove more than you want to.
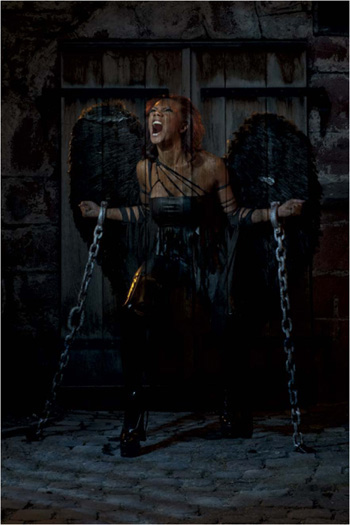
The fantastic thing about creating composites with this technique is how every single fine hair is included simply by changing the blend mode. You can clearly see this in Figure 2.9.

You can use other blend modes when creating composite images in this way, but mainly Soft Light and Overlay are used. There is a slightly different result when using Soft Light rather than Overlay—the final look is a lot softer and lower in contrast. Figure 2.10 shows Soft Light; Figure 2.11, using the Overlay blend mode, slightly darker and with increased contrast.


Once you have composited your model and background, it’s time to start working on the fun stuff: enhancing details, adding lighting effects, and so on. I’ll cover these techniques in the coming chapters (Figure 2.12).

Textures, Textures, Textures
With blend mode compositing you can also use textures instead of photographs. In fact, textures can be added to the gray paper to make it appear as though it was a solid brick wall.
Tip
Textures are everywhere. I collect them all the time by taking photographs of walls, floors, old flaking paint, rust, and so on. All around there are limitless textures to photograph, and you can even use your mobile phone so that you’re constantly adding to your collection for future use.
Tip
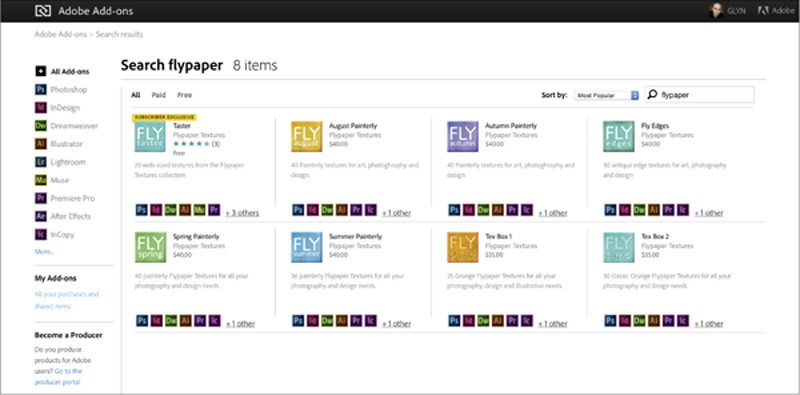
Adobe Exchange (www.adobeexchange.com) is a wonderful resource for textures. Search for “flypaper” and you’ll find many free and paid textures (Figure 2.13) that you can use in your own images.
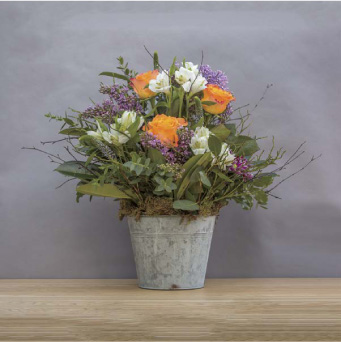
In Figure 2.14, the flowers have been photographed using available light, with gray paper attached to a piece of cardboard for the background.

1. With the flower arrangement photograph open in Photoshop, go to File > Place Embedded (File > Place in earlier versions of Photoshop) and navigate to a texture file that you have stored on your hard drive. (Using the Place command means that the file will now open directly into the document we are working on, and saves opening and dragging it across.) In this example I’m using the texture in Figure 2.15, the Adobe Exchange Flypaper add-on. Click OK to add it to the top of the layer stack, and change the blend mode to Overlay (Figure 2.16).


Changing the blend mode of this texture layer to Overlay attaches it to the gray paper but also to the flowers and the table top (Figure 2.17). There’s no need to worry about that at this stage, but if you don’t want to use the color in the texture, then you can desaturate it.

2. Go to Image > Adjustments > Desaturate (Figure 2.18), and you’ll see that the Desaturate command is grayed out and unavailable. This is because we used the Place command to add the texture, adding it as a Smart Object.

3. Go to Layer > Rasterize > Smart Object (Figure 2.19), then to Image > Desaturate. Lower the opacity of the layer to 50%.

4. Repeat this process, adding as many textures as you like and trying other blend modes, such as Soft Light or Hard Light, to create a completely bespoke background. Then click the uppermost texture layer and Shift-click the last texture layer so that they are all highlighted (Figure 2.20). Then go to Layer > New > Group from Layers, name the group textures, and click OK.
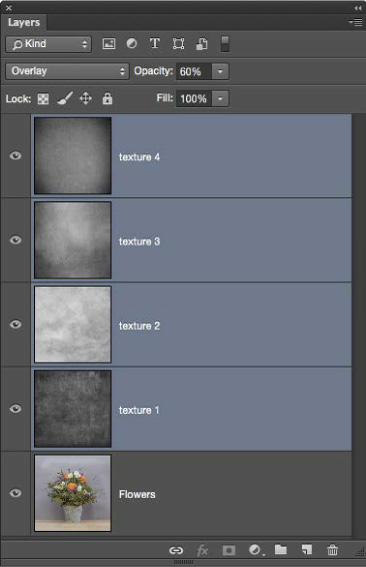
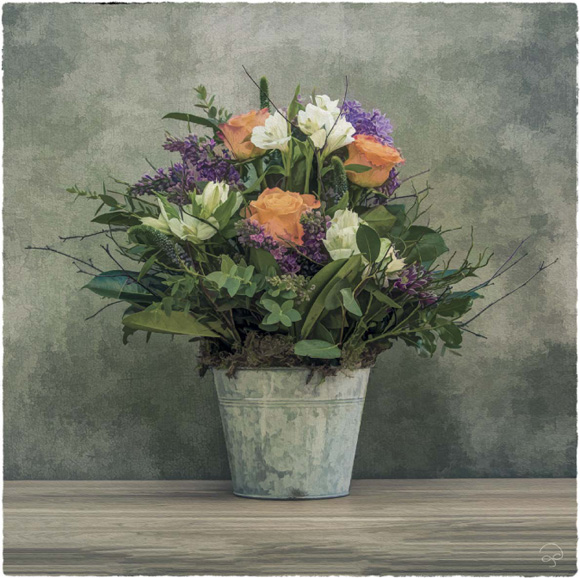
5. Add a layer mask to the textures group by clicking the layer mask icon at the bottom of the Layers panel. With a normal medium soft-edged brush and a black foreground color, paint over the table and the flowers to remove the texture, leaving it visible only on the gray paper (Figure 2.21).

Smart Dodging and Burning
Dodging and burning means to add dimension, depth, and direction by brightening and darkening specific areas of a photograph.
Ordinarily we might use the dodge and burn tools directly on our pictures. But if we go too far with the dodging and burning, as is very easily done, removing or reducing the effect means undoing and then redoing lots of work.
Here is a smarter way to dodge and burn that uses a 50% gray layer and allows us to work nondestructively.
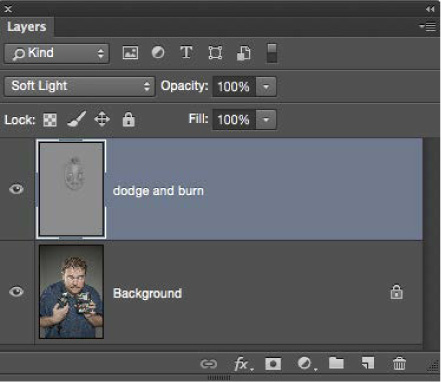
1. Open a portrait image in Photoshop (Figure 2.24), and then go to Layer > New > Layer. In the New Layer dialog that appears, name the layer dodge & burn. Choose Soft Light from the Mode menu. Select the Fill with Soft-Light-neutral color (50% Gray) checkbox (Figure 2.25) and click OK.

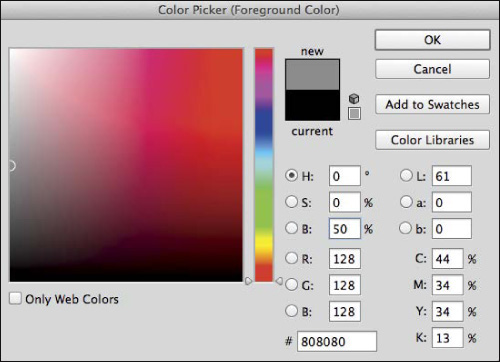
2. Set the foreground and background colors to their default of black and white by pressing D. Click the foreground color in the toolbar.
3. In the Color Picker, set H (Hue) to 0, S (Saturation) to 0, and B (Brightness) to 50 (Figure 2.26). This gives you 50% gray. Click OK.
4. Choose the Dodge tool from the toolbar, and in the tool options at the top of the screen, choose Midtones from the Range menu, set Exposure to 10%, and select the Protect Tones checkbox (Figure 2.27).

Tip
It’s very easy to overdo dodging and burning, so always use a low Exposure amount so that it can be applied gradually and with more control.
5. With the Dodge & Burn layer active, use the Dodge tool to brighten areas of the picture; to switch to the Burn tool and darken areas, hold down the Option/Alt key while using the Dodge tool.
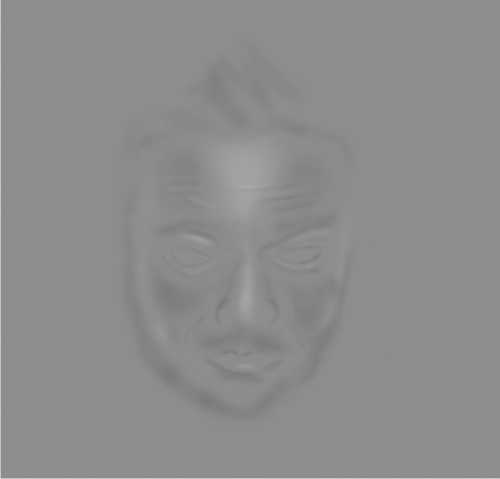
6. Option/Alt-click the eye icon of the dodge & burn layer to make it the only layer visible (Figure 2.28).
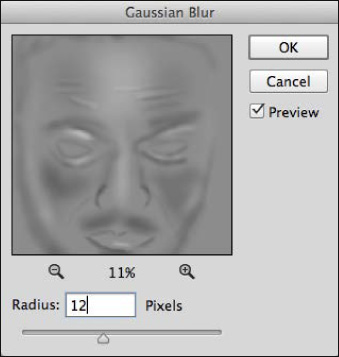
7. A common mistake with dodging and burning is having both the brightened and darkened areas very defined and not blending into each other. But because we are on a 50% gray layer we can do something about this. Use the Lasso tool to select an area of dodging and burning that you want to blend together (Figure 2.29), and then go to Filter > Blur > Gaussian Blur. Now increase Radius to whatever amount you think softens the blend between the dodging and burning the best (Figure 2.30), and click OK.

You may also find that there are areas of the dodging and burning where you want to reduce the strength, or even remove it completely; this is where we use the 50% foreground color that we prepared in step 3.
8. With a normal soft edged brush and the 50% gray foreground color, paint over areas of the dodge and burn layer to remove or reduce the dodging and burning. To remove it completely, paint at 100%; to reduce the dodging and burning by 50%, change the opacity of the brush to 50%.
Note
In Figure 2.31 you can see the original dodging and burning, which was a little too much. Figure 2.32 used the 50% gray brush, and you can see that it has been reduced. This is only possible when dodging and burning on a new layer, as opposed to dodging and burning directly on top of the picture.

9. To return to the original image view, Option/Alt-click to reveal the eye icon of the dodge & burn layer.
Transforming a Location
Sometimes the location you are shooting in doesn’t quite match what you had anticipated. At times like this, a little knowledge of gray can come in handy.
In this example I’d been hired to photograph and then retouch promotional material for an upcoming theater production. Unable to visit the location until the day of the shoot, I was assured it was perfect for what was needed: an old building with internal stone walls and the feel of an old castle. The reality, however, was quite the opposite, so it was down to the lighting and Photoshop to transform a modern hotel bedroom into an ancient castle chamber.
1. With the out-of-camera file open in Photoshop, use the Quick Selection tool to make a selection of the walls behind our two characters (Figure 2.33).
2. Save the selection for future use, as covered in Chapter 1, by going to Select > Save Selection. Name the selection cutout, and click OK.
3. We now need to remove elements from the back wall. We’ll use the Clone Stamp tool to do this. To prevent us from accidentally cloning over other areas, load the cutout selection by going to Select > Load Selection. From the channel menu, choose cutout (Figure 2.34).

4. Add a new blank layer to the top of the layer stack, name it clone (Figure 2.35), and choose the Clone Stamp tool from the toolbar (Figure 2.36).


5. In the options at the top of the screen, use the following settings: Mode: Normal; Opacity: 100%; Flow: 100%; Sample: Current & Below (Figure 2.37).

With the cutout selection visible, use the Clone Stamp tool to remove unwanted areas of the background (Figure 2.38).

Note
When cloning away areas of the background, you don’t have to create a perfectly cloned area. Having uneven areas, as you can see in Figure 2.38, makes for a more interesting background when the new wall texture is added in, much like the lighting in the blend mode technique.
6. Keep the cutout selection visible and add a Hue/Saturation adjustment layer (Figure 2.39). Set Saturation to –100 to completely desaturate the back wall, which gives us our gray background (Figure 2.40).


7. We can now begin adding textures to transform the location. In this example I wanted to make the back wall appear like an old brick wall in a castle. Go to File > Open, and open the file in Photoshop. Go to Select > All, and then to Edit > Copy.
8. Now click the tab to return to the start image (Figure 2.41), go to Select > Load Selection, and choose cutout from the Channel menu. With the cutout selection active, go to Edit > Paste Special > Paste Into.

This places the texture in the selection area as opposed to directly on top of our picture.
9. If you need to resize the texture, go to Edit > Free Transform and drag out the transform handles until the texture fills the area within the selection (Figure 2.42). Press Return/Enter.

10. To attach the new texture to our gray background so that it looks more realistic, change the blend mode of the texture layer to Soft Light or Overlay, depending on the look you prefer. (Figure 2.43). Rename this layer wall texture.

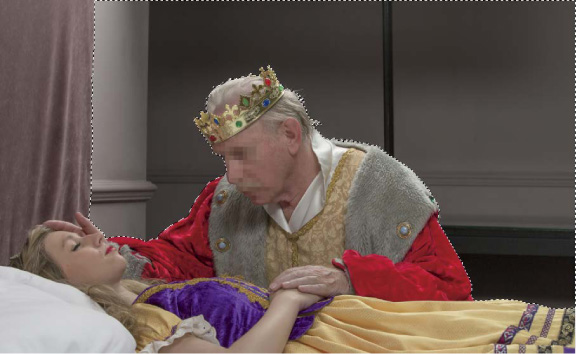
Adding a Window
This is a good example of why the lighting in the original picture is so important. Adding a window means that light from outside would be entering the room, adding highlights onto the subjects. To mimic this, I used a large softbox behind the king that represented the window light. On the opposite side of the bed a strip box was used to add a little extra light into the shadow areas (Figure 2.44).
1. Go to File > Open and open a suitable window image in Photoshop. Go to Edit > Copy, then to Select > All, and click the tab to go back to the original image.
2. Go to Select > Load Selection and choose cutout from the Channel menu. Go to Edit > Paste Special > Paste Into. Go to Edit > Free Transform to resize the window. Press Return/Enter. Use the Move tool (V) to position the window. Rename the layer window.
3. Click the thumbnail of the window in the Layers panel, and then go to Image > Adjustments > Desaturate. Then click the layer mask attached to the window layer (Figure 2.45). With a normal medium soft-edged brush and a black foreground color, paint around the window to hide any unwanted areas (Figure 2.46).


4. To add an outdoor scene into the windows, start off by making a selection of the windows using the Quick Selection tool (Figure 2.47).

5. Go to File > Open, and open a suitable outdoor image. Then go to Select > All, and then to Edit > Copy. Click the tab to return to the original image being retouched.
6. With the selection of the windows active, go to Edit > Paste Special > Paste Into, and then to Edit > Free Transform to resize the outdoor scene so that it fills the windows, creating a realistic view (Figure 2.48).

7. Once the new wall, windows, and scene had been added, the lighting on the subjects made sense. I continued to retouch the image using techniques I cover throughout the book (Figure 2.49).

Adding Dents and Damage
In this section I show you how to put dents and damage into your pictures; a special effect that is great for adding signs of battle damage to an action scene.
In the out-of-camera shot (Figure 2.50), the body armor looked too clean for it to be composited into a scene where there were explosions going off and debris flying around. In Figure 2.51 you can see how I used this technique to add battle damage in a number of places, such as the chest and head.
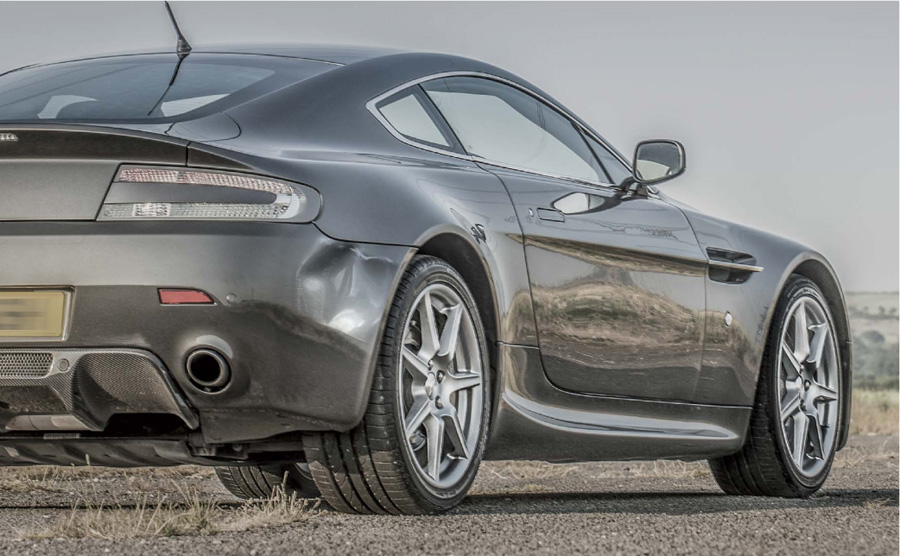
Here I’ll show you the steps for this technique by making it appear as though a beautiful Aston Martin (Figure 2.52) has some damage to the wheel arch.

For this technique you’ll need a photograph that already contains damage. (It doesn’t matter what color the dent is, because we will be completely desaturating it at some point.) If you don’t have a photograph of a dent already, there are many available from stock sites such as istockphoto.com; just search for “car dent” or something similar.
1. Go to File > Open and open an image that you want to add some dents to. Then go File > Open and navigate to the file containing the dents you will use in this technique.
2. With the Lasso tool, make a selection around the dent (Figure 2.53), and then go to Edit > Copy.

Figure 2.53
www.istockphoto.com MCCAIG
3. Click the tab (Figure 2.54) to show the picture that we are going to add the dent onto, and go Edit > Paste. Double-click the layer name, and rename it dent.

4. You may need to resize the dent for it to fit, so go to Edit > Free Transform (Figure 2.55) and resize it in proportion by Shift-Option/Alt-dragging any corner transform handle. Press Return/Enter, and use the Move tool (V) to drag it into position.

5. Remove all the color from the dent by going to Image > Adjustments > Desaturate (Figure 2.56). Because we will be using a filter, go to Filter > Convert for Smart Filters (Figure 2.57) so that any settings we apply aren’t permanent and can be adjusted.
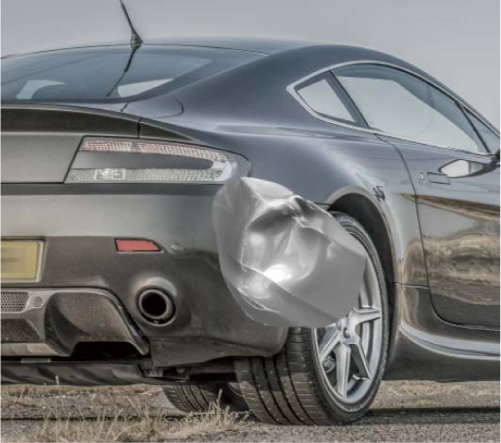

6. Click the layer mask icon at the bottom of the Layers panel (Figure 2.58) to add a white layer mask. Then with a normal soft-edged brush and a black foreground color, paint over areas you wish to remove or conceal.

7. Change the blend mode of the dent layer to Overlay, and then click once on the thumbnail of the dent in the Layers panel so that it is active (Figure 2.59).

8. Go to Filter > Other > High Pass, and drag the Radius slider all the way to the left (the minimum setting of 0.1 pixels). You’ll notice that the dent on the car is no longer visible (Figure 2.60).

9. Now, begin to increase the High Pass filter setting by dragging the point to the right (Figure 2.61) and increasing the radius. The higher the radius, the more dent is revealed (Figure 2.62). Click OK.

Because we used High Pass as a Smart Filter, this means that at any stage we can double-click the filter name in the Layers panel and make adjustments to the settings to show more or less of the dent.
Instant Six-Pack
If ever you find yourself retouching physique portraits, you could also use the dents technique to add or enhance a six-pack.
1. Figure 2.63 is the image that I want to enhance the six-pack on. So, I can make a selection of a six-pack in another picture (Figure 2.64) and use the dents technique to quickly produce the result in Figure 2.65.

2. You can have a lot of fun with this technique, but it also has a very practical application. With a little bit of work it can enhance a physique to produce the look that the model or client asks for.
Photoshop Lens Flares
A lot of folks tend to avoid Photoshop’s Lens Flare filter because its results can have that “done in Photoshop” look. But as with most Photoshop tools and filters, just because it’s there doesn’t mean you have to use it in the way it was intended. This technique shows how a simple use of 50% gray can give you much more flexibility.
1. I want to add a lens flare onto the metal part of the gun (Figure 2.66). So with the image open in Photoshop, go to Filter > Render > Lens Flare.

2. From the choice of lens flares, for this effect I’m going to use the 105mm Prime. In the small preview window, drag to position the flare where you would like it. This can be challenging due to the size of the preview, but don’t worry about being entirely accurate (Figure 2.67).

3. Adjust Brightness to 70% and click OK.
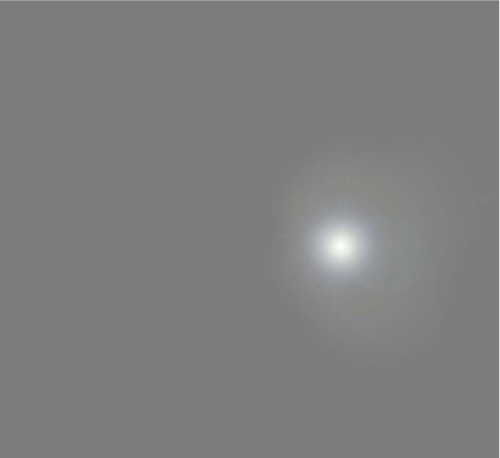
Now in Photoshop we can see that the lens flare has been added, but we can also see the additional Photoshop flares (Figure 2.68). Depending on the look you are after, you may not like to see these, but using 50% gray we are able to remove them.

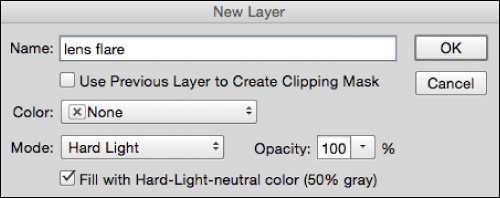
4. Go to Edit > Step Backwards to remove the lens flare. Now add a new blank layer to the top of the layer stack by going to Layer > New > Layer. Name the layer lens flare, set the mode to Hard Light, select the Fill with Hard-Light-neutral color (50% Gray) checkbox, and click OK (Figure 2.69).
Note
This process might seem a little strange, but each time you use the Lens Flare filter, the settings remain.
5. Go to Filter > Convert for Smart Filters, then to Filter > Render > Lens Flare, and click OK. Reposition the lens flare with the Move tool (V).
6. To remove the extra Photoshop flares, change the blend mode of the lens flare layer to Normal to reveal the gray layer (Figure 2.70).

7. Press D to set the foreground and background colors in the toolbar to their default of black and white. Click the black foreground color to open the Color Picker, and set H to 0, S to 0, and B to 50. Setting B (Brightness) to 50 gives us 50% gray (Figure 2.71).

8. Choose a normal soft-edged brush and paint directly onto the gray layer to remove the unwanted Photoshop lens flares (Figure 2.72).
9. Change the blend mode of the lens flare layer to Normal. Return to the color picture and see that the additional lens flares have been removed.
Make Eyes Pop
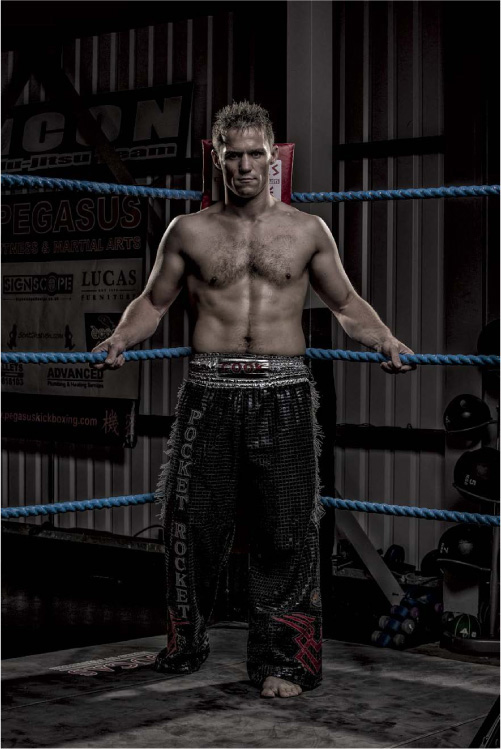
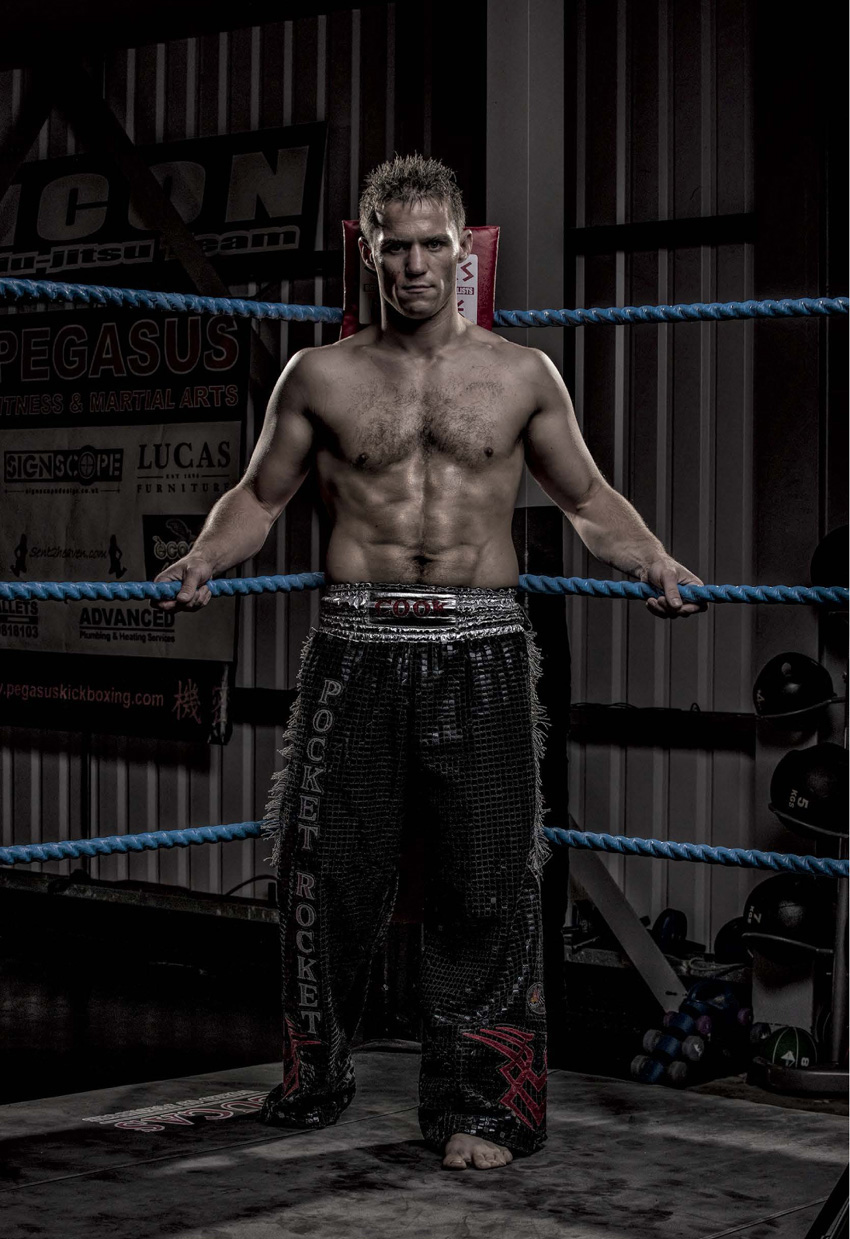
This is great for times when your subject has very dark eyes or when the lighting didn’t reveal the detail and texture of the eyes (Figure 2.73).

1. With the image open in Photoshop where you want to enhance the eyes, add a new blank layer, and name it eye detail. With the Elliptical Marquee tool (Figure 2.74), hold down the Shift key and drag out a perfect circle around the iris (Figure 2.75).


2. Fill this circular selection with 50% gray by going to Edit > Fill > Contents > 50% Gray, and click OK.
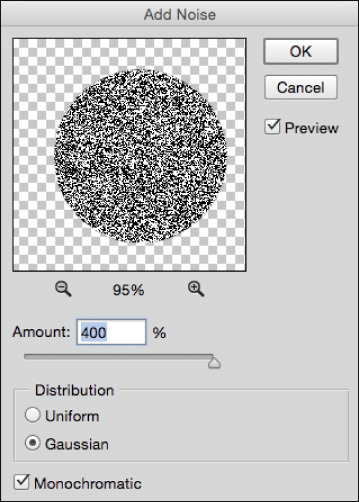
3. Keeping the selection visible, go to Filter > Noise > Add Noise. Set Amount to 400%, choose Gaussian, select the Monochromatic checkbox, and click OK (Figure 2.76).
Note
The resolution of the image you are using will determine the amount of noise you add. High-resolution images are good at 400%, whereas lower-resolution images (e.g., 120ppi) would be best around 200%.
4. With the selection visible, go to Filter > Blur > Radial Blur. Set Amount to 30, choose Blur Method: Zoom and Quality: Best (Figure 2.77), and click OK.

5. Cancel the selection by going to Select > Deselect. Add a white layer mask to the eye detail layer by clicking the layer mask icon at the bottom of the Layers panel.
6. With a normal medium soft-edged brush and a black foreground color, making sure the layer mask is active (Figure 2.78), paint on top of the image to remove areas of the circle that are outside the iris (Figure 2.79). Also paint in black to reveal the pupil and around the outside of the circle to soften and blend in.

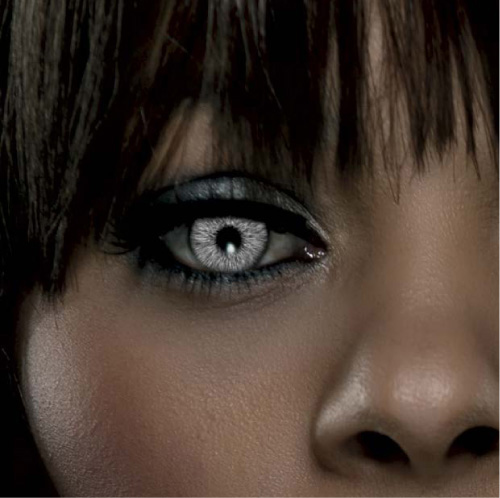
7. Change the blend mode of the eye detail layer to Hard Light, and lower the opacity to taste. In this example I lowered the opacity to 50% (Figure 2.80).

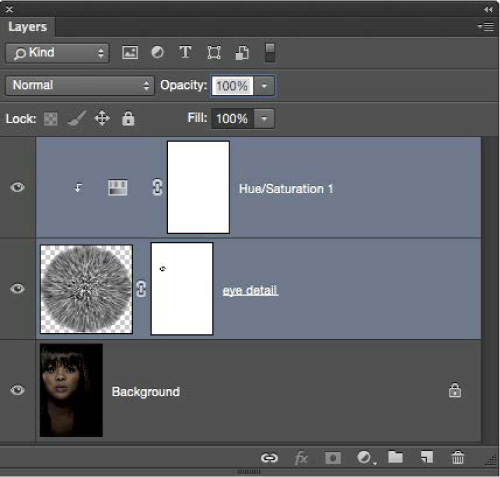
8. Now we’ll add some color into the eye. Click the Hue/Saturation Adjustment layer (Figure 2.81), and then in the Hue/Saturation properties select the Colorize checkbox (Figure 2.82).


9. To restrict the color so that it affects only the eye, click the Clipping Mask icon (Figure 2.83) in the Hue/Saturation properties. Then adjust the Hue slider to choose a color for the eye. Also adjust the opacity of the Hue/Saturation adjustment layer until you achieve the look you’re after.

10. With one eye now enhanced (Figure 2.84), click the Hue/Saturation adjustment layer in the Layers panel and Shift-click the eye detail layer so that both are selected (Figure 2.85).

11. Go to Layer > New > Group from Layers, name the group eye, and then press Command/Ctrl+J to create a copy (Figure 2.86). Then simply use the Move tool (V) and drag within the image area to reposition the eye copy layer over the remaining eye.
