
SharePoint Server 2019 supports integration with Power BI, which is one of the rich cloud features made available on-premises. The introduction of Power BI to SharePoint Server 2019 on-premises is one of the major enhancements in BI.
In this chapter, you will explore how to integrate Power BI reporting with SharePoint Server 2019 on-premises using a data gateway.
Power BI Overview
Power BI helps to turn unrelated sources of data into interactive insights. Power BI allows you to connect to various data sources and create interactive reports. Power BI consists of a Windows desktop application called Power BI Desktop and an online SAAS service called Power BI Service.
Power BI Data Refresh Architecture

Power BI data refresh architecture
- 1.
When a data gateway is installed and configured, a dedicated Azure Service Bus channel is automatically configured.
- 2.
Credentials entered for the data source in the cloud services are encrypted, tested, and then stored encrypted. Only the associated gateway (cluster) can decrypt the credentials. The Power BI Personal Gateway keeps credentials on-premises only.
- 3.
One of the supported cloud services kicks off a refresh or a live query.
- 4.
The Data Movement Service analyzes the query and pushes it to the appropriate Service Bus communication channel.
- 5.
The gateway polls its Service Bus channel for pending requests. It takes the pending request.
- 6.
The gateway fetches the query, decrypts the credentials, and sends a query to the data source for execution.
- 7.
Upon query execution, the gateway securely streams the data compressed to the cloud service.
Installing an On-Premises Data Gateway (Personal Mode)
In the previous chapter, you explored how to install an on-premises data gateway in standard mode. Now, you will explore the option of installing a data gateway in a personal mode, which is only mode supported in Power BI.
On-premises gateways allow connecting to on-premises data sources without the need to move the data. This provides the flexibility to query large datasets. The on-premises data gateway (personal mode) allows individuals to install a gateway on their computer and gain access to on-premises data.
- 1.
Log into the Power BI site (https://powerbi.microsoft.com). The sign-in account could be an Office 365 account (either a work account or a school account).
- 2.
Click Download ➤ Data Gateway (Figure 16-2).

Power BI data gateway
- 3.
Click Download personal mode ➤ (Figure 16-3).

Downloading a data gateway
- 4.
The on-premises data gateway (personal mode).exe file will be downloaded to your system. Double-click the file to start the installation wizard.
- 5.
If required, change the default installation location.
- 6.
Select I accept the terms of use and privacy statement.
- 7.
Click Install (Figure 16-4).
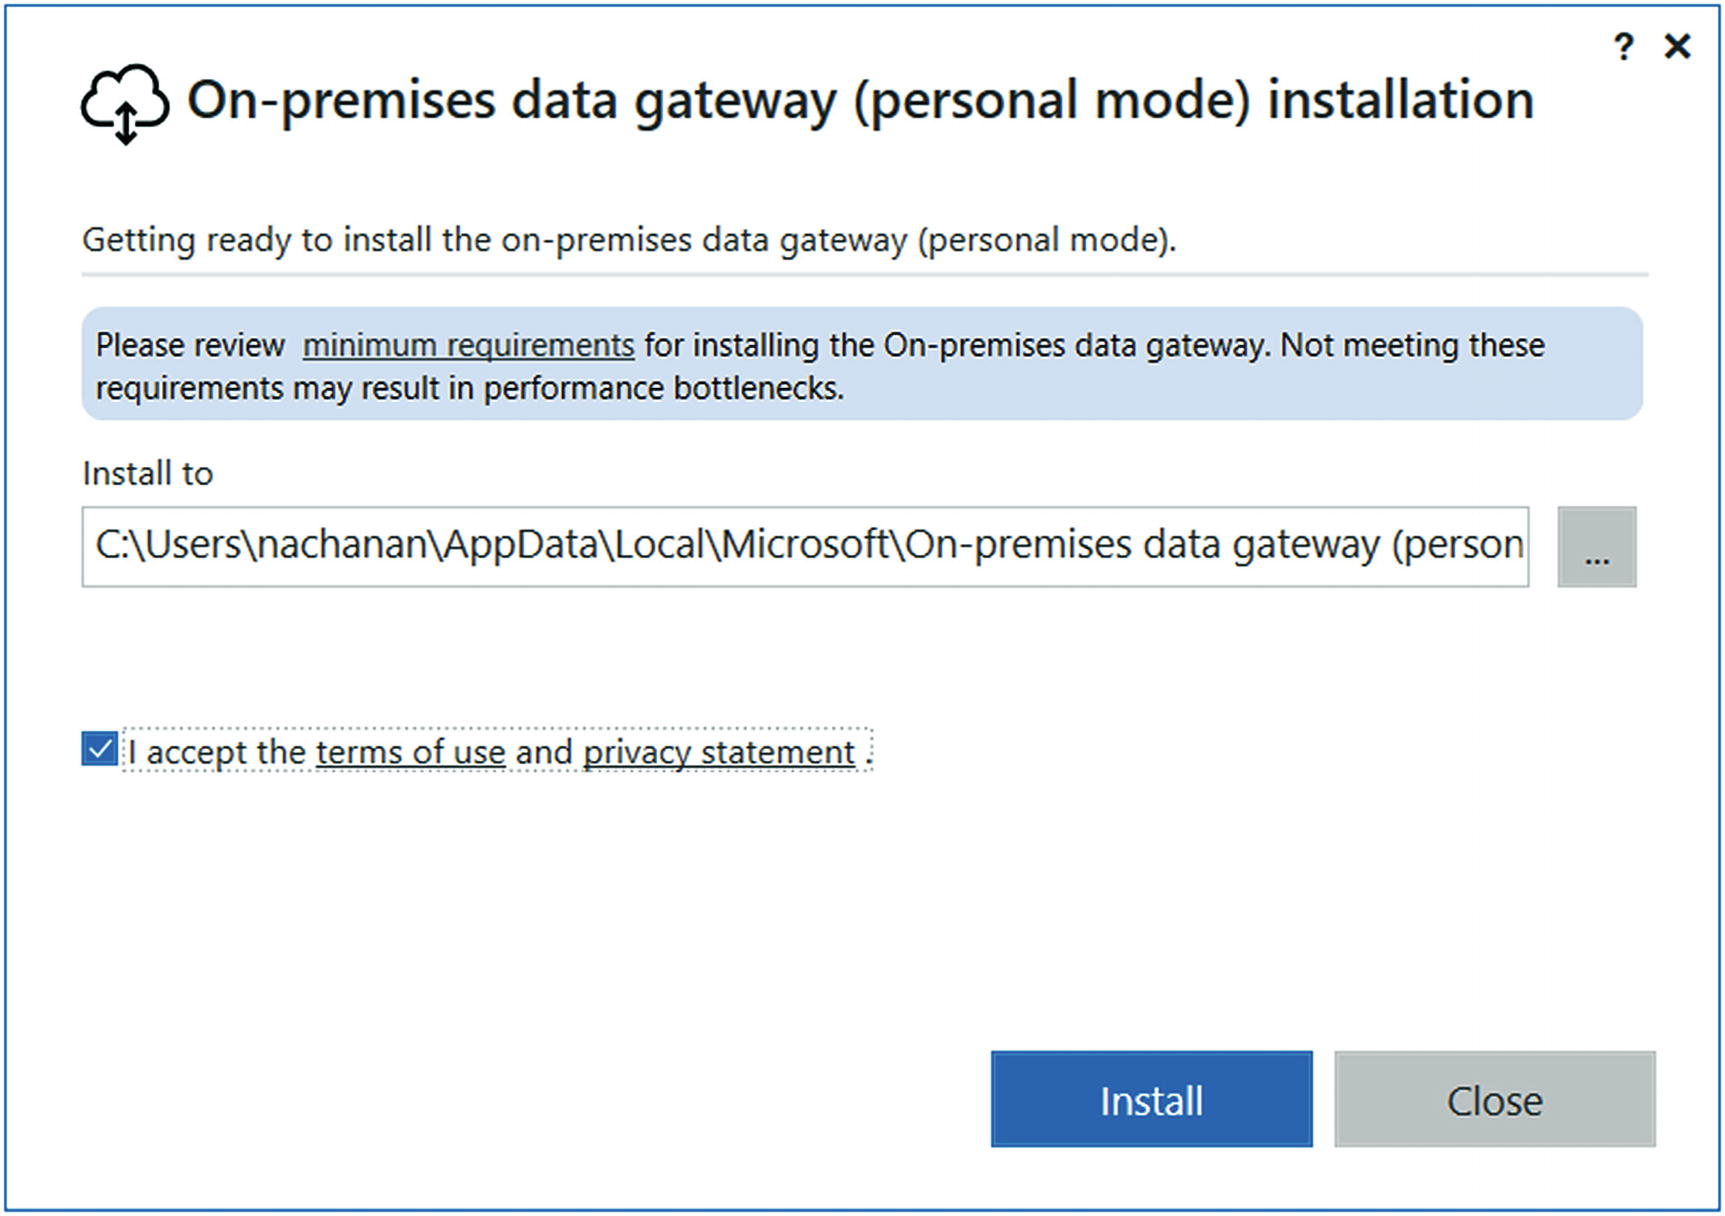
Data gateway (personal mode) installation
- 8.
The installation wizard will run (Figure 16-5).

Data gateway (personal mode) installation wizard
- 9.
Specify the email address. Provide an Office 365 organization account email address.
- 10.
Click Sign in (Figure 16-6).

Sign in with an Office 365 organization account email address
- 11.
Once installed, the on-premises gateway is ready to use in personal mode (Figure 16-7).

Data gateway install location
Connecting to an On-Premises Data Source
- 1.
Download and install Power BI Desktop from https://powerbi.microsoft.com/en-us/desktop/.
- 2.
From the Home Menu, click Get Data ➤ More… (Figure 16-8).

Getting data from more sources
- 3.
In the Get Data screen, type SharePoint.
- 4.
Select the SharePoint list option.
- 5.
Click Connect (Figure 16-9).

Getting SharePoint on-premises data
- 6.
Enter the SharePoint Server 2019 site URL.
- 7.
Click OK (Figure 16-10).
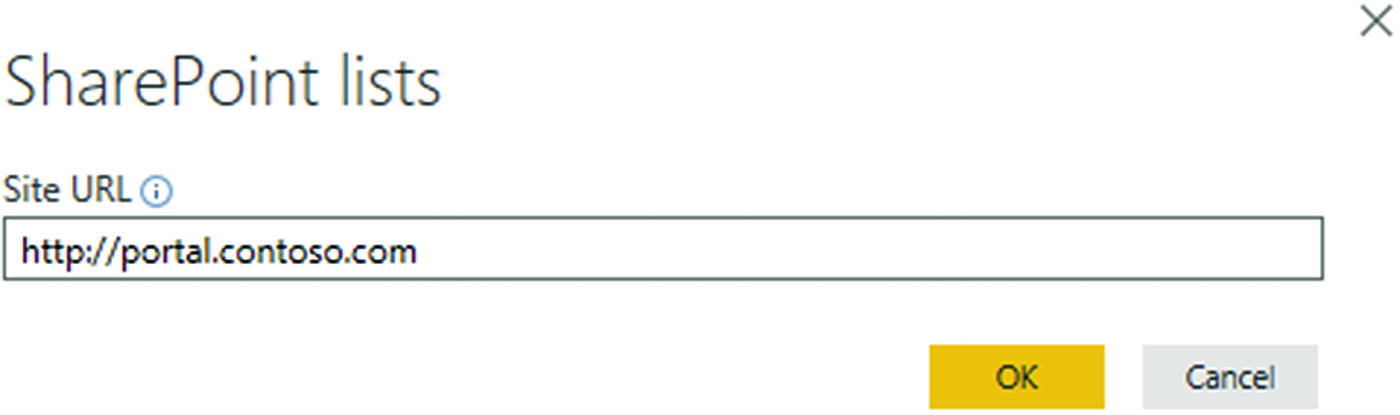
SharePoint Server 2019 site URL
- 8.
Select the list and click Load (Figure 16-11).

Loading a list from the SharePoint Server 2019 site
- 9.
Create a report and publish it (Figure 16-12).

Power BI report from SharePoint Server 2019 data
- 10.
Select the already created workspace to publish the report (Figure 16-13).
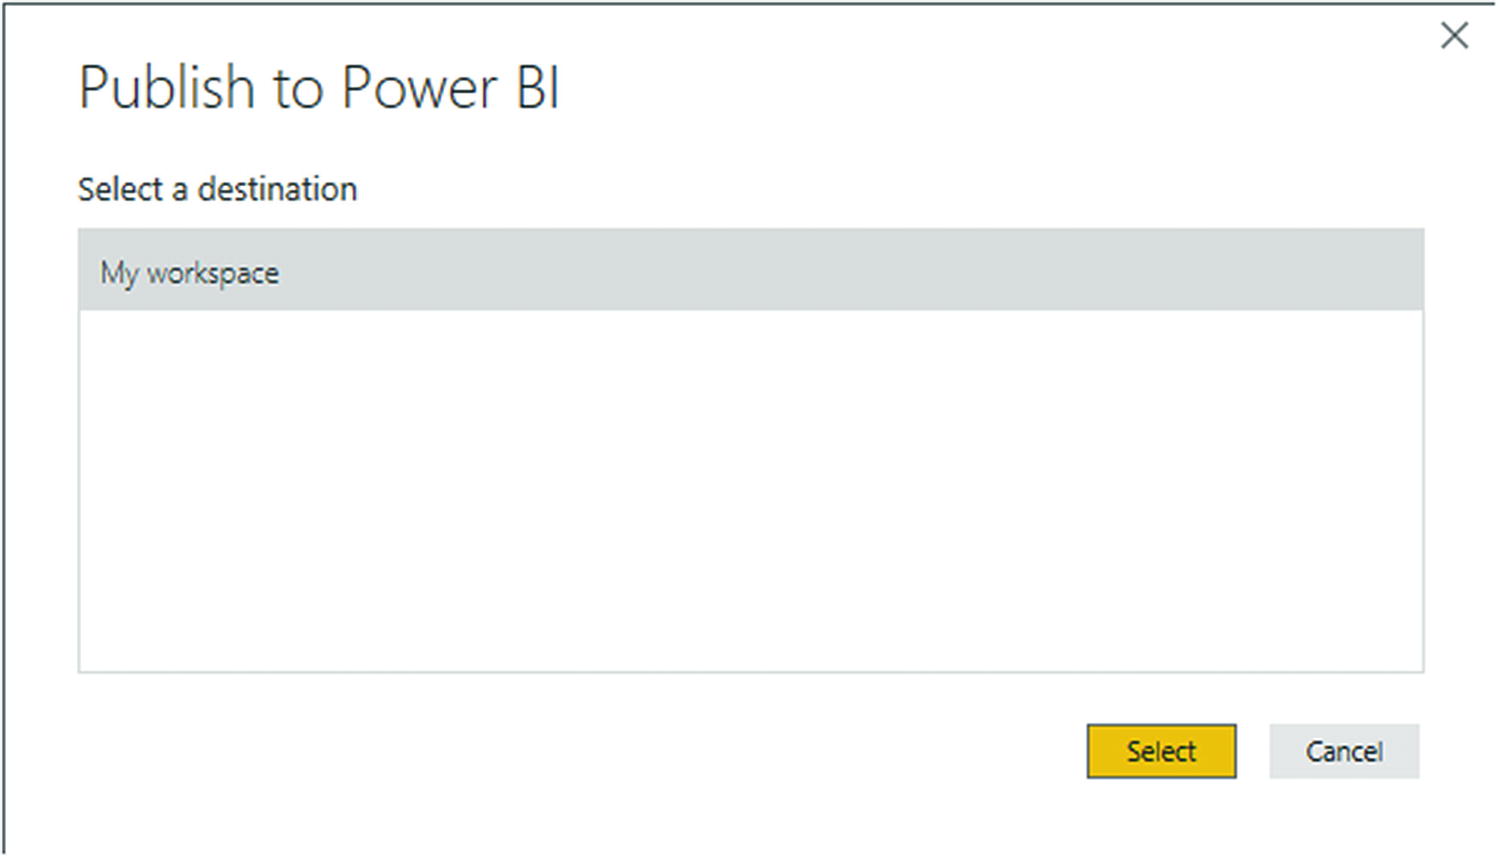
Selecting a destination workspace to publish the Power BI report
- 11.
Under My Workspaces, click Datasets.
- 12.
Select the dataset you created (e.g. Inventory).
- 13.
You now have an on-premises data gateway as well as a personal mode gateway (Figure 16-14).
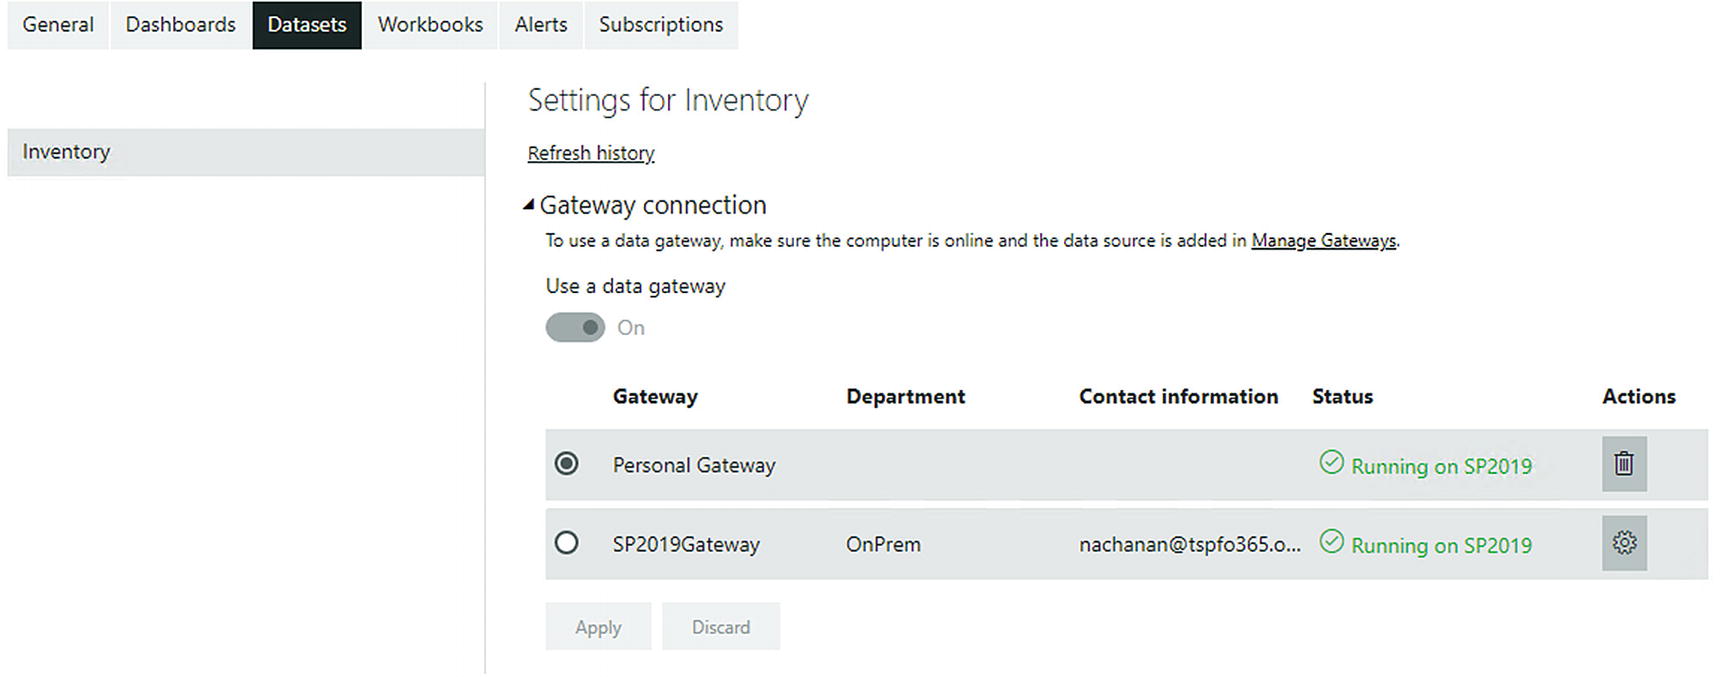
Choosing a dataset
Exploring Power BI Reports
- 1.
Under My Workspace, click Reports.
- 2.
Click the report name you created (e.g. Inventory), as shown in Figure 16-15.
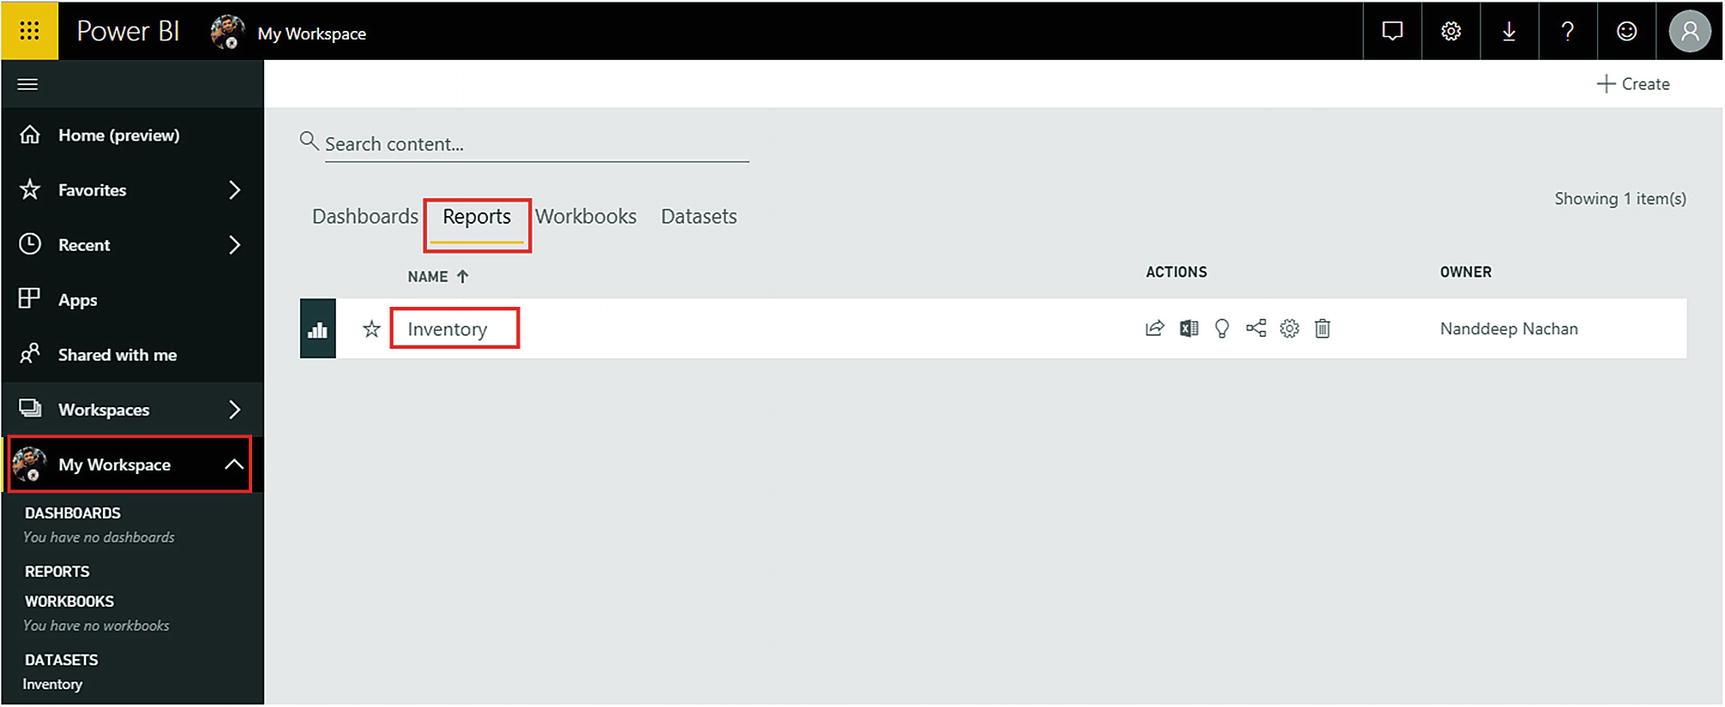
Exploring published Power BI reports

Published Power BI report
Publishing the Power BI Report to the Web (Power BI Service)
The Power BI Report does not have the Embed in SharePoint option offered in SharePoint Online. However, you can use the Publish to web option. Open the report in the Power BI web site (powerbi.microsoft.com), if not already, and then publish it to the Web.
- 1.
Click File ➤ Publish to web (Figure 16-17).

Publishing the Power BI report to the Web
- 2.
The generated embed code can be used on a SharePoint Server 2019 on-premises site (Figure 16-18).
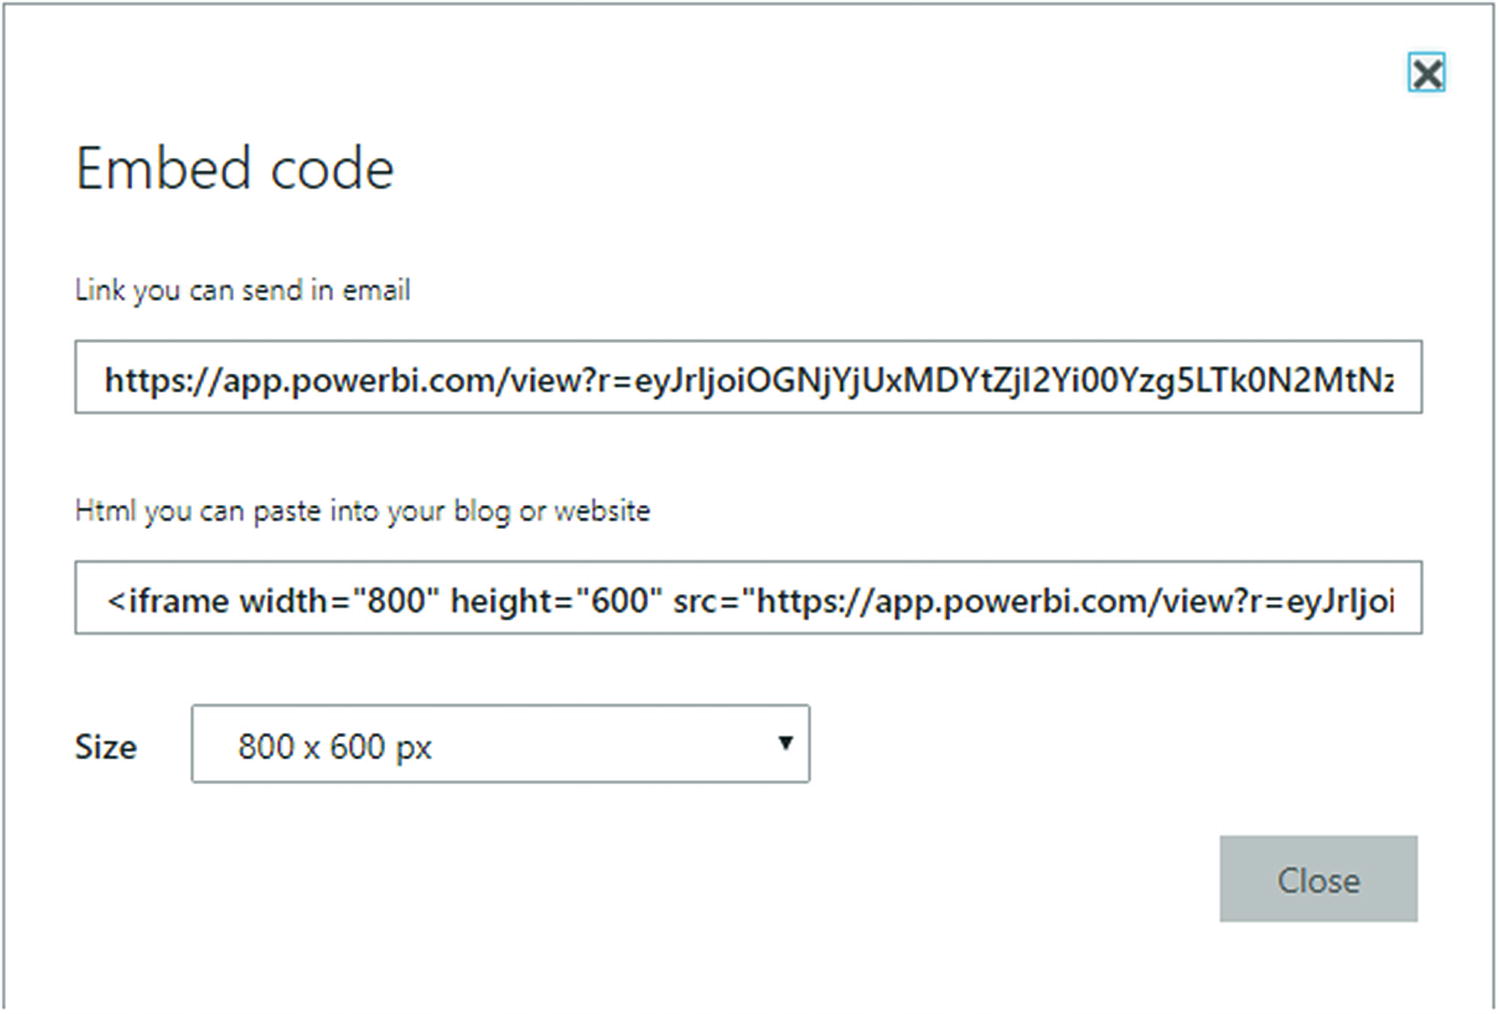
Embed code for a published Power BI report
- 3.
Open a SharePoint Online site. Add the Embed web part (Figure 16-19).
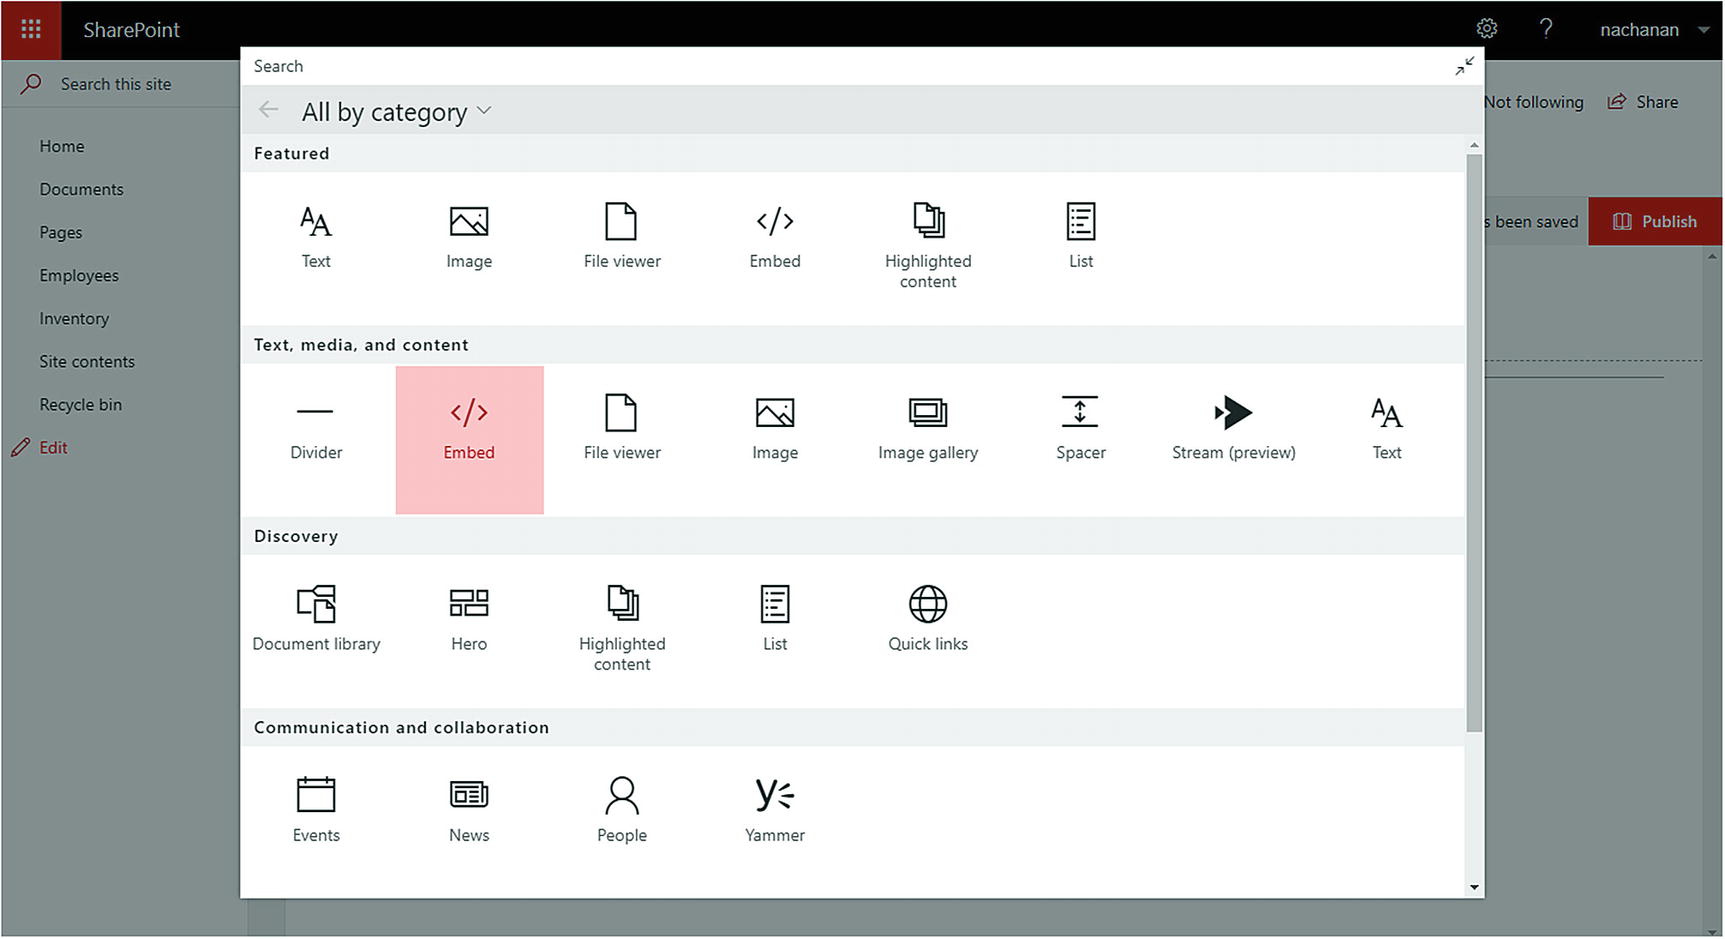
Embed web part to show Power BI report
- 4.
Copy the embed code to the web part property (Figure 16-20).
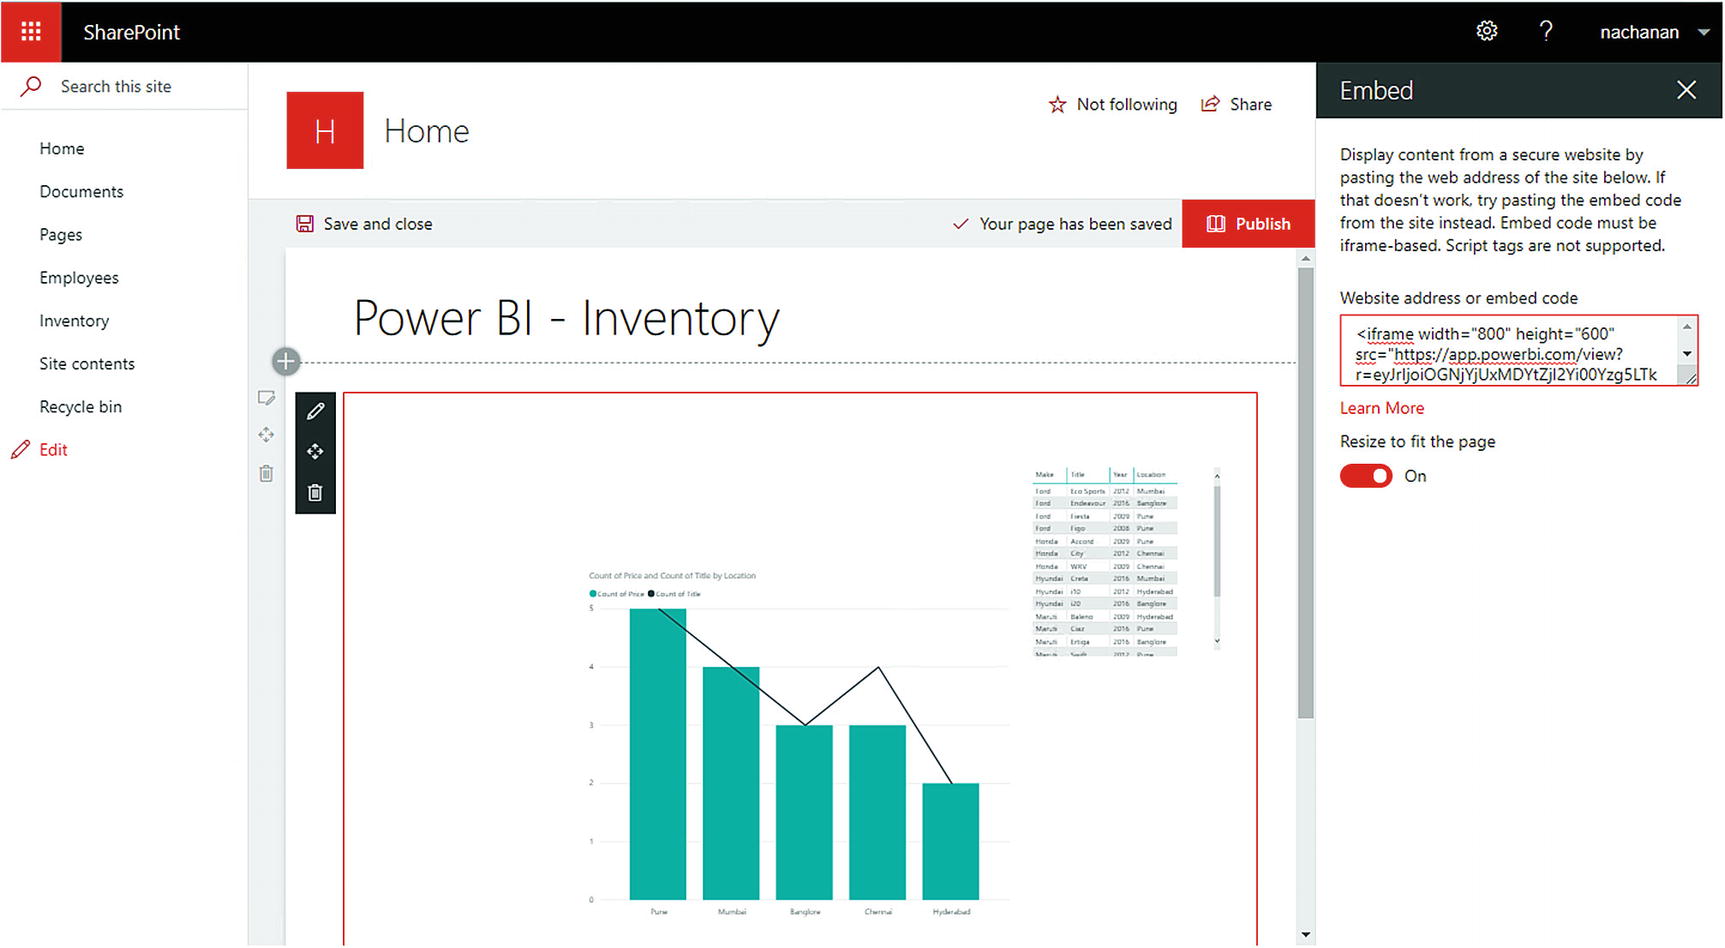
Power BI embed code
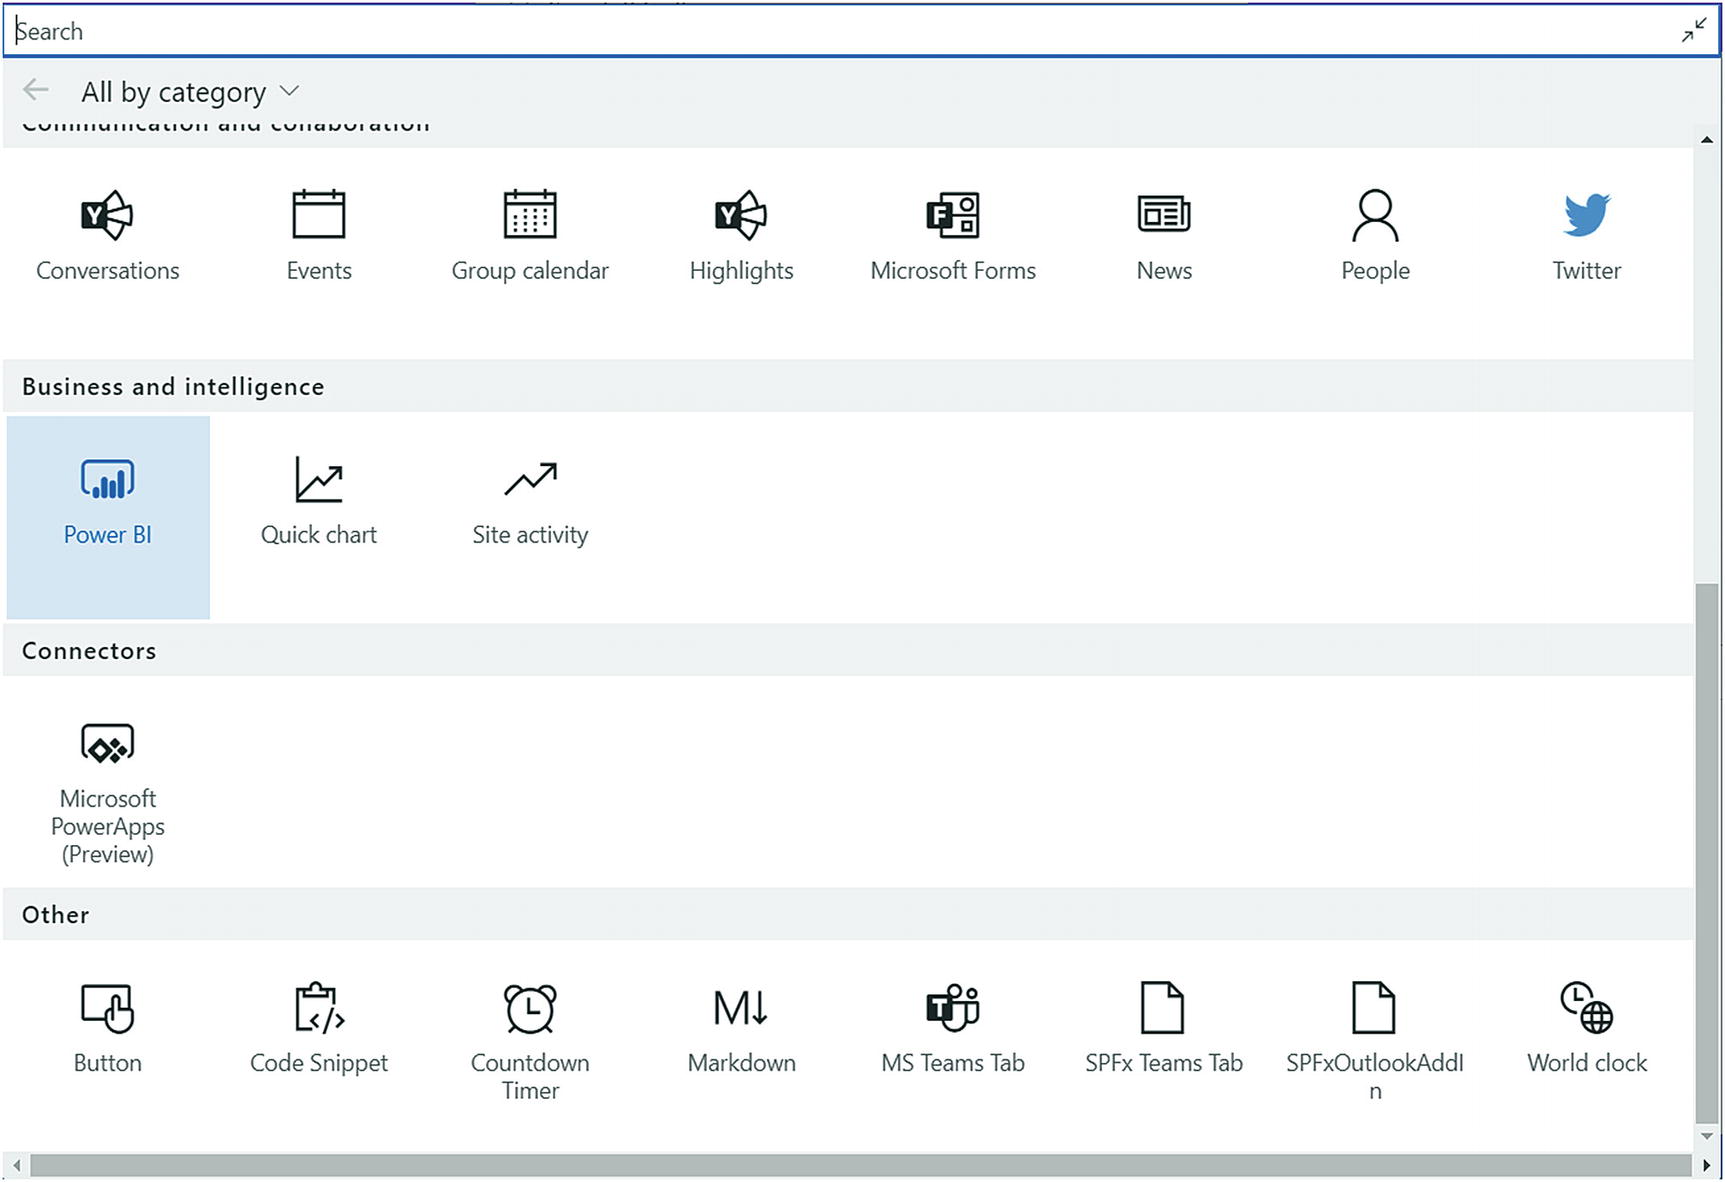
- 5.
You can also use the Power BI web part under the Business and intelligence category to show the Power BI report by specifying the published report URL (Figure 16-21).
Power BI embed code
The on-premises (SharePoint Server 2019) data now can be seen in the cloud (SharePoint Online site).
Scheduling a Refresh of Datasets
- 1.
Under My workspace, click Data sets.
- 2.
Select the dataset (e.g. Inventory).
- 3.
Under Scheduled refresh, define the refresh schedule (Figure 16-22).
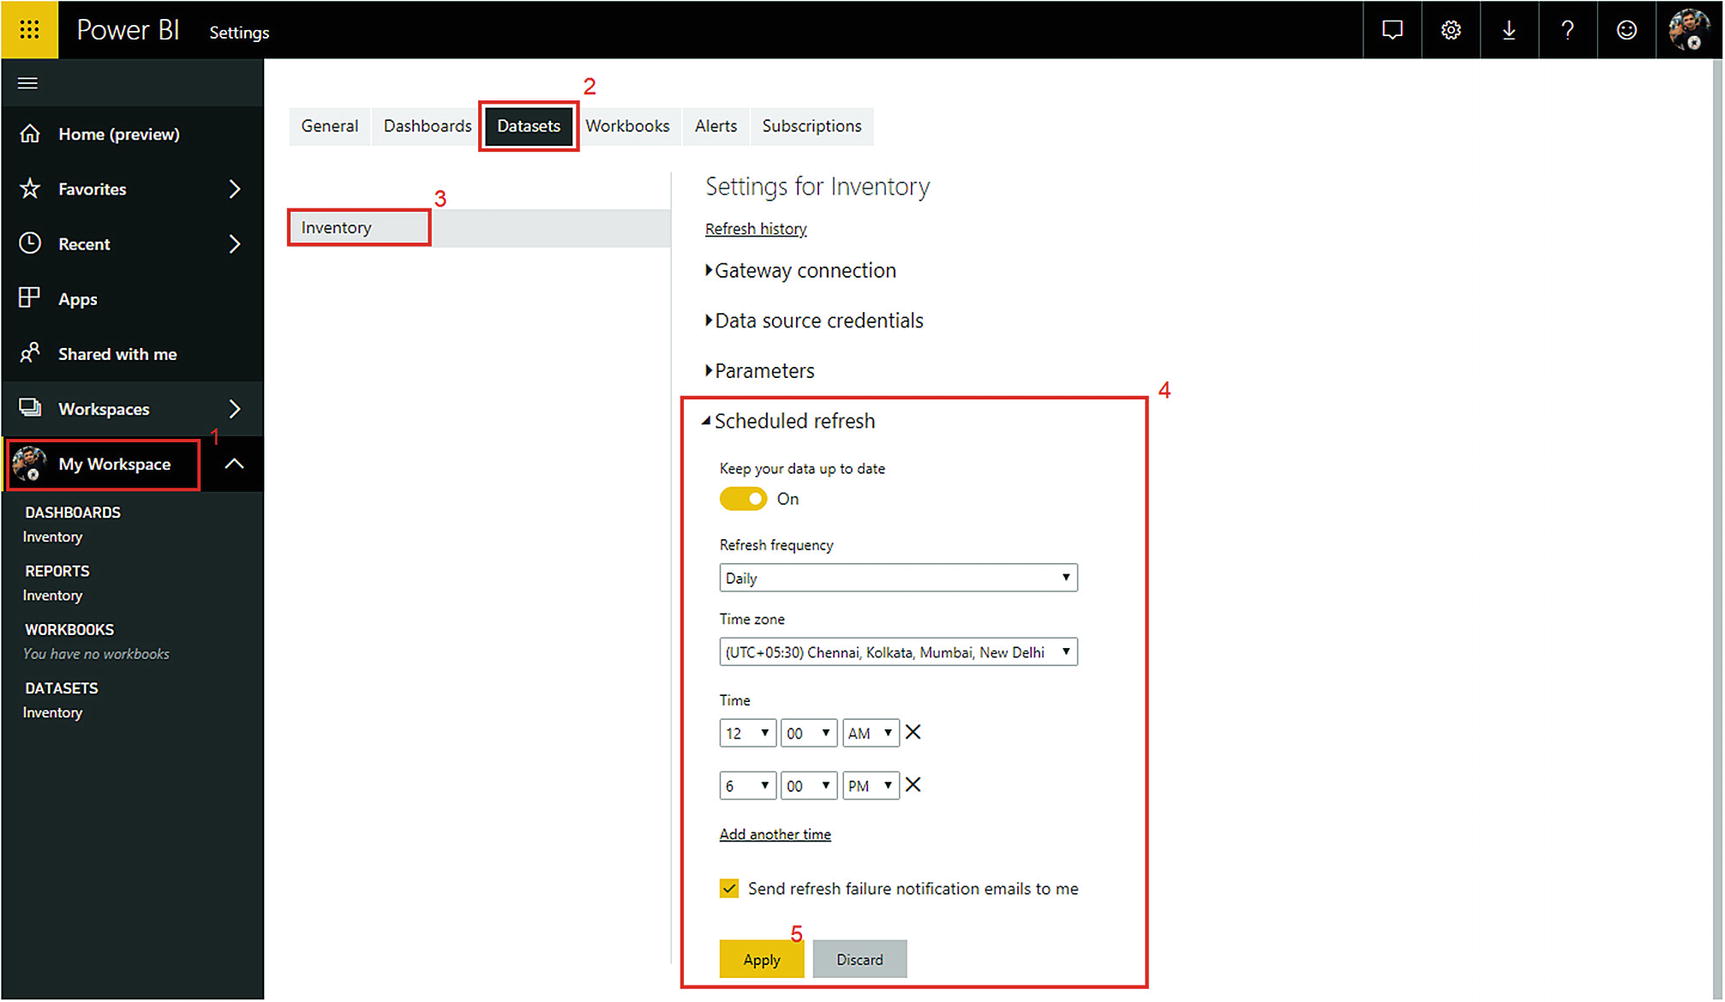
Scheduled refresh of datasets
Conclusion
The Power BI reporting cloud feature is available in SharePoint Server 2019. An on-premises data gateway helps to connect to on-premises data sources. The Embed and Power BI web parts in SharePoint Online help to display the published Power BI reports, getting the data from on-premises datasets using the on-premises data gateway. Schedule periodic refreshes of datasets to get updated data from the datasets.
In the next chapter, you will explore how to integrate Power Apps with SharePoint Server 2019 on-premises using the gateway.