
Chapter 3. Analog Methods in a Digital Age
I, a designer of planet Earth, in order to form a more perfect creative process, establish drawing skills, ensure design tranquility, provide excellent art, promote conceptual welfare, and secure the blessings of creative liberty to ourselves and our posterity, do ordain and establish this chapter for the designers of our world.
Don’t Be a Tooler
I graduated from art school in 1986. Even though the program was specifically geared to training graphic designers, we had to take drawing and illustration classes. At the time, our industry realized the importance of drawing as it relates to creative thinking and design.
But times have changed. Most art schools that offer visual communications degrees don’t require students to take any drawing classes. The majority of them focus on software-oriented design (a tool-driven process), which only compounds the problem.
This issue isn’t limited to recent design school graduates, however. Even seasoned designers who have been trained to draw have sometimes been lulled into creative lethargy by the ease and accessibility of digital tools.
This dumbing down of creativity in our industry is a serious pet peeve of mine. Those who bake down the creative process so it’s not too demanding on the individual believe the computer, rather than the artist, is the wellspring of creativity.
The fundamental problem for many designers is the lack of a well-defined and systematic creative process. In today’s design reality, it’s far too easy to fall into the routine of jumping on the computer as the first step in a creative task. We’ve all been guilty of this at one time or another. But any designer who jumps directly onto the computer is what I would call a “tooler.”
A tooler is someone who doesn’t necessarily want to improve his or her drawing skills but thinks that by learning the latest software version, applying a new drop-down menu effect, running a filter in a certain way, or mimicking some other type of convoluted Fibonacci-esque computer-driven function, he or she can avoid drawing.
Toolers don’t draw. In making that choice, they not only lessen the quality of the final product but also fail to grow as designers. It’s a lose-lose situation.
Analog—that is, drawing—and digital are not independent of each other when it comes to creating artwork. Nothing I do is fully digital, nor is it fully analog. I’m constantly going back and forth between the two throughout the creative process.
I Get Paid to Draw
Early in my career (pre-computer), people would ask me what I did for a living and I’d say, “I’m a graphic designer.” The usual response was something like, “You get paid to draw? I can’t draw a stick figure.” They clearly associated my core skill and craft with what I did for a living.
But now (post-computer) when I tell people what I do, the normal response is something like this: “That’s cool. I have a computer, too. I printed some inkjet business cards for...” And they proceed to associate what they do on a PC in their spare time using Microsoft Paint, prefab templates, Comic Sans font, and clip art with what I do as a professional.
Gone is the appreciation or even recognition of a skill or craft we as artists possess to do our jobs. For the most part, toolers don’t view themselves as lacking any core ability as “designers” because the computer, in their minds, has replaced the skill and craft they once associated with an artist’s ability.
Our industry is inundated with toolers who reinforce this poor public perception of what we do. Toolers don’t take skill and craft seriously. In essence, one could argue that they are merely glorified amateurs who just know more about the software than the general public. Mom and Pop see what they produce and say to themselves, “Hey, I can do that, too.” And thus the tooler dispensation was born.
As I stated earlier, I don’t expect every designer to be a full-blown illustrator—that’s simply unrealistic. But I do think every designer should integrate basic drawing skills into the creative process to facilitate his or her full creative potential (FIGURE 3.1). This chapter will help you understand the importance of working out your ideas in analog form before moving to digital—that is, working out your ideas on paper before ever approaching the computer.

FIGURE 3.1 Stop basing your design decisions on what you find in drop-down menus and start improving your analog drawing skills.
Concepts and Ideas
When I teach illustrative design, one of the first things I tell my students is that I can’t teach them to be creative. I can only show them methods that will aid them in their quest to create and execute unique concepts and artwork.
Much could be written on the subject of generating ideas and using creative thinking and mental problem solving in a design context. Suffice it to say that this book is intended to facilitate the execution of your ideas—not the creation of them.
A solid creative foundation starts with doing research, knowing your audience, and thinking through ideas that are appropriate for that audience both strategically and aesthetically. Only when these steps are completed can you begin to draw.
Your brain is the only computer you need at this point. You’re mining, not refining, so it’s important to load the chamber (your brain) with as much relevant information as you can to fuel your creative exploration as you draw out your ideas (FIGURE 3.2).
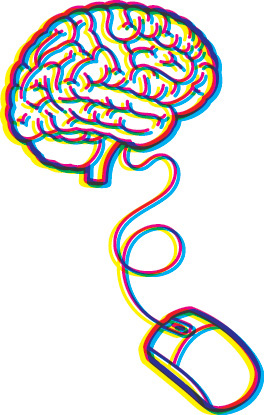
FIGURE 3.2 You have a supercomputer on your shoulders. Load it with as much information as possible so you can draw on it when needed (pun intended).
Analog Tools
As I draw out my ideas and work through the creative process, I depend on three tools (FIGURE 3.3):
• A 2B pencil for roughing out concepts and chewing on.
• A black Paper Mate Flair pen to quickly create thumbnail sketches.
• A mechanical pencil for drawing refined sketches, which I then scan and build on in my vector drawing program.
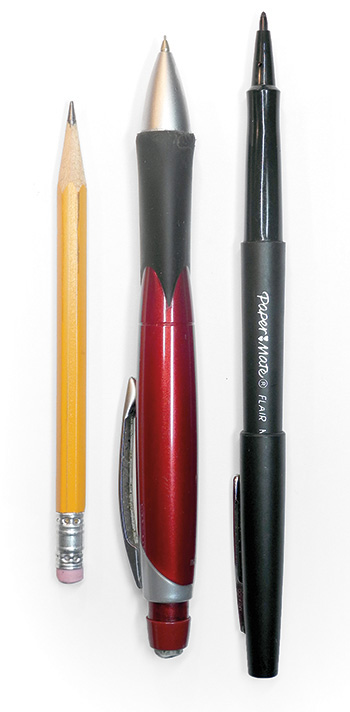
FIGURE 3.3 If the pen is mightier than the sword, then it’s a safe bet the mouse is no match for the pen either. So stop whining, grab a pencil, and start drawing.
I also like to use a black Sharpie and a red pen at times, but those don’t play a part in the foundational stage of my creative process. I use them in refining my artwork and in art directing myself, as I’ll discuss later.
The Lost Art of Thumbnailing
I love the term “thumbnailing.” It’s an apropos term to define the capture of ideas in a simple and small drawing. Because you’re just mining for concepts at this point, you don’t need to worry about how precise or technically accurate the image is. Thumbnails are nothing more than visual triggers to help you explore creative possibilities.
Think of the process as “brain dumping.” You’re simply opening up the floodgates of your mind and letting the ideas flow out on to paper. Have fun with the process: don’t get hung up on how appropriate the concept is at this point or how good the sketches may be. Remember, you’re not refining at this point; you’re simply mining. You’ll go through and refine your direction later.
You could also refer to these as doodles. In reality, the only difference between a traditional doodle and a thumbnail sketch is that one is spontaneous or random and the other tends to be purposeful. But if calling these sketches “doodles” takes the pressure off, then go for it.
An aside: as much as I try to plan for a project, I never know when inspiration will hit me. Many times something I see or think will trigger an idea, I’ll begin to make mental connections, and I’ll grab a pen and paper to sketch some quick thumbnails of the idea so I don’t I lose it. This is why you’ll see different ink and paper colors in my thumbnail sketches (FIGURE 3.4).
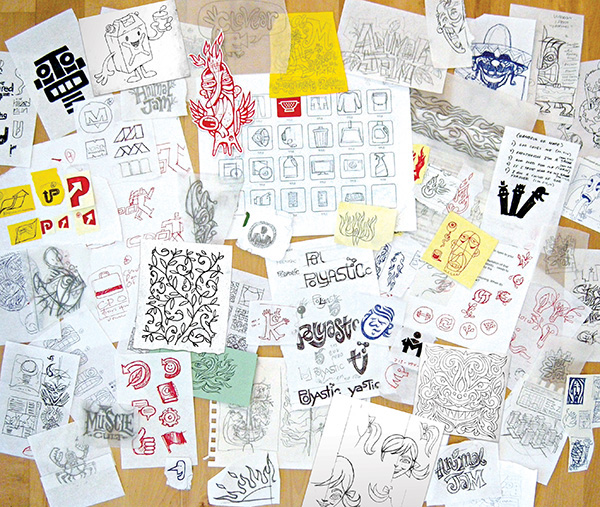
FIGURE 3.4 Thumbnails aplenty. Find the thumbnails that align with the designs on the following page.
Thumbnails may start out very crude, but through a process of refinement they lead to well-crafted and precise digital artwork (FIGURE 3.5).
FIGURE 3.5 Thumbnailing forms the foundation for any type of creative project, be it pattern design, hand lettering, character design, brand identity, icon design, or a tribal-styled illustration.
More Is Better
You can never have too many thumbnails, but you can have too few. Always push yourself to create more than you need for any given project. This will ensure that you’ve fully vetted your exploration.
“Nothing is more dangerous than an idea when it is the only one you have.”
—ÉMILE CHARTIER
There’s a nice fringe benefit to over-thumbnailing: over time, you’ll build an archive of “homeless” ideas. When a new project comes along that aligns with a previous project’s theme, you can harvest ideas from your unused archive. It’s like renewable creative energy!
An Exception to the Rule
There are, of course, exceptions. Not every project needs a lot of thumbnails. Sometimes a design motif is so geometric and simple that you don’t need to refine it beyond your initial thumbnail sketch.
Keep your creative process flexible enough to allow this approach without compromising the end results. It obviously won’t apply to every job you work on, but in the case of my Freedom of Speech project, it did (FIGURE 3.6). The speech bubble element was clearly going to be an easy-to-build object (FIGURE 3.7).
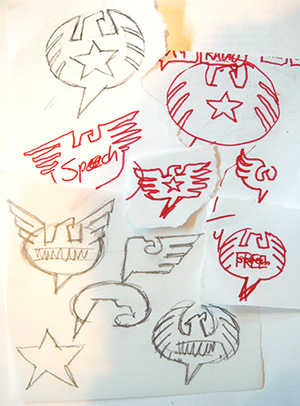
FIGURE 3.6 My concept was a very graphic and stylized speech bubble that also read as an eagle. This thumbnail gave me enough information to move from analog to digital.

I created the motif primarily using basic shapes within my drawing program—why try to draw a perfect elliptical shape when there’s already a tool that does it with precision? This applies to the star shape as well.
This project is, of course, the exception, not the rule. More often than not you’ll want to thumbnail out your ideas and then redraw and refine your drawn design before trying to pull off the vector artwork.
Refine Your Drawing
Before you get into your car and drive somewhere you’ve never been before, you probably check a map for directions. If you don’t bother reviewing a map, you can easily get lost, drive a route that’s out of your way, and experience a lot of frustration as you try to figure things out on the fly.
The same is true when it comes to building vector artwork. Drawing out and refining your ideas gives you a precise road map that you can follow in your vector drawing program. It removes the guesswork from building your art (FIGURE 3.8).
But if you don’t take the time to think through and draw what you need to build before you build it, you’ll waste a lot of time noodling around looking for that result you’re after.
Refinement is a process of evolving your art from a rough idea into a clarified plan from which you can build a design. Your goal is the same as an architect’s: you draw it the way you plan to build it.
Drawing is an iterative process. So if something just doesn’t look right after you’ve drawn and redrawn it, then it’s a good bet you need to keep drawing and rework it even more. Whenever you’re in doubt about how your drawing looks, redraw it until you remove that doubt (FIGURE 3.9).
Refinement isn’t a task reserved for just this stage of the creative process; it should blanket the whole process. Over time, you’ll learn to art direct yourself and make continual refinements along the way (FIGURE 3.10).
I find it a lot easier to draw on vellum and use a light box. I usually redraw only the parts of a drawing that I don’t like, and then once I have everything figured out, I just tape them all together to form the final refined sketch that I can scan.
This process takes dedication. If you’re not used to working this way, it will seem foreign and laborious, and I can almost guarantee that you’ll get frustrated. But anything worth doing is always hard at first, so hang in there. It will get easier, and you’ll get better at it.
You may invest more time at the beginning of a project, but it will save you time later when you actually start creating the art. It’ll also expand your creative skill set, hone your craftsmanship, and equip you to produce better work.
Create a Better Road Map
Have you ever tried to follow a map that wasn’t accurate? It kind of defeats the purpose. The same is true when you draw out your refined artwork. The more precise it is, the easier it will be to build it in vector form. Once you’re happy with your drawing, you can scan it in and place it into your vector drawing program.
The following project demonstrates how drawing serves as an accurate road map for building your art (FIGURES 3.11–3.14). The initial thumbnail, rough sketch, and final refined sketch are shown on the previous two pages.

FIGURE 3.11 This tighter sketch was closer to what I needed but still too rough to build from. It would have taken more time to finesse the vectors than to just redraw it in a more final form before moving to digital.
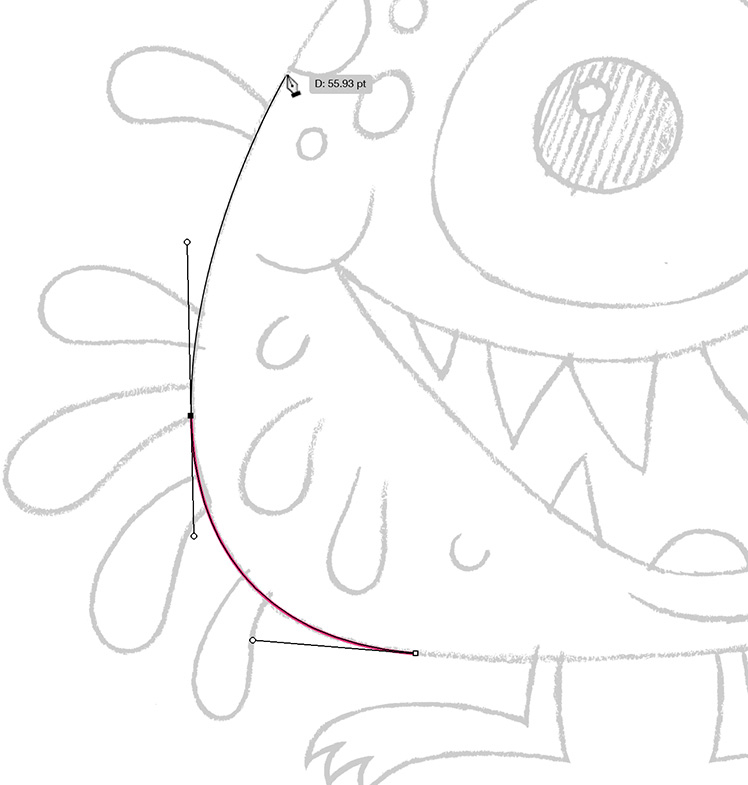
FIGURE 3.12 I removed all of the guesswork by building on top of a refined drawing. This gave me a clear road map of where to place my anchor points and how my vector paths should be shaped.

This sketch-and-refine process can apply to any type of design project that needs to end up in vector form. This example showcases a custom hand-lettered logotype design (FIGURES 3.15–3.21).
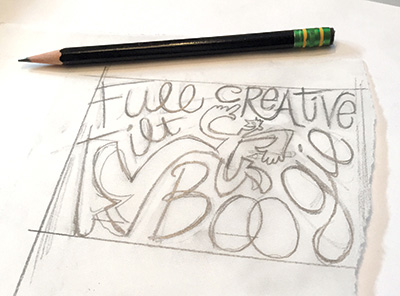
FIGURE 3.15 This thumbnail sketch established the general composition and direction for my hand-lettered design.

FIGURE 3.16 In this tighter sketch, I continued to refine my artwork. At this point I wasn’t worrying about precise shapes, just trying to flesh out the look and feel and balance the weight of the letterforms and negative space.
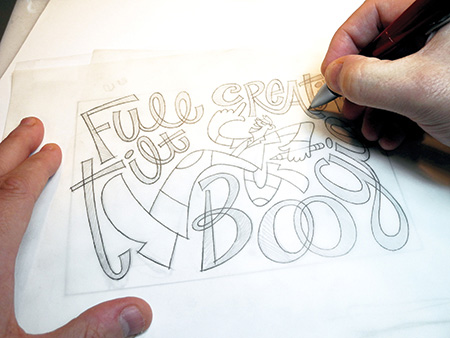
FIGURE 3.17 I started drawing my refined sketch on my light box with my rough sketch underneath. I was thinking about vector shapes. How would I go about building this in vector form? Drawing my art precisely in analog facilitated how I would build it in digital.
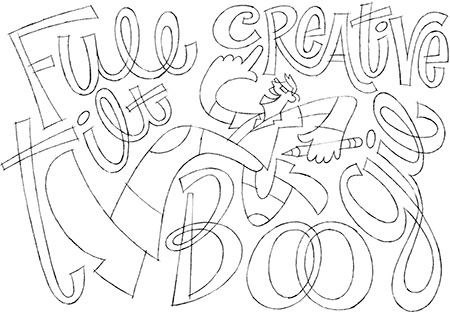
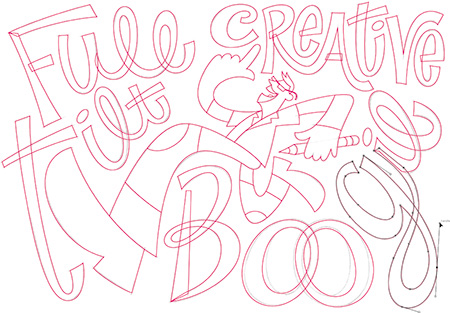
FIGURE 3.19 The refined sketch that I used as a road map to build my vector shapes with precision. At this point, I wasn’t guessing how I’d form them; I just followed what I determined in the drawing stage.
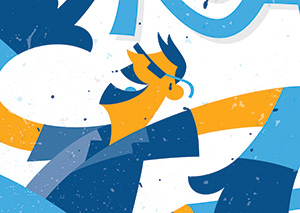
FIGURE 3.20 Once I selected my color palette for the design, I decided to work in some subtle texturing to give it an organic flair.

FIGURE 3.21 The final hand-lettered design. Yes, that’s me and one of my favorite sayings: “Full Tilt Creative Boogie!” ![]()
Back and Forth
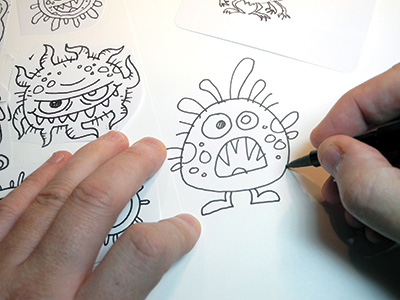
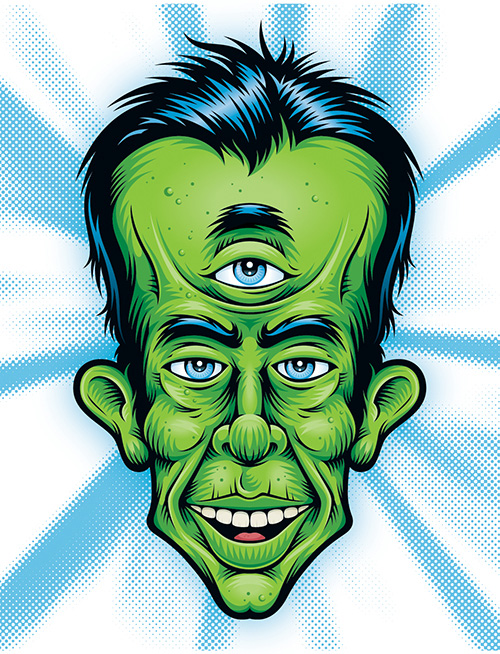
Here’s another real-world project that illustrates why the analog-to-vector process is essential. For this project I had to illustrate a three-eyed monster in a pseudo-woodcut style. To pull this off, I had to go back and forth between analog and digital throughout its creation (FIGURES 3.22–3.30).

FIGURE 3.23 An illustration like this doesn’t go fast. And I make sure to scrutinize each and every shape I draw.

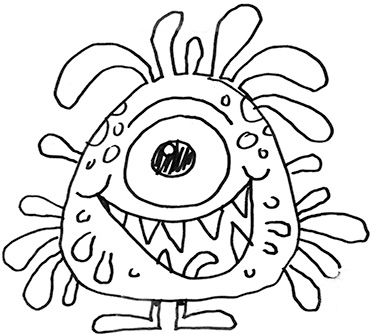
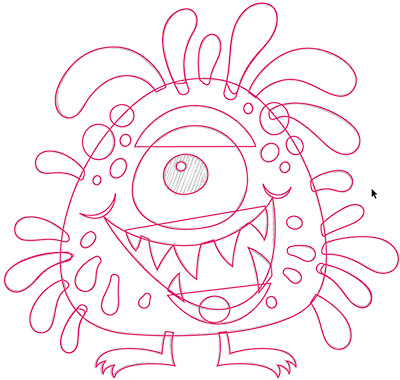
FIGURE 3.24 My refined sketch, ready to scan in. Since the illustration was symmetrical, I only had to draw out half of it in Illustrator. (You’ll learn more about symmetry in the “Symmetry Is Your Friend” section of Chapter 6, “Vector Build Methods.”)
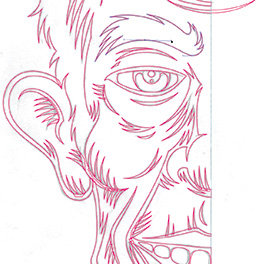
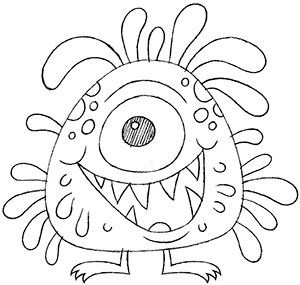
FIGURE 3.25 No guesswork was needed to build vector shapes. I simply followed what I’d already predetermined in my refined sketch.

FIGURE 3.26 I built my base black-and-white vector art and then printed it out and drew on it to get the shading I wanted. During a project like this, I go from digital back to analog several times to work out all of the detail in my illustration.

FIGURE 3.27 A refined drawing of highlight detail in the figure’s hair. I could have tried to render this without drawing it first, but it would have taken me a lot longer and probably not looked as good.
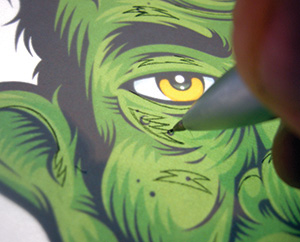
FIGURE 3.28 Using vellum, I drew on top of a color printout using my light box to work out highlight details that I’d need to build out in vector form. This process of going back and forth from digital to analog eventually becomes second nature.
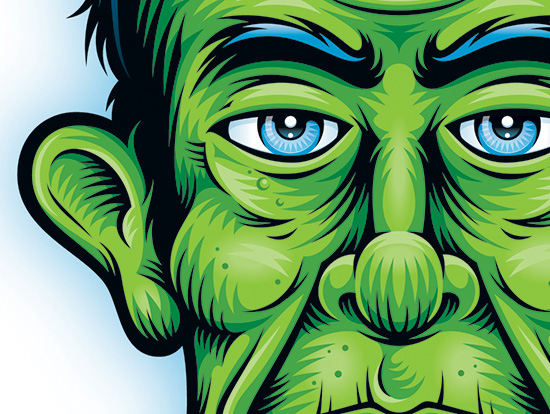
FIGURE 3.29 This image shows a close-up of the shading and highlight detailing in this illustration.
Systematic and Creative
Most of the time we create on behalf of our clients. Our design solutions need to work professionally within a commercial environment. And our creative work has to fit with a client’s business personality and marketing strategy. We also need to create artwork within a set budget and schedule, which means we don’t have the luxury of spending as much time as we might like on any given project.
These are all reasons why a systematic creative process is necessary when creating vector-based artwork. Building your vector designs on a solid creative foundation is a must in order to produce work that’s precise, on time, and effective.
The more you work systematically as you build vector artwork, the more the process becomes second nature, and the faster you’ll be able to execute your ideas without compromising the quality of the art.
Let’s take a look at this systematic process in context of a more complex project: a visual identity for a clothing company called Beloved Virus (FIGURES 3.31–3.43).
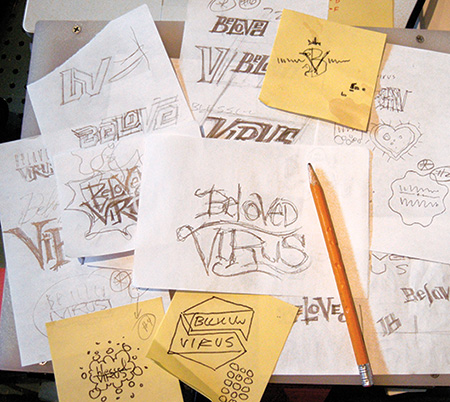
FIGURE 3.31 Part of developing a visual identity for this client was developing initial concepts for a new business name. Once we had the name nailed down, I began fleshing out a wide assortment of thumbnail sketches to determine the various directions I’d take. Drawing isn’t merely a skill for visual design; it’s a great way to enhance thinking as well.
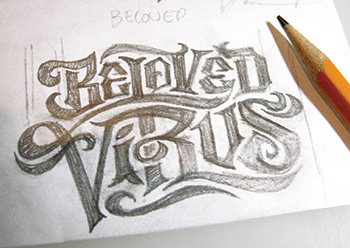
FIGURE 3.32 I wanted the mark to be more timeless and less gimmicky, so I liked the idea of an ornate, hand-lettered typographic treatment. At this stage, I put meat on the bones of my idea and started defining the design. This gave me a good idea of what to expect, but it still wasn’t good enough to build from.

FIGURE 3.33 I redrew the letterforms more precisely with my mechanical pencil. Here I was still scrutinizing the balance of the shapes and looking for areas I could refine and improve further.

FIGURE 3.34 I put the project aside for the day and approached it with fresh eyes the next morning. This helped me isolate problem areas and fix them before I went to digital. I modified several letterforms and was ready to create my refined sketch.
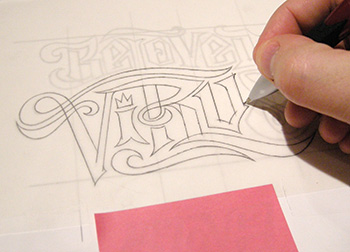
FIGURE 3.35 On this project, I scanned in and printed out my rough at a larger size so I could redraw the refined sketch with maximum precision.

FIGURE 3.36 I scanned my refined sketch and now had an exact road map from which to build my vector artwork on. No guesswork was involved; I already knew what the logo should look like.

FIGURE 3.37 Whenever I build vector artwork, I form my art by creating smaller shapes. It’s far easier than trying to create using one single shape. (Note: This and all of the build techniques demonstrated in this chapter will be explained in upcoming chapters.)

FIGURE 3.38 For example, look at the letter B. It’s made from eight different individual shapes. If I tried to build this as one or two shapes, it would be a major pain to get it built precisely. The end result wouldn’t be as elegant either.

FIGURE 3.39 I continued using this same build method to create all of the letterforms for this design. Ironically, the process looks sloppy, but it produces precise results.

FIGURE 3.40 I call this simple method “shape building.” (You’ll learn more about this in Chapter 6.)
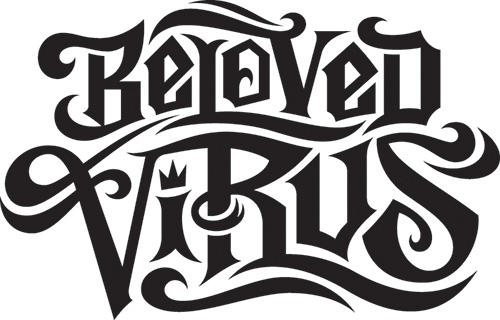

FIGURE 3.42 Along the way, I distorted the perspective of the type treatment and contained it within a dimensional nesting shape to give it more volume. The end result was an effective, precision-built brand logotype derived from the solid creative foundation of drawing.

FIGURE 3.43 I used the same systematic process to design and build all of the logo concepts I presented to my client.
If you’ve determined that you can’t do the drawing part of this process very well, then my book has taught you something already: you need to improve your core drawing skills. That’s what growing as a designer is all about.
I’m often asked, “How do I get better at drawing?” There’s no secret, the answer is easy: you just start, and you stick with it. If you start drawing today (doodling counts, by the way), in five years you’ll be a lot better at it.
One of the coolest aspects of a creative career is that talent and skill don’t diminish over time. Like wine, they only get better with age. But if you never start, you’ll never improve, and you’ll miss out on creative opportunities.
The whole reason for drawing out your vector art before you build it is to create a piece of digital art that is precise and well-crafted. Your final art will just come out better.
But if that isn’t enough, vector artwork is resolution independent, which means that you can use it in almost any format or application. It extends your design’s creative possibilities.
I’ve shown you the importance of drawing out your ideas and refining them, but you’ve seen only a glimpse of the actual vector build methods you’ll use in your vector drawing program once your drawing is complete.
You may be saying to yourself at this point, “I can draw out my ideas, but actually building the vector art is a major pain in the ass.”
Fear not, my weary friend! The next three chapters will demystify vector building through simple, systematic methods that will equip you for success.
 Field Notes: When Is a Drawing Done?
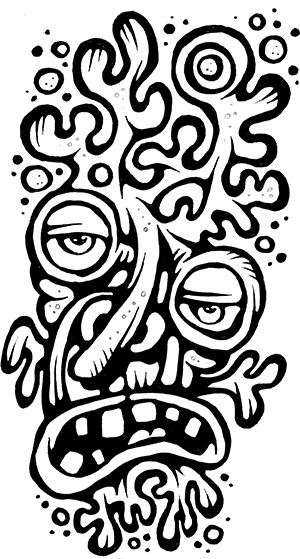
Design Drills: Essential Nonsense
I’d never say that I completely understand all of my own doodles, because I don’t. Most just flow out of me without any forethought. I simply open up the floodgates and see what happens. It’s more fun that way.
I’ll admit that most are strange, and some are a bit disturbing. The latter category I refer to as “Dark Morsels.” Once again, don’t ask me what they mean.
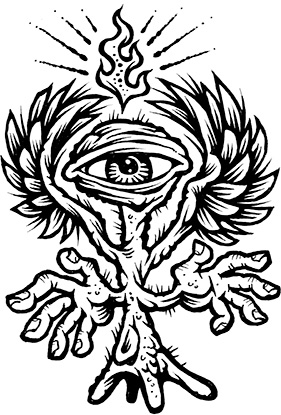
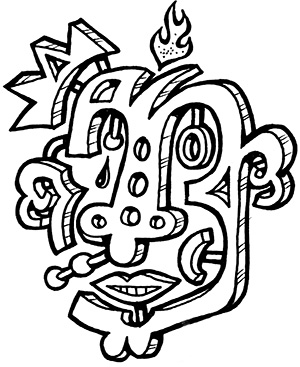
That said, I think doodling is a great way to exercise creativity. That’s why I consider doodling essential nonsense. The following examples showcase a rogue’s gallery of bizarre doodles harvested from the deepest recesses of my mind (FIGURES 3.44–3.51).
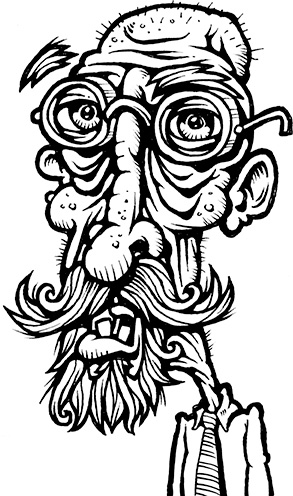

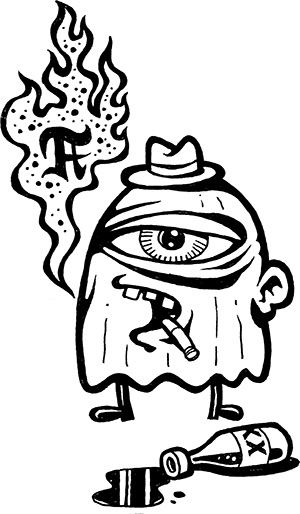
FIGURE 3.45 A prophetic look at social media in the year 2028: aged Twitter acolytes genetically modify themselves with bird DNA, while slinging verbal arrows and smoking government-approved big pharma.


I’ve also included a project walk-through where I show how I narrowed down a collection of doodles and thumbnail sketches into a rather hairy self-promotional piece (FIGURES 3.52–3.56).

FIGURE 3.52 Sometimes the best marketing ideas leverage pop culture. I decided to create a fun and interactive marketing piece that also promoted my illustration work. These are thumbnail sketches for an illustrative mask inspired by the popularity of beards and by Twitter.
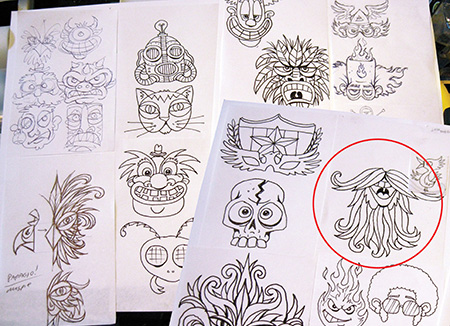
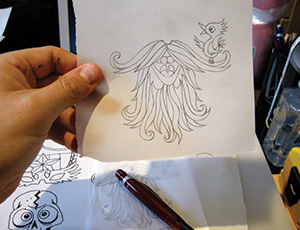

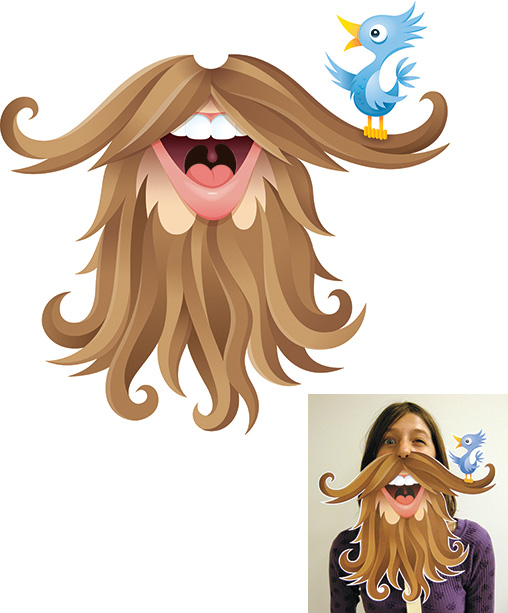
FIGURE 3.56 My final illustrative mask, Twitter Beard. My snarky daughter Savannah demonstrates its use. ![]()
Doodling also lends itself to practical purposes on real world projects like the editorial illustration shown in Chapter 10, “Good Creative Habits,” Figure 10.1.