
The iDVD project has been pretty straightforward so far: you’ve added chapters to an edited iMovie video, tossed it into iDVD, and edited the project’s theme to make it look slick and polished. In this chapter, you’ll add a few more things to the project: an additional submenu, other movies, a photo slideshow, and DVD-ROM data that is stored on the disc and accessible to people using computers instead of commercial DVD players.
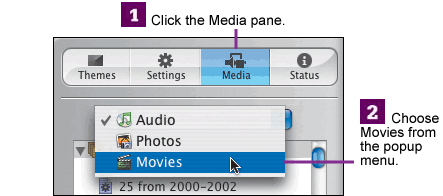
You already have one submenu in your project—the Scene Selection folder that contains each chapter of your movie. However, since you’ll be adding more content in this chapter, let’s create a new submenu to store it.
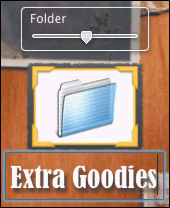
![]() Click the Folder icon to create a new submenu.
Click the Folder icon to create a new submenu.

![]() Enter a custom title (instead of “My Folder”), and double-click its icon to open it.
Enter a custom title (instead of “My Folder”), and double-click its icon to open it.
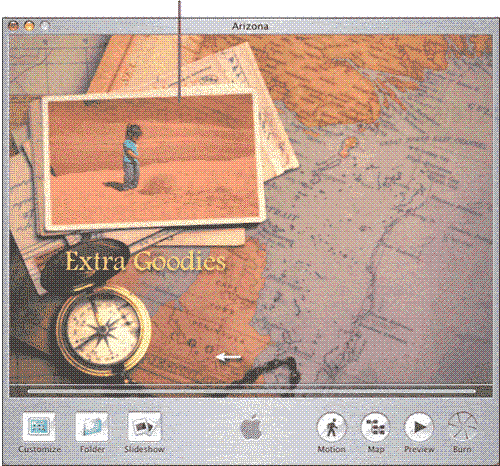
iDVD retains the drop zone content you added to the previous menu.
![]() Apply a theme and edit the text as you did in the last chapter.
Apply a theme and edit the text as you did in the last chapter.
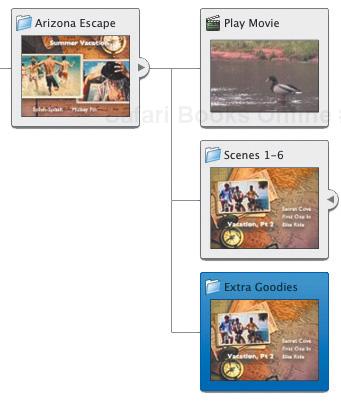
Here’s a simplified map showing where the submenu fits in:
I wanted to share a clip that didn’t make it into my final edited movie. I used iMovie’s Share feature to save it as a QuickTime file (see Chapter 10), which I can now bring into iDVD.
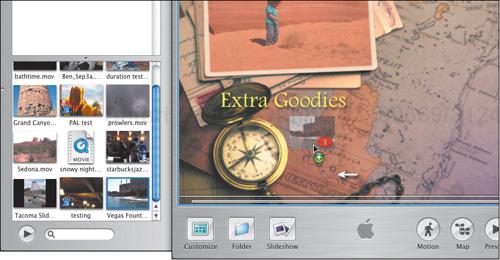
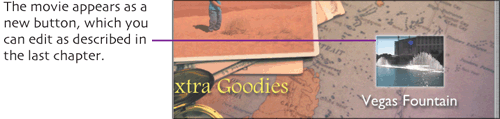
![]() Drag a movie clip to the menu.
Drag a movie clip to the menu.
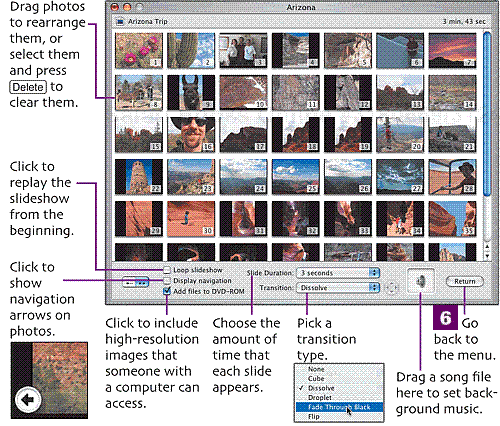
In Chapter 5, you added photos to your iMovie project. Once incorporated into your movie, however, the photos get converted to video clips. In iDVD, you can build a slideshow that presents your photos sequentially, with transitions between each one and a soundtrack in the background. Although you could accomplish something similar in iMovie, it’s much easier to do it here.
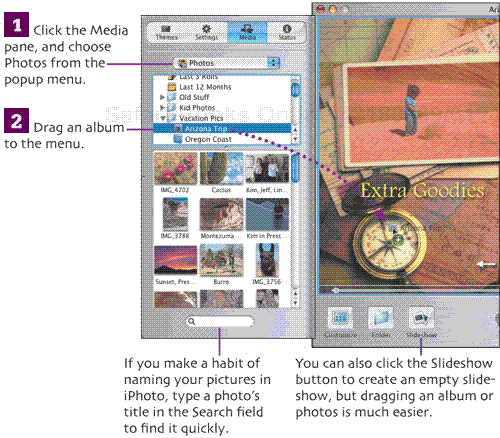
In iPhoto, I made an album of my favorite photos. It’s easier to drag an album into iDVD, but you can also select the photos you want and drag them in as a group to create a new slideshow.

![]() Set options for the slideshow.
Set options for the slideshow.
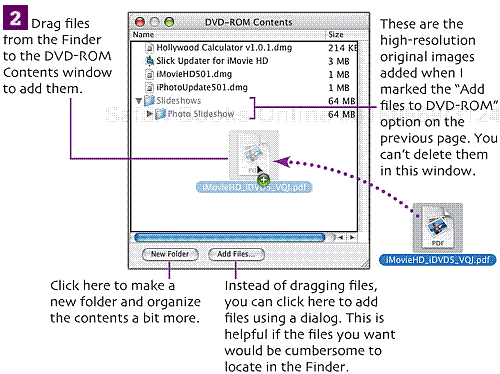
The acronym DVD stands for “digital versatile disc” because you can store more than just movies on the shiny silver platters. iDVD can create a DVD-ROM (read-only media) area of a disc containing files that are accessible when the disc is inserted into a Mac or PC with a DVD drive.
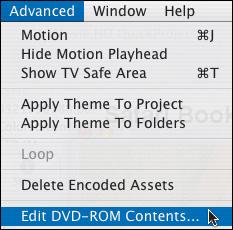
![]() iDVD manages DVD-ROM content separate from its theme-driven interface. Choose Edit DVD-ROM Contents to begin.
iDVD manages DVD-ROM content separate from its theme-driven interface. Choose Edit DVD-ROM Contents to begin.
Submenus are often created when you’ve run out of room for all the buttons on one menu. If you’re facing button overload, move some of those items to a new submenu: select them, and choose New Menu from Selection from the Project menu. However, you can’t go back and move them to the previous menu, except through the Undo command.
When you drag a movie file from the Finder to your menu, make sure you don’t release it over a drop zone.
For the best quality, try to use QuickTime files that were saved as Full Quality DV (if they came from iMovie).
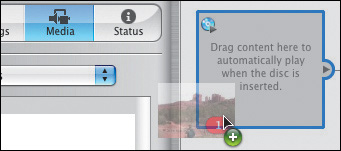
Many DVDs these days include a short bit of video that plays before the menu loads. To do this, click the Map button and drag a movie file or group of photos to the AutoPlay well in the upper-left corner of the map.
Click the Preview button while in the Slideshow editor to watch your slides without previewing the full DVD menu.
To make photos appear better in iDVD, crop them first in iPhoto using the 4 × 3 (DVD) option under the Constrain popup menu.
You can create slideshows by dragging photos from the Finder or even directly from iPhoto’s main window.
Consider dragging a bunch of photos to the AutoPlay well in the Map view to start your DVD with a slideshow before the menu loads.
When picking an image to use as the slideshow button’s icon, use the
 or
or  keys to view the photo thumbnails instead of dragging the slider.
iDVD automatically scales slide-show photos to fit within the TV Safe Area. To use the full screen, open iDVD’s preferences, click the Slideshow icon, and disable the option labeled “Always scale slides to TV Safe area.”
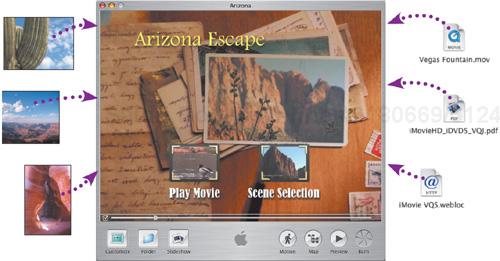
DVD-ROM content can be nearly any file on your Mac. For example, you could include Web links (such as those created when you drag a URL out of Safari to the Desktop), PDFs containing more information about your vacation destination, maps, etc.
Feel free to rearrange the items in the DVD-ROM Contents window by dragging them into whatever order you like.
When you set up DVD-ROM content, iDVD only creates a link to the files you’ve specified; the original files aren’t copied until you burn the disc. If you delete or move a file to a new location in the Finder, you’ll get a “File not found” message. Either move the file to its previous location, or delete the reference in the DVD-ROM Contents window and add the file again.