
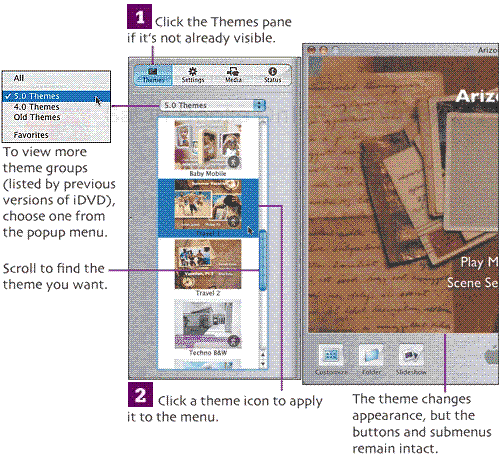
Instead of starting off with a blank slate, iDVD offers a selection of professionally designed themes to enhance your DVD menus. You can stick with one of Apple’s creations, or customize the look by changing elements of the interface. Either way, you end up with a DVD that looks good, no matter how talented you are in the design department.
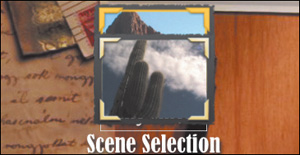
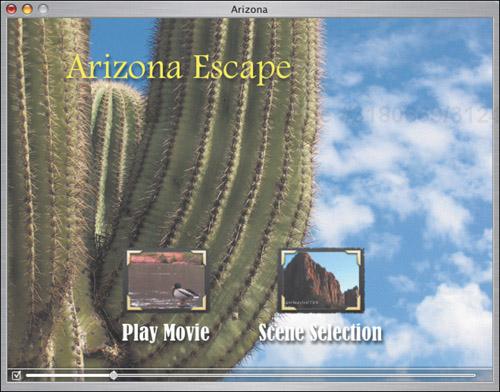
iDVD includes 73 pre-designed themes, ranging from specific topics such as Anime Pop to general imagery like Portfolio. I’ll choose Travel 1 to match my vacation theme and express a world-traveler feel.
You can have only one title in a menu, and it behaves a bit differently than other text, depending on the theme. You don’t need to select the title to edit its formatting.
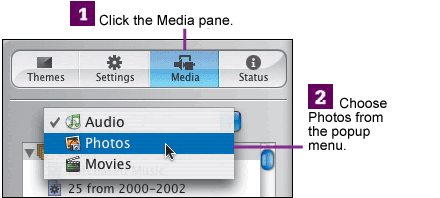
![]() Click the Settings pane.
Click the Settings pane.

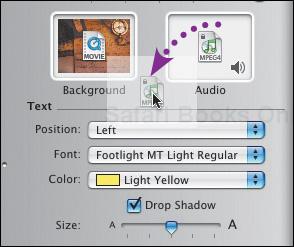
![]() Customize the text’s appearance by choosing Font, Color, and Size, and whether it should include a drop shadow.
Customize the text’s appearance by choosing Font, Color, and Size, and whether it should include a drop shadow.
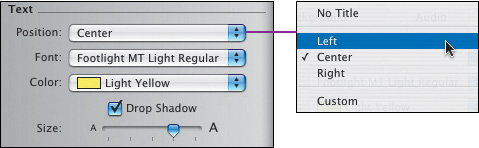
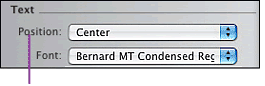
![]() Choose a position for the title. The Left, Center, and Right options align the title to a specific area based on the theme. Choose Custom to drag the title anywhere onscreen.
Choose a position for the title. The Left, Center, and Right options align the title to a specific area based on the theme. Choose Custom to drag the title anywhere onscreen.
Before changing formatting settings
After changing formatting settings
![]() If you want to change the title’s wording, double-click it to make the text field editable.
If you want to change the title’s wording, double-click it to make the text field editable.

![]() Type your new title, and then click outside the box to apply the change.
Type your new title, and then click outside the box to apply the change.

Formatting buttons involves two components: the buttons’ text (if there is any), and the buttons’ shape. When editing buttons, the settings apply to all buttons and submenus on the page. These controls are also found in the Settings pane.
![]() Click a button once to select it (if you double-click, it's action will engage, such as playing the movie or opening a submenu).
Click a button once to select it (if you double-click, it's action will engage, such as playing the movie or opening a submenu).

![]() Customize the text’s appearance by choosing Font, Color, and Size, and whether it should include a drop shadow.
Customize the text’s appearance by choosing Font, Color, and Size, and whether it should include a drop shadow.
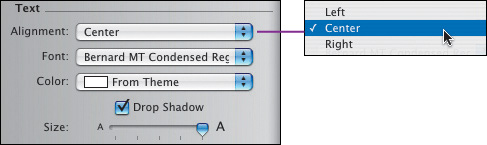
![]() Choose an alignment for the button’s text. For buttons that are just text, the alignment dictates how the buttons line up in relation to one another.
Choose an alignment for the button’s text. For buttons that are just text, the alignment dictates how the buttons line up in relation to one another.
Aligned left

Aligned right
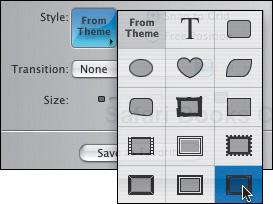
![]() To use a different shape (or in this case, to use a button shape in addition to the text), click the Style popup menu.
To use a different shape (or in this case, to use a button shape in addition to the text), click the Style popup menu.
The buttons are currently snapped to the underlying grid, which is why they’re overlapping.
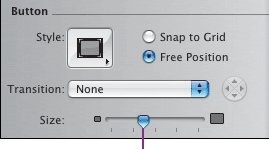
![]() If you want to adjust the button sizes, drag the Size slider.
If you want to adjust the button sizes, drag the Size slider.
When button shapes are visible, the Alignment popup menu becomes the Position menu, which controls the position of text relative to the button.
![]() Click the Free Position button to liberate the buttons, then drag them into your preferred locations.
Click the Free Position button to liberate the buttons, then drag them into your preferred locations.


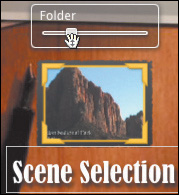
Buttons don’t have to be static pictures. Part of iDVD’s Motion features are motion buttons. A button that links to a movie can play a portion of the movie in the button’s thumbnail image. If the button leads to a submenu containing movie clips, you can choose which clip’s starting frame appears in place of the generic folder icon.

![]() Click a button once to select it.
Click a button once to select it.
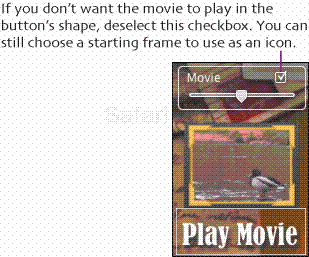
![]() Drag the Movie slider to locate the frame you wish to use as the starting point.
Drag the Movie slider to locate the frame you wish to use as the starting point.
Submenu buttons work the same way: drag the Folder slider to locate an image to use as the button’s icon.
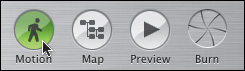
![]() To see how the button plays back, click the Motion button. Click it again to turn motion off.
To see how the button plays back, click the Motion button. Click it again to turn motion off.
DVD isn’t just a visual medium—you can add your own music that will play while the menu is onscreen. Some themes already include background music, which you can easily change.
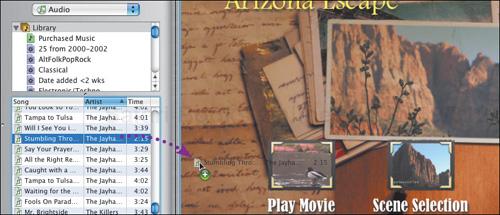
![]() Locate the song you want to use.
Locate the song you want to use.
![]() Drag the song to the menu’s background. It will play while Motion is enabled.
Drag the song to the menu’s background. It will play while Motion is enabled.
Removing a song is as easy as dragging it out of the Audio well, where it disappears in a puff of smoke.

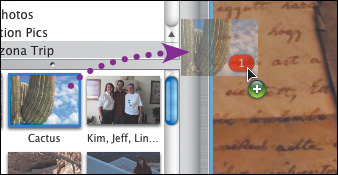
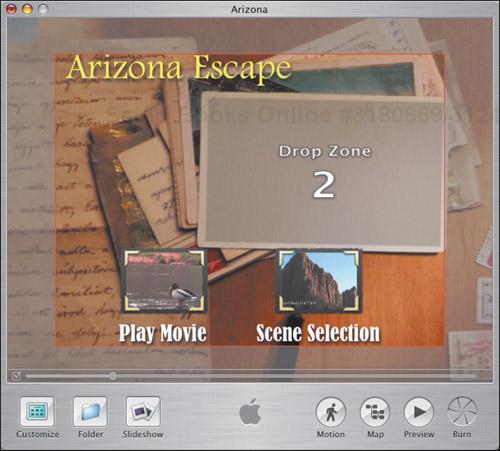
Several iDVD themes include one or more drop zones, areas that can accept video or image files to add more visual interest. You can add multiple photos or single video files to drop zones. For this example, I’m adding pictures to a zone.
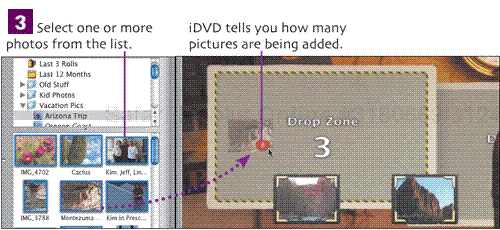
![]() Drag the selected photos to the drop zone to add them.
Drag the selected photos to the drop zone to add them.
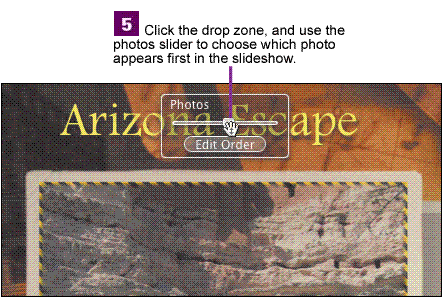
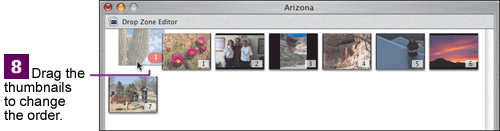
![]() Would you like to rearrange the order in which the photos appear? Click the edit Order button to bring up the Drop Zone Editor.
Would you like to rearrange the order in which the photos appear? Click the edit Order button to bring up the Drop Zone Editor.
To delete a photo, select it and press ![]() .
.
You can also drag more photos (up to 30) from the Media pane to the Drop Zone Editor to add them to the slideshow.

If you added a movie to the drop zone, the movie plays back when Motion is enabled. In this example, I exported a section of my movie to a QuickTime file (see Chapter 10).

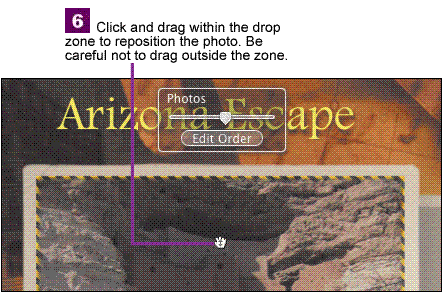
To remove drop zone video or photos, click and drag the contents out of the zone.

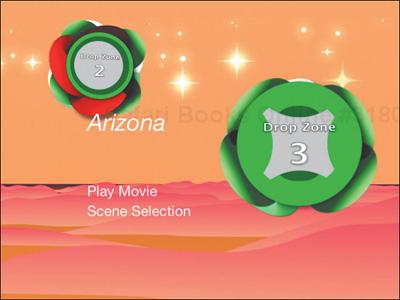
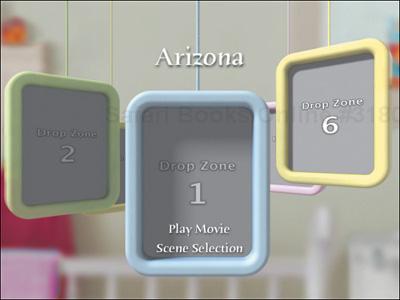
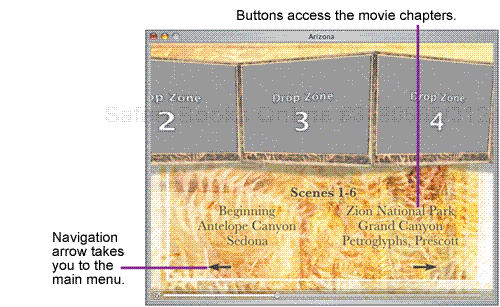
Most of the new themes introduced in iDVD 5 feature animated drop zones. Instead of having one drop zone area in the menu, these themes offer several drop zones that move. In my project, the Travel 1 theme features drop zones moving right to left across the screen while other travel-related items (a globe, suitcases) whiz past the screen.
You work with animated drop zones just as with the drop zones found on the previous two pages. If Motion is turned on, however, you’ll be trying to drag media files onto moving targets. Instead, follow these steps.
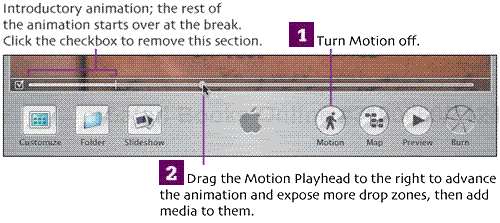
![]() You can also double-click a drop zone to bring up a special Drop Zone Editor made for the animated drop zone themes. Drag photos or movie files to the empty slots to populate the drop zones.
You can also double-click a drop zone to bring up a special Drop Zone Editor made for the animated drop zone themes. Drag photos or movie files to the empty slots to populate the drop zones.

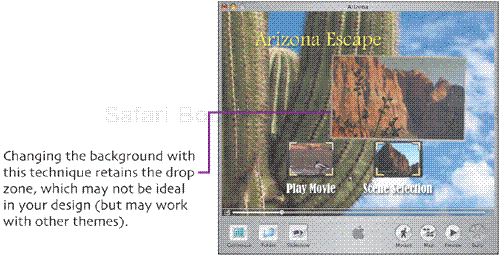
A dramatic way to customize your menu is to replace a theme’s background image with one of your own, either a photo or a movie.
Drag a photo from the Media pane to the menu’s background.
Another method is to drag a media file to the Settings tab...

...and, after the Settings pane appears (without releasing the mouse button), drag the file to the background well.
With this approach, however, the drop zone is hidden by the background image.
Your main menu is now done, so it’s time to turn to the submenu that iDVD automatically created to access the chapters you set up in iMovie.
iDVD assigns a default theme to the submenu.
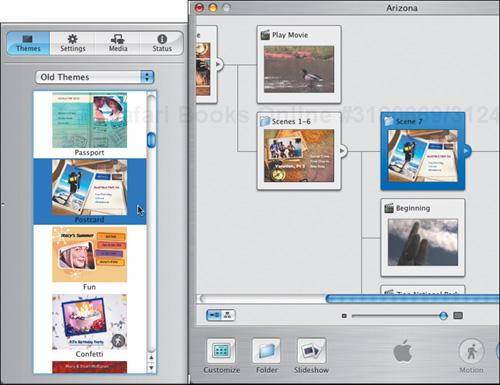
![]() Choose a new theme in the Themes pane.
Choose a new theme in the Themes pane.

![]() You can also apply themes in the Map view. Simply click a menu, and then choose a theme from the Themes pane.
You can also apply themes in the Map view. Simply click a menu, and then choose a theme from the Themes pane.
![]() Using the steps you learned in this chapter, customize the buttons and other elements of the submenu.
Using the steps you learned in this chapter, customize the buttons and other elements of the submenu.
If 73 built-in themes aren’t enough for you, consider buying themes from other developers. See Appendix B.
Some themes include background music when the Motion button is enabled. That’s fine for playing the DVD on a television, but can be grating while editing. I usually activate Motion only when I need to view animated elements.
When using the Custom position for the title, remember that most television screens cut off part of the visible image. Choose Show TV Safe Area from the Advanced menu to view recommended boundaries marked in red.
To make multiple-line button titles, simply hit Return between words.
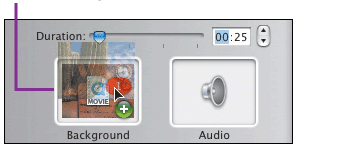
Is nothing happening when you click the Motion button? Go to the Settings pane, and check the Duration slider—it may have gotten set to zero. Duration controls how much of the menu’s motion plays before starting over. Typically, this amount is the menu’s longest background movie or audio, but you can set it lower.
You can drag a QuickTime movie to the Audio well, which will use only its audio track.
The music loops created in Garage-Band make for great background music on a DVD.
When you drag a song onto the Audio well in a theme that already has background music, your song takes precedence. If you remove your song from the well, the theme’s song is still there—you need to delete that, too, for no background audio.
If you’d rather not see the drop zone text (“Drag photos...”), go to iDVD’s preferences and uncheck Show Drop Zones. The zones are still there, just not explicitly marked.
Go to iDVD’s preferences if you want to turn off the Apple logo watermark.
You can also drag image and video files from the Finder to a drop zone, instead of using the Media pane.
The length of time each photo appears onscreen depends on how many photos you’ve added, and the Duration amount. The fewer the photos, the longer each will be visible.
It’s not possible to resize or crop drop zone photos within iDVD.
If you’ve already added photos to a drop zone, dragging more to the zone replaces the ones you have. To add more photos and retain the existing ones, use the Drop Zone Editor instead of dragging them in the menu.
In the Drop Zone Editor, view the photos in a list by clicking the view preference buttons in the lower-left corner of the screen.
A drop zone video plays back from the beginning of the clip; you can’t choose a starting frame like you can with motion buttons.
If you want to use a movie as a background image (also known as a motion menu), you need to drop it on the Background well—otherwise, the movie becomes a button. Also, export it from iMovie as a Full Quality DV QuickTime movie to get the best image quality.
If you switch to a new theme, your custom background is deleted; you’ll have to add it again to the new theme.
For a little more visual snazz, apply a transition between menus. Choose one from the Transition menu in the Settings pane. Also note that transitions play only when going to a sub-menu, not when returning to the previous menu.
In the Map view,
 -click multiple submenus to select them, and then click a theme to apply it to them all at once.