
In Hollywood, shooting and editing a film is only the first half of the process. No matter how good the movie may be, without distribution it’s going to sit anonymous on a shelf.

You’re probably not aiming for a screening at the Sundance Film Festival, but currently your movie exists only on your hard disk. Now is the time to put that iDVD editing to work and burn your project to disc.
Before jumping in, I need to cover a few DVD basics.
Several flavors of blank DVDs are on the market, and iDVD 5 now supports them all: DVD-R, DVD+R, DVD+RW, and DVD-RW). The RW (rewriteable) variants are especially attractive because you can reuse them to burn copies of your project for testing.
DVD discs come in 1×, 2×, 4×, and 8× speeds. This is a measurement of how fast the SuperDrive’s laser can carve data into a disc’s surface. Check the specifications of your Mac at Apple’s support site to determine your Super-Drive’s speed: www.info.apple.com/support/applespec.html.
Also, before you burn any DVD disc, make sure your SuperDrive’s firmware has been updated—on some models, using 4×-speed DVD-R media can damage the drive! Read more about it at docs.info.apple.com/article.html?artnum=86130.
(You can find the URLs above, along with other related information, at this book’s companion Web site: www.necoffee.com/imovievqs/.)
If your Mac doesn’t have a SuperDrive, iDVD 5 can also “burn” the project to a disc image for burning to a disc later using an external DVD burner.
Lastly, remember that a DVD disc can store roughly 4.7 GB of data (compare that to CD-Rs, which hold about 700 MB). That means you’ll need to have plenty of free hard disk space available when it comes time to encode (prepare) the data and burn it.
Use iDVD’s Preview mode to see how the DVD will operate when played back on a DVD player.

A virtual remote control device appears so you can test how the menu items will work.

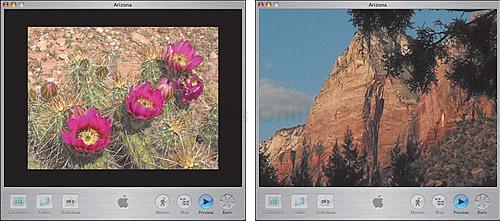
A slideshow or video footage plays back in iDVD’s window.
Before a project is burned to disc, iDVD encodes the data into a format that DVD players will recognize. This process also compresses your movie’s gigabytes of video footage into a size that will fit on the disc. iDVD offers two types of encoding options, which you access from iDVD’s preferences.
For projects of up to 2 hours in length, choose Best Quality. At burn time, iDVD analyzes the movie to determine the best level of compression while retaining image and sound quality.
This means Best Quality offers no background encoding, but you gain an extra 60 minutes’ worth of footage on disc.
![]() Finally, time to burn! Click the Burn button to start the disc burning process.
Finally, time to burn! Click the Burn button to start the disc burning process.

![]() When prompted, insert a blank DVD disc in your Mac’s SuperDrive.
When prompted, insert a blank DVD disc in your Mac’s SuperDrive.

![]() Wait. Get some coffee. Go to bed. Depending on your project’s size, iDVD can take hours to encode and burn the disc. If you’re curious, you can watch the burn process in the Creating Your DVD dialog that appears.
Wait. Get some coffee. Go to bed. Depending on your project’s size, iDVD can take hours to encode and burn the disc. If you’re curious, you can watch the burn process in the Creating Your DVD dialog that appears.
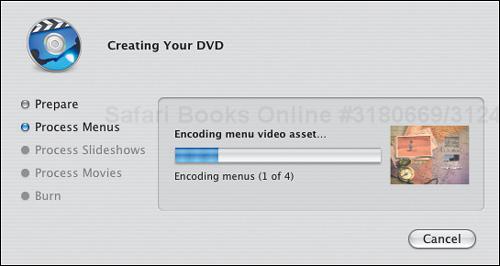
Prepare. iDVD checks that it has the pieces it needs to continue the burning process.
Process Menus. Buttons, motion menus, and other interface elements are rendered and encoded.
Process Slideshows. Slide-show photos and transitions are processed here.
Process Movies. The heavy lifting—if you’re using Best Quality, the entire movie is scanned to determine the best compression quality, then the footage is rendered.
Burn. The audio and video data are combined, or “multiplexed,” into a single stream that DVD players can read. The data is then etched into the disc’s surface by the SuperDrive’s laser.
After the Burn stage, the disc ejects and you’re done!
What’s that you say? You don’t currently own a Mac with a SuperDrive? Not a problem! You can save an iDVD project as an archive, and then take that file to someone else who owns a Super-Drive. An archive is also good if you want to build a project on one computer, but do the encoding and burning on a faster Mac.

Or, if you own an external DVD burner, create a Disc Image that you can burn to a DVD using the Finder or an application such as Roxio Toast. (This option doesn’t include the checkboxes below.)
Select Include encoded files if you want to save the encoding that’s been done already, even though it will make the archive file size larger.
Remember that Best Quality does not encode in the background. Many people mistakenly wait for the progress bars in the Status pane to appear, to no avail. Encoding begins when you burn the disc.
If you’re using Best Performance with background encoding enabled, wait until the assets have finished encoding before you burn the disc.
Projects longer than 60 minutes are more likely to have reduced image quality due to the higher degree of compression required to fit on a disc.
Use the DVD Capacity figure to gauge how much space your project will occupy on the disc. Also, the numbers change depending on whether or not Motion is enabled.
Make sure you have plenty of hard disk space before you burn: at least twice the size of your project.
Enable the Motion button before burning to make sure motion elements are included.
Blank CDs can be bought for pennies apiece, but DVDs are still on the higher edge of the price range (but dropping). However, buying in bulk from online stores such as www.shop4tech.com, or www.dealnews.com can get you prices well below $1 per disc.
Remember that the total space occupied on the disc includes motion menus, slideshows, and the like. So, if your movie is 52 minutes long, you may still get an error message that the project is too big.
Including transitions between menus or within slideshows increases the burning time.
After your DVD is burned, label it with a permanent marker; adhesive labels can unbalance the disc during play and potentially damage your DVD player.
Test the DVD on several DVD players and computers.