© Mohamed Bouzid 2020
M. BouzidWebpack for Beginnershttps://doi.org/10.1007/978-1-4842-5896-5_1

1. Webpack: First Steps

Mohamed Bouzid1 
(1)
NA, Morocco
 

In this very first chapter, we will start by laying the foundation for our work by installing the tools we need in order to run webpack on our local machine. Then we will talk a little bit about the default configuration that webpack has introduced with version 4, called “zero config.” Next we will write our first “hello world” example, which as you might already know, is a mandatory standard when starting to learn anything new. Finally, we will talk very briefly about the webpack bundling command that we will use in order to build our final output files.

Installing Webpack

First of all, you need to have Node JS installed on your machine because webpack relies on it. If you don’t have Node installed, you can go to https://nodejs.org/en/download/ and follow the instructions based on your operating system.

To check if you have Node JS in your system, open up the terminal and type the following:
$ node -v
The next step after making sure Node JS is installed on our machine is to create our working directory/folder, which we will name “webpack_beginners.” Depending on your preference, you may have created it manually or via terminal like the following:
$ mkdir webpack_beginners
$ cd webpack_beginners
Once you are in the webpack_beginners folder, use the following command to initiate a basic JSON file:
$ npm init -y

This will create a file called package.json that will save references to our installed modules.

Via npm, the -y option is to answer yes to all prompted questions; it’s not that important for us at this stage, so we will just say yes to everything.

If you open the generated package.json file, you will see something similar to what is shown in Listing 1-1.
{
  "name": "webpack_beginners",
  "version": "1.0.0",
  "description": "",
  "main": "index.js",
  "scripts": {
    "test": "echo "Error: no test specified" && exit 1"
  },
  "keywords": [],
  "author": "",
  "license": "ISC"
}
Listing 1-1

package.json: The basic generated JSON file

The package.json file will serve for NPM to identify our project (name, version, author, main entry file...) and handles the third-party dependencies needed for it to be fully functional. Assuming you are creating a JS library that you want to share on GitHub, etc., you might be interested in changing the name and the version above, and maybe write a description as well. But that’s not our focus here, to see more what this package.json file will do for us, let’s install webpack using our command line:
$ npm install webpack webpack-cli --save-dev

Note that whether you are in Linux, Mac, or Windows, the command is basically the same assuming you have NPM installed already on your machine, which is mostly the case if you followed the installation of Node JS correctly. The --save-dev option is to tell NPM that we need this just for our development purposes, meaning that these packages will be installed on our local machine only.

The command above will install webpack for us with its own CLI (command-line interface) . Once the installation command finishes, open the package.json file, and you should see something similar to what’s in Figure 1-1.
../images/494641_1_En_1_Chapter/494641_1_En_1_Fig1_HTML.jpg
Figure 1-1

The package json file after installing webpack and webpack-cli

Notice that webpack and webpack-cli were added with each one’s version under the devDependencies. Also notice that a new folder called node_modules was created, as well as another file called package-lock.json .

So, on one hand, in addition to the basic generated properties (that we have seen above) like the name of project, version, author, etc., package.json lists all the packages that your project directly depends on, meaning that whenever you install a new package from your terminal, that package name and version number will be added to package.json. The package-lock.json, on the other hand, is the full representation of the dependency tree of your project, including the indirect dependencies. For example, when you install webpack, other packages that it depends on will get installed as well. Package-lock.json will also contain the specific version of each module, so that if someone took your project later and ran “npm install” on their machine, they will get the exact same versions you installed. That way there will be no breakdown on the application (i.e., due to a package that got updated and has some break changes).

Now that we have our webpack installed, let’s try to open the node_modules folder and locate our webpack package. Figure 1-2 shows the exact location, which is under “node_modules/.bin”.
../images/494641_1_En_1_Chapter/494641_1_En_1_Fig2_HTML.jpg
Figure 1-2

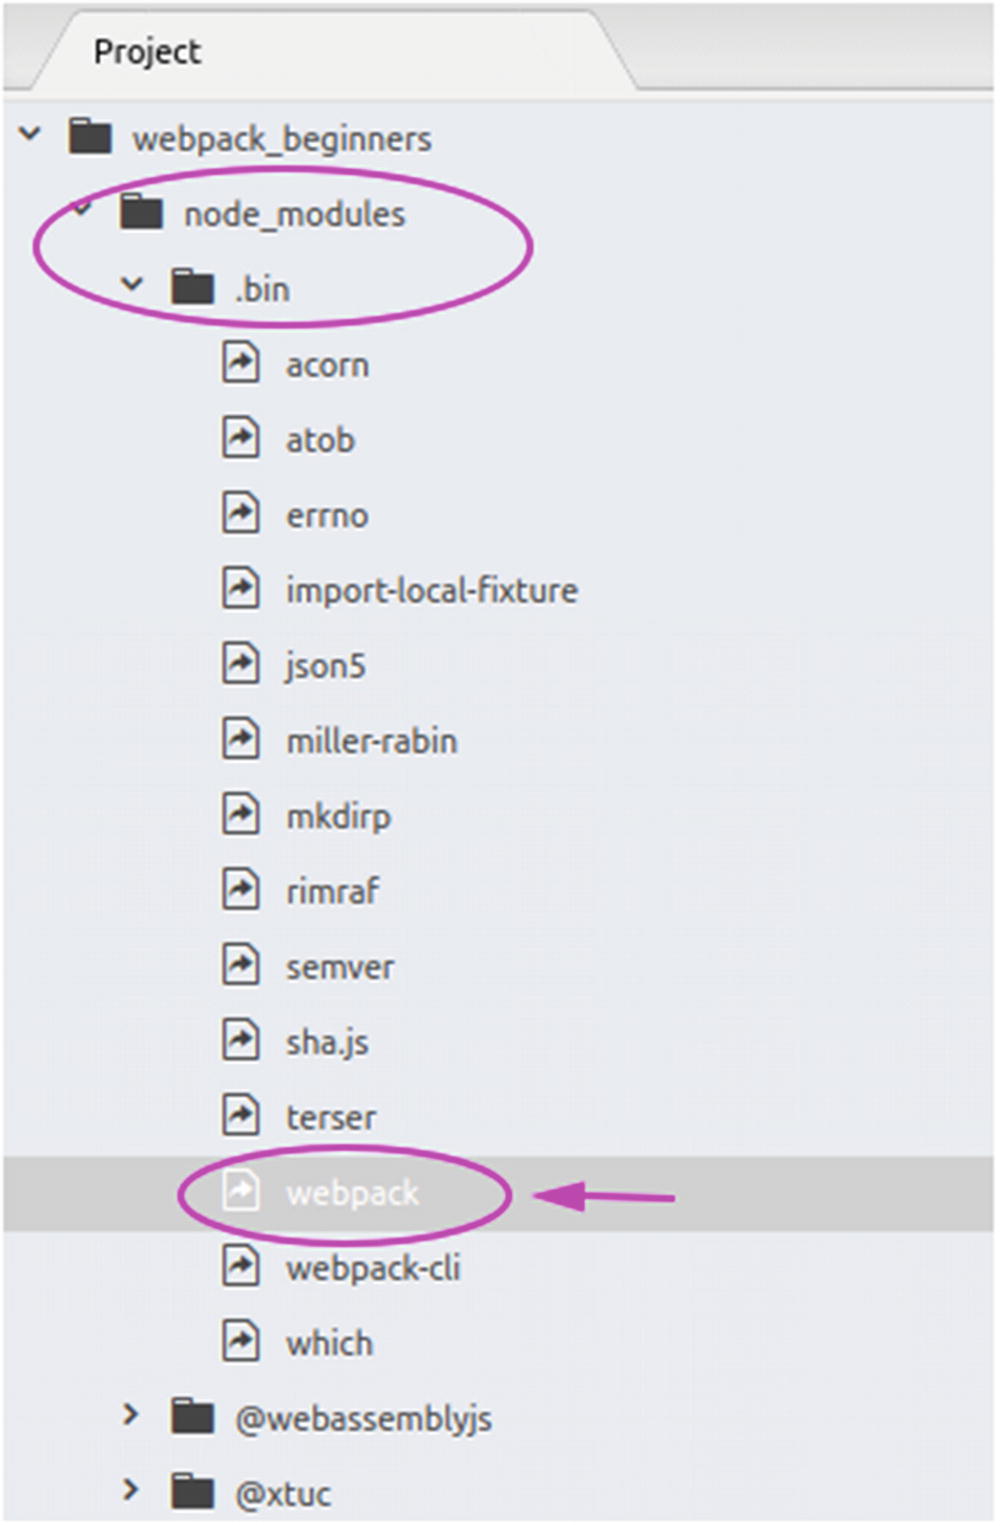
The file “node_modules/.bin/webpack” responsible for running webpack command

The file “webpack” above (under “node_modules/.bin”) is where the “Webpack command” comes from, so every time we need to compile our JavaScript, we'll call this file from our terminal. However, there is a better way to do this (which we will see in the next section) by making an alias command that will call that file for us instead of specifying the path to it. With that in mind, it’s time to write some basic code and start exploring the power of webpack.

Webpack 4 Zero Config

If you ever used webpack 3 before, you know that you have to create a configuration file called webpack.config.js in order to tell webpack where your files are, what to do with them, and where to output the result. Webpack 4, by default, is zero config now, here is the quote from webpack’s official website:

Configuration

Out of the box, webpack won't require you to use a configuration file. However, it will assume the entry point of your project is src/index and will output the result in dist/main.js minified and optimized for production.

Source: https://webpack.js.org/configuration/

What this means is that webpack expects you to create an entry file called index.js inside an src folder, and then it will create and output the result in dist/main.js for you, without the need to create the configuration file yourself or do anything else.

I will assume you are always inside the folder we created in the first place (the one we named as “webpack_beginners”). So now let’s create a folder called src and also a file index.js inside it. In Figure 1-3, you can see a screenshot of what my folder tree looks like.
../images/494641_1_En_1_Chapter/494641_1_En_1_Fig3_HTML.jpg
Figure 1-3

Our “webpack” folder tree after adding an “src” folder and index.js file

In your index.js, write a first hello world alert:
alert('Hello Webpack World !');
Save the file, and in your terminal/console, run:
$ node_modules/.bin/webpack

What we did here is to tell webpack to bundle our JS. If you wonder what a node_modules/.bin/webpack is, it’s just the path to our webpack command, which is basically a JavaScript file itself. There is a better way to call it for sure, and we will see this in a few moments.

After telling webpack to bundle our JavaScript, webpack will go and search for src/index.js and start from there, after executing the webpack command in your terminal. You will get an output similar to what is shown in Figure 1-4.
../images/494641_1_En_1_Chapter/494641_1_En_1_Fig4_HTML.jpg
Figure 1-4

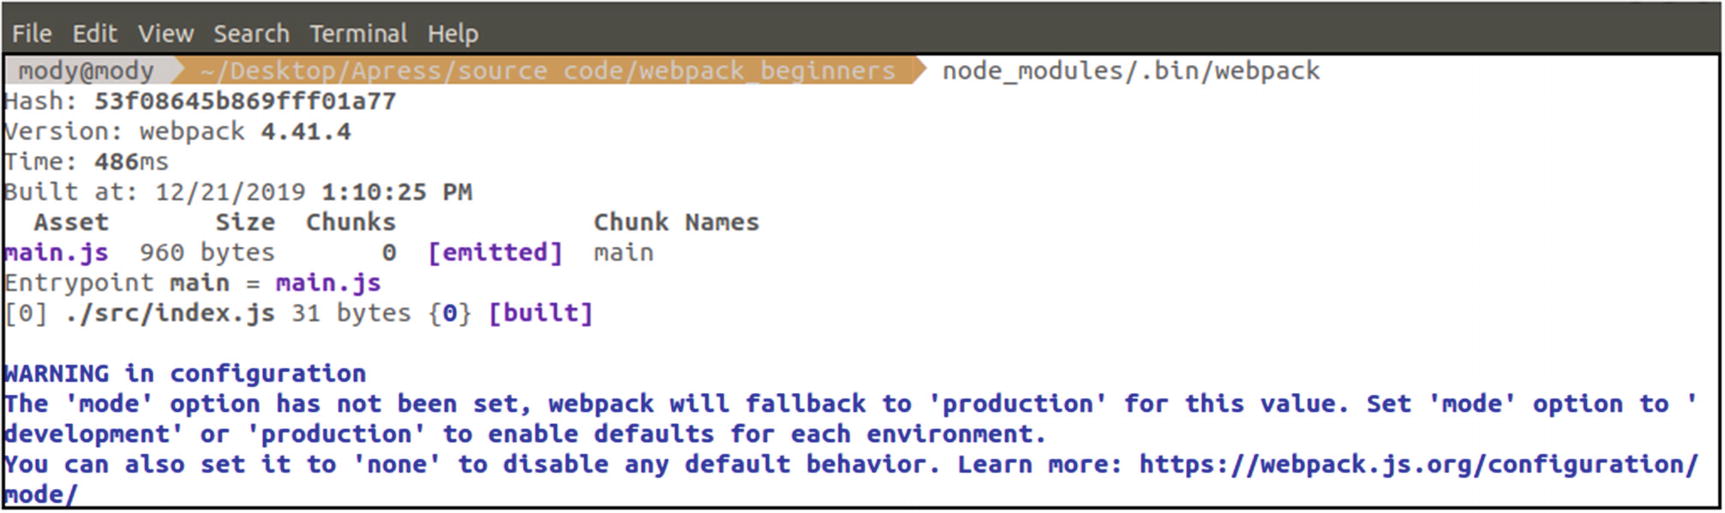
Terminal output of running “node_modules/.bin/webpack” command

As you can see from the output, webpack specifies what was built for us as a result (a file called main.js); also notice a warning at the bottom that says the following:
  • WARNING in configuration.

  • The ‘mode’ option has not been set, so webpack will fall back to ‘production’ for this value. Set 'mode' option to 'development' or ‘production’ to enable defaults for each environment.

  • You can also set it to 'none' to disable any default behavior. Learn more at https://webpack.js.org/configuration/mode/

This simply means that we haven’t told webpack what mode we are working on (development or production) yet, as result, the fallback is set automatically to production so it decides that our JavaScript should be minified. In order to get rid of that warning above, we will add a flag --mode=production when calling the webpack command like this:
node_modules/.bin/webpack --mode=production
After the compilation is done, let’s take a look into our text editor (or IDE depending on what you use) and see what we’ve got in Figure 1-5.
../images/494641_1_En_1_Chapter/494641_1_En_1_Fig5_HTML.jpg
Figure 1-5

main.js: the file generated by webpack under dist folder

Webpack created a dist/main.js file for us and compressed our code as well – but wait a minute! Don’t you see that our alert ('Hello Webpack World !') transformed to a strange code? I mean that there are more things added to it. Let’s wrap the code in our text editor and take a zoomed look, like it is shown in Figure 1-6.
../images/494641_1_En_1_Chapter/494641_1_En_1_Fig6_HTML.jpg
Figure 1-6

Our “Hello webpack world” wrapped in its own module

If you noticed, our alert is at the very bottom, but you can see that there is a bunch of code that precedes it, which you don’t have to worry about or understand because it’s specific to webpack and how it makes the modules requiring functional.

The next step is to create an HTML file and make a link to our dist/main.js to see if everything works fine.

Go ahead and create an index.html file at the root of our webpack_beginners folder, and fill it with the code you see in Listing 1-2.
<!DOCTYPE html>
<html lang="en" dir="ltr">
  <head>
    <meta charset="utf-8">
    <title></title>
  </head>
  <body>
  <script type="text/javascript" src="dist/main.js"></script>
  </body>
</html>
Listing 1-2

index.html: referencing our dist/main.js file

Save the file and open it in your browser. Yay – the code is working, and your first “Hello Webpack World” just pops out. See Figure 1-7.
../images/494641_1_En_1_Chapter/494641_1_En_1_Fig7_HTML.jpg
Figure 1-7

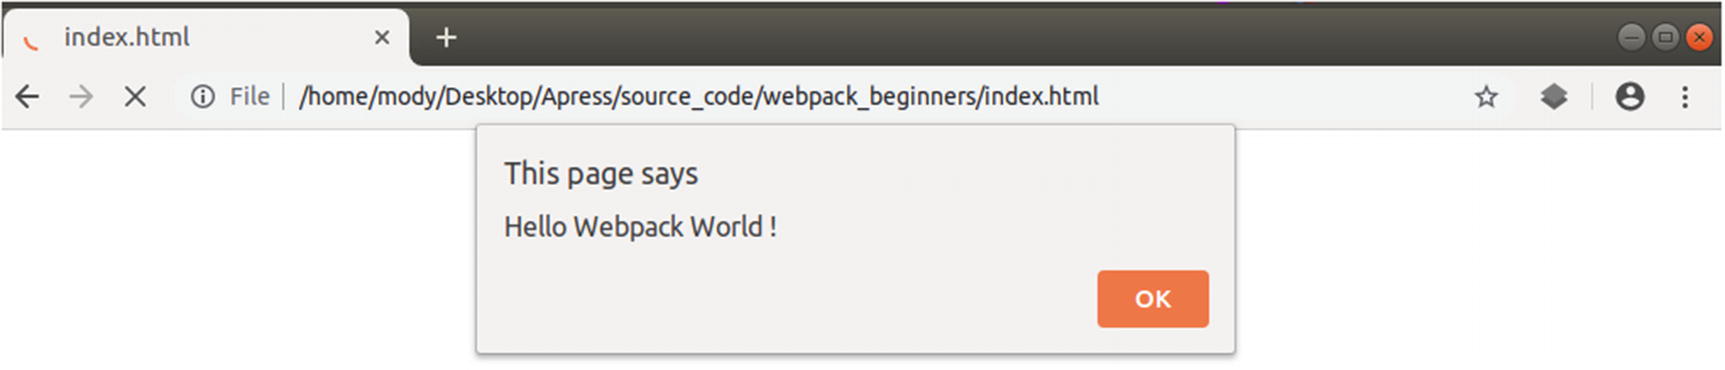
Your first “Hello world” alert

While this is a very basic example of our first working JavaScript file bundled by webpack, it’s time to congratulate yourself! You did it, and you should be proud as you just made your first step in the webpack world. But before we move to more serious things, let’s talk a little bit about the bundling command and how we can use it in a friendlier way to tell webpack to compile our JavaScript.

The Bundling Command

As I already mentioned, before we move on to the next chapter, I want to talk about the webpack command we used before “node_modules/.bin/webpack” as it might seem that it’s an ugly way to do it, and for sure there is a better way. What you can do is to open your package.json file and look under scripts, which appears like this:
"scripts": {
  "test": "echo "Error: no test specified" && exit 1"
}
Remove the line:
"test": "echo "Error: no test specified" && exit 1"
And replace it with this one:
"build": "webpack --mode=production"
So it will look like this:
"scripts": {
  "build": "webpack --mode=production"
}
In the “script” line that we added above to our package.json, there is no need to specify the exact path to webpack file like we did in our terminal because it will know where to find it. Now instead of calling:
$ node_modules/.bin/webpack
We will use our custom command:
$ npm run build
This will look for a webpack command in the node_modules folder and call it for us. Note that you can name your script what you like. It doesn’t necessarily have to be “build.” You can, for example, name it “dev” and then call it from your terminal as the following:
$ npm run dev

So whatever you name it, you should call it with its name, but you will find that most people generally use “build” or “dev” in the webpack world.

Summary

In this chapter, we introduced the necessary commands to install webpack on our machine. We have seen the package.json file and what it basically does. Then we created our first JavaScript file and bundled it with webpack. Also, we explored the entry file and how it should be named in order for webpack zero config to work correctly. Additionally, we have learned how to run webpack command from our terminal.

..................Content has been hidden....................

You can't read the all page of ebook, please click here login for view all page.
Reset
18.226.4.239