6. Close Encounters
Tips and Techniques for Safely Getting Closer to Your Subject
Moving in closer for those in-your-face, frame-filling images of wildlife is the goal of many a wildlife photographer. Who doesn’t want to capture every detail in the feathers or fur of a subject or that direct, soul-to-soul connection when wildlife looks into the lens? Each chapter in this book builds upon previous chapters with tips and information to help improve your wildlife photography. Getting closer to your subject will help you make more dynamic and interesting images, whether you achieve this through the use of longer lenses and attaching teleconverters or by actually moving physically closer to your subject. In this chapter, I’ll explore the many techniques I use to get closer to my subjects.
Poring Over the Picture
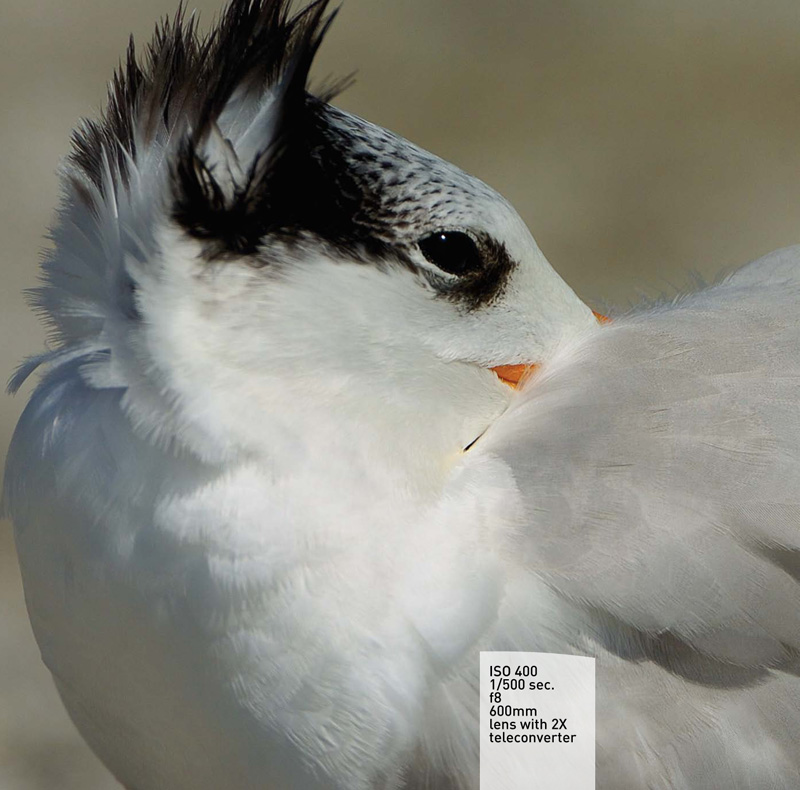
The ultimate compliment wildlife can give me is to continue about its daily life unconcerned by my presence. A quiet and slow approach allowed me to get within frame-filling range of a sow and her cub.


Poring Over the Picture
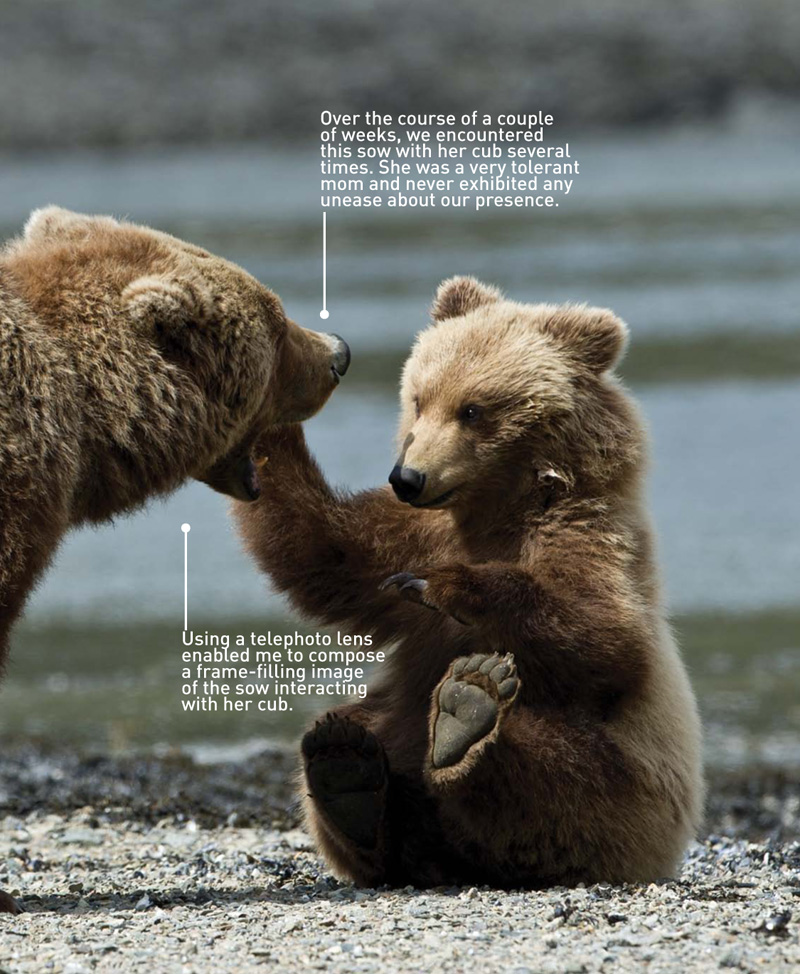
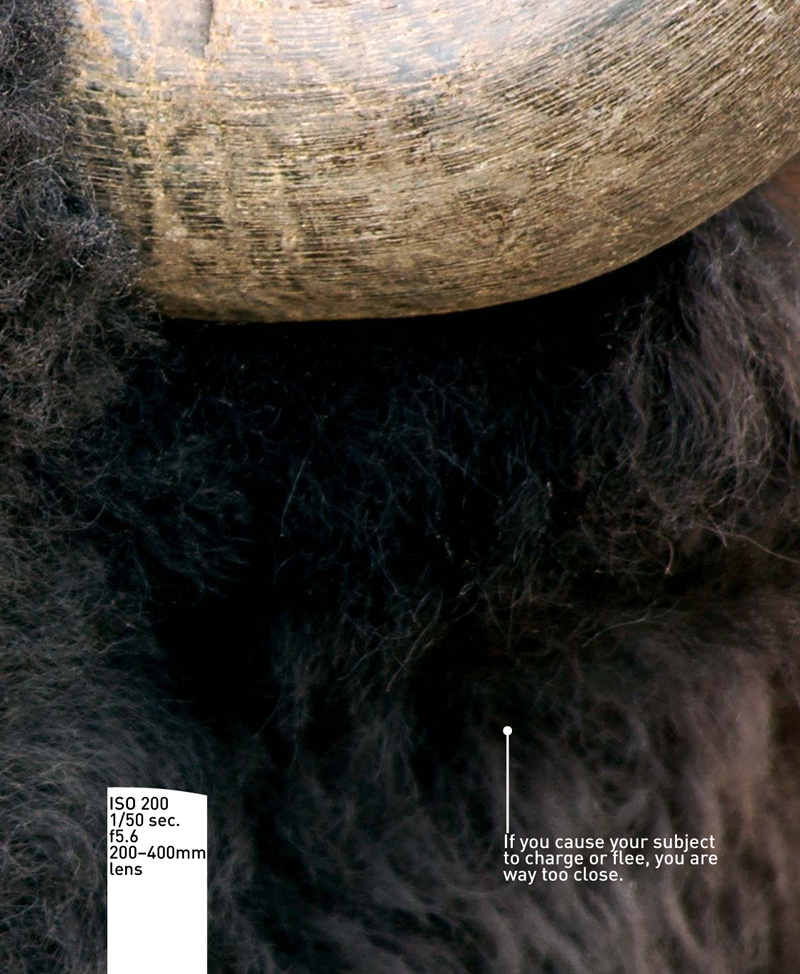
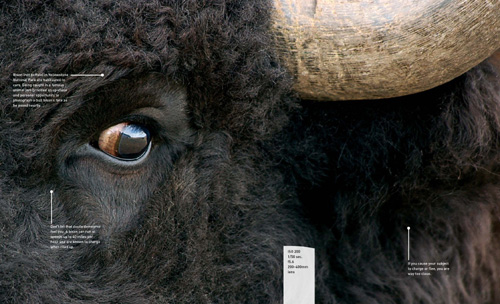
Getting closer to your subject might involve using more than one technique. To capture this in-your-face, eyeball-to-eyeball shot of a bison, I photographed from the safety of my car using a telephoto lens to increase the magnification.
Getting Closer Through Increased Magnification
One way to bring your subject closer is through the equipment you own (Chapter 1, “Equipment Essentials”). DX bodies with their small sensor increase the magnification by 1.5X/1.6X (crop factor). Adding a longer focal length lens to your system is another way to increase the subject size in your images. If you already have the long glass, try using a teleconverter to increase the focal length of your lens. You have several options to consider when trying to increase subject size in your frame.
DX Bodies
If you have a DX camera, you are already getting an increased magnification of 1.5X your lens’s actual focal length due to the cropped sensor (Figure 6.1). DX bodies are popular among those who want greater magnification but can’t afford the big glass. Because of the smaller sensor size, lenses are multiplied by 1.5X (Nikon) or 1.6X (Canon) to come up with the equivalent focal length on a DX body.
Figure 6.1 Using a DX body increased the magnification of my 200–400mm lens by 1.5X due to the size of the sensor.
Telephoto Lenses
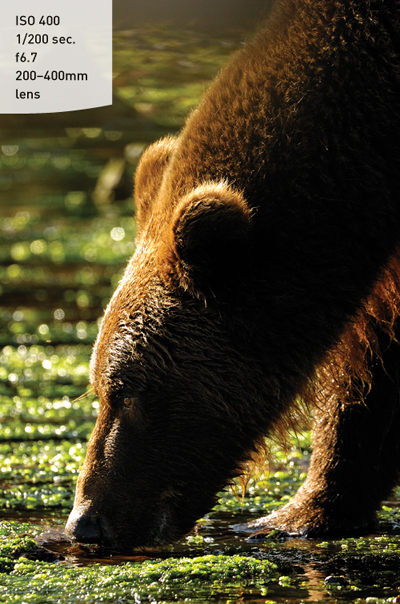
Depending on your current lens selection, it may be time to step up to the next longer telephoto lens to bring your subject closer. Once you get into the super telephoto range (400mm and up), your lens choices are narrowed down to fixed focal length—400mm, 500mm, 600mm, and so on—which have fairly wide apertures (2.8, f4). This increased magnification and wide aperture allow you to capture frame-filling, peak-of-action images (Figure 6.2). Do a little research to find out which telephoto lenses are available for your camera within your budget and just how much you would gain in focal length and speed if you were to upgrade.
Figure 6.2 A fast super telephoto allowed me to get frame-filling head shots of a bear shaking off water as it emerges from the river.

Teleconverters
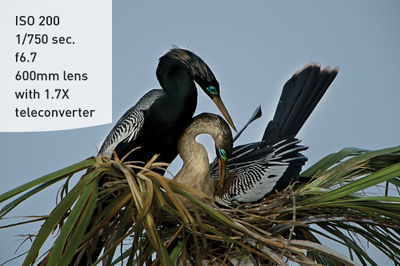
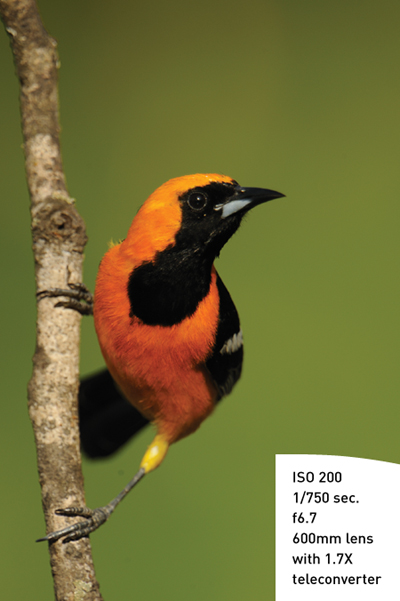
If you already have a super telephoto lens, think about adding a teleconverter to increase your focal length even more, giving you tighter cropping (Figure 6.3). Nikon and Canon offer teleconverters that are designed to match specific lenses for the best performance. The 1.4X teleconverter works well with lenses that have an f4 maximum aperture, and the 1.7X (Nikon) or 2X teleconverters are fully compatible with telephoto lenses of 2.8 or wider apertures.
Figure 6.3 Adding a 1.7X teleconverter to a 600mm f4 lens resulted in the equivalent of a 1000mm f6.7 lens.
Third-party lens companies also offer teleconverters that fit most lenses but are not as sharp as those designed by the camera manufacturer. Plus, when they are mounted to a lens with a maximum aperture of 5.6 or less, autofocus is lost, not to mention the loss of light that may cause your shutter speed to drop into the blurring range when you don’t want that effect. I tend to shy away from third-party teleconverters for these reasons.
Getting Closer Physically—Blinds
Whether a super telephoto lens is in your future or not, shooting from blinds is another way to get closer to your subject. Some subjects are more nervous than others; small birds, for example, take flight at the slightest sound or movement. Shooting from an established blind that is placed near an active wildlife crossing to using your car, a buggy, a boat, or even a canoe as a blind are all good techniques for close-ups. By camouflaging your human shape, you can often get closer to wildlife than if you approach it on foot.
Photographing from Established Blinds
The ranches I visit in South Texas provide established blinds near water holes that are frequented by many different species of birds during the hot spring months. Wildlife is attracted to water to drink and to bathe. By strategically placing a blind near a water hole (Figure 6.4), you can photograph from a much closer range than normal. The blind camouflages your shape and minimizes movement, preventing birds from flying away. Permanent blinds can be quite comfortable for the photographer (Figure 6.5) as well as have room to set up chairs, a table for your binoculars, a bird book and notebook, and so on.
Figure 6.4 Shooting from a blind minimizes human impact on wildlife.

Figure 6.5 Permanent blinds have room to set up a chair and some comforts for the long haul.

Once you have settled into the blind and the birds don’t sense movement or hear noise for a while, they will resume their activities and provide you with many photo opportunities (Figure 6.6).
Figure 6.6 A Hooded Oriole lands on a perch to scan the area for danger before dropping down to the water.
Note
Drink plenty of water when photographing in hot conditions. It’s easy to become dehydrated, which will shut down a photo shoot in a big hurry.
Your Car as a Blind
Your car can serve as a mobile blind at many refuges and parks. Wildlife becomes accustomed to vehicles, yet will flee at the first site of a person out of the car. Several window-type mounts (Figures 6.7 and 6.8) can aid you in shooting from the car window or rooftop. They include beanbags, an L.L. Rue window mount, and a Puffin Pad, to name a few.
Figure 6.7 The Puffin Pad is a high-density, rigid foam construction that is designed to hug the window. A Walt Anderson panning plate is attached to the lens foot.

Figure 6.8 Many window supports are available to choose from depending on whether you are shooting from a window or the roof of a safari vehicle.

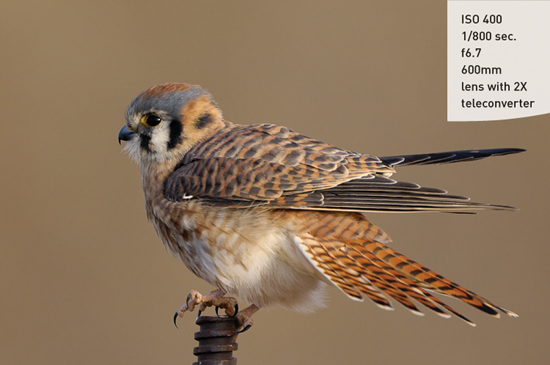
A normally shy American Kestral (Figure 6.9) posed for me as I photographed it from my car window using an L.L. Rue window mount at Bosque del Apache National Wildlife Refuge. You can exit your car and photograph from the side of the road at Bosque, but some of the birds are better photographed from the car because they feel less threatened.
Figure 6.9 An American Kestral perches on a metal bar to better see his prey.
Tundra Buggy
When visiting Churchill, Manitoba, to photograph polar bears, you travel around in a Tundra Buggy. Its giant wheels safely maneuver the trails out to Hudson Bay where the bears congregate each fall waiting for the bay to freeze up so they can continue their journey out to sea. Although there are places where you can photograph polar bears one-on-one, I prefer the safety of the Tundra Buggy. Not only can you photograph the bears with no fear for your safety, but they come right up to you, giving you point-blank, close-up photo opportunities.
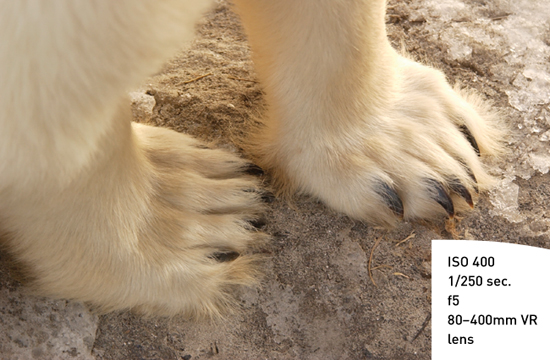
Close-up opportunities that would be impossible without the buggy include head shots (Figure 6.10) to paw details (Figure 6.11). A short zoom lens mounted on a second body lies on the seat next to me ready for close encounters such as these.
Figure 6.10 A curious polar bear checks out a photographer while a buggy full of tourists looks on.
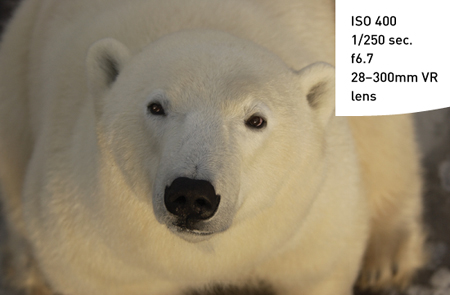
Figure 6.11 Look for the detail shots when your subject is up close, like the furry paws of a polar bear.
Approach By Boat
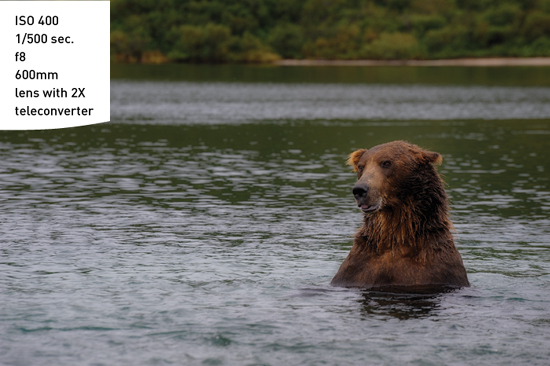
The only way to approach some subjects is by boat. Harbor seals (Figure 6.12), sea otters, and Black-legged Kittiwake, to name a few, all live either in the water or on offshore rocks. To photograph them, you must go to them by boat. Some wildlife allows you to approach it, and other wildlife flee when you get too close. The key is to approach to within photographable distance while not disturbing your subject. It’s a win-win situation when you come home with great shots without negatively impacting the wildlife by your presence. This increases the chance of future photographers having the same experience one day. A kayak (Figure 6.13) is even less threatening than a motor boat. With its low profile, it gives you eye-level (Figure 6.14) access to your subjects.
Figure 6.12 A Harbor seal allows a close approach by boat to make frame-filling portraits.
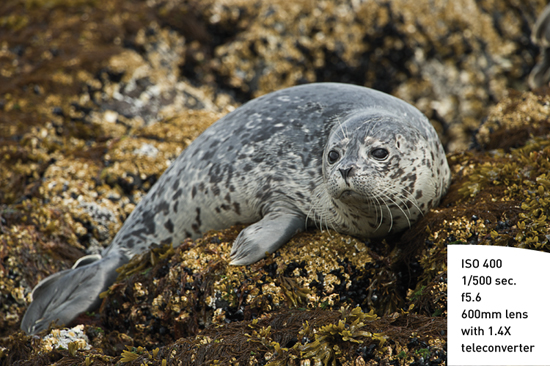
Figure 6.13 Approaching wildlife slowly and silently in a kayak is less threatening than in a motorized boat.
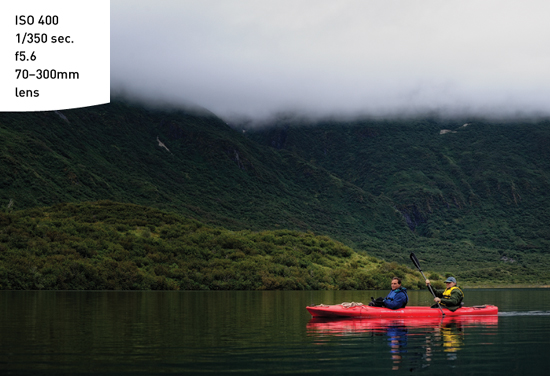
Figure 6.14 A fishing bear pauses to check us out before diving back under the water in search of fish carcasses.
Getting Closer Physically—Slowly and Carefully
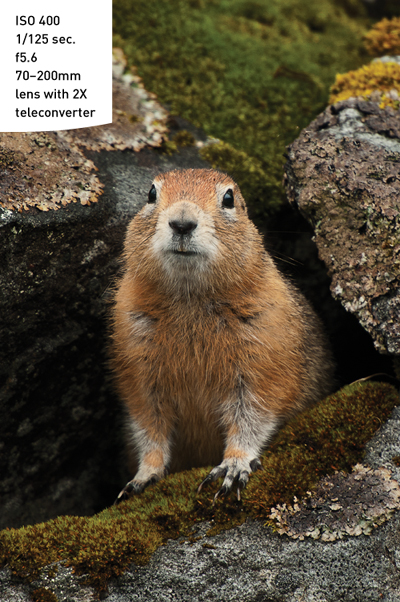
Truly, the greatest thrill is that of the hunt—to be in the wilds with your feet firmly planted on the earth seeking out your subjects using knowledge and wit. But as stated earlier, you must approach them in such a way that they know you are there yet continue on doing what they do with little concern. With knowledge of your subject and visiting locations where there is an abundance of wildlife that is habituated to humans, you, too, can approach some wildlife and get in the close-up zone (Figure 6.15).
Figure 6.15 A curious squirrel pauses to check me out while I click the shutter to capture its cute pose.
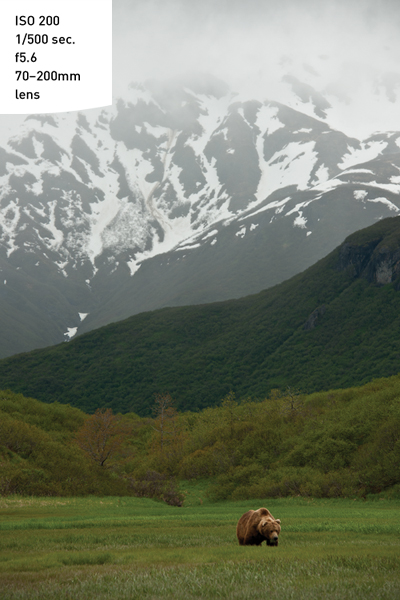
I always get set up well before I approach wildlife so I am ready to capture a spontaneous moment as it unfolds. Once I’ve found a subject, I get the insurance shots: I photograph it for the first time from a photographable distance and include the environment in the first few frames. When the background is as beautiful as that in Alaska (Figure 6.16), the insurance shots are great shots in their own right.
Figure 6.16 The insurance shots are the first series of clicks I make when approaching wildlife.
After giving the subject some time to get used to my presence and when it seems to be comfortable, I begin to move in closer. I call my approach red light, green light, moving when the subject is looking away and stopping when it looks in my direction. I continue in this manner until I am within the range I need to get frame-filling images of my subject (Figure 6.17).
Figure 6.17 A slow, steady approach brought me within frame-filling distance of a Bighorn ram.

When approaching many wildlife subjects, a zigzag approach is less threatening than a direct line. Keeping my head down and moving closer, I made an indirect approach towards a Pronghorn while it watched me. When I got within range, he actually walked towards me, filling my viewfinder even more (Figure 6.18).
Figure 6.18 A curious Pronghorn actually closed the distance between us as he came closer to check me out.

Watch for signals from your subject that you are getting too close: ears back, tail raised, rump flared, and so on. Know the signs of distress that your subjects exhibit so that you can avoid causing them to flee at your approach. Be patient, move slowly, and make as little noise as possible. You’ll find that you can get closer to your subject than you had originally thought.
Avoid noisy clothes. The sound of your legs scratching together as you walk is a sure signal to wildlife that you are there.
Be sure to understand and follow the rules, and you’ll be rewarded with great shots of the wildlife you encounter.
Chapter Assignments
Approaching wildlife to capture successful shots takes awareness, good judgment, and patience. With planning and practice, you’ll improve your close-up photography skills without affecting the behavior of your wildlife subjects. Be sure to complete the following assignments to increase your proficiency.
Get Closer with Your Longest Lens
Give it all you’ve got—focal length that is. With your longest lens mounted, go into your backyard or to a local park and try to approach the birds and squirrels. Chances are they will be somewhat habituated and will let you get fairly close. See just how much of the frame you can fill with your subject. Pay attention to your body, and avoid any sudden noises or movements.
Get Closer Using a Blind
Pitch your tent in your backyard to use it as a blind. Set it up near a feeder or other location where wildlife visits, and take a chair with you to sit it out for a few hours. When you first set up the tent, the wildlife will be a bit skittish, but soon they’ll get used to it. Then you can go inside, and with the door open, set up to photograph whatever comes near. Even though you are not as visible in the tent, remember that wildlife can still hear or smell you. You must be very quiet, even in a blind.
Get Closer with a Slow and Careful Approach
Try to sneak up on your pet. That’s right; you need to sneak up on your pet and get a shot before it awakens from the sound of the shutter. You’ll be surprised at how well your pet hears when you think it is dead to the world. OK, some of you might not have pets, or your pet might be able to sleep through an earthquake. If so, try this exercise on someone else’s pet. A friendly pet works best.
Share your results with the book’s Flickr group!
Join the group here: flickr.com/groups/wildlifephotographyfromsnapshotstogreatshots.