7. Creative Composition
Basic Guidelines for Improving Your Photographic Composition
Composition defined is the pleasing arrangement of the elements that make up a photograph within the frame. Many suggested guidelines are available to help you learn the art of good composition, from leading lines, patterns, and shapes to depth, subject placement, and camera angle. Perspective, background, even or odd numbers, and spatial relationships also play a part in effective composition. The art of directing your viewers’ eyes through the frame to your subject in the most direct path is a skill that takes time to master. Knowing the rules, and even more important, knowing when to break them will take your image making from snapshots to great shots.
Poring Over the Picture
Following the rule of thirds and placing the subject in one of the four power quadrants is an effective compositional technique.
Poring Over the Picture
Odd numbers of subjects generally make better compositions than even numbers. They break up the tendency to pair up even numbers and draw your viewer’s eye through the frame. Composition with even numbers has a more static feel to it.
Using Lines, Shapes, and Patterns
Lines, shapes, and patterns bring a sense of visual harmony to an image. Leading lines direct your viewer’s eye to the subject; shapes and patterns in nature can give your image balance.
Lines
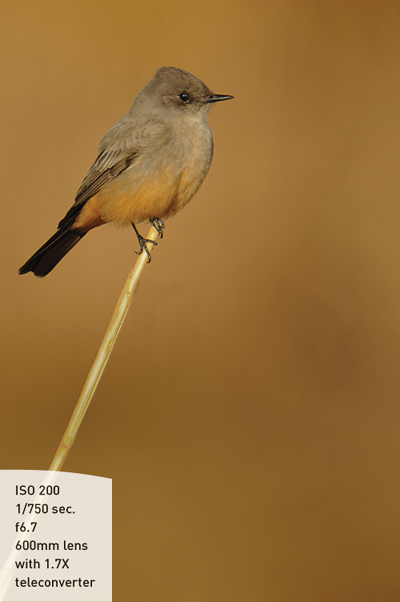
Lines provide the most direct route to your subject. Lines can be vertical or horizontal; they can be diagonal or even S-shaped. Vertical lines convey a sense of strength and power. The reeds in Figure 7.1 provide a bold background of vertical lines that complement the blues of the water. The reeds also tell viewers a bit about the habitat of the subject, which uses the protection of the reeds to nest and raise its young. Diagonal lines also evoke a feeling of power, plus they add a sense of motion in the direction they travel. Figure 7.2 illustrates in its simplest form how a simple grass stalk leans in a diagonal direction and leads to the Says Phoebe perched at the top. The simplicity of the composition keeps your eye on the intended subject.
Figure 7.1 A Common Moorhen stands out in contrast against the green reeds in the background.

Figure 7.2 A stalk of grass provides a perch for the bird as well as a diagonal line leading to it.
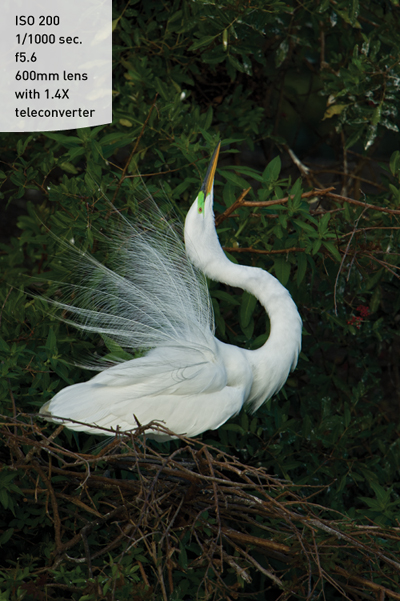
An S-curves provides a gentler meandering path to your subject. An S-curve conveys a feeling of peace and well-being, a slower pace, and grace. A Great Blue Heron stretching for nesting material is a thing of pure beauty as its body curves gracefully (Figure 7.3).
Figure 7.3 A Great Egret is captured in a graceful pose as it displays its finery to attract a mate.
Converging lines create a vanishing-point effect, adding visual depth to your image. While photographing in Bosque del Apache, I discovered a lone sandhill crane walking between the rows of corn (Figure 7.4). The rows lead to the crane, framing it between them and then recede off into the distance. The converging lines, shallow depth of field, and color contrast collaborate to make the crane stand out among the corn.
Figure 7.4 A sandhill crane poses between rows of corn. The converging lines lead to the crane and then recede into the distance, giving the image visual depth.

Shapes
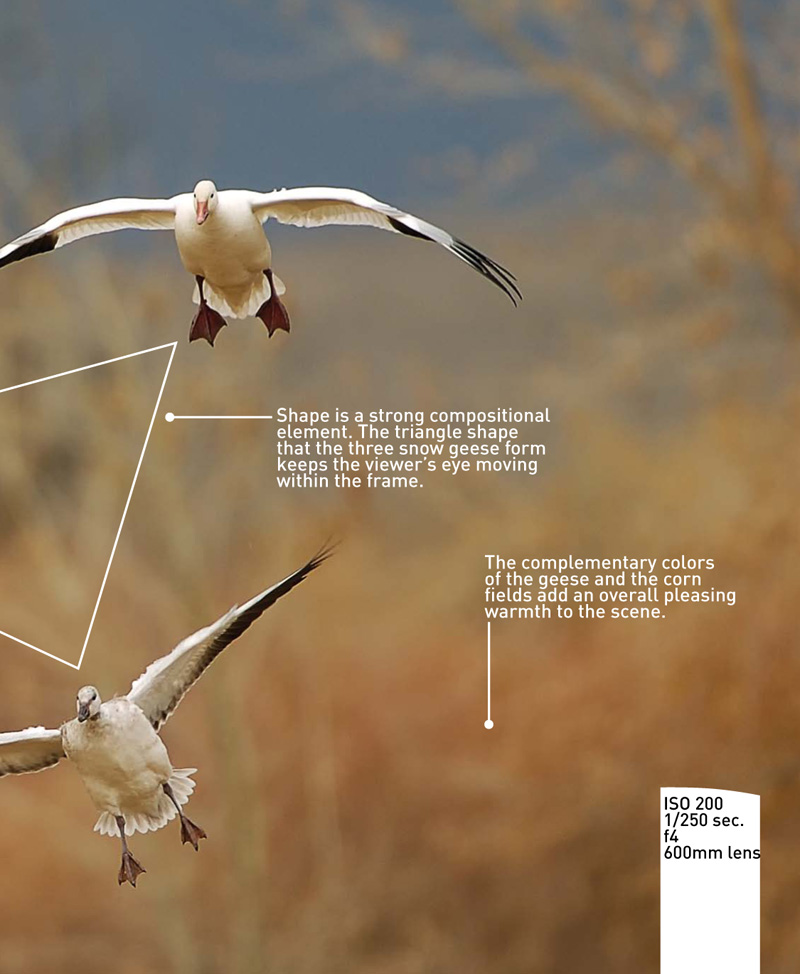
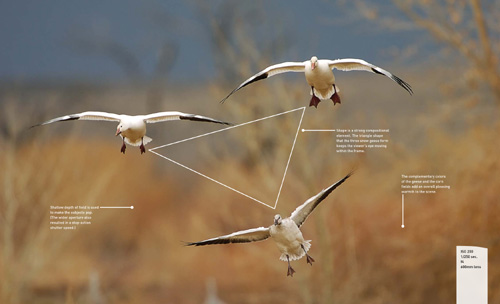
Shapes make great compositional elements, and you’ll find many shapes in nature. A sleeping bear takes on a triangular shape, which leads your eyes from his face, along the ground to view his paws, up his legs to his elevated rump, and down the slope of his back to his face once again in a closed shape that keeps you and your viewers engaged with the subject (Figure 7.5).
Figure 7.5 A polar bear pauses to take a nap and naturally falls into an engaging pose.

Patterns
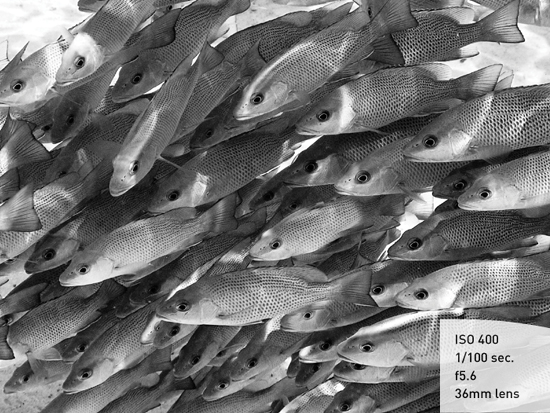
Repeating patterns in nature give an image a graphic feel. When photographing groups, look for patterns when all the subjects turn or look in the same direction. A school of fish swimming in a tight formation creates an interesting graphic of shapes and lines, resulting in a repeating pattern (Figure 7.6). The tight formation of the fish and the shadows and light all work toward the feeling of a huge school of fish as far as the eye can see.
Figure 7.6 A school of fish swims close together to create a pattern of bullet shapes heading from right to left. (An underwater housing was used in the making of this image.)
Framing Your Subject
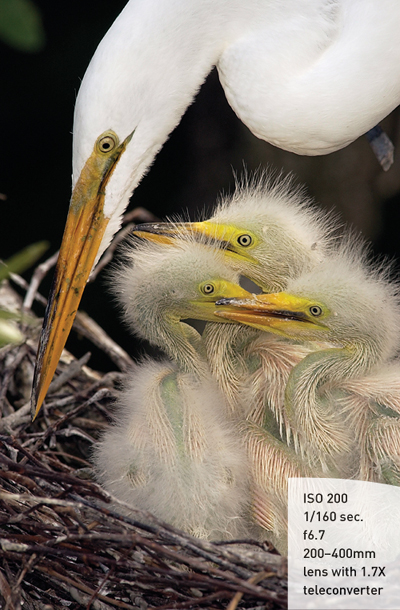
Framing is a common practice in landscape photography that fills in empty space and draws your viewers towards the subject, and it can be used in wildlife photography to draw your attention to the subject in the same manner. Framing can incorporate foliage or it can be part of your subject. In Figure 7.7, an adult Great Egret protectively hovers over her young chicks, framing them with her neck. It’s a natural path along the gentle curve of her neck to her head where the direction of her gaze takes your eyes to the chicks.
Figure 7.7 A telephoto lens with a wide aperture and the Great Egret framing her chicks draw your eye to the chicks and keeps it there.
Creating Perspective
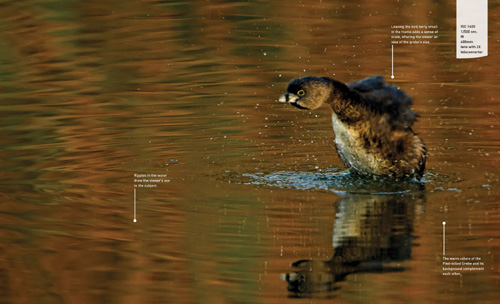
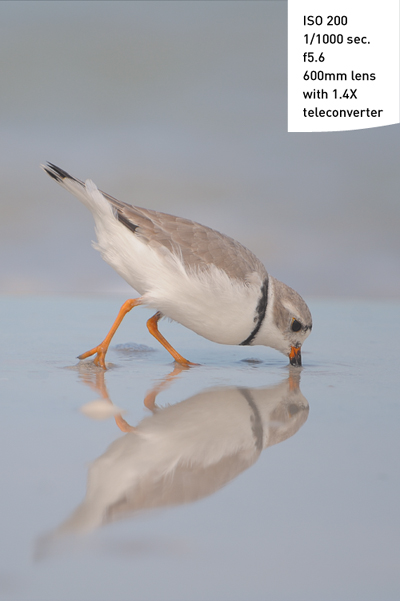
Your perspective or camera angle plays a big role in how you present your subject to your viewers. Photographing a Snowy Plover at eye level (Figure 7.8) means lying on your stomach in the sand and surf to see your subject and its world from its point of view.
Figure 7.8 Getting down low so that I was at eye level with the Snowy Plover enhanced its reflection in the water.
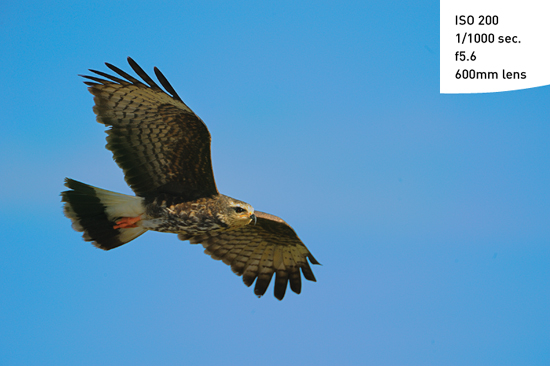
On the other hand, capturing a bird in flight requires tilting your camera and your head towards the skies to capture the graceful soaring of a Snail Kite in flight (Figure 7.9) as it hunts for snails. Turning your camera skyward provides a different perspective that works well with birds in flight but can result in exposure issues. A bird’s underwings can become underexposed and dark against a bright sky. Dialing in plus exposure compensation against a bright sky will brighten the image so you can see the feather detail in the bird’s wings.
Figure 7.9 Aiming upward at a Snail Kite provides a sense of height as it flies by.
Tip
Don’t just shoot from your standing height. Get low, get high, look up, look down, and move around to find the best perspective for your subject and what you want your images to convey.
Concealing to Draw Attention
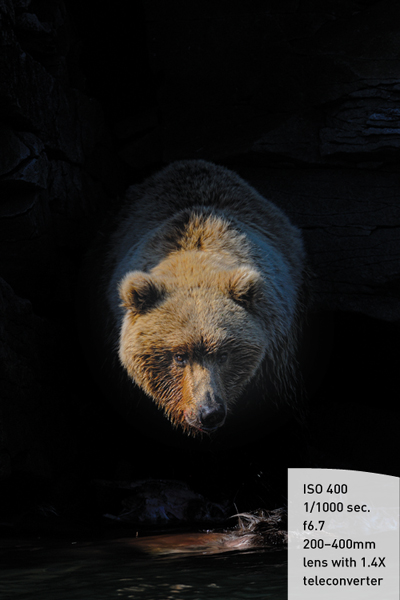
It is often said that what you conceal is just as important as what you reveal within an image. Using shadow and light is a good way to reveal what you want your viewers to see and conceal the rest within the shadows. The coastal brown bear in Figure 7.10 was feeding on a moose carcass that had washed up. He was in the recess of a rock, and bright light was hitting the rock face—a real exposure nightmare. I dialed in minus exposure compensation to darken the rock face, throwing all but the bear’s face into shadow and hiding the gore of the dead moose. The image draws viewers’ attention to the bear’s face. Concealing most of the bear adds a certain drama and mystery to the image.
Figure 7.10 Underexposing the image hides all but the bear’s face as it emerges from a rocky recess.
Frame Filling vs. Environmental Shots
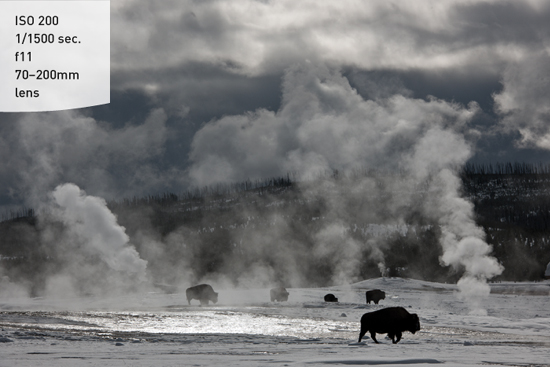
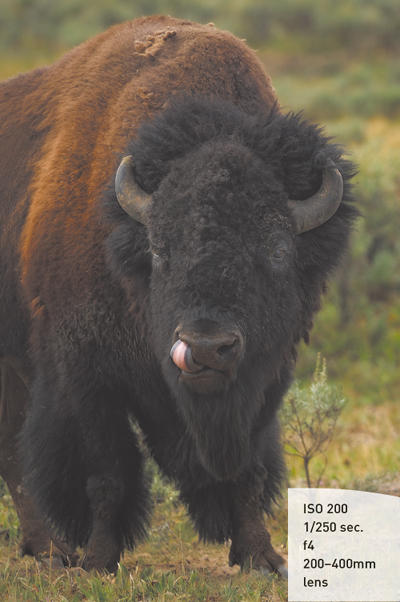
The lens you select determines your photographic style (Chapter 2, “Camera Settings and Shooting Techniques”). Do you select a mid-range wide to telephoto lens when photographing wildlife to include the environment, or do you pull out your biggest gun to photograph a frame-filling face? Each image tells its own story. It’s up to you to decide which story is most interesting to you and your viewers. An environmental portrait of a herd of bison milling around the thermals of Old Faithful (Figure 7.11) using a mid-range zoom lens to include the background and a smaller aperture for increased depth of field provides your viewers with more information about the location where the image was made and your subjects’ habitat. Environmental portraits are storytelling compositions.
Figure 7.11 Bison use the heat of the thermals for warmth and to find exposed grasses to eat.
For a more intimate composition, try filling the frame with your subject. You can create frame-filling images by moving in closer to your subject (Chapter 6, “Close Encounters”) or by increasing the image size with a telephoto lens (Figure 7.12). Background distractions are minimized, keeping all of your attention on the subject.
Figure 7.12 Frame-filling compositions eliminate distracting elements from the background.
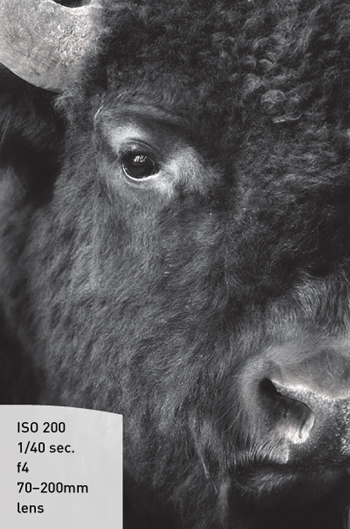
Moving in tighter on your subject for an in-your-face shot provides greater detail and more information about the subject. The proximity of your subject connects with you on a more intense level in an eye-to-eye composition (Figure 7.13).
Figure 7.13 The diagonal line from the bison’s nose to its eye draws the viewer through the frame to lock onto the intense stare.
Incorporating Background
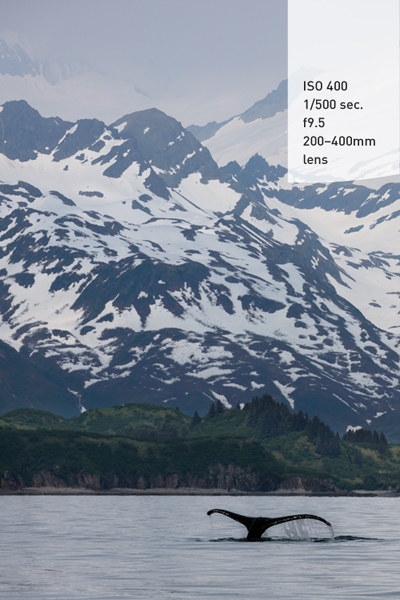
Including more background in an image adds a sense of place to the story. With the subject smaller in the frame and a closed-down aperture for increased depth of field, the background appears sharper and more detailed. A whale fluke by itself is a dramatic image, but by zooming back to include more of the environment, you give your viewers clues to the location, which is part of the storytelling element of image making (Figure 7.14).
Figure 7.14 A whale goes into a dive with snow-covered mountains as a backdrop.
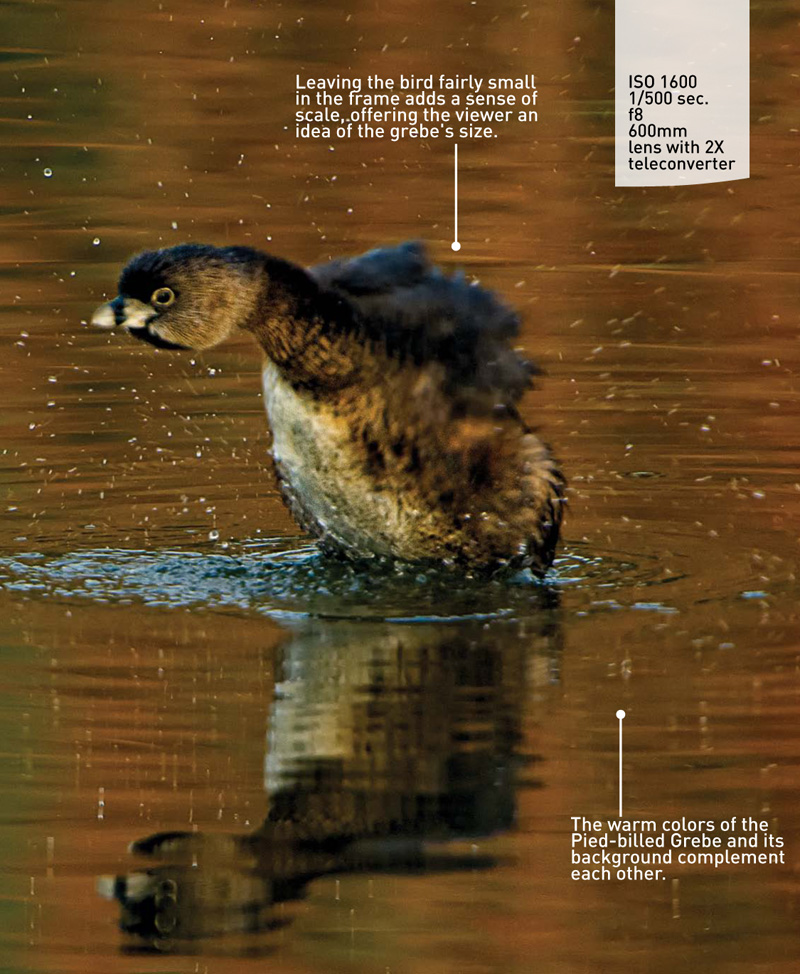
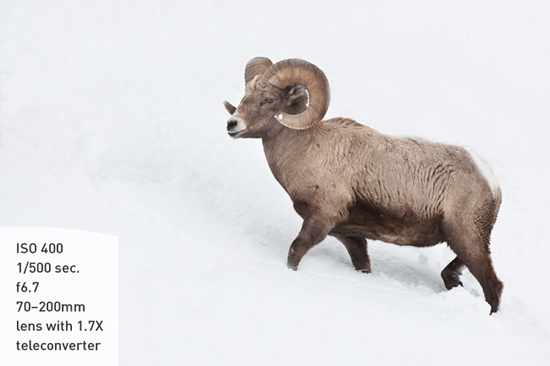
A wider aperture and tighter composition diminishes the background, throwing everything out of focus and providing a diffused color palette that complements your subject rather than competing with it for your viewers’ attention (Figure 7.15).
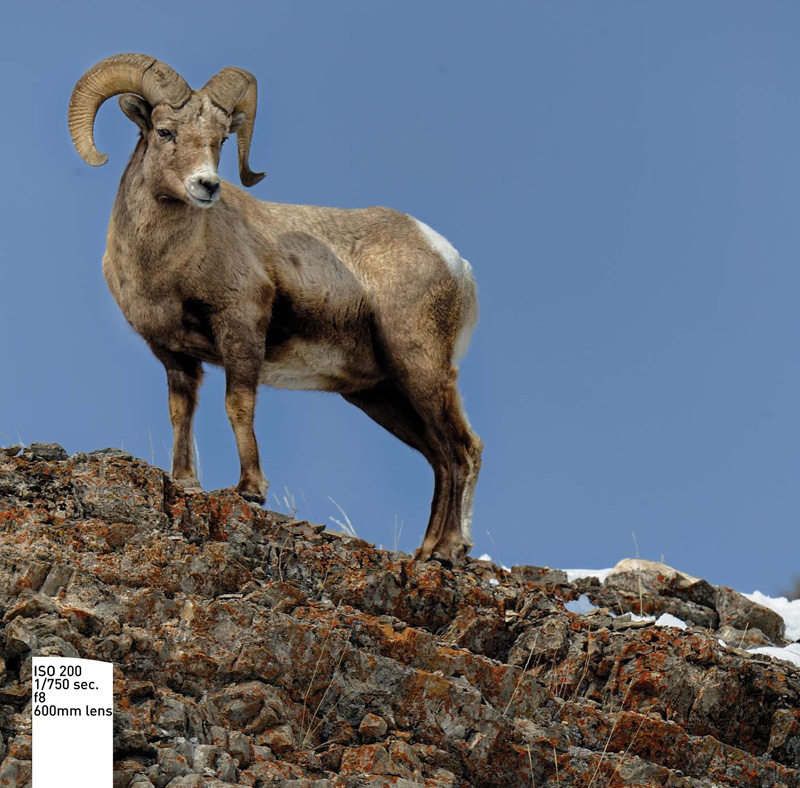
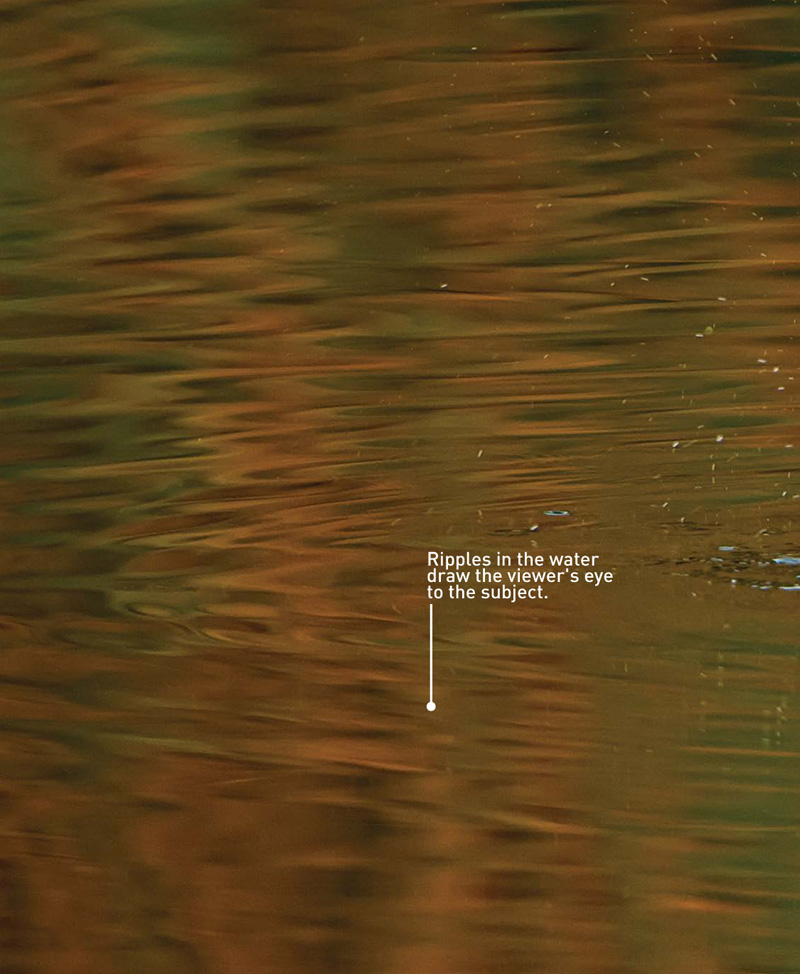
Figure 7.15 A Bighorn sheep stands out against the snowy background.
Applying the Rule of Thirds
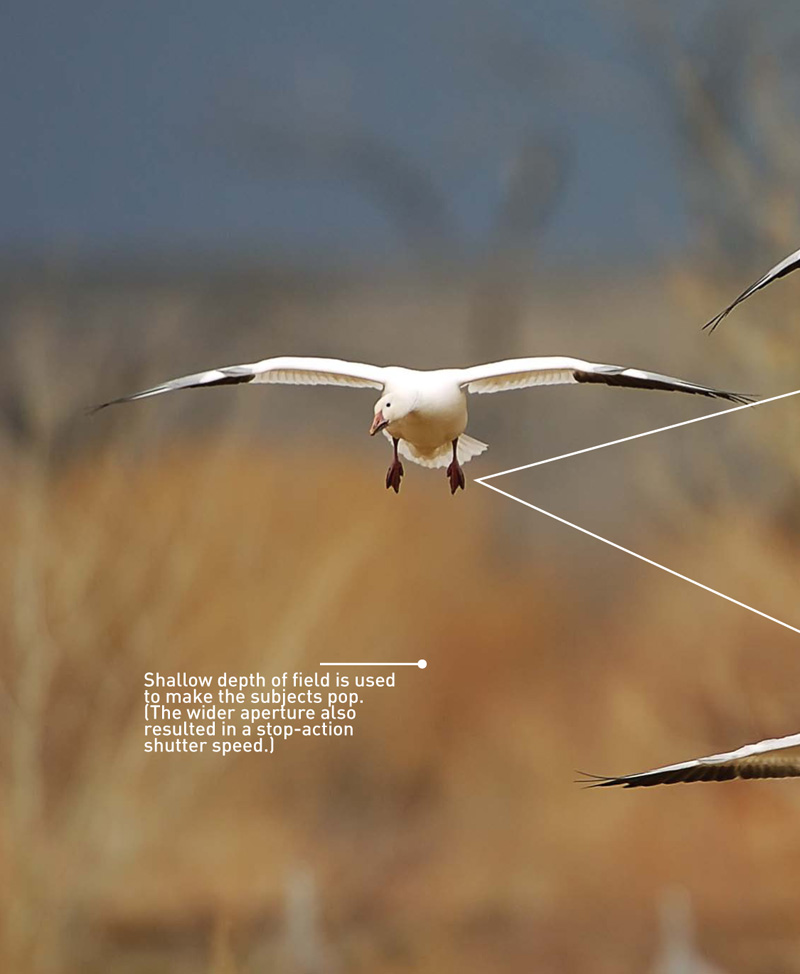
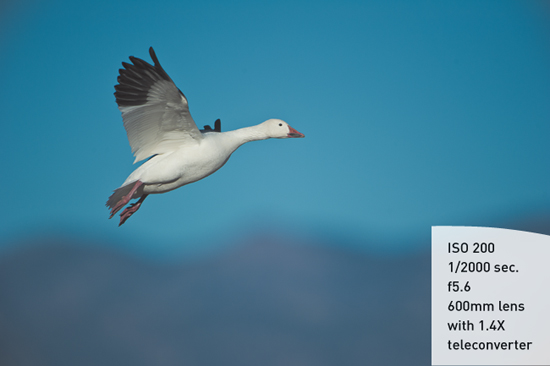
The rule of thirds is the basis for strong compositions in photography. If you divide an image into nine equal segments, the four intersecting points are called power points. When an image is placed within one of the intersections, it becomes more balanced and pleasing to the eye. Placing the snow goose (Figure 7.16) in the upper-left power point as it flies into the frame not only gives a sense of balance, but it also lends height to the goose, emphasizing flight.
Figure 7.16 The distant mountains add to the sense of height that the placement of the snow goose provides.
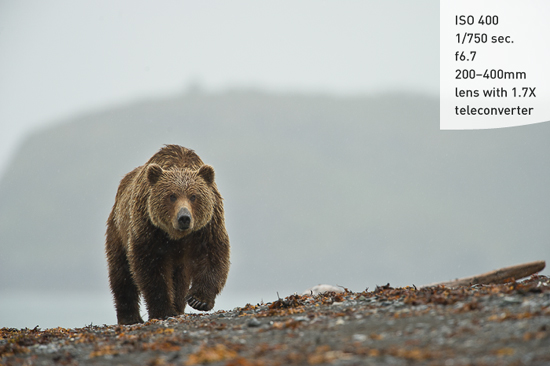
On the other hand, getting low and placing an approaching grizzly bear in the lower-left power point enhances the impression of power and strength (Figure 7.17).
Figure 7.17 The blurred background adds to the feeling of visual depth.
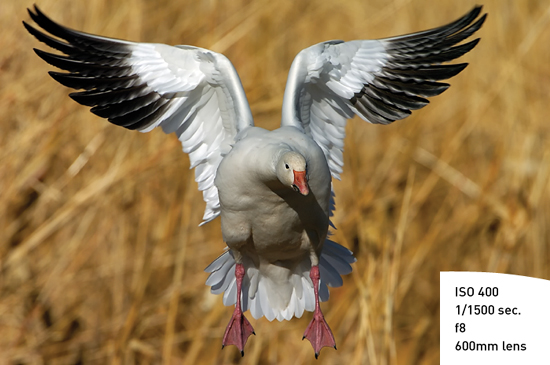
Rules are meant to be broken. But to successfully break them, you must understand them in the first place. Knowing the rule of thirds and the placement of your subject in one of the power points gives your images a feeling of symmetry, equilibrium, and rhythm. Placing your subject in the center of the frame can be one of the most powerful compositions if the subject fills the frame and makes a bold statement, as Figure 7.18 illustrates.
Figure 7.18 Breaking the rules and centering your subject can make a dramatic composition.
Chapter Assignments
Applying what you learned about composition in this chapter, take some time to work through the assignments to get a better understanding and feel for what makes a good composition.
Move in Tighter
Beginning photographers have a tendency to compose more loosely and include more than is necessary in the frame. Using the techniques you learned in Chapter 6, compose your image, take two or three steps closer to your subject (if you can do so safely), and then recompose your image. Take a before and after shot to compare the difference a few steps closer can make in the impact of your images.
Look for Lines, Shapes, and Patterns in Your Images
Using leading lines in nature draws your viewers’ eyes to your subject. Shapes and patterns add a graphic element to an image. Look through your existing images. Have you used leading lines to create a path to your subject? Are there shapes and patterns that make up pleasing groupings or graphics in your images? Then go out and consciously look for these elements the next time you are photographing. Nature is full of lines, shapes, and patterns that add interest and create more compelling images.
Rule of Thirds
Using the rule of thirds, make four photographs placing your subject in each of the power intersections, and then compose the image so the subject is dead center. Do this several times with different subjects, and then compare the images to see how moving the subject in each frame leads your eye to your subject.
Share your results with the book’s Flickr group!
Join the group here: flickr.com/groups/wildlifephotographyfromsnapshotstogreatshots.