
With some experience and practice with getting games written in Silverlight, there will be various features that you might want to add to provide additional functionality and polish. We will examine some of these features in this chapter.
The areas covered will include setting up a game navigation structure, music and sound effects, creating high score tables, saving and retrieving game settings, and handling tombstoning in Silverlight. Some of these features are very similar to features that we have already explored in the context of XNA, so there shouldn't be too much here that is new or unfamiliar.
In a finished game you will almost certainly need to have multiple Silverlight pages in your project, allowing the user to move between them in an appropriate manner. Pages will likely be required for a title page, the game itself, an "about" screen, high scores, and so on.
Silverlight allows movement between different pages of content in a much more straightforward manner than XNA, as each page is entirely self-contained and can coexist with other pages that the application needs to use.
Actually structuring the game in a way that acts intuitively, allows flexible navigation from any page to any other page, and also meets Microsoft's requirements for navigation is a little trickier, however.
There are several issues that need to be addressed. First is the navigation history. When a Silverlight application launches, it displays its initial page (MainPage by default) that we can use to display a menu with options such as to start a new game, show the settings, and so on. The user can navigate from here to another page, say the game play page, and the initial MainPage will be added to the navigation history. If the user presses the Back button, they return to the MainPage and can access the menu again.
All good so far, but what happens if the game wants to take the player from the game play page into a high score page? It can navigate to the high score page easily enough, but then when users click the Back button they will return not to the MainPage menu as they might expect, but instead to the finished game play page. We somehow need to be able to manipulate the page history so that we can always get to the menu when the Back button is pressed, but can still navigate from any page to any other page.
This is compounded by one of Microsoft's Marketplace publication requirements. It states that:
Pressing Back from the game's first screen must exit the game.
Pressing Back while playing the game must display an in-game menu, and pressing Back while this is displayed must exit the game.
Outside of game play (such as when looking at settings or high scores), pressing Back must return to the previous page or menu.
The final complication is that there is no way to cleanly exit a Silverlight application on demand. In XNA we have access to the Game.Exit method, which immediately closes the game, but there is no equivalent in Silverlight. The only methods of closing a Silverlight app are for the user to navigate back when viewing the first page in the navigation history, or for the app to throw an unhandled exception. Personally I can't stomach the latter of the two options, so we need to find a way to get the first option to work.
The basic flow of navigation that we will aim for will be along the lines of that shown in Figure 14-1.

Note
The game need not be limited to the pages defined here, but for the purpose of this book we will use this as a reasonable model of how the game pages can fit together.
With the exception of the Play Game page, all the navigation flows already fit within both the technical limitations of the Silverlight application, and Microsoft's publication requirements. By always forcing the player back to the main menu when they want to reach another part of the game (the Settings page, for example), the navigation model is kept very simple, while also ensuring that a menu is displayed when Back is pressed during a game. From any of the pages, pressing Back twice will exit the game.
It is important, however, that the game in progress is not lost when navigating back while playing. The users have no choice but to access the Main Menu page to gain access to other pages, and will not be very pleased if their game is discarded when they navigate in this way.
To avoid this problem, we make a note of the fact that a game is in progress when navigating back from the Play Game page, which allows the Main Menu page to add an additional option to resume the current game. This is one of the key features of this relatively simple navigation model.
There is one final problem within the defined model. When the Play Game page reaches a state where the game has ended, it shows a flow directly to the Show Scores page. It's very nice to take users to the high score page after a game finishes, both to see their own score added to the table if it was good enough, and to see what other scores are there for them to beat. The problem with this is that the navigation stack would end up including the Play Game page, so pressing Back from the Show Scores page would navigate back there rather than to the menu. How can we get the Back button to go back to the menu in this situation?
The answer is to use redirection.
In fact, the only way to get from the Play Game page to the Show Scores page while having just the Main Menu in the navigation history is to not actually navigate directly from Play Game to Show Scores at all. Instead, we add a little extra code into the Main Menu page, which allows one page to redirect the navigation into another page via the menu itself.
When the Play Game page wants to transfer the player into the Show Scores page, instead of navigating there itself, it instead sets a property on the Main Menu page, indicating where it wants to go and then navigates back instead. Silverlight therefore ends back on the Main Menu page, but detecting the request to move elsewhere, the menu page immediately navigates on to the new destination, opening the Show Scores page. The result is that the only page in the navigation history is still the Main Menu page.
Let's clarify that by viewing it as a diagram. Figure 14-2 shows the processes that the game undergoes and the navigation stack at each stage. The dark-shaded item on the stack is the page that is on display at each stage, and the writing between the stages shows the point at which one stage moves to the next.

As this diagram clarifies, the navigation stack will always have the Main Menu page as its first item and will only ever have one other page after the menu in the stack. When one page wants to navigate to another, it does so by navigating back to the menu, ensuring that the stack never gets any deeper than this.
So that's the theory; now it's time to look at how we implement this in a game project. All the code for this section can be found in the GameNavigation example project that accompanies this chapter. It is set up to use exactly the same pages and navigation, as described in Figure 14-1.
Nearly all the required code is present in MainPage, which is the page that implements our main menu. The first thing we need to add is an enumeration containing the details of all the pages within the project. Each enumeration item must exactly match the name of the page it represents. Listing 14-1 shows the enumeration defined for the example project.
Example 14.1. The GamePages enumeration defining each of the pages available to the game
internal enum GamePages
    {
        MainPage = 0,
        GamePage,
        SettingsPage,
        HighScorePage,
        AboutPage,
    }
Note
The enumeration as configured here will launch the game at the MainPage page. If you wanted to begin with a different page, perhaps a title page, this can be achieved by placing it at the start of the enumeration with the value 0; whichever enumeration item gets the value 0 will be initially displayed when the game launches.
Next a static property called TargetGamePage is created with which a non-menu page can request navigation to a different page (for example, the game page requesting navigation to the high score page). Being static, other pages can set this property without needing access to an instance of the MainPage class. We will look at an example of how a page can use this shortly. A corresponding property to allow navigation parameters, TargetGamePageParameters, is provided, too. The property declarations are shown in Listing 14-2.
Example 14.2. Declaring the static TargetGamePage and TargetGamePageParameters properties
/// <summary>
    /// The page that should next be opened when the menu page is navigated to
    /// </summary>
    static internal GamePages TargetGamePage { get; set; }
    static internal string TargetGamePageParameters { get; set; }
Now we need a function to actually perform the navigation from the menu page. This is the NavigateToPage function, and it exists in two versions: one that requires just a GamePages enumeration value to indicate where to navigate to, and another that also accepts a parameter string to append to the navigation URI. Listing 14-3 contains the code for both versions of the function.
Example 14.3. The two overloaded versions of the NavigateToPage function
/// <summary>
    /// Navigate to the specified page
    /// </summary>
    private void NavigateToPage(GamePages toPage)
    {
        NavigateToPage(toPage, null);
    }
    /// <summary>
    /// Navigate to the specified page, passing the provided parameters
    /// </summary>
    private void NavigateToPage(GamePages toPage, string parameters)
    {
string uriString;
// Are we navigating to the menu page?
if (toPage == GamePages.MainPage)
{
// We are already on the menu page, no navigation required
// Show the menu so that it is displayed within the page
this.Visibility = System.Windows.Visibility.Visible;
return;
}
// Build the URI for navigation
uriString = "/" + toPage.ToString() + ".xaml";
// Include parameters if there are any
if (!string.IsNullOrEmpty(parameters))
{
uriString += "?" + parameters;
}
// Navigate to the specified page
NavigationService.Navigate(new Uri(uriString, UriKind.Relative));
// Hide the page content so that it doesn't briefly appear when navigating
// directly between other pages
this.Visibility = System.Windows.Visibility.Collapsed;
}Let's take a quick look at some of the details of this piece of code. The function will only ever be called when the MainPage itself is on top of the navigation stack, so the first thing it does is check to see whether MainPage is the navigation target. If so, no further navigation is required as we are already displaying the required page. The code can therefore return without doing anything more—though before doing so, it makes the page visible; we will discuss the reason for this in a moment.
For any other page, a URI is constructed containing the name of the page, taking from the enumeration value name with a leading slash and the trailing .xaml suffix. If any parameters were provided, they are added to the URI, too. The function then navigates to the requested page.
After navigating the menu page content is made invisible; we already saw it being made visible again when navigating to the menu page itself. Why is this necessary?
The reason is that when one page (such as the GamePage) navigates directly to another page (such as the HighScorePage) via the menu page, the menu page is very briefly displayed on the screen. This results in the menu appearing unexpectedly for a moment, which looks very odd. We stop it from being displayed by simply making the content of the menu page invisible when navigating away from MainPage. When the game navigates back to actually display MainPage, the page content is made visible once again.
The final piece of code required to wire this all together is present in the MainPage class' OnNavigatedTo override. This will be called every time the game navigates to MainPage, including when the game is first launched. All the function needs to do is call into NavigateToPage, passing in the value from the static TargetGamePage and TargetGamePageParameters properties. This ensures that if another page sets these properties before navigating back to MainPage, the MainPage code will immediately navigate onto the requested target page.
Once the navigation has been processed, the two properties are set back to navigate by default to MainPage itself. This way, if the user presses Back in any other page, the application will return to MainPage rather than to whichever page was most recently set into the TargetGamePage property.
Listing 14-4 shows the MainPage.OnNavigatedTo function.
Example 14.4. Navigating to whichever page is required when MainPage becomes active
protected override void OnNavigatedTo(System.Windows.Navigation.NavigationEventArgs e)
    {
        base.OnNavigatedTo(e);

        // Navigate to whichever page has been set to be opened next
        NavigateToPage(TargetGamePage, TargetGamePageParameters);
        // Reset the target page and parameters to be the menu so that by default
        // when other pages navigate back, they return to the menu
        TargetGamePage = GamePages.MainPage;
        TargetGamePageParameters = null;
}Everything is now in place to allow our pages to navigate in whatever way they need with minimal code. MainPage itself can navigate to any other page by calling the NavigateToPage function directly. Listing 14-5, for example, shows the code for the New Game button, which navigates to GamePage.
Example 14.5. Processing a click on the New Game button within MainPage
private void newGameButton_Click(object sender, RoutedEventArgs e)
    {
        // Begin a new game
        NavigateToPage(GamePages.GamePage);
    }
Parameters can be passed to the target page, as shown in Listing 14-6. This also navigates to GamePage, but this time includes a parameter to indicate that an existing game in progress should be resumed. We will look at how games are resumed in a moment.
Example 14.6. Passing parameters when navigating from the Resume Game button within MainPage
private void resumeButton_Click(object sender, RoutedEventArgs e)
    {
        // Resume the game
        NavigateToPage(GamePages.GamePage, "GameState=Resume");
    }
Other pages that want to allow the user to return to the menu by pressing the Back button do not need any extra code to be added to facilitate this. As the menu is already on the navigation stack, pressing Back will naturally navigate back to the menu.
If other pages want to provide another mechanism for returning to the menu (clicking a button, for example), they simply need to call the NavigationService.GoBack function to emulate a press of the Back button.
The final requirement is for one non-menu page to be able to take the player directly into another non-menu page—the game page taking the player to the high score page in our example. A very simple demonstration of this is present in the example project: start a game and then click the End Game button on the game page to simulate the game finishing, and the high score page appears straight away.
All that a non-menu page needs to do to implement this is to set the static MainPage.TargetGamePage property and then call NavigationService.GoBack. This will return to MainPage, which will detect the value in the TargetGamePage property and navigate immediately on to this page. Listing 14-7 shows the code behind the End Game button.
Example 14.7. Taking the player directly from the game page to the high score page
private void endGameButton_Click(object sender, RoutedEventArgs e)
    {
        // Go directly to the high score page
        MainPage.TargetGamePage = MainPage.GamePages.HighScorePage;
        NavigationService.GoBack();
    }
Have a play with the example project and see how it works. Some specific scenarios to try are as follows:
Navigating back and forth between the pages by selecting them in the menu and pressing the Back button
Ending a game and pressing Back from the high score page, which returns to the menu and not to the game
Pressing Back from the menu page, which always closes the application
There is, in fact, a little more navigation work to do when it comes to tombstoning and the application life cycle, but we will consider these details in the "Application Life Cycle" section later in this chapter.
Other than support for tombstoning, it looks like we're finished with navigation. Unfortunately, however, there is one final area that we need to cover, which is how we maintain the stage of our game from one page to the next.
In Silverlight games on Windows Phone, navigating back to an existing page will return to the existing instance of the page that was put on the navigation stack; the page is cached and reused. Navigating forward, however, always creates a new instance of the page being displayed, and its content will therefore never be cached.
This might sound like a nuisance, particularly as the page could be cached if we navigated backward instead of forward. The truth is that we will need to be able to rebuild the game page from stored state in order to recover from tombstoning anyway, so using the same approach for navigation does not really introduce any additional effort.
If we want to allow the players to resume their game after navigating back to the menu, we therefore need to be able to restore all the game state so that the game picks up exactly where it left off. The game state needs to encompass everything the game needs to resume in a new game page instance: the positions and types of all objects within the game, the player's score, health and number of lives, and any other details that the game needs to function.
In practice, this is not really too difficult to achieve. What we need to do is remove all this information from the game page and place it into another class—we will call this the GameState class. The game will create a single instance of this class when it launches, and it can then be accessed by all the pages within the application.
As well as allowing the game to resume by rebuilding the game page from the stored state, having the state stored also allows us to implement some other nice features, such as the automatic addition or removal of the Resume Game button on the game menu, and the ability to warn the players that they will lose their game if they select Start New Game while a game is in progress. If you tried out the project, you will probably have seen all these features in action.
The GameNavigation example project implements just the framework of a game, but we will track two pieces of information in the GameState object:
The
IsGameActiveproperty identifies whether a game is currently in progress. This is set totruewhen the game is initialized, and is set back tofalsewhen the game ends (when the player clicks the End Game button in our example).The
Scoreproperty contains the player's current score. It is set to a random value each time a new game begins, but not when a game is resumed. This will allow us to see during our experimentation when a new game starts (because its value will have changed), and when a game is resumed (because its value will remain unchanged).
GameState also contains a function named ResetGame, which can be used to set the game to its initial state, ready to play. In the example project, this function simply sets up the random score value. It is also responsible for setting IsGameActive to true to show that a game is in progress.
An instance of the GameState class is provided by GamePage via a static property, also named GameState. When this is first queried, the underlying private _gameState backing field will be null, and so a new instance of the class is created. After this, the same object instance will be returned every time the property is called. It can be accessed from within GamePage or from within any other page in the application.
Listing 14-8 shows the code from GamePage that implements the GameState property.
Example 14.8. The GamePage class' GameState property
private static GameState _gameState;
    /// <summary>
    /// Returns a reference to the game's GameState object
    /// </summary>
    internal static GameState GameState
    {
        get
        {
            if (_gameState == null) _gameState = new GameState();
            return _gameState;
        }
        set
        {
            _gameState = value;
        }
    }
The state of the game can now be tracked, so all that is left is to actually use the object within the pages of the application.
The first place this is used is when the Start New Game button is clicked on the menu page. Before navigating to the game page, it calls into the GameState.ResetGame function to prepare the game ready to be played.
Note
It may seem odd to handle the initialization of the game in this button click, rather than in one of the functions or events inside GamePage. There is an important reason for calling the reset function from here, however, as we will see in the "Application Life Cycle" section later in this chapter.
The next place the GameState object is used is in GamePage.OnNavigatedTo, shown in Listing 14-9. This function will be invoked by Silverlight each time GamePage is displayed, as a result of clicking either the Start New Game or the Resume Game button on the game menu. As we saw back in Listing 14-5 and Listing 14-6, these two buttons both navigate to the game page, but one passes the URI parameter string GameState=Resume, and the other does not. The code, therefore, checks for this parameter and displays a corresponding message within the page.
Example 14.9. Handling the OnNavigatedTo event inside GamePage
protected override void OnNavigatedTo(System.Windows.Navigation.NavigationEventArgs e)
    {
        base.OnNavigatedTo(e);

        // See if we can find a resume mode specified in the querystring
        string resumeMode;
        NavigationContext.QueryString.TryGetValue("GameState", out resumeMode);
        if (resumeMode == "Resume")
        {
            gameStateText.Text = "Game state: resuming an existing game.";
        }
        else
        {
            gameStateText.Text = "Game state: starting a new game.";
        }

        // Display the player's score
        scoreText.Text = "Score: " + GameState.Score.ToString();
    }
The only other uses of the GameState within the example are inside MenuPage. The GameState.IsGameActive property is used to determine whether the Resume button should be displayed or hidden (in the MainPage.OnNavigatedTo function), and also to see whether a confirmation message should be displayed (in the MainPage.newGameButton_Click event handler) to warn the player that they will lose their existing game if they proceed.
We will need to work more with the GameState object when we deal with tombstoning, but until then the use of the object within the project is really very straightforward.
Putting these pieces of functionality into the foundation of your games results in a consistent and predictable navigation model that should serve most, if not all, of the games that you create.
Many games will want to offer a choice of game settings to the user, and just as we did in XNA, we can easily store and retrieve them in Silverlight.
The method of actually storing the settings is identical to the approach we used in XNA back in Chapter 9, so have a look there if you have forgotten how the storage works. The SettingsManager class from the XNA GameFramework has been added to this chapter's version of the SLGameFramework project and is virtually identical. The main changes are that the class has been made static so no instance is required, and the RetrieveValues function (which was used to read settings from XNA game objects) has been removed.
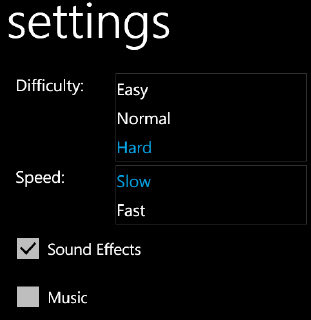
The SLGameFramework.SettingsManager class can be seen in action in the SettingsExample project that accompanies this chapter. It builds on the navigation project from the previous section and implements the Settings page. The example implements four simple settings, as shown in Figure 14-3.
There is, in fact, very little to do to implement this functionality. Silverlight's rich user interface hugely simplifies the task of displaying the settings options to users and allowing them to interact with these settings. All we really need to do for the Settings page is display the appropriate values when it opens and store any modified values when it closes.
The first of these tasks is handled by overriding the page's OnNavigatedTo function, which is called each time the page appears on the top of the navigation stack. In here we can read out all the existing settings and ensure that they are displayed in the page. Listing 14-10 shows all the code required for this.
Example 14.10. Putting the current game settings into the Settings page
protected override void OnNavigatedTo(System.Windows.Navigation.NavigationEventArgs e)
    {
        base.OnNavigatedTo(e);

        // Put the current settings values into the form controls
        SelectListItem(difficultyList, SettingsManager.GetValue("Difficulty", "Normal"));
        SelectListItem(speedList, SettingsManager.GetValue("Speed", "Slow"));
        musicCheckbox.IsChecked = SettingsManager.GetValue("Music", true);
        soundCheckbox.IsChecked = SettingsManager.GetValue("Sound", true);
    }
Note
The SelectListItem function shown here is a little helper function also contained within the SettingsPage code that makes it easy to select an item in a ListBox control by its item text. Another function in the class, GetListItemText, allows the text of an item to be retrieved.
This piece of code displays all the current game settings, ready to be updated by the user. When users finish, they simply press the Back button to return to the game menu. This will cause the OnNavigatingFrom function to be called, so we can override it and use it as a trigger to write the values back into the SettingsManager class. Listing 14-11 shows the code.
Example 14.11. Putting the game settings back into SettingsManager
protected override void OnNavigatingFrom(NavigatingCancelEventArgs e)
   {
       base.OnNavigatingFrom(e);

       // Save each setting
       SettingsManager.SetValue("Difficulty", GetListItemText(difficultyList.SelectedItem));
       SettingsManager.SetValue("Speed", GetListItemText(speedList.SelectedItem));
       SettingsManager.SetValue("Music", musicCheckbox.IsChecked.Value);
       SettingsManager.SetValue("Sound", soundCheckbox.IsChecked.Value);
   }
Note
OnNavigatingFrom will be called even if the user navigates away by pressing the Windows button. This ensures that the settings are saved even when the game is about to be tombstoned.
From the code side of the page, this is all we need to do to maintain the game settings. Other parts of the game can query the settings by simply calling into the SettingsManager.GetValue function.
Before we move on, though, let's just quickly look at the design of the page's user interface. The various controls used by the form have been placed into a Grid control, with one control per grid cell, as this provides a simple and flexible layout mechanism.
The grid itself has been placed inside a ScrollViewer control is to allow the settings to still be accessed if the game is running in a landscape orientation. Without this, the settings further down the page could easily run off the bottom of the screen and become accessible. The same approach can be useful in portrait mode, too, if there are more settings than can be comfortably contained within the visible page.
Following on from the high score placeholder in the previous sections, we will now implement a working high score table into the project.
This functionality will be based entirely on the high score table code that we added to XNA back in Chapter 9, so please refer to that chapter for details on the class structure and its internal workings. The main changes described here will revolve around transferring the code into the SLGameFramework project, updating its presentational functions to work with Silverlight and XNA, and seeing how to integrate it into the navigation structure.
All the code in this section can be found in the HighScoresExample project that accompanies this chapter.
Of the three classes used in the XNA GameFramework project (HighScores, HighScoreTable, and HighScoreEntry), two are essentially identical in the Silverlight implementation; the only class needing code changes of note being the HighScores class. These changes primarily revolve around the presentation of the scores.
In XNA we created a series of TextObjects to present the scores, and its HighScores class offers a function named CreateTextObjectsForTable that can build these TextObject instances for display on the screen, saving the games that use this class the effort of having to create these objects themselves. While this particular function implementation is not relevant for Silverlight, we will provide an equivalent function to simplify display of the scores onscreen, and for Silverlight it is simply named ShowScores.
Silverlight offers several controls that we could potentially use to host the display of scores, but the one that best meets our requirements is the Grid control. This is the control that provides the simplest method for presenting a three-column data display (the columns being for the position within the high score table, the name, and the score) while allowing us to control the alignment of text in the individual columns and also allowing the columns to expand or contract as needed to fit the text that it contains.
The ShowScores function expects a Grid to be passed as one of its parameters, and will fully configure and populate the grid with all the scores. There are several parts to this. First of all, the grid configuration is set up. Any existing content is removed, and the grid columns are set so that the first and third columns (the position and score columns) automatically adjust to their content, while the second column (the name column) expands to fill as much space as it can. We have seen all these settings before in XAML, but not yet looked at the equivalent C# code. Listing 14-12 shows how this is set up.
Example 14.12. Configuring the Grid read for the display of scores
//Clear any controls contained in the grid
       scoresGrid.Children.Clear();

       // Reset the grid columns
       scoresGrid.ColumnDefinitions.Clear();
       scoresGrid.ColumnDefinitions.Add(new ColumnDefinition() { Width = GridLength.Auto });
       scoresGrid.ColumnDefinitions.Add(new ColumnDefinition()
                                          { Width = new GridLength(1, GridUnitType.Star) });
       scoresGrid.ColumnDefinitions.Add(new ColumnDefinition() { Width = GridLength.Auto });

       // Reset the grid rows
       scoresGrid.RowDefinitions.Clear();
Once the grid is ready to display its data, the code loops through each high score entry, adding TextBlock controls to the cells of the grid so that the position, name and score are displayed.
ShowScores also allows a highlightIndex parameter to be provided. If this value is available, the score at the specified index will be displayed in bold text and will fade its opacity to highlight the player's new score. As the code loops through adding the score entries, it looks for the entry matching this index; if the index is found, a reference to that row's name TextBlock is stored in the highlightedName variable.
Once all the names have been added, the code sets up a Storyboard for the highlightedNameTextBlock, if one was found, so that its Opacity can be faded. We have seen how to set Storyboard objects up in XAML, but not in code. Listing 14-13 shows how this is achieved.
Example 14.13. Preparing and activating a Storyboard using C#
// Did we find a name to highlight?
        if (highlightedName != null)
        {
            // Yes, so create a storyboard and a double animation to fade its opacity
            Storyboard scoreFader = new Storyboard();
            DoubleAnimation faderAnim = new DoubleAnimation();

            // Set the target object and target property of the fader animation
Storyboard.SetTarget(faderAnim, highlightedName);
Storyboard.SetTargetProperty(faderAnim, new PropertyPath("Opacity"));
// Set the other animation parameters
faderAnim.Duration = new Duration(new TimeSpan(0, 0, 1));
faderAnim.RepeatBehavior = RepeatBehavior.Forever;
faderAnim.AutoReverse = true;
faderAnim.From = 1;
faderAnim.To = 0;
// Add the fader to the storyboard
scoreFader.Children.Add(faderAnim);
// Add the storyboard to the grid
scoresGrid.Resources.Add("scorefader", scoreFader);
// Begin the storyboard
scoreFader.Begin();
}We will see how and when this function is called in a moment.
So the game can gain access to the high score tables, we must first create an instance of the HighScores object. To allow the whole game access to the high score data, this instance is implemented as a static property inside HighScorePage.
When the property is first queried, the HighScores object instance is created and initialized with each of the high score tables that the game needs. All subsequent calls to the property are returned this same object instance, ensuring that the whole game sees an up-to-date set of scores.
Listing 14-14 shows the implementation of this property. In our example we use a single table, named Default, and set it to contain a maximum of 20 entries.
Example 14.14. The HighScorePage.HighScores property
private static HighScores _highScores;
        /// <summary>
        /// Returns a reference to the game's GameState object
        /// </summary>
        internal static HighScores HighScores
        {
            get
            {
                // Do we already have a highscore instance?
                if (_highScores == null)
                {
                    // No, so create one
                    _highScores = new HighScores();
                    // Add the tables
                    _highScores.InitializeTable("Default", 20);
                    // Load any existing scores
                    _highScores.LoadScores();
                }
                return _highScores;
            }
}When each game finishes, we need to check whether the score the player has achieved is good enough to add to the high score table, and if so, prompt the player to enter their name.
The first part of this is handled in the game over sequence inside the game page. In our example, this is handled by the End Game button inside GamePage. The code behind the button is shown in Listing 14-15.
Example 14.15. Checking to see whether a high score was achieved and navigating accordingly
private void endGameButton_Click(object sender, RoutedEventArgs e)
    {
        // Indicate that the game has finished
        GameState.IsGameActive = false;

        // Was the score good enough for the high score table?
        if (HighScorePage.HighScores.GetTable("Default").ScoreQualifies(GameState.Score))
        {
            // Yes, so go to the "enter your name" page
            MainPage.TargetGamePage = MainPage.GamePages.HighScoreNamePage;
        }
        else
        {
            // No, so go to the high score page
            MainPage.TargetGamePage = MainPage.GamePages.HighScorePage;
        }
        // Either way, navigate back to the menu so that it can redirect for us
        NavigationService.GoBack();
    }
The HighScoreTable'sScoreQualifies function is used to find out whether the player's score is good enough for the high score table. If the score is not good enough, the code navigates to the existing HighScorePage to show the player the scores to beat—we will take a look at the contents of that page in a moment. On the other hand, if the score is good enough to make it in to the high scores, the game navigates to a new page: HighScoreNamePage.
HighScoreNamePage simply allows the players to enter their name for inclusion in the high score table. At its heart, the page consists of little more than a TextBox, but there are several nice touches that we can add to the page to make it a little nicer to use.
One such touch is to automatically save the player's name to the game settings whenever a high score is achieved. The saved name can then be restored the next time the page is displayed, saving users from having to enter their names again. The page also automatically focuses on the player's name field and selects the existing text so that if a new name is entered it automatically overwrites the name that is present.
The page also offers an ApplicationBar that can be used to signal addition of the entered name, and handles pressing of the Enter key (either from a hardware keyboard on from the SIP) for the same purpose.
Once the player's name is entered and submitted, the page's AddName function is called to process it. This function accesses the high score table object via the HighScorePage.HighScores property, adds the new name, and saves the score.
It then redirects off to HighScorePage to display the score. If a name was actually entered by the player, the MainPage.TargetGamePageParameters property is used to pass the index of the new score entry. This can then be used by HighScorePage to highlight the addition, as we will see in a moment.
The code of the AddName function can be seen in Listing 14-16.
Example 14.16. Processing the submission of a new high score name
private void AddName()
   {
       // Do we have a name?
       if (nameText.Text.Length > 0)
       {
           // Store the name into the game Settings
           SettingsManager.SetValue("HighscoreName", nameText.Text);
           // Add to the high score table and retrieve the index of the new position
           int newScoreIndex = HighScorePage.HighScores.GetTable("Default").AddEntry(
                                                   nameText.Text, GamePage.GameState.Score);
           // Save the updated scores
           HighScorePage.HighScores.SaveScores();
           // Pass the new score index to the highscore page so we can highlight it
           MainPage.TargetGamePageParameters = "HighlightIndex=" + newScoreIndex.ToString();
       }
       // We need to navigate to the high score page...
       MainPage.TargetGamePage = MainPage.GamePages.HighScorePage;
       // Go back to the menu and allow it to redirect for us
       NavigationService.GoBack();
}All we have left to do is to display the high score table on the screen. We have already covered most of the code required for this, and we now just need to actually set up a Grid control to receive the score text.
The presentation of the high score table will be enhanced, particularly if there are lots of entries within it, by allowing the user to scroll up and down. With scrolling enabled, you can have potentially hundreds of entries, and the user will be able to access them all with a simple swipe of a finger.
Making the grid scrollable is simply a matter of placing it inside a ScrollViewer control. This control will automatically allow the player scroll to the full height of the grid, allowing all the scores to be brought into display.
The entire XAML code for the ContentPanel within HighScorePage is shown in Listing 14-17.
Example 14.17. The user interface markup for the high score table
<!--ContentPanel-->
        <Grid x:Name="ContentPanel" Grid.Row="1" Margin="12,10,12,0">
            <ScrollViewer FontSize="28">
                <Grid Name="scoresGrid" Margin="10 0 10 0" />
            </ScrollViewer>
</Grid>
Omitting any size information for the ScrollViewer will result in it expanding to fill its container, the ContentPanel. The same applies to the scoresGrid, which will fill the ScrollViewer completely except for a 10-pixel margin on the left and right edges, as specified by the Margin attribute.
The C# code required to display the scores within this Grid is little more complex than the XAML, and is shown in Listing 14-18. It looks for a new score entry index in the navigation query string (as will be passed by HighScoreNamePage), and then calls the HighScores.ShowScores method to populate the high score grid.
Example 14.18. Getting the high scores displayed on the screen
private void PhoneApplicationPage_Loaded(object sender, RoutedEventArgs e)
    {
        string paramValue;
        int newScoreIndex;

        // Are we highlighting an entry?
        NavigationContext.QueryString.TryGetValue("HighlightIndex", out paramValue);
        if (!int.TryParse(paramValue, out newScoreIndex))
        {
            // Nothing found or not numeric, so don't highlight anything
            newScoreIndex = −1;
        }

        // Get the HighScores class to show the scores inside the scoresGrid control
        HighScores.ShowScores(scoresGrid, "Default", newScoreIndex);
    }
The score display is not especially interesting to look at, so there are lots of presentation enhancements that could be applied to make the page a little more visually exciting, but in terms of functionality, this is all that we need to do!
Sound was the subject of Chapter 5, where we looked at how to play music and sound effects in XNA games. In this section, we will find out how to achieve the same things in Silverlight.
In actual fact, Silverlight on Windows Phone 7 does not have any direct audio capabilities. This is not a problem, though, as we can hook into XNA's audio library and get it to do the work for us. We will therefore be using exactly the same audio classes as we did back in Chapter 5: SoundEffect, SoundEffectInstance, Song, and MediaPlayer. If you need to jog your memory about these classes, this would be a good opportunity to do so!
There are two main differences with the way these classes are used in Silverlight as compared with XNA. The first is the need for a timer to be set up to process XNA's updates; without this, any attempt to play sound will fail with an error. The second difference revolves around loading sound and music data, as there is no Content project in Silverlight projects.
Let's take a look at the details. All the code for this section can be found in the MusicAndSounds example project that accompanies this chapter.
Before we can use XNA's audio features, we must first reference its audio assembly. To directly access the audio classes, a reference is needed to the Microsoft.Xna.Framework assembly, inside which the Audio namespace contains all the classes that we are interested in working with.
As you will see in a moment, we will actually wrap up all the access to the audio classes inside a new class within the SLGameFramework, so in many cases your game can use the functions offered by this class without actually having to add the XNA assembly reference itself.
You saw when we worked with sound effects and music in XNA that it is very easy to set up a music file or a sound effect and tell it to play. It then plays asynchronously in the background until it finishes. We can optionally instruct it to loop when it repeats, and all this happens entirely automatically.
The reason this background playback can work is because XNA is constantly attending to the playing sound, ensuring that it continues to play and that it loops at the appropriate point. This happens automatically as part of XNA's internal update/draw cycle.
When sounds are played in Silverlight, the XNA audio library still needs to attend to the playing sound, but it cannot do so in the update/draw cycle because there is no such thing in Silverlight applications. For the audio processing to be carried out, we must manually create a timer for XNA and allow it to call into its internal Update method on a regular and frequent basis.
If we forget to do this, XNA's audio library will throw an exception as soon as we attempt to play a sound, so it will come to our attention fairly quickly. We can add some code to the SLGameFramework project, however, which will simplify the task of initializing this timer as far as is possible, taking away the nuisance factor of setting it up in each of your games.
The timer is initialized in a class inside SLGameFramework called XNAAsyncDispatcher. The code for the class is wrapped up in a series of private functions, and the class constructor is private, too, so it cannot be instantiated. Instead, it offers some static members that can be called from your game.
To initialize the timer, simply call the static XNAAsyncDispatcher.Start method. Nothing more is required, but this call must be made from your Silverlight application's App class constructor. If you call if after that, it will fail to initialize. If you don't know when your app starts whether you will need sound or not, initialize the timer anyway—you can always ignore it if you later decide that it is not required. You can check whether the timer has been initialized by querying the static XNAAsyncDispatcher.IsStarted property.
Listing 14-19 shows a simple App class constructor that is configured to initialize the XNA dispatcher.
Example 14.19. Initializing the XNAAsyncDispatcher timer
/// <summary>
    /// Constructor for the Application object.
    /// </summary>
    public App()
    {
        // Global handler for uncaught exceptions.
        UnhandledException += Application_UnhandledException;

        // Standard Silverlight initialization
        InitializeComponent();

        // Phone-specific initialization
        InitializePhoneApplication();
// Start the XNA Async Dispatcher so that we can play music and sound effects
SLGameFramework.XNAAsyncDispatcher.Start();
}The code inside the XNAAsyncDispatcher class is not especially interesting; essentially it configures a timer that calls into an XNA Update method every 1/20 of a second. Feel free to take a look in the class if you would like to see its content in more detail.
The main thing we need to overcome to play sound effects in Silverlight is the lack of the Content project. Fortunately, this is not too much of a problem, as we can initialize a SoundEffect object from a Stream. XNA provides a simple way of obtaining such a Stream via its TitleContainer function, which we can use to open a sound file contained within our project.
Listing 14-20 shows a simple example of using these objects and methods to create a sound and start it playing.
Example 14.20. Loading and playing a sound file
using System.IO;
using Microsoft.Xna.Framework;
using Microsoft.Xna.Framework.Audio;

[...]

    private void PlaySound()
    {
        // Create and load the SoundEffect
        SoundEffect mySound;
        mySound = SoundEffect.FromStream(TitleContainer.OpenStream("Sounds/Piano.wav"));
        // Play the sound
        mySound.Play();
    }
The sounds that are to be played are added into the project, just as we added images for our sprites. They can be placed into a folder (as they are in this example, in the Sounds folder) to keep them separate from other files and resources, and must be in .wav format. Their Build Action property must be set to Content.
A new Stream is created each time the code in Listing 14-20 is executed, and as we are likely to want to play the same sound effect hundreds or thousands of times within a game, it makes sense to cache the sound data instead of needing to repeatedly reload the same sound multiple times.
We can, in fact, cache the SoundEffect object because it is all we need to initiate playback of the sound as many times as we want.
To simplify the initialization and caching of sounds, a new class named AudioPlayer is added to the SLGameFramework project. This will take care of as much of the work of dealing with sounds as it can, providing a simple API for our games to use. The class is static, so it can be used without first having to create an instance.
The class first declares a class-level dictionary of SoundEffect objects named _soundEffects. It will be keyed by the path and file name of the sound being played, allowing it to easily identify whether a particular sound has already been loaded or is being played for the first time.
To populate the dictionary, a private function named GetSoundEffect is used. Passed the path and file name of a sound, it will check to see whether it has already been cached; if not, it will be loaded and added to the dictionary. Either way, the sound (newly loaded or cached) is returned to the calling procedure.
This is then used by a public function named PlaySoundEffect. Provided with the path and file name of the sound and the playback parameters (volume, pitch, and pan values), this function performs two tasks: it checks that the XNA dispatcher timer has been started (by calling into the XNAAsyncDispatcher class); assuming that it has, it retrieves the SoundEffect object and calls its Play method.
A further overload of PlaySoundEffect accepts just a sound path and file name, and uses the default playback parameters (maximum volume, normal pitch, no panning) for when they do not need to be adjusted.
Listing 14-21 shows all the SLGameFramework.AudioPlayer functions described so far.
Example 14.21. Loading and playing sound files in the AudioPlayer class
private static Dictionary<string, SoundEffect> _soundEffects =
                                                       new Dictionary<string,SoundEffect>();

    // Plays the sound effect at the specified content path and filename
    public static void PlaySoundEffect(string soundPath)
    {
        PlaySoundEffect(soundPath, 1, 0, 0);
    }

    // Plays the sound effect at the specified content path and filename
    public static void PlaySoundEffect(string soundPath, float volume, float pitch,
                                                                                  float pan)
    {
        // Check that the XNAAsyncDispatcher has been started
        XNAAsyncDispatcher.CheckIsStarted();

        // If we have no volume then there is nothing to play
        if (volume * SoundEffectMasterVolume == 0) return;

        // Get and play the sound effect
        GetSoundEffect(soundPath).Play(volume * SoundEffectMasterVolume, pitch, pan);
    }

    // Checks if the specified sound is cached (and loads and caches it if not),
    // then returns its SoundEffect object.
    private static SoundEffect GetSoundEffect(string soundPath)
    {
        // Convert the path to lowercase so that it is case-insensitive
        soundPath = soundPath.ToLower();

        // Do we already have this sound loaded?
        if (!_soundEffects.ContainsKey(soundPath))
        {
            // No, so load it now and add it to the dictionary
            _soundEffects.Add(soundPath,
                              SoundEffect.FromStream(TitleContainer.OpenStream(soundPath)));
        }

        // Return the sound
        return _soundEffects[soundPath];
    }
Playing a sound from a Silverlight game is now as easy as simply calling the AudioPlayer.PlaySoundEffect function. Listing 14-22 shows the code behind the Piano button in the MusicAndSounds example project. This single line of code is now all we need to load, cache, and play the specified sound.
Example 14.22. Loading and playing sound files in the AudioPlayer class
private void pianoButton_Click(object sender, RoutedEventArgs e)
    {
        // Play the Piano sound effect
        AudioPlayer.PlaySoundEffect("Sounds/Piano.wav");
    }
Sound effect instances can be used in Silverlight, too, allowing the sound to be controlled after its playback has started using the SoundEffectInstance class' IsLooped, Pan, Pitch, and Volume properties along with its Pause, Play, Resume, and Stop methods.
To allow instances to be created, the CreateSoundEffectInstance function shown in Listing 14-23 is added to the AudioPlayer class.
Example 14.23. Initializing and returning SoundEffectInstance objects
public static SoundEffectInstance CreateSoundEffectInstance(string soundPath)
    {
        SoundEffectInstance instance;

        XNAAsyncDispatcher.CheckIsStarted();

        instance = GetSoundEffect(soundPath).CreateInstance();
        instance.Volume = SoundEffectMasterVolume;
        return instance;
    }
Listing 14-24 shows a simple example of using a sound effect instance, taken from the Motorbike button in the MusicAndSounds project. This example doesn't actually use the sound instance for anything that could not have been achieved with a simple call to PlaySoundEffect, but it does show how instances can be obtained and used.
Example 14.24. Obtaining and playing a SoundEffectInstance
private void motorbikeButton_Click(object sender, RoutedEventArgs e)
    {
        // Play the Motorbike sound effect using a SoundEffectInstance
        SoundEffectInstance sound =
                              AudioPlayer.CreateSoundEffectInstance("Sounds/Motorbike.wav");
        // Set a random pitch
        sound.Pitch = GameHelper.RandomNext(-1.0f, 1.0f);
        sound.Play();
    }
As you may have spotted in the code listings, the class also provides a property named SoundEffectMasterVolume that allows the volume level for all played sounds to be controlled. It is a simple float property, whose value is multiplied by the volume levels provided for each call to the sound effect functions. Volume levels specified in calls to PlaySoundEffect are, therefore, proportional up to a maximum of the specified master volume level.
This property provides a great way of allowing the overall volume level of your game to be set in a Settings page. If the volume level is set to 0, the class will actually skip playing sounds altogether to save processor resources.
Note
The master volume will not have any effect on sounds that are already playing when its value is modified. If you have any existing sound instances that need to be modified, particularly those that are looped, you will need to adjust their volume levels manually in your game code.
You can experiment with the effect of the master volume by altering the value of the slider in the example project.
To allow MP3 and WMA music files to be played, the XNA Song class is at our disposal. Just to be awkward, music files are loaded into Song objects in a different way from SoundEffect objects; we simply call the static Song.FromUri function, passing in the path to the music file, and its data will be loaded ready for playback.
However, as you may recall from when we explored this subject in Chapter 5, Microsoft has some specific requirements about when a game is allowed to play music. If the phone's media player is currently playing music, a game must respect the existing playback and not begin playback of its own music. The same restriction applies in Silverlight games.
We can package up the process of checking for playback permission, loading, caching (using the same approach as for SoundEffects), and finally playing a song in the AudioPlayer class once again. This is handled by the PlaySong function, shown in Listing 14-25.
Example 14.25. Initialing and playing a Song from an MP3 or WMA file
public static void PlaySong(string songPath, bool autoRepeat)
    {
        // Make sure we are in control of the media player
        if (MediaPlayer.GameHasControl)
        {
            // Convert the songPath to lower case so it is case-insensitive
            songPath = songPath.ToLower();
            // Is the song cached?
            if (!_songs.ContainsKey(songPath))
            {
                // Load the song
                _songs.Add(songPath,
                               Song.FromUri(songPath, new Uri(songPath, UriKind.Relative)));
            }
            // Get a reference to the song
            Song song = _songs[songPath];
            // Set media player parameters
            MediaPlayer.IsRepeating = autoRepeat;
            MediaPlayer.Volume = MusicMasterVolume;
            // Start playing
            MediaPlayer.Play(song);
        }
    }
Alongside this function the AudioPlayer class provides a series of related methods and properties: StopSong, PauseSong, and ResumeSong can be used to control playback; SongState returns a value indicating whether the song is stopped, playing, or paused; SongPosition returns a TimeSpan that shows how far through the playback of the song has progressed; and finally the GameHasControl property tells us whether we are actually allowed to play music at the current time.
Listing 14-26 shows the code for the example project's Music button, which loads and plays a piece of music when first clicked. Subsequent clicks toggle its state between paused and playing.
Example 14.26. Playing, pausing, and resuming a piece of music
private void musicButton_Click(object sender, RoutedEventArgs e)
    {
        // Start, pause or resume the song
        switch (AudioPlayer.SongState)
        {
            case MediaState.Stopped:
                AudioPlayer.PlaySong("Sounds/JoshWoodward-Breadcrumbs-NoVox-02-2020.mp3");
                break;
            case MediaState.Paused:
                AudioPlayer.ResumeSong();
                break;
            case MediaState.Playing:
                AudioPlayer.PauseSong();
                break;
        }
    }
Music files also need to be added to the project with a Build Action of Content, exactly the same as for sound effect files.
Along similar lines to the SoundEffectMasterVolume property, another property named SongMasterVolume is available for controlling the Song playback volume. This is actually just a wrapper around the MediaPlayer.Volume property, but is provided for convenience and consistency. Changing the volume using this property will affect songs that are already being played.
Unlike sound effects, Song playback will still be initiated even if the volume is zero because the volume could later be increased, and to ensure that the expected output is achieved, the Song needs to be initiated when requested by the calling code.
The next subject area is the application life cycle and how to handle your game being deactivated and reactived by the operating system.
Silverlight applications do not escape the need to handle the application life cycle, tombstoning, and saving and restoring game state. The requirements for Silverlight are very similar to those for XNA, which was covered back in Chapter 10, but as usual there are some differences.
One difference is that Silverlight does provide a little more assistance in the task than XNA did (that is to say, more than none, which is about how much help XNA provided!).
If the user navigates away from your game by pressing the Windows key, or if the game is interrupted in some other way such as the arrival of an incoming phone call, the application will be tombstoned as with our XNA games. This results in the application being terminated (though it will give the appearance of still running in Visual Studio to allow the IDE to reconnect to the application when it is reactivated), and nearly all content of the game will be lost.
The help we get from Silverlight is that it remembers some of what our application was doing. This amounts to automatic storage of the navigation stack, including the full URI of each page within the stack.
When the user returns to the application, it will open to the page that was last being used before it was tombstoned. Any query string values that were passed to that page via its URI will be present and can be read out once again. Other than this, though, it is an entirely new page.
The same goes for the other pages on the navigation stack; Silverlight may have retained their URIs, but not the actual page instances. Each page will be reinstantiated as the user navigates back to it.
This assistance certainly saves us some work, but it doesn't remove the need for your games to save their state to either isolated storage or the PhoneApplicationService.Current.State dictionary each time the game is deactivated, and then retrieve it again when it is subsequently reactivated.
Let's explore this automatic storage of the navigation stack by experimenting briefly with the HighScoresExample project that we worked on earlier in this chapter. Run the project and with its main menu displayed, press the Windows button and then the Back button. Silverlight remembers that we were on the menu page and restores it to the top of the navigation stack.
Repeat this with the About page open. When the game is reactivated, the About page automatically displays once again. Pressing Back again returns to the main menu, and pressing it a final time closes the application. Clearly all the page navigation is working exactly as we need.
Now try deactivating the game while the Game page is displayed—but make a note of the displayed score before you do. When the game is reactivated, it redisplays the correct page, but the score has been lost and set to 0; it was not persisted.
This is all just as you would probably expect, but here are a couple of things you might not expect. First of all, end a game and enter your name so that it appears in the high score table. With the high score table displayed and your name highlighted, press the Windows button and then the Back button. The game returns to the high score page as expected, but your name continues to be highlighted. How did it survive the tombstoning process?
The answer is that the highlight index is part of the query string used to navigate to the high score page. You can see this being set up using the MainPage.TargetGamePageParameters property back in Listing 14-16. When you navigate back to the game, the high score page is being completely reconstructed from scratch, but the HighlightIndex query string element is still on the navigation stack, so it is picked up once again and used to highlight the same table entry.
The other behavior you may not expect is on the Settings page. Navigate your way there and change one or two of the options; then press the Windows button and then the Back button. The modified options all survive the tombstoning process.
This behavior is in fact because there is code in the SettingsPage class managing the storage of the settings for us. You may recall that all the settings are persisted in the page's OnNavigatingFrom function, as shown back in Listing 14-11. As well as being called when the user navigates away within the application, this function is also called when navigating out of the application, so it is storing the values for us.
Hopefully this clarifies what does get automatically stored by Silverlight and what does not. For the substantial part of the data that does not, we need to make arrangements for our code to look after itself.
The four life cycle events are handled in Silverlight projects by the App class. Their event handlers, Application_Launching, Application_Closing, Application_Activated, and Application_Deactivated, are all provided automatically when a new project is created, and can be filled in with whatever code is required. We will use them to store away the values that our game needs when it is deactivated and recover them when it is reactivated. The code required for this state storage can be found in the Tombstoning example project.
Our simple example game needs to store only two pieces of information: the player's score, and whether or not the game is currently active. We could simply write each of these values into the PhoneApplicationService.Current.State dictionary individually when the game is deactivated, and that is a perfectly valid and workable way to store the game data. However, there is an easier way: store the GameState object itself.
As you may recall from Chapter 10, we can place any object we want into the State dictionary, providing it can be serialized. The GameState object in the example project can certainly be serialized: its scope is public, it has a default constructor (which is public and has no parameters), and all its properties are serializable.
Note
If your GameState object contained properties that could not be directly serialized, they would need to be controlled via the use of the DataContract and DataMember attributes. The "Controlling Serialization" section in Chapter 10 contains everything you need to know to get these attributes working in your game.
To store our game state when it is deactivated and to restore it when it is activated again, all we need is the code shown in Listing 14-27.
Example 14.27. Storing and restoring game state before and after being tombstoned
// Code to execute when the application is deactivated (sent to background)
    private void Application_Deactivated(object sender, DeactivatedEventArgs e)
    {
        // Write the game state to the state object
        PhoneApplicationService.Current.State.Clear();
        PhoneApplicationService.Current.State.Add("GameState", GamePage.GameState);
    }

    // Code to execute when the application is activated (brought to foreground)
    private void Application_Activated(object sender, ActivatedEventArgs e)
    {
        // Restore the game state from the state object
        GamePage.GameState = (GameState)PhoneApplicationService.Current.State["GameState"];
    }
Tip
When you restore a real-time game, a nice touch is to automatically put the game into pause mode so that players have a chance to work out where the game has got to before they are thrown back into the action.
That is all there is to it, but don't forget that all the pages will be re-created after the state has been restored. This means that all the pages' constructors, Loaded events, and OnNavigatedTo functions will be called again when the pages are next navigated to. It is important therefore not to put anything into these procedures that will disrupt the restoration of the existing game.
This behavior is why the example projects call into GameState.ResetGame inside the Start New Game button click event handler rather than inside GamePage; putting the call into the GamePage's Loaded event would result in it being called again after the application reactivated, wiping out the restored data.
Tip
For data that you always want to persist between sessions, you should try to ensure that the data is stored every time it is updated rather than just in the life cycle events. For example, we save the high scores every time they are changed rather than just when the game deactivates. This helps to ensure that unexpected closure of the application does not result in lost data.
Game in Focus: Diamond Lines, Part II
Let's wrap up by putting some of the things we have covered in this chapter into the Diamond Lines example game. Specifically, we will add page navigation, a GameState class, support for tombstoning, some game settings, and sound effects. All the changes can be found in the DiamondLinesPartII project.
The navigation is added using the technique described in the "Game Navigation" section at the beginning of this chapter. No implementation changes were required.
The supported pages are MainPage (displaying the game menu), GamePage (into which all the game content has been placed), SettingsPage, and AboutPage. As the game does not currently have any "game over" checking, or indeed any scoring, there is no high score functionality included.
The area of the game that has changed the most since the first version of this code was presented in the last chapter is around the control of game state. Just as in the example project we looked at in the last section, Diamond Lines uses an object called GameState to store the information about the game.
The state of the game is really very simple; we just need to know whether it is active and the colors of the diamonds in the game grid. None of the other information that the game uses is of significance, as it all revolves around animation and updating the game board.
For data storage, the GameState class therefore simply requires two properties: IsGameActive to track whether a game is in progress or not, and DiamondColors to store an array of the diamond colors in play.
Note
Due to a limitation of the way serialization works, the DiamondColors array is stored in a slightly unusual way. We will examine this in more detail in the "Tombstoning Support" section in a moment.
Alongside these properties, GameState also offers a ResetGame function that randomizes all the diamond colors, and two additional functions named GetDiamondColor and SetDiamondColor that allow the color for an individual game cell to be queried or updated.
When the game is actually playing, the diamond colors are stored inside the corresponding Diamond objects rather than being stored in the GameState object. This is very convenient as it allows the Diamond class to completely look after its own state and content. It doesn't lend itself well to serialization, however; ideally we want to get all that data moved across into the GameState class.
This data transfer could have been achieved by getting the Diamond class to work with the data in the GameState class each time it needs to read or set a color, but there is an easier way to handle the state. There are, in fact, only two points within the game at which the GameState actually needs to be valid and up to date: when the game is being resumed and GamePage is opening, and when GamePage is closing due to the user navigating away or the game being tombstoned.
We can respond to GamePage opening by ensuring that when it initializes all the Diamond objects, it simply reads out all the colors from the GameState object. That will ensure that anything placed into GameState will be restored into the board when GamePage is next activated. Listing 14-28 shows the InitializeDiamonds function, called when the page is first loaded, performs this task.
Example 14.28. Restoring game state into the Diamond objects
/// <summary>
    /// Initialise the sprites ready for the game to be displayed
    /// </summary>
    private void InitializeDiamonds()
    {
        // Stop the fader animation if it is activated
        Fader.Stop();

        // Remove all existing sprites from the canvas
        GameCanvas.Children.Clear();

        // Add a new set of random diamonds
        for (int x = 0; x < BoardWidth; x++)
        {
            for (int y = 0; y < BoardHeight; y++)
            {
                // Create the diamond sprite
                _gameBoard[x, y] = new Diamond(this, x, y);
                // Set its color from the colors in GameState
                _gameBoard[x, y].Color = GameState.GetDiamondColor(x, y);
            }
        }

        // All the time there are lines left on the board, remove them
        while (FindLines(false));

        // Switch to idle state
        MovementState = MovementStates.Idle;
    }
Putting the diamond colors back into GameState is handled by the OnNavigatingFrom override, which simply loops through each Diamond object, transferring the color value across to the state object. This update ensures that when the page closes, for whatever reason, the GameState always contains the data of the game in play. Listing 14-29 shows how this is achieved.
Example 14.29. Putting the diamond colors back into GameState
protected override void OnNavigatingFrom(
                                      System.Windows.Navigation.NavigatingCancelEventArgs e)
    {
        base.OnNavigatingFrom(e);

        // Loop for each diamond, copying the colors back to the GameState object
        for (int x = 0; x < GamePage.BoardWidth; x++)
        {
            for (int y = 0; y < GamePage.BoardWidth; y++)
            {
                GameState.SetDiamondColor(x, y, _gameBoard[x, y].Color);
            }
        }
    }
Transferring data from and to the GameState object in this way is a convenient mechanism of allowing complex in-game data to be stored away and retrieved when needed. Just be sure to keep the execution of the OnNavigatingFrom code as fast as possible so that it doesn't get terminated prematurely during tombstoning.
Most of the work for supporting tombstoning is already done by this stage, and in theory the only thing left to do is to add and retrieve the GameState object to and from the PhoneApplicationService.Current dictionary each time the application deactivates and reactivates. The code required is just as shown in the "Application Life Cycle" section earlier in this chapter.
However, using this in Diamond Lines reveals a limitation with the .NET serializer: it is unable to serialize multi-dimensional arrays. The normal way to store the diamond colors inside GameState would be as a two-dimensional array, but attempting to put GameState into storage in this way results in an exception.
There are several ways to manipulate the array so that it can store the game data without needing to be multidimensional, but the approach I decided to use was to change it into an array of arrays. Each item in the outer array will represent a column across the x axis and will contain an inner array full of the actual colors for that column. The declaration of this array inside the GameState class is shown in Listing 14-30.
Example 14.30. Declaring the GameState color array without using multiple dimensions
/// <summary>
    /// The array of colors of the diamonds in play
    /// </summary>
    /// <remarks>.NET is unable to serialize multi-dimensional arrays, but it is
    /// able to serialize arrays of arrays. This is therefore implemented as an
    /// array of arrays: the outer array is for the x axis, the inner arrays for
    /// the y axis.</remarks>
    public int[][] DiamondColors { get; set; }
One of the downsides to this structure is that the array cannot be dimensioned within a single call. The outer array can be set up easily enough, but the inner arrays must be created individually. This is handled in the GameState constructor, as can be seen in Listing 14-31.
Example 14.31. Creating the empty DiamondColors array
public GameState()
    {
        // Create all the required space in the DiamondColors array.
        // First create the outer array
        DiamondColors = new int[GamePage.BoardWidth][];
        // Now create the inner arrays at each outer array index
        for (int x = 0; x < GamePage.BoardWidth; x++)
        {
            DiamondColors[x] = new int[GamePage.BoardHeight];
        }
    }
Finally, to simplify reading and writing from and to the array, the GetDiamondColor and SetDiamondColor functions are provided, as shown in Listing 14-32.
Example 14.32. Utility functions to get and set diamond colors for specific array items
public int GetDiamondColor(int x, int y)
    {
        return DiamondColors[x][y];
    }
    public void SetDiamondColor(int x, int y, int color)
    {
        DiamondColors[x][y] = color;
    }
Once the GameState class has been set up in this way, it is quite happy to be serialized when the game is deactivated.
There is another handy feature that we can add to the game too, which will preserve the game state not only when the game is tombstoned but also when it actually closed. This allows the player to leave the game alone for an extended period of time or to back out of it, and the next time they launch it the game that they were playing will still be present.
This is achieved simply by placing the object into the IsolatedStorageSettings.ApplicationSettings dictionary, the same location we are storing game settings. The SLGameFramework.SettingsManager class can look after this for us using the SetObjectValue and GetObjectValue methods; they are the same as SetValue and GetValue, but specifically work with object types.
Implementing this feature starts by checking for a stored GameState object when the Launching event, recovering it if one is found. After restoration it is removed from storage so that old game states cannot be recovered later on. Listing 14-33 shows the code for this.
Example 14.33. Restoring persisted game state when the game launches
private void Application_Launching(object sender, LaunchingEventArgs e)
    {
        // Do we have a stored game state from a previous game session?
        if (SettingsManager.GetObjectValue("StoredGameState", null) != null)
        {
            // Yes, read it out so that it can be restored
            GamePage.GameState =
                         (GameState)SettingsManager.GetObjectValue("StoredGameState", null);
            // Remove the game state from storage
            SettingsManager.DeleteValue("StoredGameState");
}
}Placing the game state into storage is very easy, too, but there is one detail to remember: just because a game is deactivated, there is no guarantee that it will ever be reactivated again. To ensure the player really does not lose their game, deactivation should place the game state into storage in both the Deactivated and the Closing event, as shown in Listing 14-34.
Example 14.34. Persisting the game into permanent storage for retrieval in later sessions
private void Application_Deactivated(object sender, DeactivatedEventArgs e)
{
// Write the game state to the state object
PhoneApplicationService.Current.State.Clear();
PhoneApplicationService.Current.State.Add("GameState", GamePage.GameState);
// Is a game currently active?
if (GamePage.GameState.IsGameActive)
{
// Yes, so place the GameState object into the ApplicationSettings in case we
// never reactivate
SettingsManager.SetObjectValue("StoredGameState", GamePage.GameState);
}
    }
// Code to execute when the application is closing (eg, user hit Back)
// This code will not execute when the application is deactivated
private void Application_Closing(object sender, ClosingEventArgs e)
{
// We can place the game state into isolated storage ready to be retrieved next
// time the game begins. Is a game currently active?
if (GamePage.GameState.IsGameActive)
{
// Yes, so place the GameState object into ApplicationSettings
SettingsManager.SetObjectValue("StoredGameState", GamePage.GameState);
}
}Give the game a try and experiment with tombstoning it and with completely closing it. The game state survives all these operations, always allowing the players to carry on exactly where they left off.
The Diamond Lines settings are very simple, allowing the player to choose the speed at which the diamonds animate ("normal" or "fast") and to turn sound effects on and off. SettingsPage is implemented exactly as described in the "Game Settings" section earlier in this chapter.
Actually using the settings is a very easy task, too. The animation speed is observed inside the Diamond class' BeginTranslate method. When this is called, the calling code will already have set the TranslateDuration property as appropriate, but we can make it faster by simply scaling it down. In our code, we multiple the value by 0.4 if the animation speed is "fast," reducing the time by 60 percent, as shown in Listing 14-35.
Example 14.35. Applying the animation speed setting
internal void BeginTranslate()
    {
        double animSpeed = 1;

        // Reduce the translation duration if in fast animation mode
        if (SettingsManager.GetValue("AnimSpeed", "Normal") == "Fast") animSpeed = 0.4;

        // Is there any translation to do?
        if (XOffset != 0 || YOffset != 0)
        {
            _diamondSprite.BeginTranslate(XOffset, YOffset, 0, 0,
                                         TranslateDuration * animSpeed, 0, TranslateEasing);
        }
    }
The sound effect control is handled in the GamePage's Loaded event. It simply sets the AudioPlayer.SoundEffectMasterVolume property to 1 if sound effects are enabled or 0 if they are disabled. No further processing for this setting is needed. Listing 14-36 shows this piece of code.
Example 14.36. Switching sound effects on or off
private void GameCanvas_Loaded(object sender, RoutedEventArgs e)
{
    // Now that the page has loaded, reset the game so that we have some diamonds to
    // display
    InitializeDiamonds();

    // Add an event handler for the CompositionTarget's Rendering event so that
    // we can keep the game moving
    CompositionTarget.Rendering += new EventHandler(compositionTarget_Rendering);

    // Set the sound effect volume level
    AudioPlayer.SoundEffectMasterVolume = (SettingsManager.GetValue("Sound", true) ? 1 : 0);
}Our final enhancement is to add in the sound effects. Three different effects are provided: a "whoosh" sound when diamonds swap position, a sound for each time a line of diamonds is formed, and a quiet high-pitched ringing sound to represent the diamonds landing within the board.
The first two of these sounds are easily implemented by simply calling the AudioPlayer.PlaySoundEffect function at the appropriate points: within the SwapDiamonds function and the FindLines function. When removing lines, the game now keeps track of "chain reactions" (lines formed after other diamonds fall) and increases the pitch of each subsequent chain reaction to increase the sense of excitement.
The final sound is played each time a diamond completes its fall within the game board. We don't initially have an appropriate point to trigger that sound, but we can add one by handling the Sprite control's TranslateCompleted event inside the Diamond class. As each diamond finishes moving, it will fire this event and allow the sound to be played.
Any of the movement modes could be active when this event fires however, so we must first check that the game is in Dropping mode. Only then is the sound effect played. A random pitch is applied to vary the sound. Listing 14-37 shows the implementation.
Example 14.37. Playing the DiamondDrop sound effect each time a diamond falls into a new location
void _diamondSprite_TranslateCompleted(object sender, EventArgs e)
    {
        // Are the diamonds currently dropping?
        if (_gamePage.MovementState == GamePage.MovementStates.Dropping)
        {
            // Yes, so this diamond has just landed. Play a drop sound effect.
            AudioPlayer.PlaySoundEffect("Sounds/DiamondDrop.wav", 1,
                                                      GameHelper.RandomNext(0.0f, 0.5f), 0);
        }
    }
That covers all the new functionality that we will add to this example game. Its presentation is undeniably basic, but the fundamental parts of a complete working game are here (and the addictive nature of the game content clearly shows through, as I have found many times while "testing"!)
While XNA will be the choice for many games on Windows Phone 7, Silverlight still offers a rich and capable set of functions for gaming and will sometimes prove to be the better option of the two technologies. XNA excels with flexible, accelerated graphics displays and 3D graphics, but falls far behind in terms of user interface. Silverlight may not have quite the same level of power and flexibility for graphical rendering, but is much more capable when complex user interfaces are required and can hold its head high in terms of animation effects.
Deciding which of these technologies to use will be one of the first decisions you make when writing a game, as they are fundamentally different in the ways that they work. Both have their strengths, however, so consider carefully which one better suits the type of game that you are planning to write.
At this stage we conclude our exploration of Silverlight, and in fact this is pretty much the end of designing and developing games altogether. I very much hope you have enjoyed the journey so far!
For the last two chapters we will explore some other aspects of working with games, starting with a very important topic that will inevitably follow on from your game programming: how to distribute your game to your audience.