
12. Using WordPress: Images, Videos, and Other Media
In This Chapter
• Using images, videos, and other media in WordPress
• Creating slideshows and galleries
• Editing images in WordPress
• Uploading PDFs and other files to your site
In Chapter 11, “Using WordPress: Content,” we talked a lot about words. Sure there was one short section on how to add an image to a post, but that was about it. Why? Simply because there is so much more to talk about around images, videos, audio files, and other files that I knew that topic needed a chapter on its own. And here it is.
This chapter is, essentially, about everything that isn’t words for posts and pages. All about dealing with images, videos, podcasts, and other files that people want to have in their sites. We’ll cover all the important parts of pulling multimedia into your content.
Managing Media
Before getting back to working with images and such, let’s talk about managing all the media for your site. We first talked about organizing media in Chapter 6, “Setting Up Your WordPress Site Right the First Time,” with the media settings. The focus there was what should WordPress do with the files you upload (and I recommended keeping the setting to organize uploads by year and month). Now let’s talk about how you look at all those images you upload.
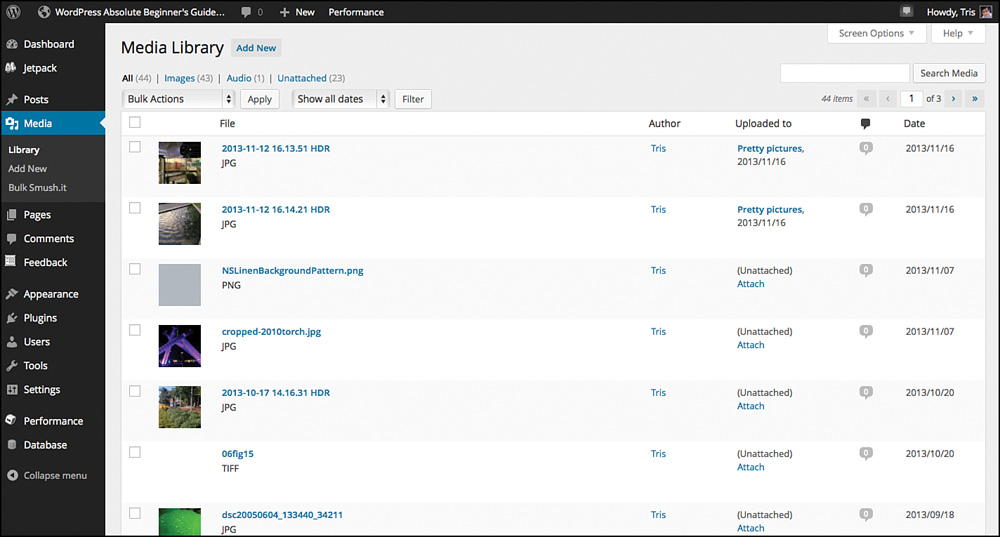
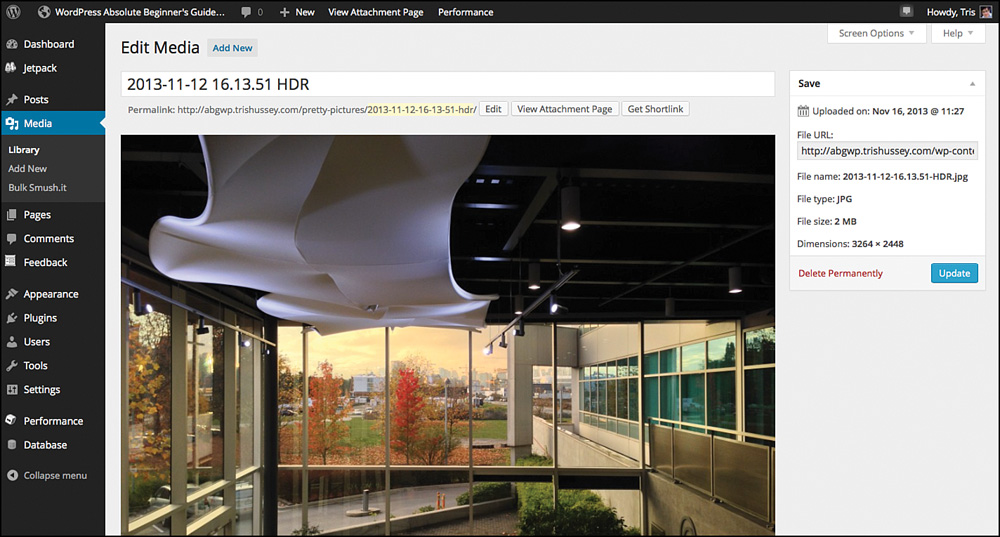
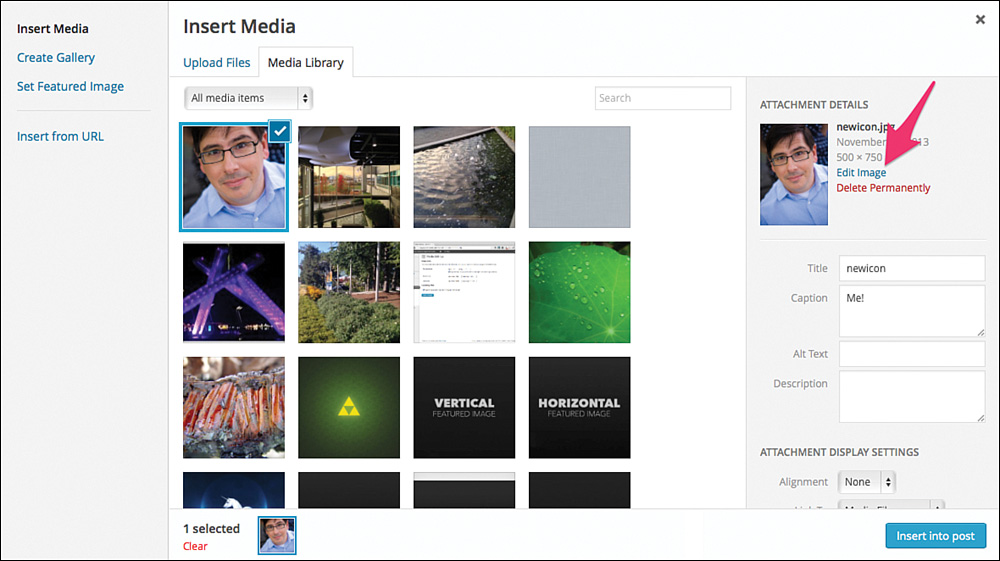
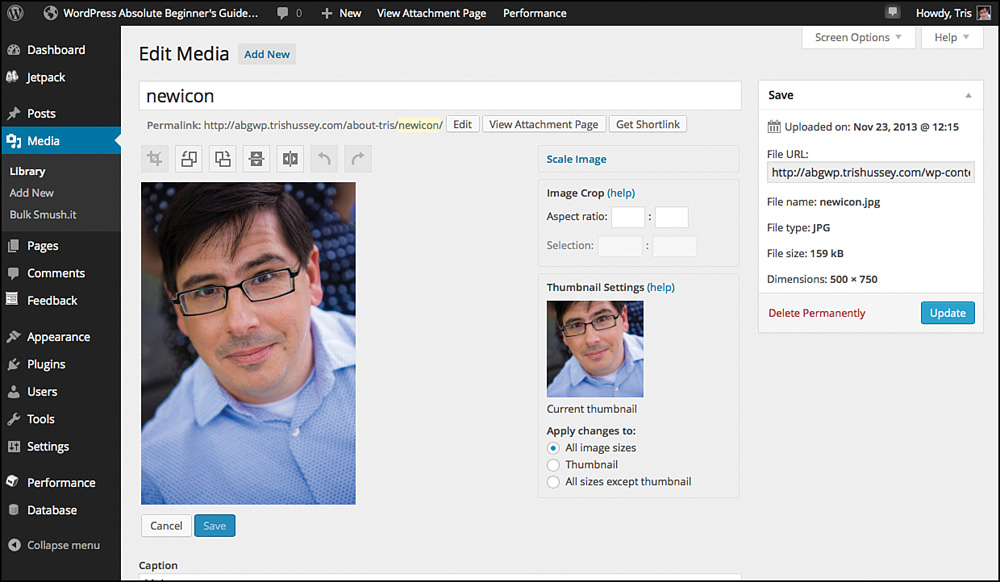
Clicking the Media button on the admin sidebar (or using the fly-out menu and clicking Library) brings you to the Media Library (Figure 12.1). From here you can manage just about everything having to do with your media. You can rename media, delete them, and even do basic edits to many kinds of images. Like the Post and Page lists, if you select multiple images at once using the check boxes, you can apply an action to all of them at once. In the case of media, that action is just to delete them (for now). Passing your mouse over an image (or other media) reveals Edit, Delete Permanently, and View. The Edit Media screen (Figure 12.2) gives you the chance to change the item’s name and other data about it. We’ll get to what happens when you click the Edit link here shortly.
 TIP
TIP
As you can see from Figure 12.1, most of the images don’t have meaningful filenames. This isn’t bad right now, but soon there will be lots of images, and if you ever need to search for an image you used before and would like to use again, what will you search for? Exactly. It takes only a second (and I often forget when I’m uploading things), but naming images with a name that makes sense will help you find and search for images later.
If you’re trying to figure out what images you have on hand, the Media Library is the place. You probably noticed when we were inserting the images in Chapter 11 that you saw something that looked an awful lot like this screen. There’s a good reason for that—functionally they are the same. So when you’re inserting an image into a post, you can search for images (assuming you know what to search for) and edit images, as well as upload them, from that screen.
 NOTE
NOTE
It’s important to know, and remember, that if you’ve uploaded some media to WordPress using FTP—even if it’s in wp-content/uploads/—it will not appear in this media list. This is one of those frustrating parts of working with videos, podcasts, and other large files in WordPress. After you upload a file through FTP, you have to know how to get the URL for that file to use in posts, pages, widgets, and so on. Don’t worry, I’ll cover that in this chapter.
But wait a second—when I upload images to WordPress, you said that the images are organized into folders by month and year. I don’t see any folders here. I want some folders! I know you’re thinking that right now. Heck, I wish I could create folders, or at least tag images, to have “logos,” “screenshots,” “photos,” and any other organization scheme for media, too. But we don’t. At least not yet. When? I don’t know, but it’s something I’m pretty sure WordPress developers are looking at. The Media Library and all the aspects of managing media are well overdue for an overhaul. Just like WordPress 3.8 has focused on making the admin screens better, more useful, and just better, Media and the Media Library will get attention in the future.
Working with Images
Chapter 11 covered the basics of how to upload and insert an image into a post or page. Now we’re going to take things a little further with galleries, featured images, and editing images after you upload them. We’ll start with the easiest of the set: Featured Images.
Using Featured Images
Many themes, though not all, use Featured Images to give Posts and Pages a little extra visual boost. Think of a featured image as the singular image that defines what your post is about. If you would say it with a picture, you would use...; that’s the question to ask yourself when picking a featured image (it’s usually pretty obvious). How themes use Featured Images varies widely. Some display them on the home page or in archive listings. Others also put the featured image at the top of the post or page. What you get just depends on what the theme designer had in mind.
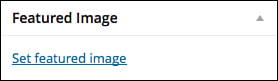
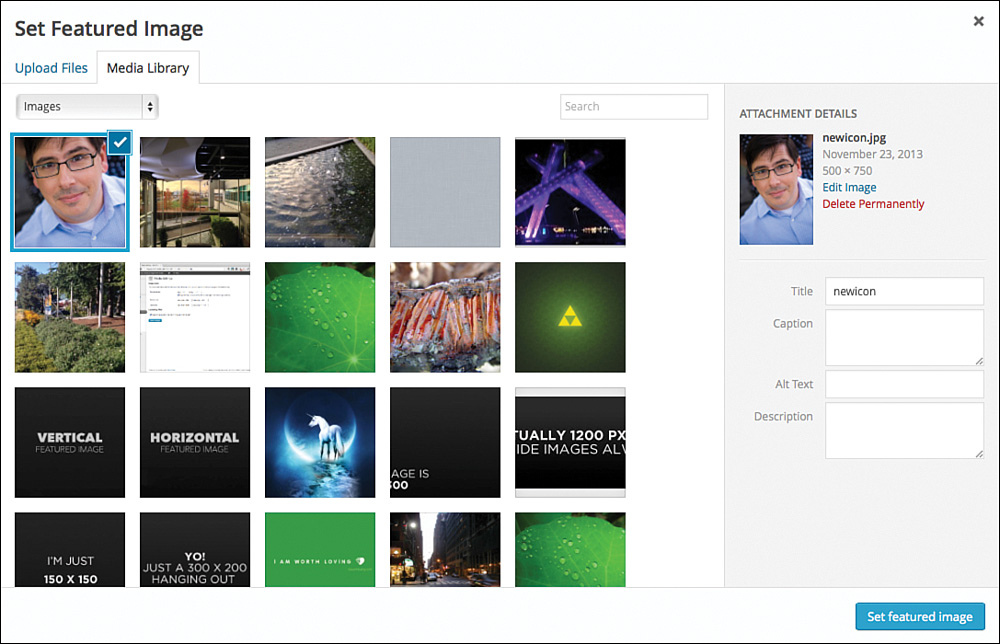
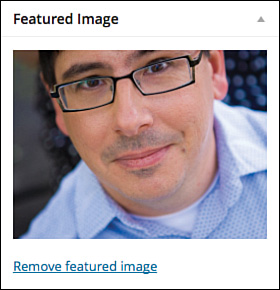
If your theme supports Featured Images, the place to start will be in the Editor down the screen and on the right (Figure 12.3). Clicking Set Featured Image brings you to the now familiar media screen. You can pick from one of your existing images or upload a new one. When you have the image selected, the button on the right will activate to Set Featured Image (Figure 12.4). After you click the button, you are returned to your post and will see something like Figure 12.5. The Set Featured Image becomes Remove Featured Image, if you want to remove or change the featured image for the content. You need to remove and then reset a featured image if you need a different image than the one you originally chose. When you click Publish or Update, your new featured image will be in place. What will it look like? That’s anyone’s guess. It depends on the theme.
One of the keys to using Featured Images well is learning what the right image dimensions are for your theme. Some themes will use the image as is as the featured image. Others will crop or scale the image to fit specific dimensions. Figure out what the right size is for your theme and make sure you stick to it for consistent-looking content.
What about when you need more than a featured image, or more than a few images in a post, and you have lots of images to show—and putting them all in a post would just be too much. Then you need a gallery or slideshow!
Using Galleries and Slideshows
Out of the box, WordPress has a very basic gallery function built in. It’s not great, but it will do in a pinch. To get more advanced galleries and slideshows, you need to install a plugin (or two) to get the job done. There are lots of slideshow and gallery plugins out there. I’ve used NextGEN gallery (http://wordpress.org/plugins/nextgen-gallery/free), “Genesis Responsive Slider (http://wordpress.org/plugins/genesis-responsive-slider/free, but it only works on Genesis child themes), and WooSlider (http://www.woothemes.com/products/wooslider/, paid) in the past with great results, but for sake of clarity and simplicity, I’m going to use a plugin we’ve already talked a lot about: Jetpack.
First, let’s insert a gallery with Jetpack turned off so you can see what creating a plain-old-basic WordPress gallery is like. For this example, I’m going to create a gallery in a new page, and the end result will be in the new default theme Twenty Fourteen, but this works the same way in posts or pages and any theme.
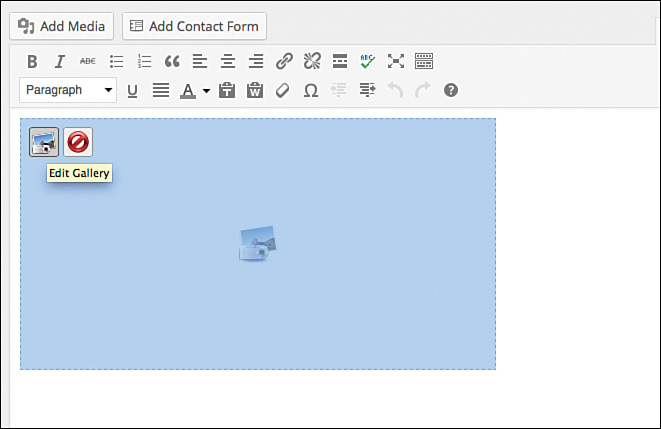
Now start a new (or open an existing) post or page. You can start writing the text and put in the title, if you want, but the magic starts when you click Add Media. From the Add Media screen, click Create Gallery. You should see something like Figure 12.6 (except without the check marks).
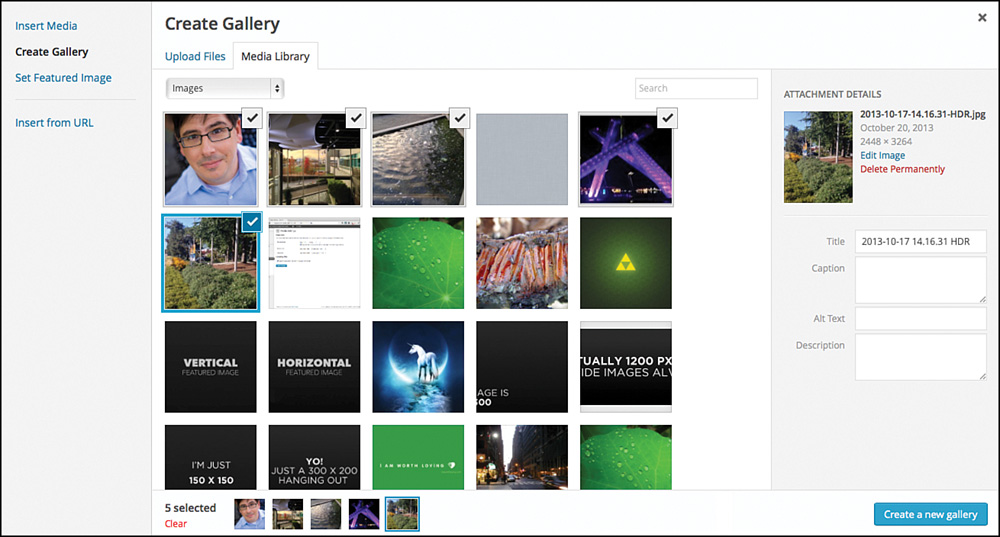
This is where you determine the images that will make up your gallery. If you drag and drop several images onto the window, they will be the images for the gallery. In this example, I’m going to use some existing images. To select multiple images, click the images while holding down the Ctrl key (Windows) or command key (Mac). You’ll see a blue check appear in the corner of each image selected (Figure 12.6). Don’t worry if the images aren’t in the order you want them; we’ll take care of that in the next step.
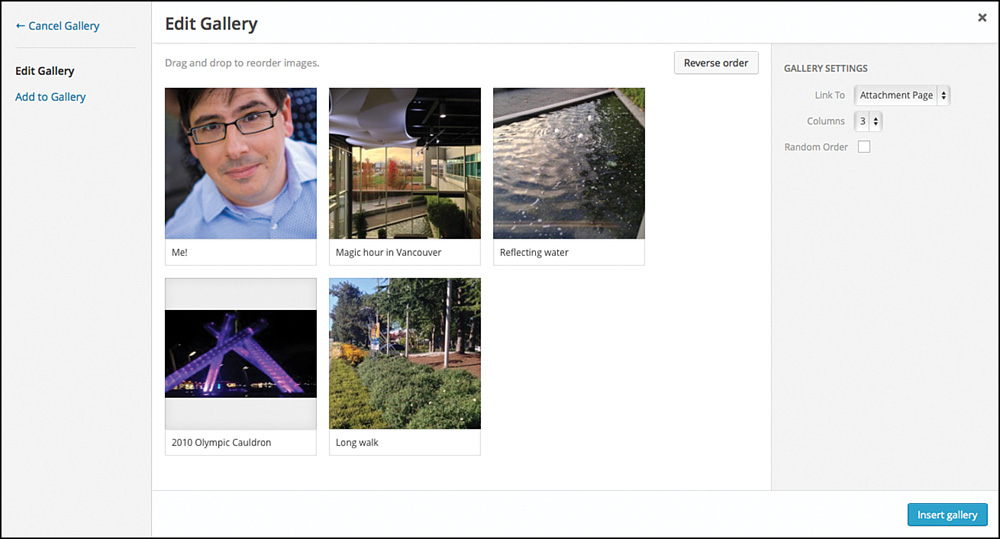
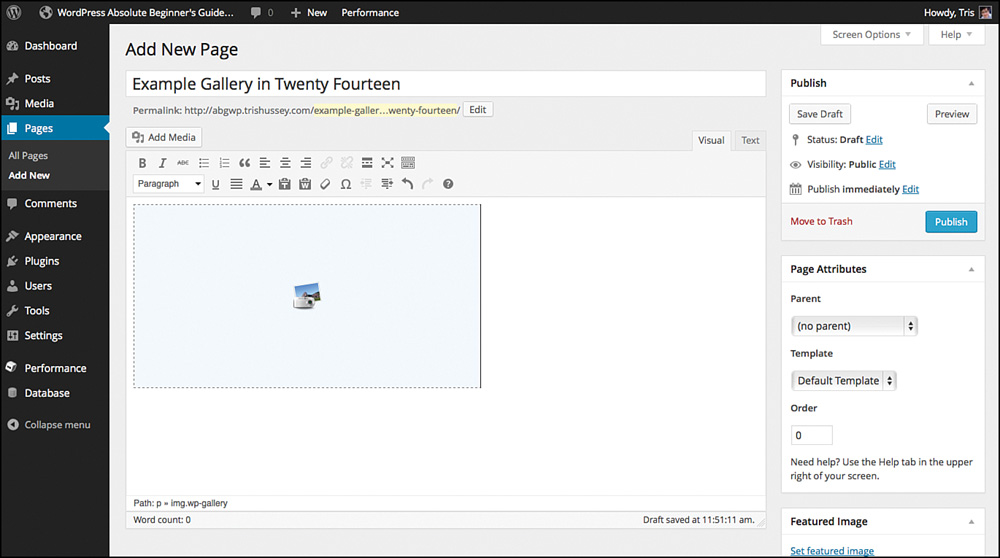
When you have all the images selected, click Create Gallery, and you’ll see Figure 12.7. Now you can caption the images if you want, set the number of columns, and drag the images into the order you prefer. When you’re done, click Insert Gallery, and you’ll see the placeholder image in your post or page where the gallery will be in relation to the rest of the content (Figure 12.8).
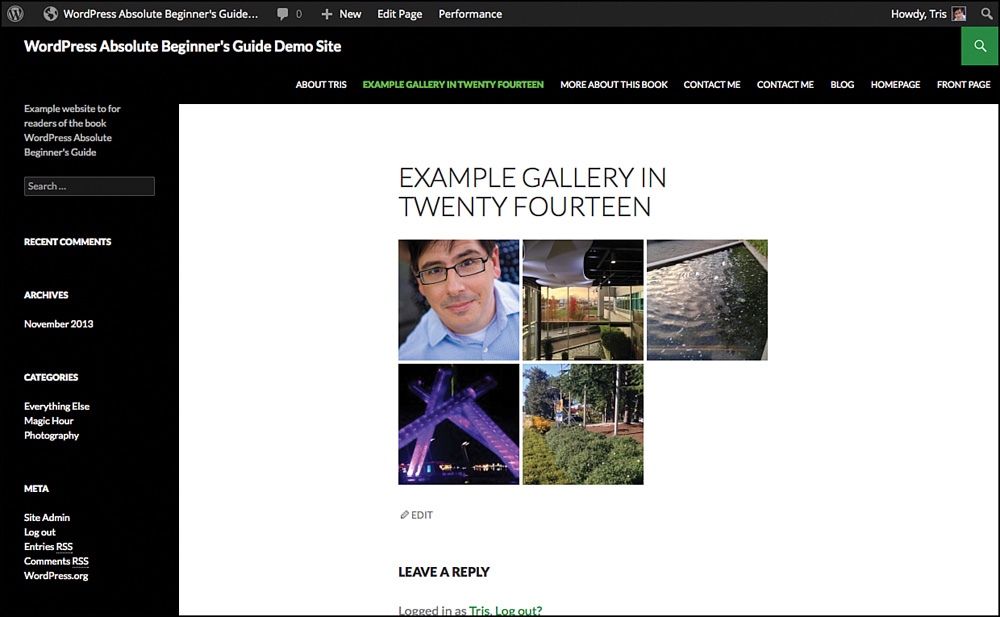
When the post or page is done, click Publish and you’re done! Figure 12.9 shows the final product. Not stunning, but functional.
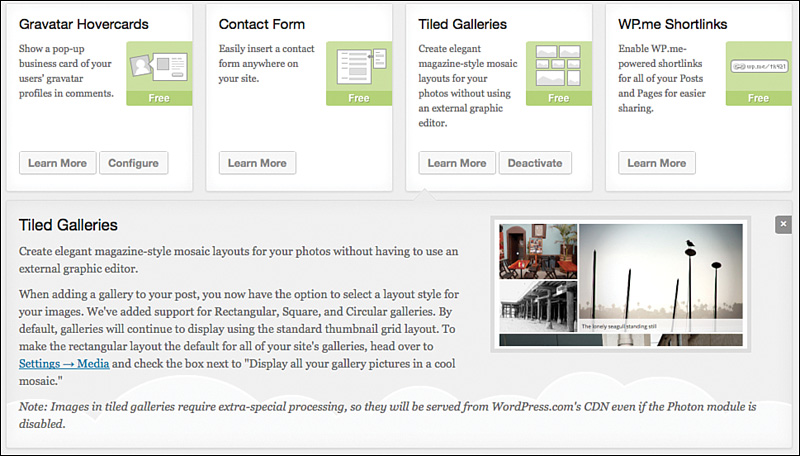
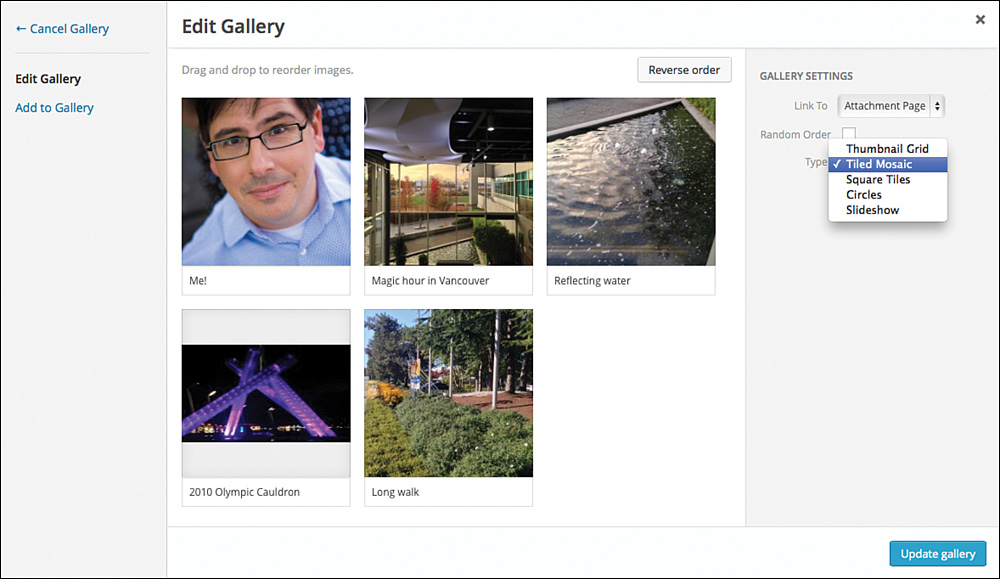
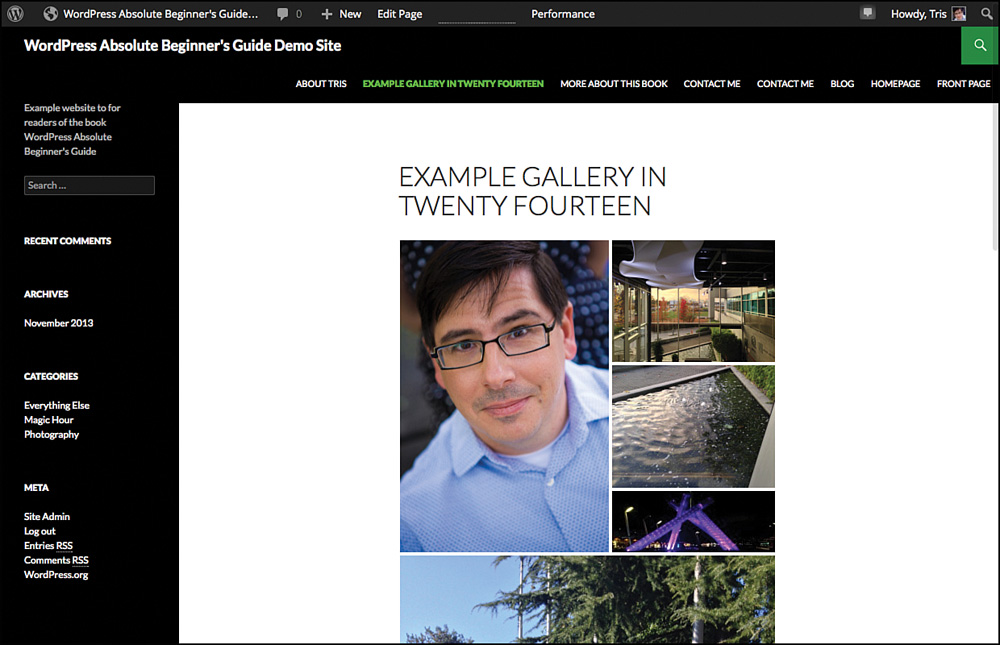
That’s the basics. For plugins like NextGEN gallery, WooSlider, or Genesis Responsive Slider, they work outside of the Insert Media screens. They have their own ways of managing the images in the sliders. However, if you use Jetpack, everything is integrated with the Insert Media tool. It’s handy, to say the least. After you activate Jetpack, you have access to several great gallery features. From the Jetpack screen, activate the Tiled Galleries (Figure 12.10) and Carousel (Figure 12.11). You don’t have to have both active, you can choose one or the other if you want. Tiled galleries give you new options for the galleries beyond just square. The Carousel option lets visitors click from your pictures into an immersive slideshow of your images. After you turn these options on, there will be new options under the Media Settings that you can check out. Let’s edit that gallery from Figure 12.10 first. Going back to that page, I click the gallery and then the Edit Image button (Figure 12.12); this brings up the Gallery Editor again. From the pull-down menu, I’m going to choose Tiled Mosaic and click Update Gallery to return to the editor. Nope, it doesn’t look different yet; this is just a placeholder image, remember. We have to click Update and refresh the page to see what’s new (Figure 12.14).
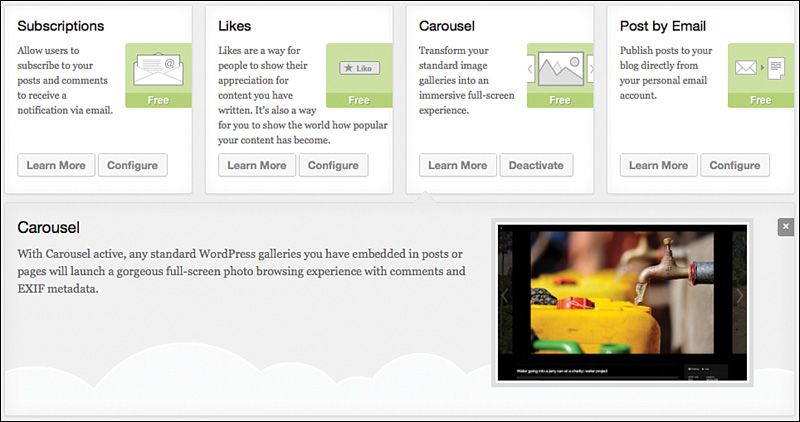
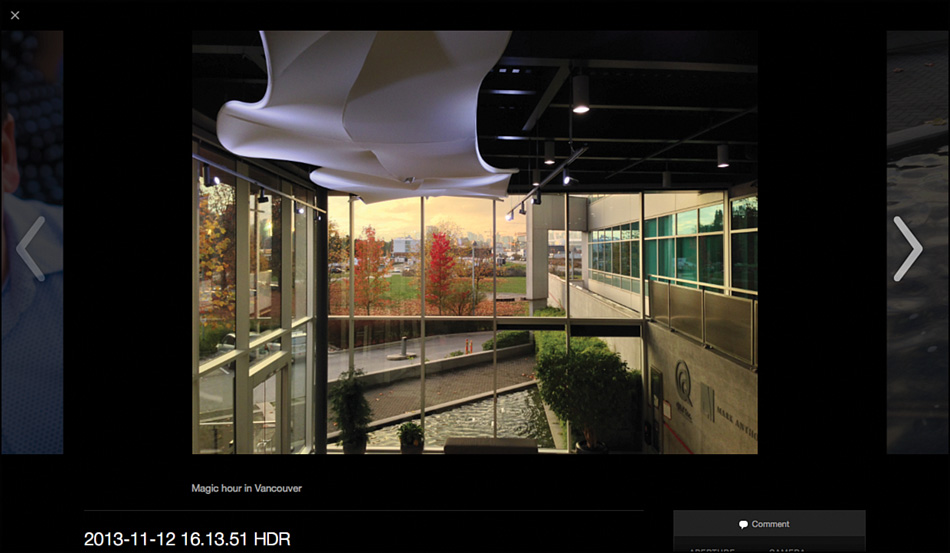
When you pass your mouse over each image, the caption slides up from the bottom of the image, and when you click the image, you automatically get a slideshow of the entire gallery (Figure 12.15).
Pretty spiffy and certainly easy. You can read up on these gallery styles on the official Jetpack page—http://jetpack.me/support/tiled-galleries/—which is handy because I’m sure there will be even cooler galleries in the future.
If you want to move beyond these basics, or have a slider that automatically changes images on a page, you will need to find a plugin or theme that supports that. Twenty Eleven has a built-in Featured Post slider that uses a static page with a specific template and setting certain posts as Sticky to make it happen. Other tools use shortcodes or integration with the theme (like WooSlider and Genesis Responsive Slider), which is very handy and ensures that the integration between theme and slideshow is as seamlessly as possible.
Using the Image Editor
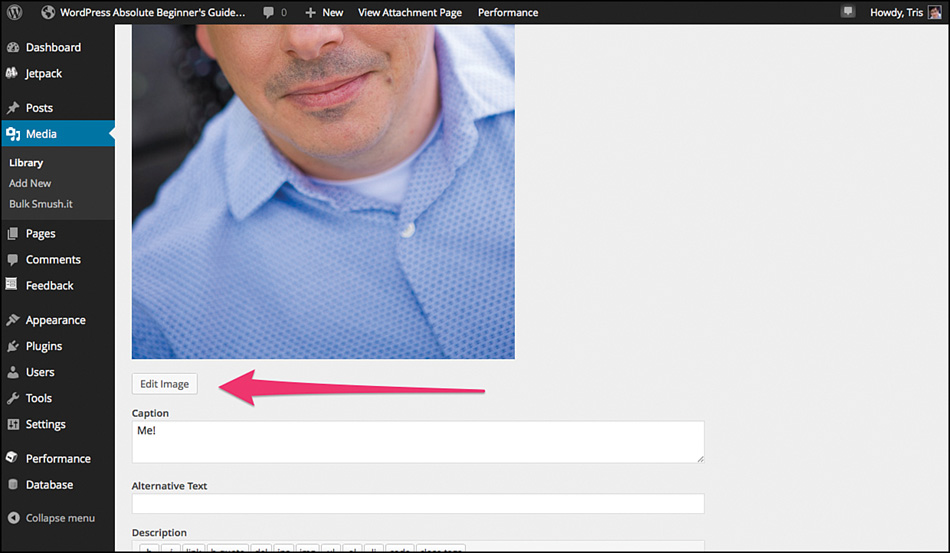
Sometimes you upload an image and realize that it needs to be a touch smaller or would look better cropped. Or, oops, you need to rotate the image for it to make sense. It happens, and WordPress can help you out of those quick jams (and this is very handy when you’re working with Featured Images). The built-in Image Editor in WordPress isn’t intended to replace an image editor on your computer (although the online ones are getting better). The built-in editor is for quick fixes, like resizing and such. It takes just a couple clicks to get to the editor, and it starts with either clicking Edit below the image via the Media Library, or if you’re inserting an image through Add Media, you can edit the image there. Figures 12.16 and 12.17 show you what I’m talking about.
Regardless of how you get there, it looks like Figure 12.18 when you arrive.
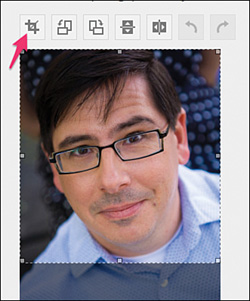
By clicking and dragging in the image, I bring up the “marching ants” selection area that will let me crop the image. In this case, I’d like to crop the image so it’s shorter but the same width. Clicking the crop icon (Figure 12.19) will set it, and the result is Figure 12.20.

Make sure you click Save, or you’ll lose the changes you just made. Let’s make the image’s dimensions smaller with the scale tool. Clicking Scale Image opens up an area to set the new dimensions. WordPress will make sure that the image will stay in proportion (so it won’t look stretched or squished) and won’t let you make the image larger than you originally uploaded (so it will still look good). I’m shrinking this image by half to set the width from 500 pixels to 250 (Figure 12.21).
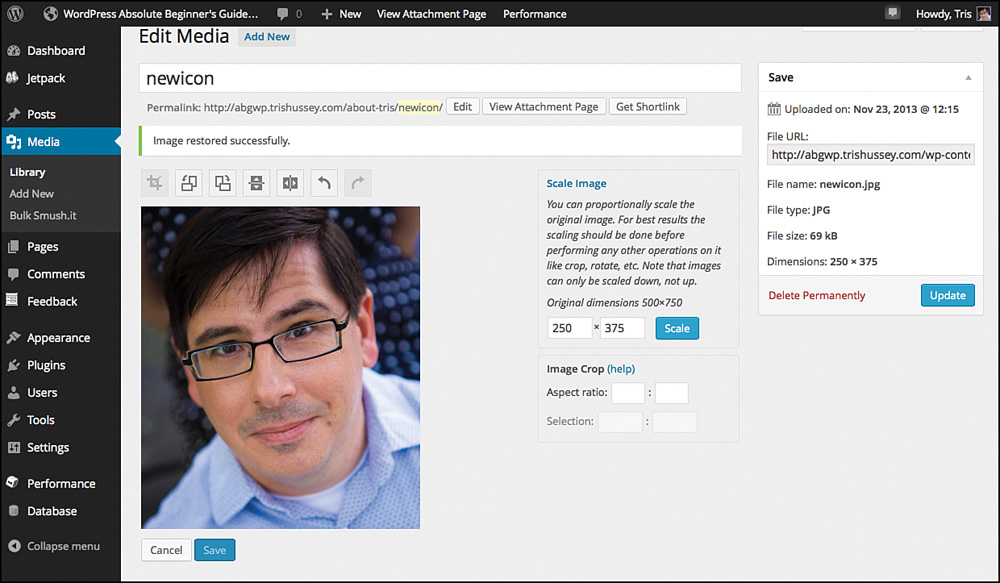
When everything is done, click the Update button to save all the changes to WordPress and update all the instances of the image in the site. Did you notice the box for choosing to update the thumbnail only or all sizes except the thumbnail? This lets you make changes to only the areas of the site you want. Often the thumbnail image has the wrong cropping, so you want to fix that—or the thumbnail is fine, but you really want to change the rest of the images. This is how you can have that kind of fine-grained control. The buttons for rotating the image clockwise or counterclockwise as well as vertical or horizontal flipping work just as you’d expect. Just remember to click Save and Update to make sure the changes “stick.”
Remember the Image Editor is really intended for quick fixes. You can’t add text to images, apply effects, or that sort of thing.
Now for some honesty.
The WordPress Image Editor can be a great lifesaver, but it’s wonky. It doesn’t always work like you expect or update images the way you want them. Myself, when I’m trying to get an image right for a post, I use the image editor on my laptop. Even Preview (on the Mac) can be better than what the WordPress Image Editor is (or should be).
Optimizing Images
Over the years, with better digital cameras and faster Internet connections, we’ve gotten used to uploading images right from our devices to Facebook, Twitter, and our websites. However, Facebook and Twitter and many other sites show you a scaled-down and compressed version of the image for the world to see. Maybe the full image is hiding around in their servers somewhere—Facebook and Flickr let you download full-size copies of your images—but what you look at on the pages aren’t the full-sized images. They aren’t even just visually reduced by 50 or 25%; they are physically smaller files in dimension, resolution, and file size. WordPress does a similar thing with creating thumbnails, small, medium, and large sizes of the images while keeping the full-sized image available as well. Now let’s talk about taking this a step further. Let’s ensure that images load quickly for everyone all the time. The first thing to do is on you, but there are a couple automagic things that will make your efforts really shine.
First, don’t upload the full-sized, right-off-your-camera image. It’s huge. I’m just as guilty of doing this as anyone else, but for most people’s needs, the full-size 2.5 megabyte 3200×2400 pixel image is overkill. So if you take a moment, open the image in Preview or Paint.Net (Windows) or any other image editor before you upload it; reduce the dimensions by half, and export the JPEG (for photos) to 80% quality. Your visitors probably won’t be able to tell the difference, and the file size will be much smaller. How much? Doing this on one of my images from my iPhone, the 1.3 megabyte image became a 348KB image. Half the size. Less time needed for you to upload it, less time needed for your visitors to download it to view it. You don’t have to go to the extreme of this example (reducing the dimensions by half) to get much smaller images, but before you upload, it’s a good idea to make sure you’re only uploading the largest size you really need to get the job done. However, most hosts and WordPress put a limit on how big a file you can upload (for me, it’s 7 megabytes), which really comes into play when we talk about podcasts and videos, but even here it sets an upper limit to think about. You can, however, do even more. You can even compress and optimize images automatically as you upload them. How? WP Smush.it.
WP Smush.it
WP Smush.it uses a Yahoo! Service to compress and optimize PNG, JPEG, and GIF images automatically for you when you upload. The results can be pretty amazing and lead to significantly smaller files—which means your site loads faster for everyone. Figure 12.22 gives you an idea of the savings I’m talking about.
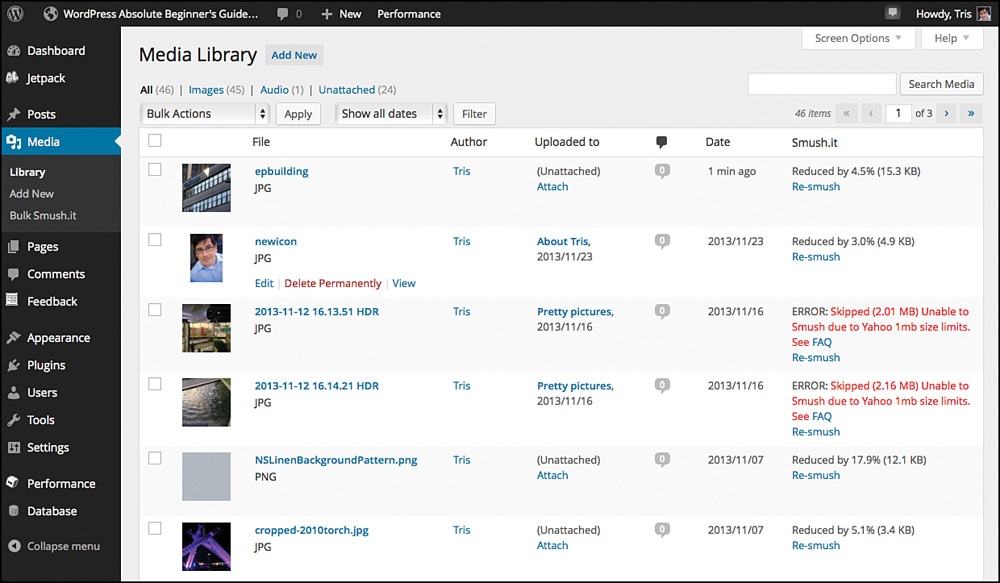
Oh, you noticed that some of the images have error messages in the Smush.it column? Yes, the Yahoo! Service allows images only 1MB or less to be processed. So my full-sized photos are too big to smush. The others? Just fine. The plugin WP Smush.it is a newly reinvigorated effort from the original WP Smush.it effort that languished. This plugin adds a little extra time to the upload process because it has to upload the image to WordPress, then send to Yahoo!, then back to WordPress for all the final image size creating. I think the extra time is worth it, however. Saving even a few KB across an entire page adds up fast. Combining Smush.it with caching leads to some pretty awesome load times. Of course, we can make things even faster thanks to Jetpack, Automattic, and WordPress.com.
Photon
Part of the Jetpack plugin suite is a module called Photon, which, after you activate it, takes your images and hosts them literally on servers around the world so they load faster for everyone. Photon takes the load off your server to serve the images to visitors by using the servers that host WordPress.com and all its millions of users. You can learn more about Photon on the official page: http://jetpack.me/support/photon/.
There is a catch, though. For Photon to work, Jetpack changes how your site serves images. Although there is a copy on your server in case there is a delay from the Photon servers, if you, for example, edit the image the way described earlier, it won’t take effect with Photon. To make changes to an image, you need to upload a new version of that image with a different name for the image to be replaced. I’ve seen an issue where a site owner wanted to replace the featured image with a better cropped version, and cropping a new image and using FTP to “replace” it didn’t actually work. The Photon copy was still the master copy for the site.
So can Photon help you? Sure. Is it for everyone? Mostly. I think for a lot of sites with pretty normal and basic image use, Photon will give the site a little load time boost. Here’s the thing, though, as we’ve talked about with Jetpack before; Jetpack loads a lot of code to go with it. So using Photon might really only bring your site to a level that is on par with a non-Jetpack-enabled site, so the speed improvements might be a wash.
I recommend that you try it, see if Photon (and Jetpack for that matter) are more of a help than an hindrance, and see what works for your site.
Video and Audio Files
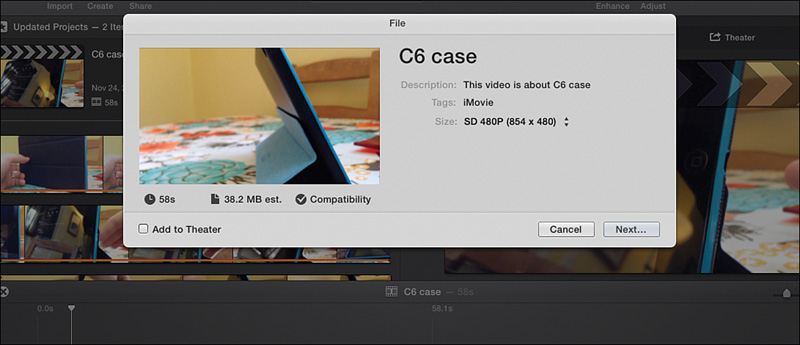
Videos and audio files are where things start to get tricky. Remember that “uploads limited to 7 MB” thing I mentioned just a bit ago. Right. So I’ll show you why this is an issue with video. A simple 58-second video, rendered through iMovie as standard definition, is about 38MB (Figure 12.23).
There is no way to upload that video through WordPress out of the box. The only way to do it is through FTP, and that means the video won’t show up in the Media Library. You’ll have to remember the filename and where you uploaded the video to use it. So if I upload that video to my demo site, the URL is going to be something like http://abgwp.trishussey.com/wp-content/uploads/c6video.mp4 (assuming that’s what I name the video). Hard to remember? No. A little inconvenient? Yes. However, that’s it. Audio files (like podcasts) are generally smaller, so my one-minute WordPress podcast episode is well under the limit for uploading. Here’s the question: Why would you upload videos to your own site instead of YouTube? The reality is that unless you’re planning on selling the videos or need to restrict access to them for some reason, you should take advantage of YouTube’s breadth and reach. Because you can upload a video up to 15 minutes long (imagine the file size!), it’s a real bonus. Audio files are a different beast. There just aren’t the same options available for free audio/podcast storage. Services like Soundcloud are great to start with, but will cost you money to keep using. So for the case of audio files, I think uploading them to your own server is the best course of action.
NOTE
Okay, there actually is a way to upload larger videos within WordPress, but it isn’t free. You do it by subscribing to the paid VideoPress service. More information is on the VideoPress site: http://store.wordpress.com/premium-upgrades/videopress/.
To recap, uploading videos can be a little tedious, and YouTube is a better choice. With audio files, uploading them through the media uploader is probably going to work for short segments. Great, but how do I use them?
Let’s get to that right now.
Embedding Content in Posts and Pages
Getting your media into a post or page has gotten so easy now that it almost seems like magic. First, here is a post that I created that will have a video I uploaded, a podcast, and a YouTube video (Figure 12.24).
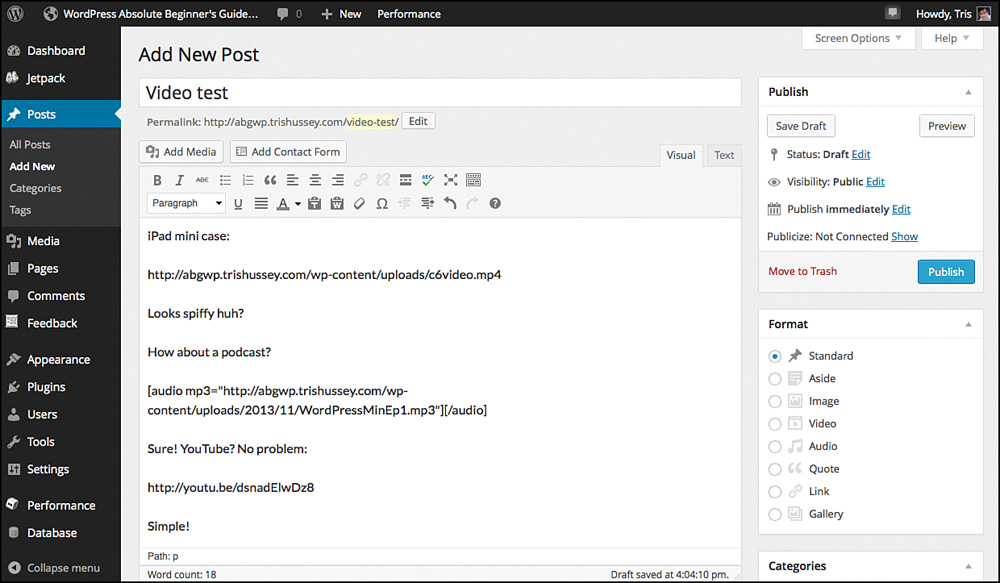
Notice the distinct lack of strange or fancy code? Right, that’s because we don’t need fancy codes or plugins for most media that you’re going to come across. For the video, I just pasted in the URL to where I uploaded it. Notice that it is not a link. It’s just text. This is important. Flipping to the text/HTML side of the editor just to be sure it’s not a link is a good idea if you’re not sure. The podcast? I uploaded it just like I would an image and clicked to Insert it into the post, and the shortcodes were written for me (Figure 12.25).

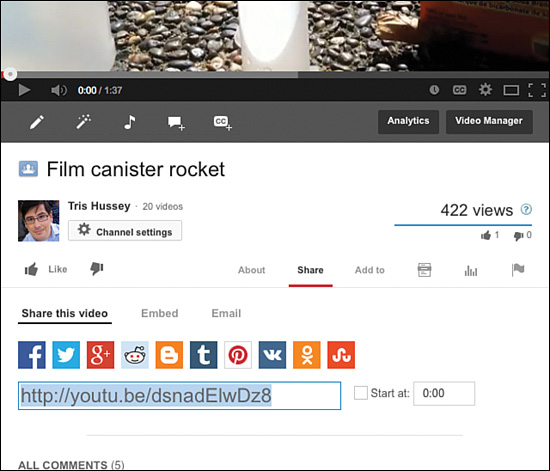
For my YouTube video, I went to my channel, copied the Share link for the video, and pasted it in (Figure 12.26). Again, pasted as text, not a link.
When I published the post, the result is in Figure 12.27.
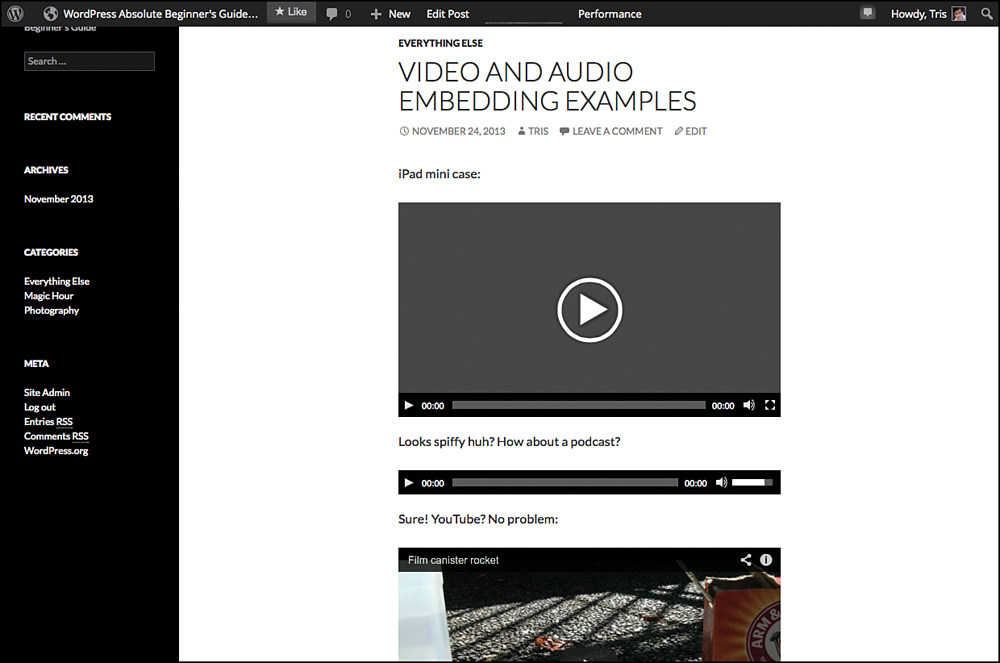
Yes, it’s really that simple. WordPress has built-in HTML5 players for video and audio files (which means they also work for mobile devices) and uses a system called oEmbed to pull in the players from YouTube, Flickr, Vimeo, and other services automatically. The end result is that putting multimedia into your posts and pages is painless. No worrying about media plugins or pasting special embed codes that sometimes don’t work. Most of the time, this is all you need. For the increasingly rare occasion when you do need to paste in embed codes, here’s what you need to do.
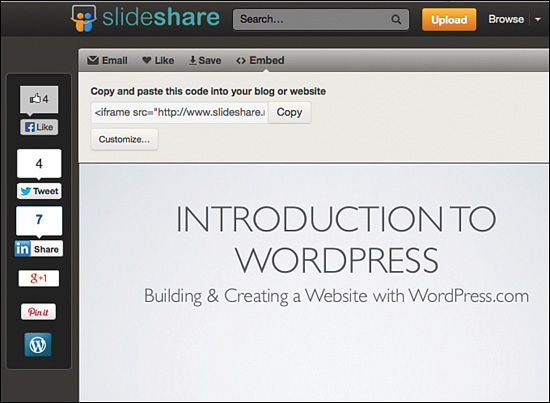
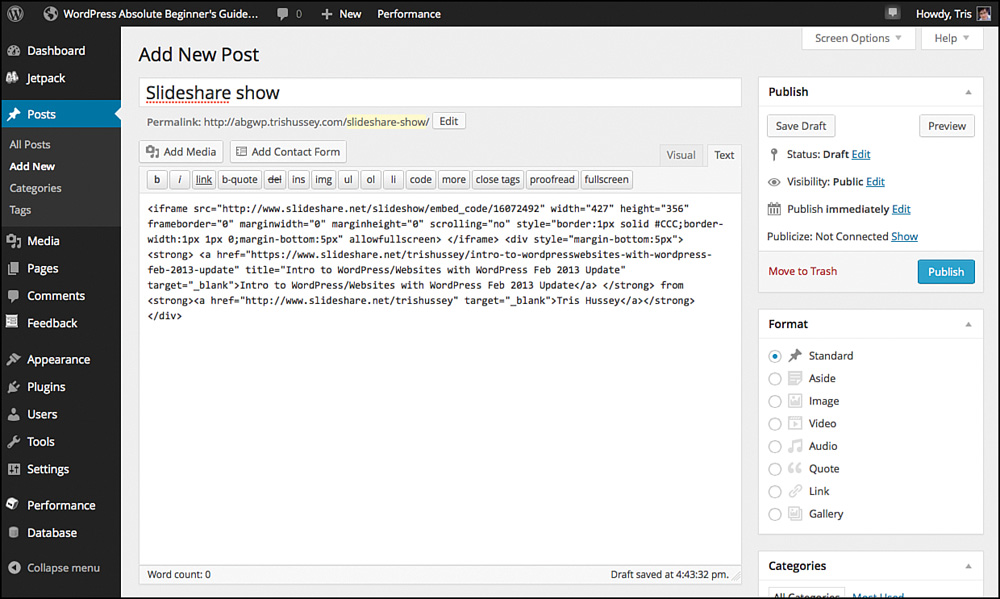
Slideshare, for example, uses an iframe embed code for its slideshows (Figure 12.28), and after you copy the code, you need to paste it into your new post in text. Start your post and click the Text tab and then paste (Figure 12.29). You can switch back to the Visual site if you want, and you’ll see a big yellow placeholder box where the slideshow will be in relation to the rest of the content. When you publish, the slideshow (or whatever you embedded) should be there.
A little more complicated, but still not too hard. Now what about other kinds of files? Just as easy.
Other Files
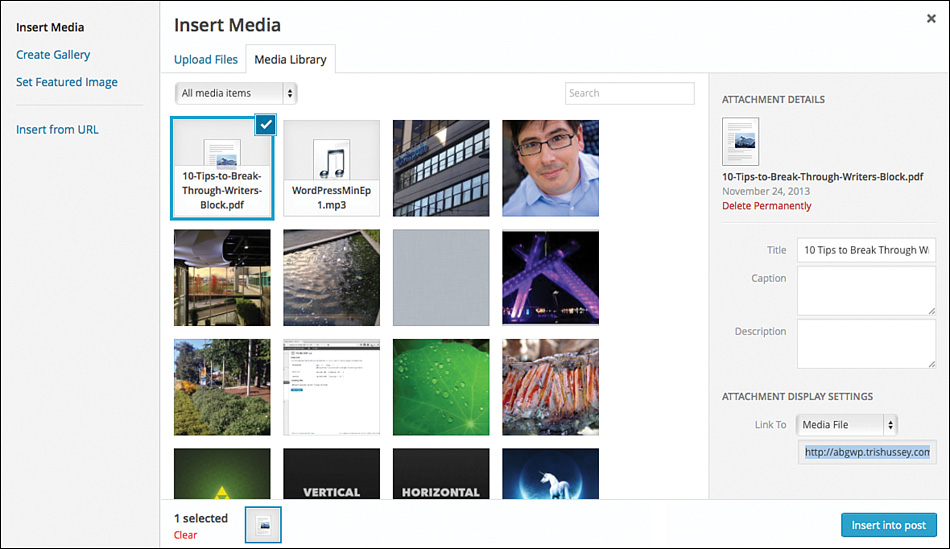
You can upload text, PDF, Word, ZIP archives, and most other files to your site through the Media Uploader (keeping under the 7MB limit of course), and then like any other kind of media, insert it into a post—for example, a PDF version of a post (Figure 12.30) to be included at the end of the text version (Figure 12.31). There are some file types that you can’t upload through the Media Uploader (such as epub for books and scripting files), but FTP will work fine in those cases.
WordPress is really media made easy.
Conclusion
If there is one thing WordPress has made really easy—besides publishing content—it’s including media with your content. Just about everything is drag and drop, click and publish. It’s very satisfying to be able to go from taking photos, uploading them, and having a slideshow and gallery of the pictures in just a few minutes. It’s awesome. This chapter wraps up the part of the book about content. These early chapters should be enough for most users to get their site going and humming along. In the next chapters, we get into some cool and advanced stuff. Hold on, this is where it gets good.