
17. Advanced WordPress Settings and Uses
In This Chapter
• How to use WordPress to build a website
• Making a site private and using it for collaboration
• Running a forum with WordPress
• How to use WordPress on your computer
• How to move a WordPress site to a new server
At this point, if you’ve been reading through the entire book, you’re a pretty savvy WordPress user. However, there is still a lot more that can be done with WordPress. We’ve touched on one already—using WordPress to make a “regular” website—but there are things like using WordPress to power forums, make private sites, and even run WordPress on your computer. Then there are the tasks like how to move a WordPress site from one host to another (or from your computer to a host), which can be a lot harder to do right than it seems. These topics are what this chapter is all about—using WordPress in new and different ways.
Using WordPress as a Website
Long before I was writing books about WordPress and blogging, I was helping people create “regular” websites using WordPress. The idea was pretty simple at first, set a Page as the home page with nice graphics and text, use lots of other pages to cover the rest of the content, and then reserve posts for a blog for the site. Back in 2006, this was pretty cutting-edge stuff. For a while, it took a little behind the scenes tweaking, a couple plugins, and more than a little coding to make WordPress a “website.” Now in 2013–2014, not using WordPress to build your website seems a little silly. There are hundreds of themes available designed not for WordPress as blog, but WordPress as website. And we’ve moved on from only using a page as the home page. Now you can keep your front page your “latest Posts”—at least as far as the Reading Settings go—and have a mix of content from posts, pages, widgets, sliders, and galleries all together in one place. And still have a blog, too. So technically it’s a lot easier to use WordPress to build a website; now the complicated part is picking the theme and content that you want to put there.
In general, there are two ways to use WordPress for a website. First is the home page as static Page model. It works great for many situations and it’s very simple to do. In fact, I’ll show you how Twenty Twelve was designed especially to do that very job beautifully. The other way is to leave the default setting the way it is (the home page is the set of the latest posts), but the actual homepage is anything but default. From magazine style themes with widgetized content areas to themes that focus on key pieces of featured content (parts of posts or pages, or both) to one-page themes with several areas that use static content, sliders, Custom Post Types, and posts to make an engaging layout, the world of WordPress as a website is pretty amazing. In this section, we’ll go through the two main ways and use two different free themes to do it: first the static Page model using Twenty Twelve and then the Customizr theme for the posts as home page layout.
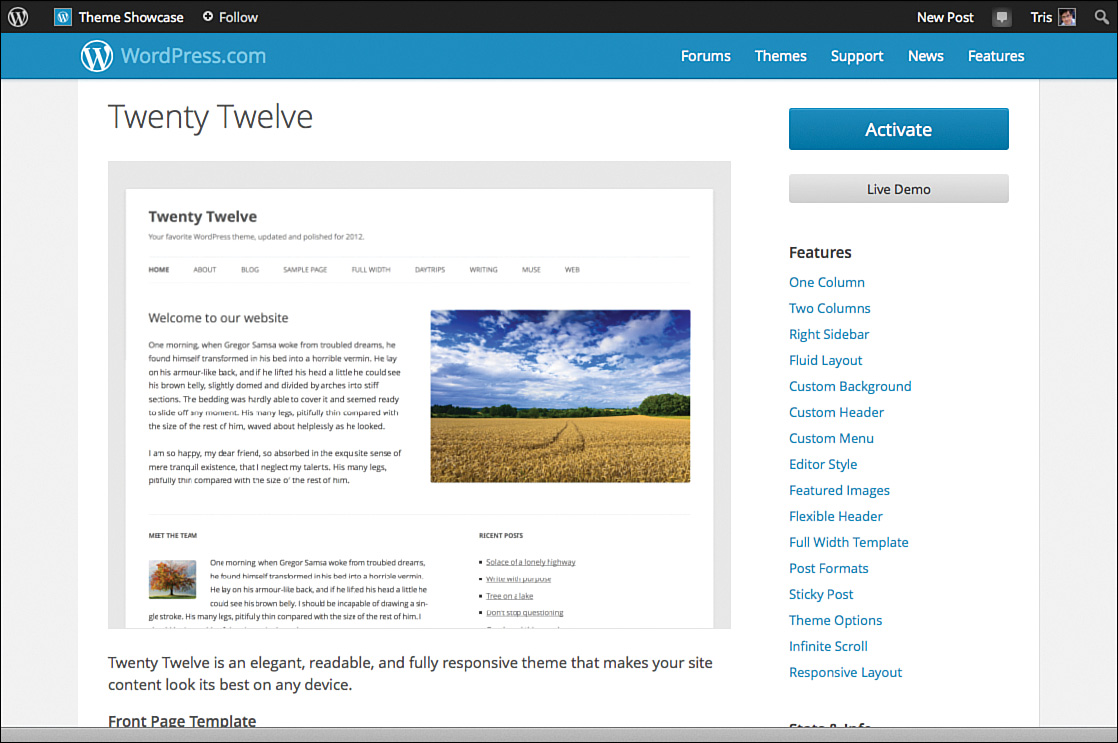
In Chapter 16, “Customizations Without (Much) Coding,” I used Twenty Eleven as the example theme, and in this chapter, I’ll be using Twenty Twelve because Twenty Twelve has a unique and powerful Page template (remember those from Chapter 11, “Using WordPress: Content”) that allows you to combine static content on the front page with a couple handy widget areas. The example page on WordPress.com (http://theme.wordpress.com/themes/twentytwelve/) gives a taste of what you can do with this theme. It has a nice concise landing page with a call to action. Do you want intro text and some space for your latest posts? The sky is the limit, so let’s get going on the why and how—and there are lots of “hows” for making WordPress a website—of using WordPress to create a “traditional” website with the static Page model.
For this to work, you need at least one page to use as the home page. You can also have a page that will be used as a container for all your blog posts. It serves as a way to have all your posts in one place without having to put all the posts in a single category (that you also have to remember to use). For this example, we’re going to go with the two-Page setup: a front page and a blog page. The first step is to create the front page.
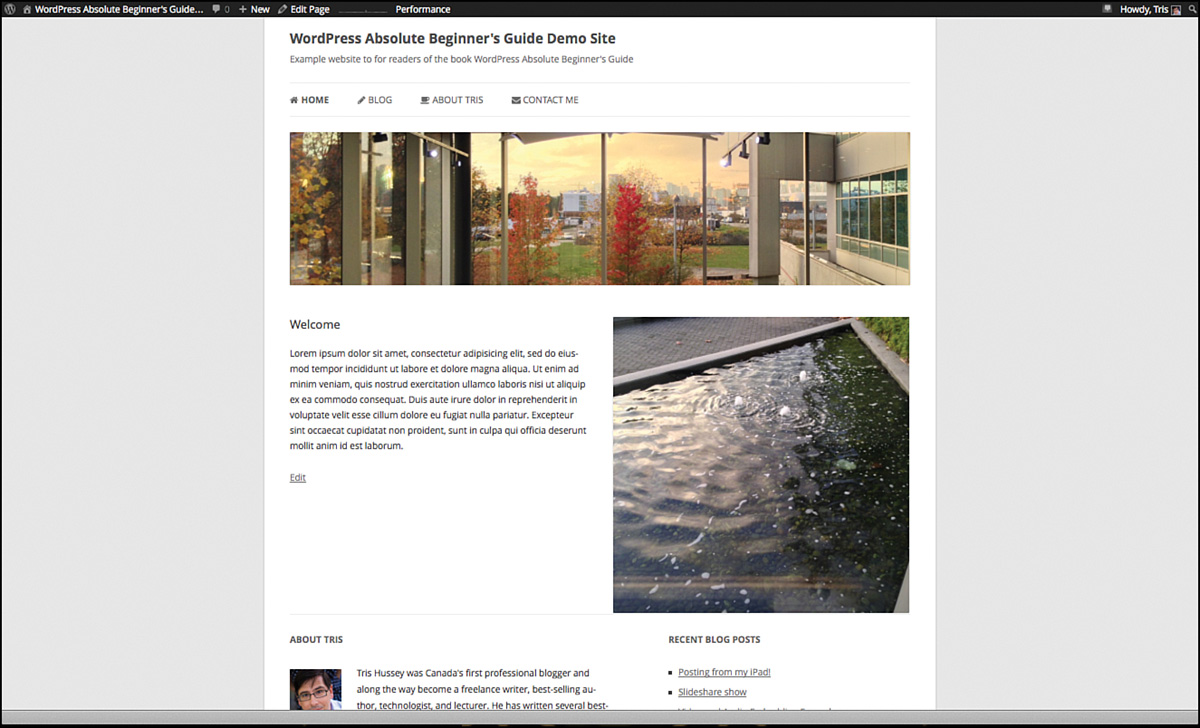
According to the instructions (the link from earlier), we just need to activate Twenty Twelve, create a page, and make sure to use the Front Page template. To get the look in the example (Figure 17.1), we also need to use a featured image that is 624 pixels wide (any height, but I’m going to go for square). I’m going to cheat a little and use a paragraph of lorem ipsum for the text. Figure 17.2 shows the completed page we’ll use for the front page.
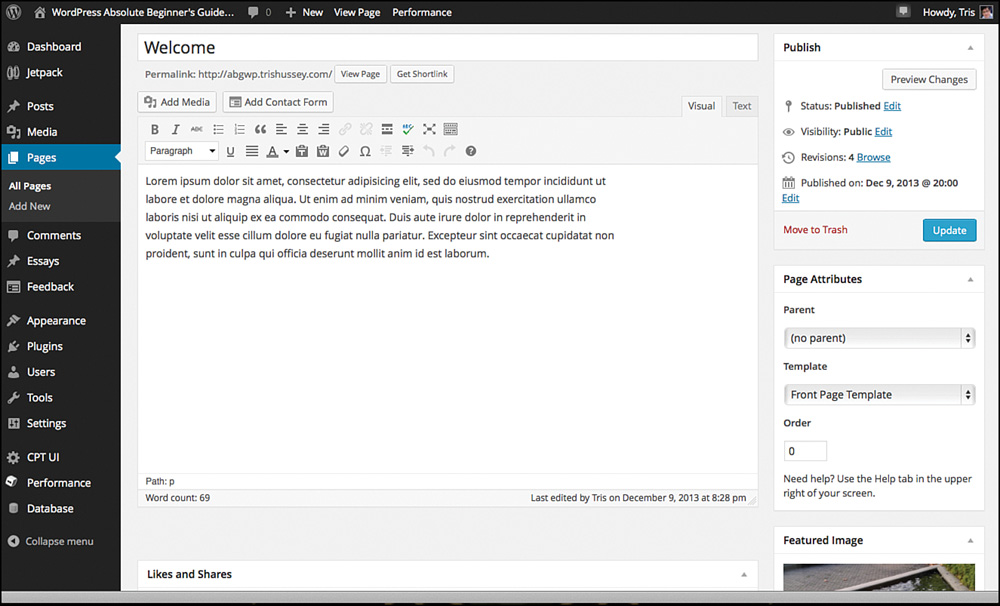
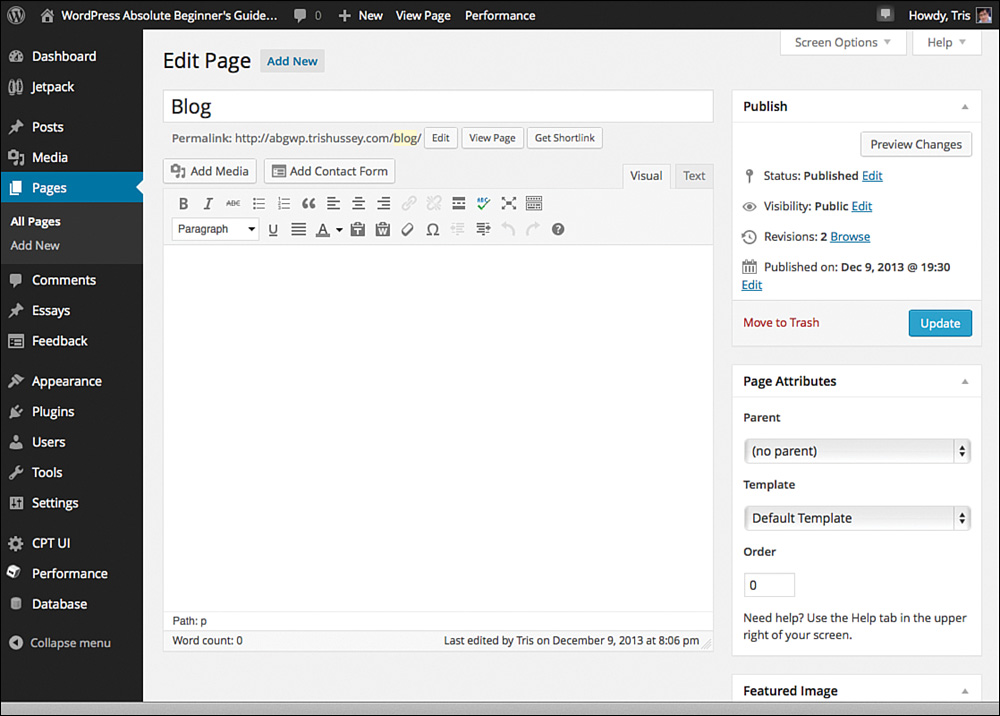
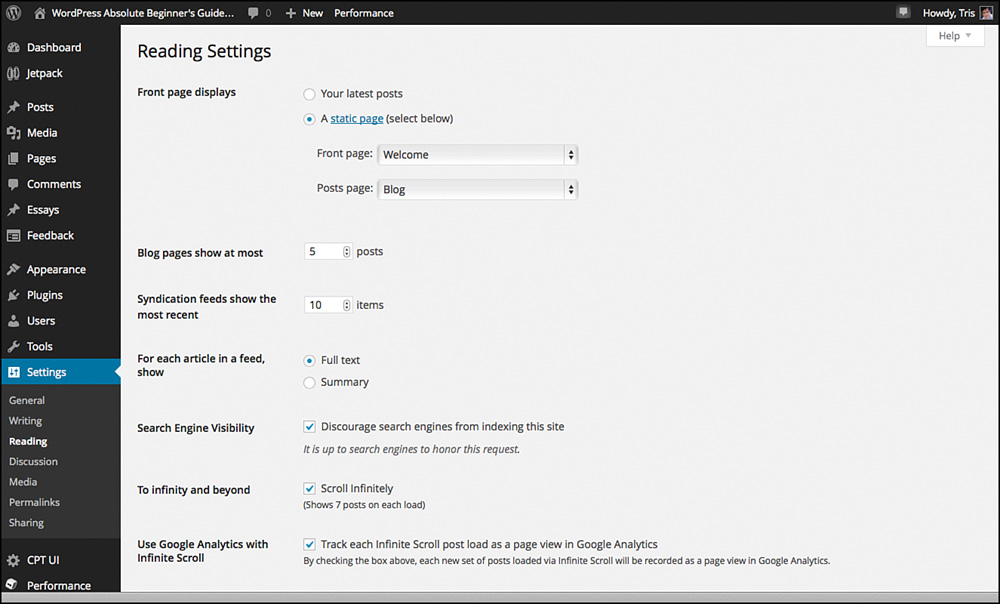
The title for this page matters; it’s displayed above the introductory content of the site. So I used a name I’d be able to pick out from a mass of pages but one that also made sense—Welcome. For the blog page, we just make a new page with whatever title (I usually use Blog) and save it. No content is needed in the content area (Figure 17.3). Now to take the first step to making this site into a website. Go to the Reading Settings and under the Front Page Displays, click A Static Page option and pick the two pages we just created from the menus (now you understand why you need to name them something recognizable). Then click to Save Changes (Figure 17.4).
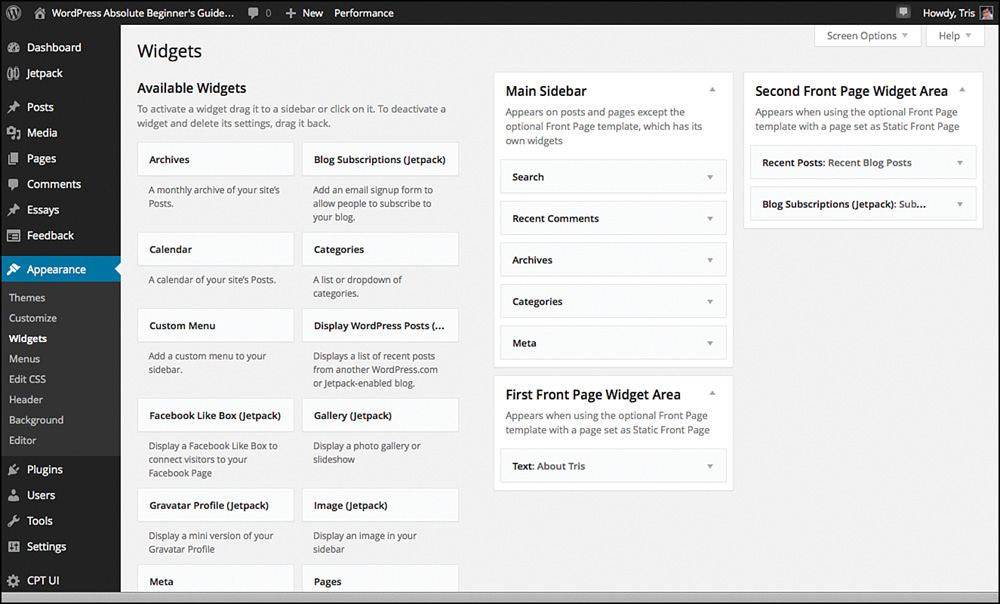
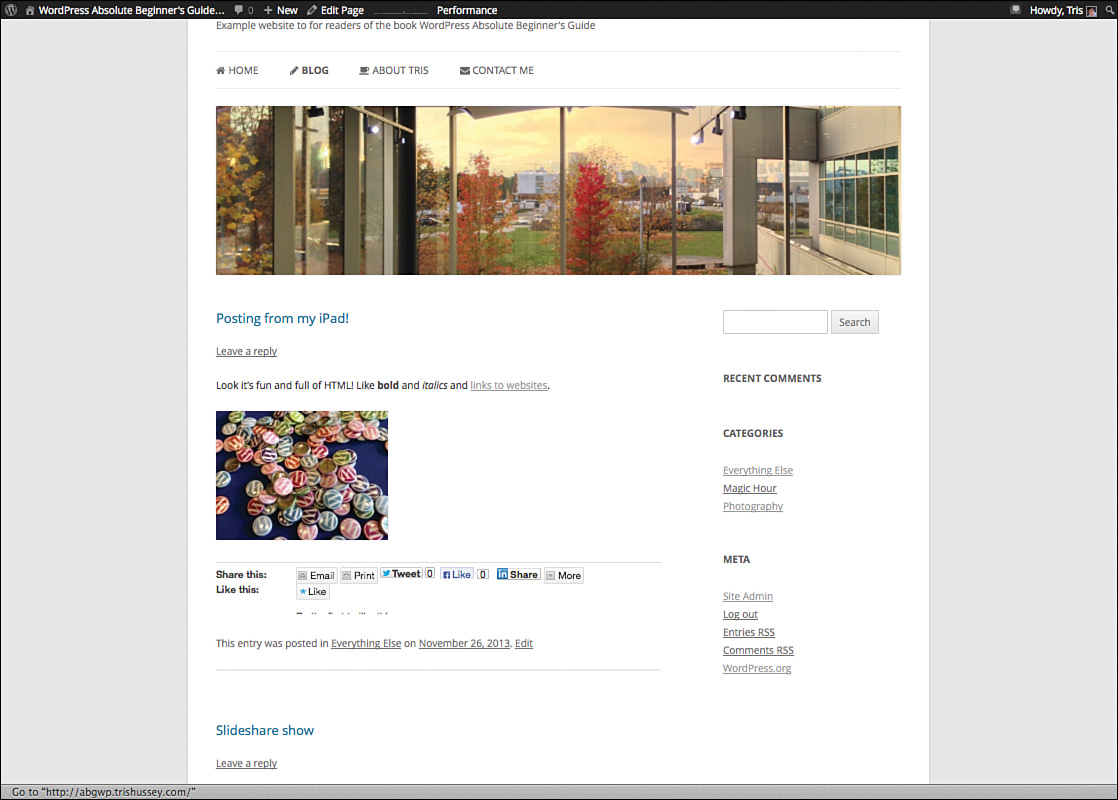
You can switch tabs to look at the site and, after refreshing, there it is! The content of the page is there (I added a header to make things look nice) and below are a couple widget areas (Figure 17.5). The example theme page from WordPress.com uses a text block for About the Team and then recent posts. I’ve done the same using a text widget and a couple handy Jetpack widgets (Figure 17.6). I also added the Blog Page to our menu (and used the Font Awesome pencil icon, which you learned about in Chapter 16), so when you click that menu item, you see all the blog posts published thus far (Figure 17.7). As far as making a “site,” that’s about it. There isn’t a heck of a lot more to do. As you create more content, you decide if the content should be pages or posts or even Custom Post Types. Since we’re using a page as a container for all your posts, if you want to have content that is easily connected, like posts, the Custom Post Type route is a good one to take. You might wind up having to look up a little advanced theme editing (maybe) to add the custom taxonomies to the layouts, but at this point this is the start of a great site. Next is taking a step back, resetting the Reading Settings to the default settings (Front Page shows the latest posts) and switching to Customizr so we can use a magazine theme for the website.
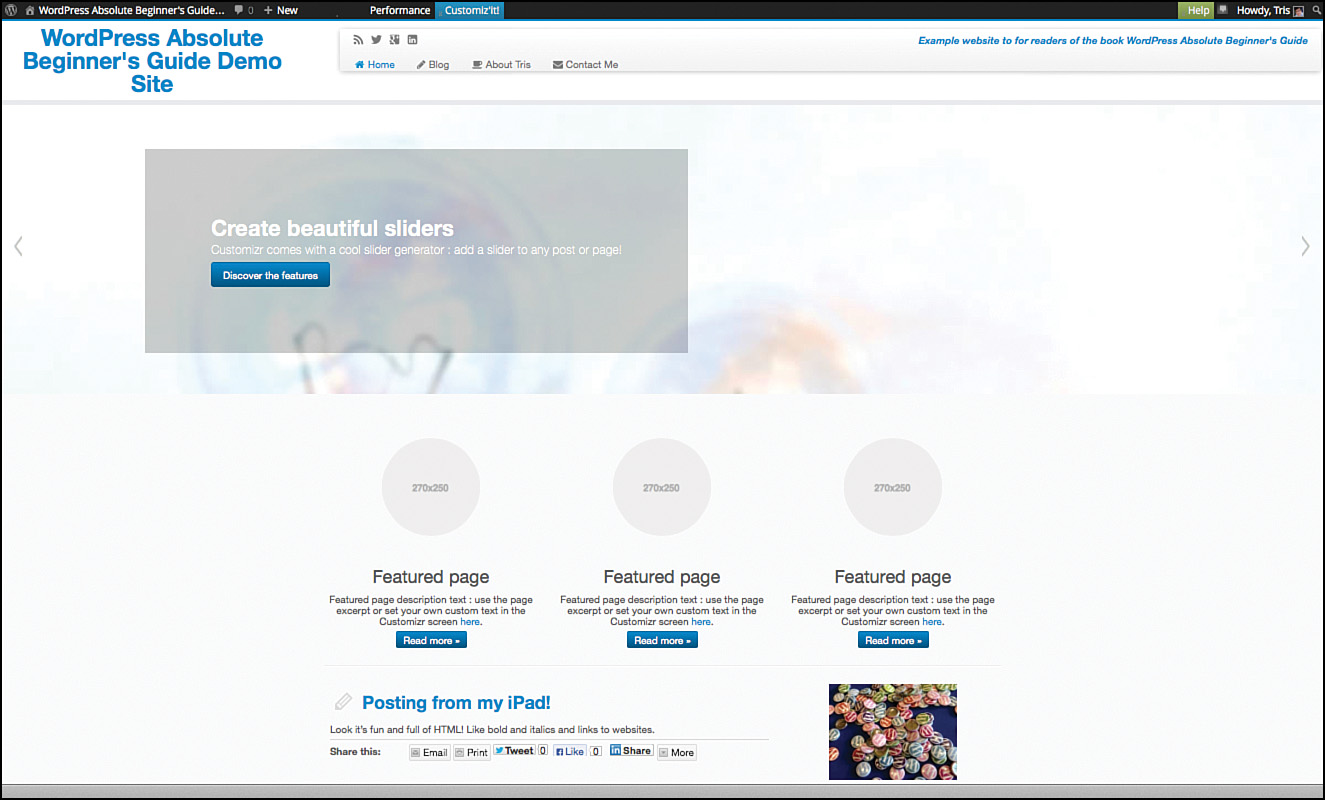
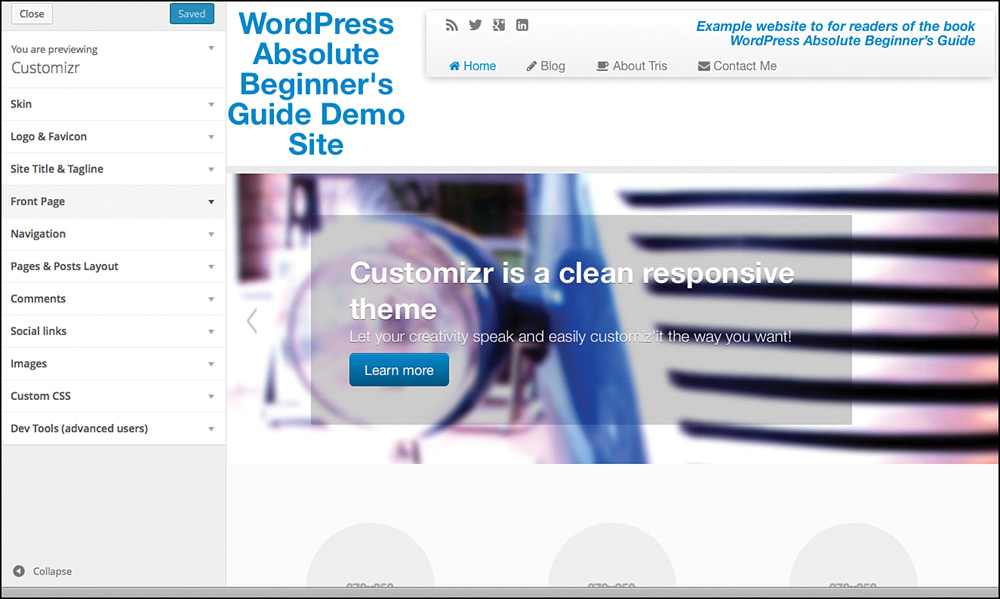
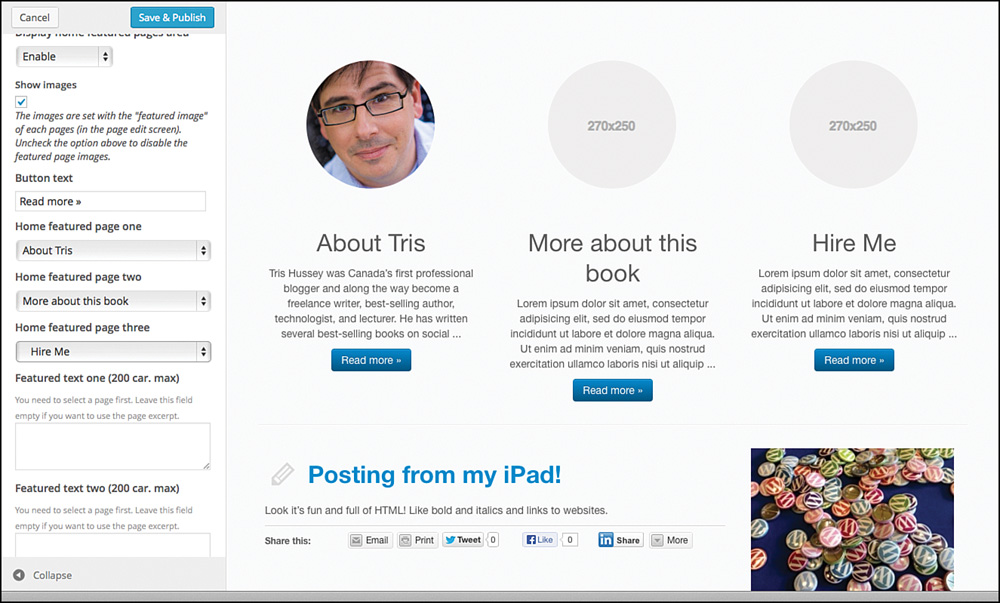
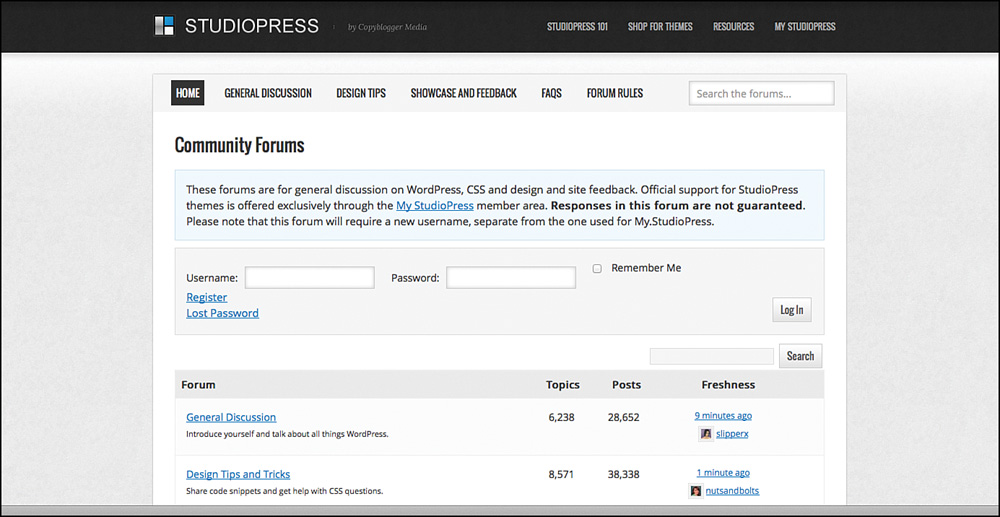
Customizr is an interesting option for a theme that has several components to the home page. Just turning it on, you can see the site has a whole new look and feel. It’s impressive and dynamic (Figure 17.8) with a slider (which is defined through clever use of Media settings) and the capability to set featured pages to highlight as key content. For posts, you can display as many as you want on the home page, but I think one or two is good for this layout. Customizr, like many other themes of its kind, has a set of menus and options you can use to set the various aspects of the theme and the layout. Customizr happens to use a clever application of the live theme preview so you don’t have to hop from settings to site to settings to site to see what looks good (Figure 17.9). For example, here I’m setting what the featured pages are on the home page; before saving the settings, I can see what they look like (Figure 17.10). Customizr is just one example of a theme designed to adapt to different kinds and uses of WordPress. If Customizr looks like the theme for your project, I encourage you to read more about it on its site: http://www.themesandco.com. There are so many different options out there to pull off a website with WordPress. Many themes use the same approach as Customizr, with settings and options to go through and customize for yourself. When you’re picking a theme—free or paid—that you want to use for a website, make sure there is good documentation on how to use it. Customizr (which is free), StudioPress (paid), and WooThemes (paid and free) all have examples, sample code, and great user forums (the StudioPress forum is even powered by WordPress) to help you learn how to tap into the power of these themes.
While you’re developing your next great online masterpiece, you might want to keep it hidden from the world—probably doing more than just telling search engines not to index it. Welcome to the world of private sites, and the good news is that it takes only a couple plugins.
Making a Private WordPress Site
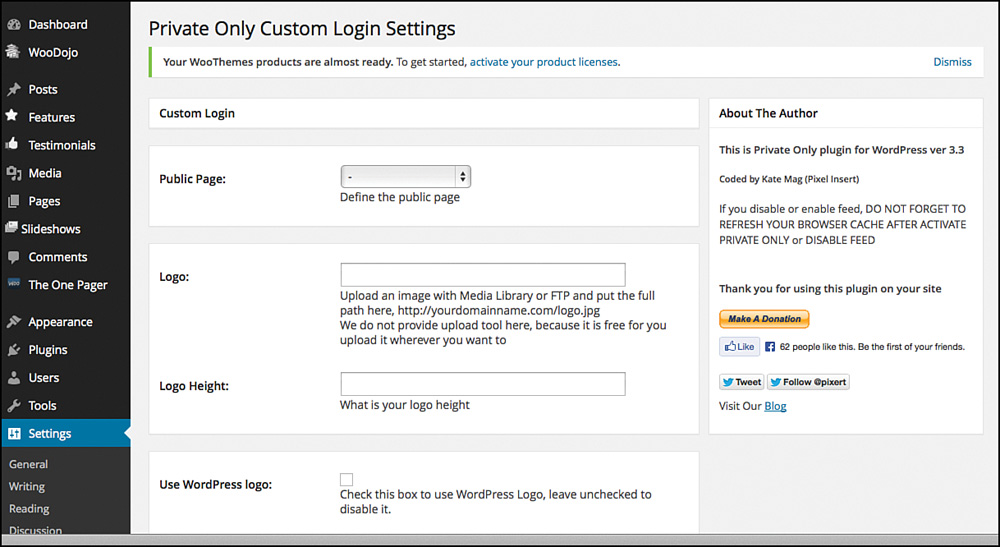
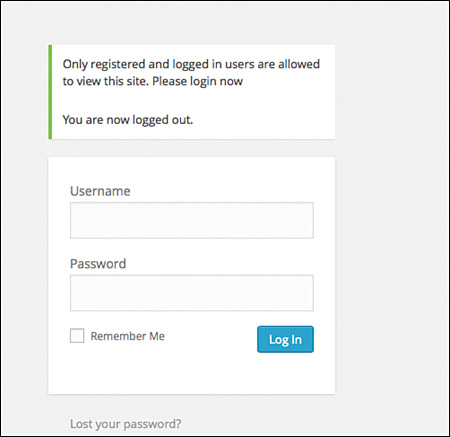
Whether it’s for a site that’s in progress and not ready for the whole world or—as we’ll cover in a minute—a private site for team communication and collaboration, sometimes things just need to be on a need-to-know basis. The fastest and easiest way to make a private site is with a plugin like Private Only (http://wordpress.org/plugins/private-only/). It does one thing really well: keep people out. The settings are very simple (Figure 17.11), you actually don’t need to configure anything. After you install and activate the plugin, only users with Subscriber or higher privileges can see the site. Everyone else? Nope. If you go to the site’s URL, you see this (Figure 17.12).
When you’re ready for the site to be public, all you have to do is turn off the plugin. There are a couple of caveats here. First, the people who need access to the site need to remember their usernames and passwords. This can be a challenge for some folks to manage (Why do I have to keep logging into this site? Do you want the rest of the world to see it? No. Then...), but this is the cost of a little measure of security. Also some plugins (like Jetpack and some premium plugins and themes) like to “call home” once in a while. Most of the time, the plugin won’t interfere with that process, but it could, so just keep an eye out if you’re having issues getting something working. Now that you have a private site, how about using that bit of knowledge to make a new communication and collaboration site with WordPress? Not possible? Oh, yes it is.
WordPress for Communication and Collaboration with P2
In May 2009, the folks at Automattic unveiled P2 (http://wordpress.org/themes/p2), a new theme built especially for collaboration. In the announcement post—http://ma.tt/2009/05/how-p2-changed-automattic/—Matt Mullenweg talked about how P2 evolved from the theme Prologue, which was one of the first themes to let people create posts from the home page, and how Automattic (with its decentralized, mostly remote workforce) needed something to be able to communicate without getting bogged down with emails. P2 grew out of the need to stay in touch, converse, comment, see updates in real-time, and be able to follow specific conversations more closely. At the end of the post, Matt says this:
It completely transformed how Automattic works internally and I think is one of the most valuable things we’ve adopted in the past year. I’m on the road a lot, and sometimes my only connection is checking the mobile-optimized P2 on my iPhone.
I’m excited about P2 partly because blogs provide an incredibly robust infrastructure on which to build more advanced apps, and this is a good example of that. I’d love to see more themes that transform what WordPress can do top-to-bottom.
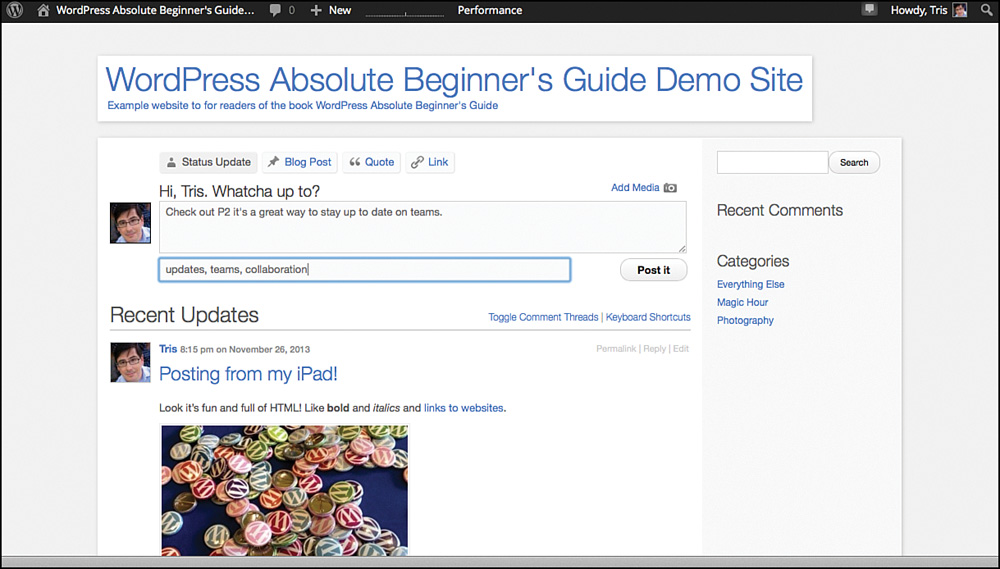
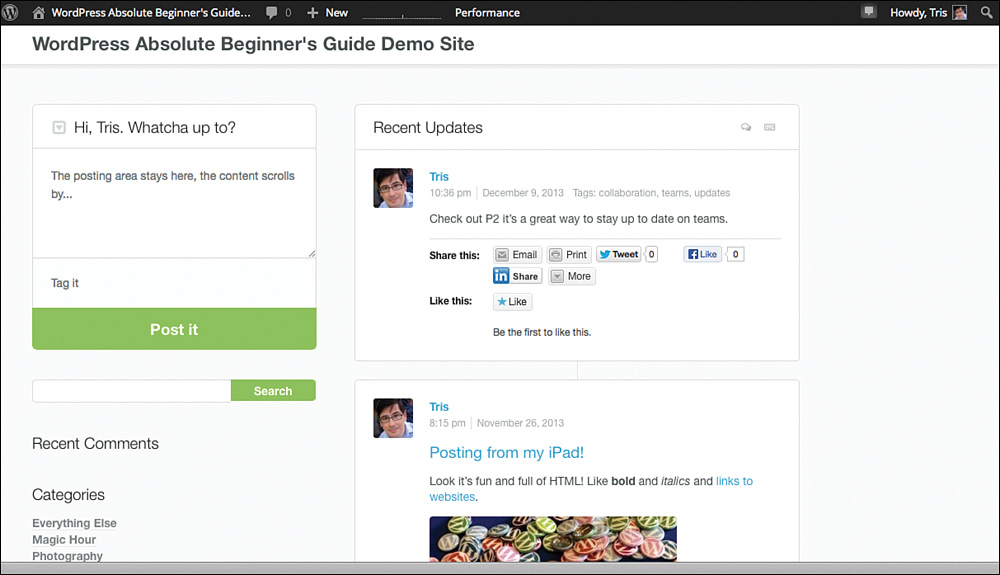
That was four years ago, and P2 has only gotten better. I’ve used it on a number of projects and although design-wise it’s spartan, functionality-wise it’s rich (Figure 17.13). You create posts from the top of the home page, tag with keywords to help people track conversations and topics, and post. Simple. When your team visits P2, all the new posts and comments won’t just be at the top of the page; they will be highlighted with a subtle yellow color. As you read, the color fades away. P2 is great and works really well, but the folks at WooThemes took it a step further with a child theme called Houston (http://www.woothemes.com/2013/11/houston-we-have-lift-off/; http://wordpress.org/themes/houston). Like Automattic, WooThemes needed to keep its folks in the loop, even when they couldn’t be in the same space (or even if they were in the same space). They loved P2, and because P2 can work as a parent theme for other themes, they started work on their own version—Houston (Figure 17.14). Combining P2 or Houston with plugins like P2 by Email (http://wordpress.org/plugins/p2-by-email/) and Markdown for P2 (http://wordpress.org/plugins/markdown-for-p2/) and many others (http://wordpress.org/plugins/tags/p2) can enhance your P2 or Houston-powered site with additional functions and settings. In the end, if you can get more communication, more collaboration, and less email, you’re going to come out ahead of the game.
Setting Up Forums in WordPress
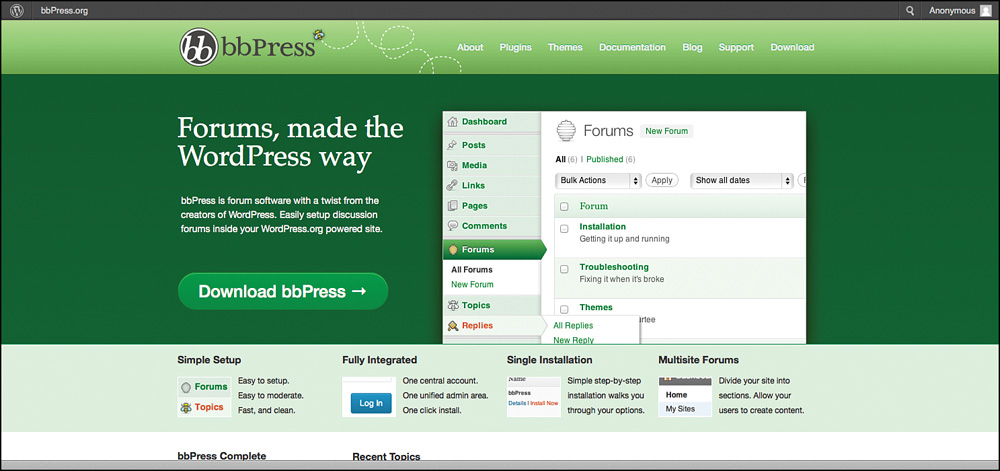
Maybe a private site or collaboration site isn’t what you need. How about a forum? How about a place where people can post, discuss, and answer things? Forums are some of the oldest tools on the Internet, except that many of the ones that are web-based are a royal pain to set up, use, and maintain. Between a raft of settings and keeping spammers at bay, forums can be more hassle than they are worth. That is why Matt Mullenweg created bbPress, a forum system that is built as a WordPress plugin so you can run it either as a portion of an existing site or run it on its own separate site (using WordPress) (Figure 17.15).
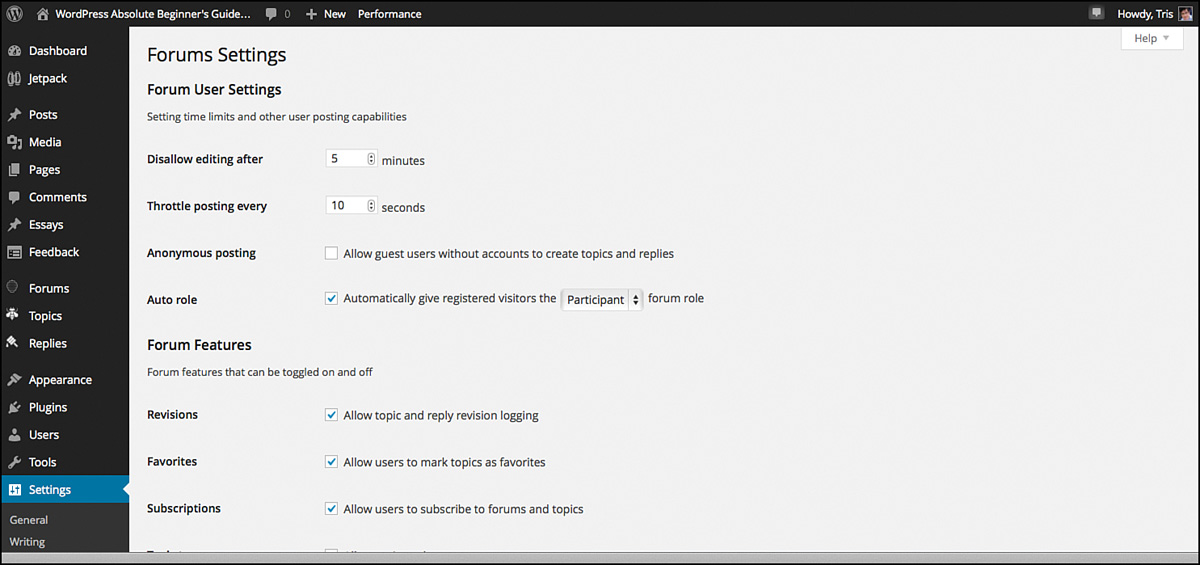
After you download and install the bbPress plugin, getting a forum set up takes just a few minutes (Figure 17.16). The bbPress Codex is a good starting place—http://codex.bbpress.org/step-by-step-guide-to-setting-up-a-bbpress-forum/—but here is the real gist (and how I got a little confused in the first place). When you think of a “forum,” you need to think a little more broadly than just “a place for discussion”; think “a container for discussions,” and these containers can have parent-child relationships (to define the topics for discussion). For example, on one of my sites, I have a parent forum for beta testers and then child forums for release notes, bug reports, feedback, and feature requests. Topics, in the bbPress world, aren’t groups of conversations; they are the first post in a discussion, within a forum. In the old forum parlance, they are posts, threads, or discussions. Topics were the idea of what bbPress uses for child forums. After you get your head wrapped around that, bbPress is a breeze. You can create new topics and replies from the admin Dashboard or from the site. You have control over users and what they can do. You can make your forum as locked down or open as you want. One of the big problems with managing forums is keeping spammers and spam out of the equation. Thankfully, bbPress is fully integrated with Akismet, so you’re covered there, too.
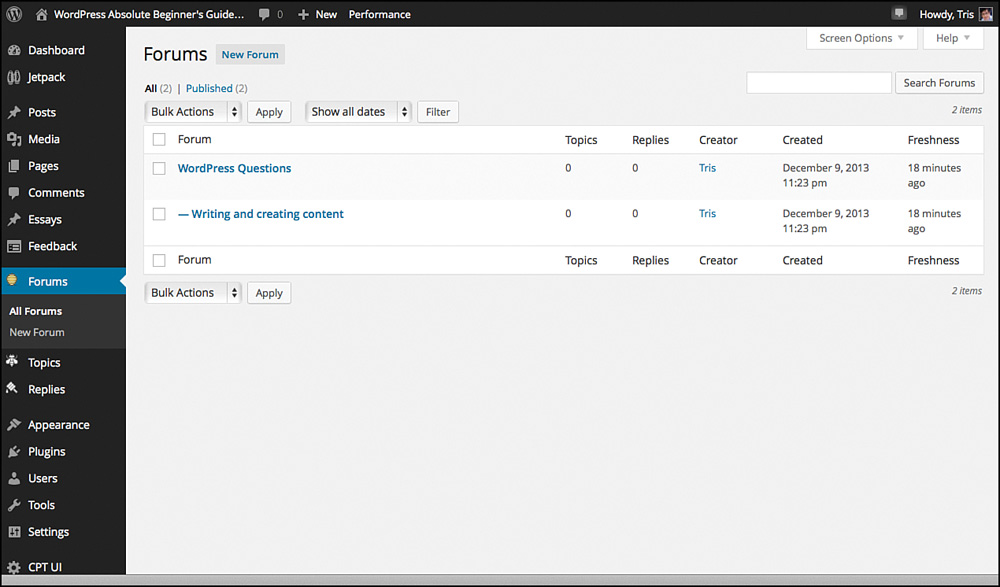
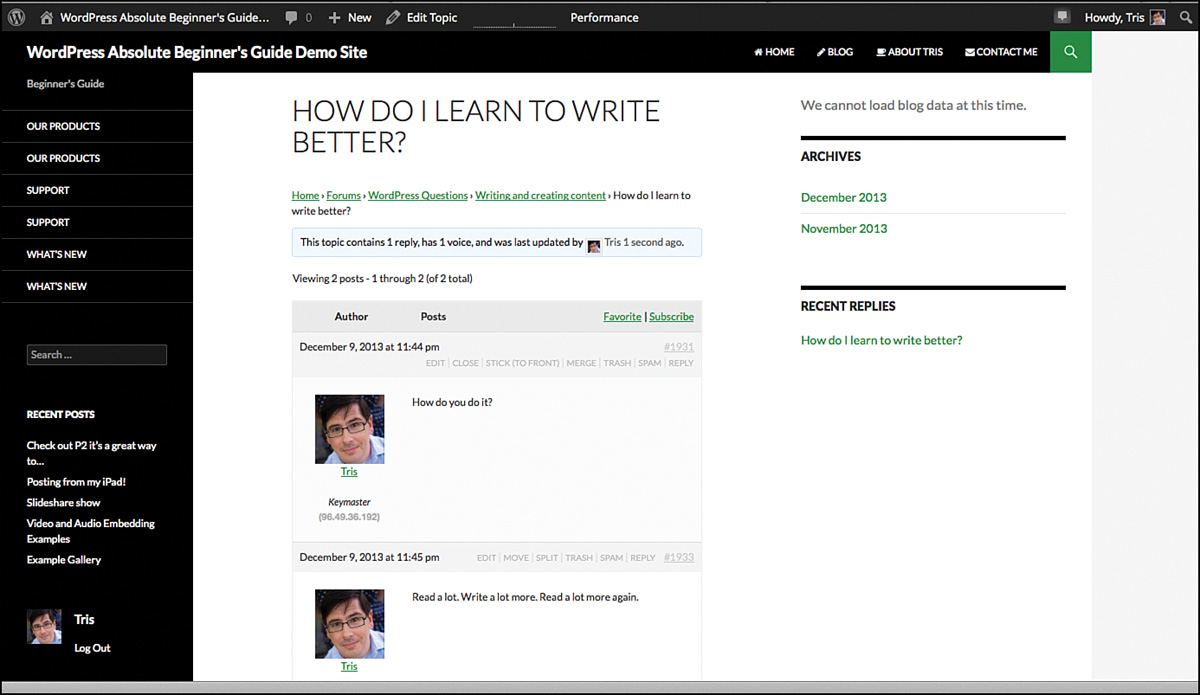
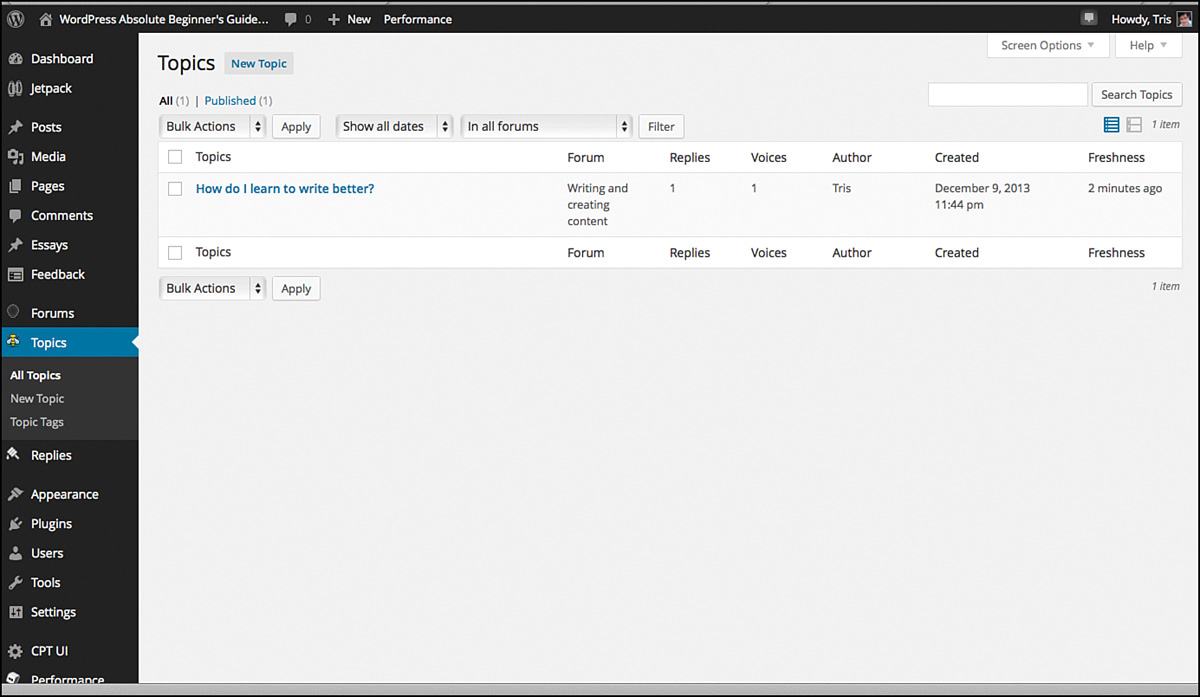
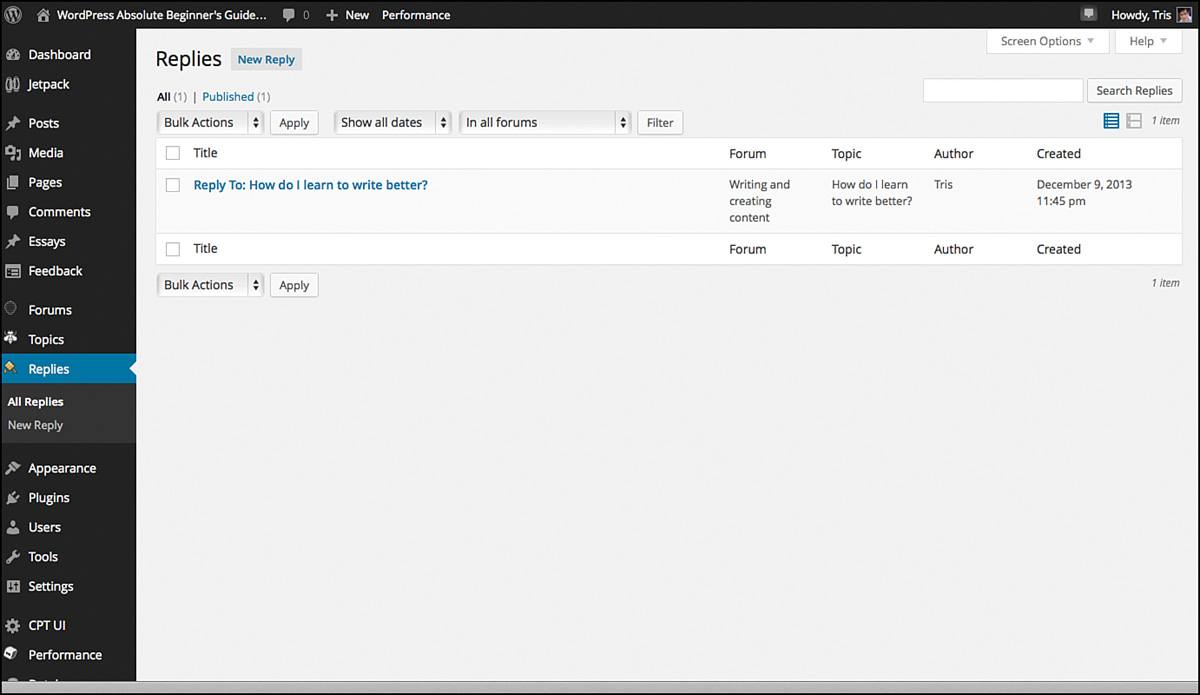
I created a couple forums on the demo site along with a primary parent (WordPress Questions) and a child (Writing and Creating Content). On the site (using the new default theme Twenty Fourteen), it looks like Figure 17.17, and in the admin Dashboard, the forums look like Figure 17.18. If topics (the threads of discussion) have been started and replied to on the site, it looks like Figure 17.19. Now on the Dashboard, the Topics are in one place (Figure 17.20) and the Replies are in another (Figure 17.21). I find that a little disjointed, but this isn’t what your visitors see; it’s what you, as the admin, see in the back end. So users just think they are seeing a forum that works.

As far as making your forum look cool, like StudioPress has done (Figure 17.22), it’s just a matter of using a theme for your forum. For a starter forum, you can stick with your current theme and grow from there.
Because your site can’t really run two themes at once, if you want a completely different look and feel for a forum, you either run the forum as a separate install of WordPress or learn more about making custom WordPress themes. The former you have covered through this book; the other is a book for another day.
What if you want to experiment on your own, without even a host or domain or anything but a computer? Can you “try out” WordPress on your own computer without anyone on the Internet being able to get to it? Absolutely. Having a local install of WordPress is how most of us develop our new WordPress themes and sites, not to mention how we learn and experiment. So how do you pull this off? It just takes a little downloading.
Running WordPress on Your Computer
Yes, I know I said that WordPress isn’t like a program you run and install on your computer. So how can you run WordPress on your computer if it isn’t designed to run on a computer? Simple, we install all the extra programs that servers have running, and then we can run WordPress. Yep, I’m saying we make your computer a little server.
 NOTE
NOTE
Just because we’re making your computer a server, that doesn’t mean that people can get to your computer through the Internet and start browsing around. We’re putting the software in place that servers run and have, but not opening your computer up to the world. Your computer will stay nicely hidden on your network at home behind your router and everything. Yes, if you know what you’re doing, you can take what I’m showing you here and make your computer available on the Internet. But most, okay all, Internet service providers frown upon this. So don’t. Not unless you really know what you’re doing and know the risks. For now we’re going to keep things safe and locked away.
The first step is to get the right components. In the server world, the generic term for what is needed for WordPress to run is called a LAMP stack. LAMP stands for Linux Apache MySQL PHP. Linux is the operating system, Apache the web server, MySQL the database program, and PHP is the scripting language. Now most of us aren’t running Linux—we’re running Macs or Windows, so do you have to switch to Linux? Not at all, because there are MAMP and WAMP stacks too (Mac and Windows, respectively)! Here’s the gotcha, though; using a generic MAMP or WAMP stack is going to mean doing a lot of manual things to install WordPress. Hard? Nope. More than many folks want to deal with to experiment? Yes. On the other side, if you are thinking about getting into WordPress development and this book is your first foray into that world, then learning to use a generic MAMP or WAMP stack is a really good idea. For everyone else, I have something better: a prepackaged stack that installs WordPress, all the other components, and does all the configuring for you. It is like being able to run WordPress on your computer like any other program!
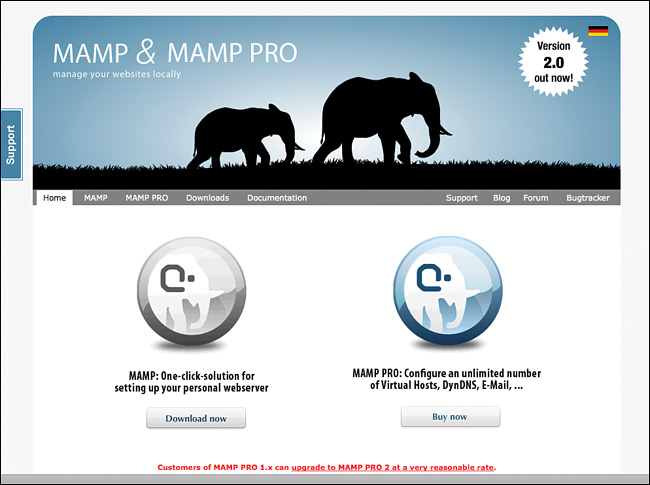
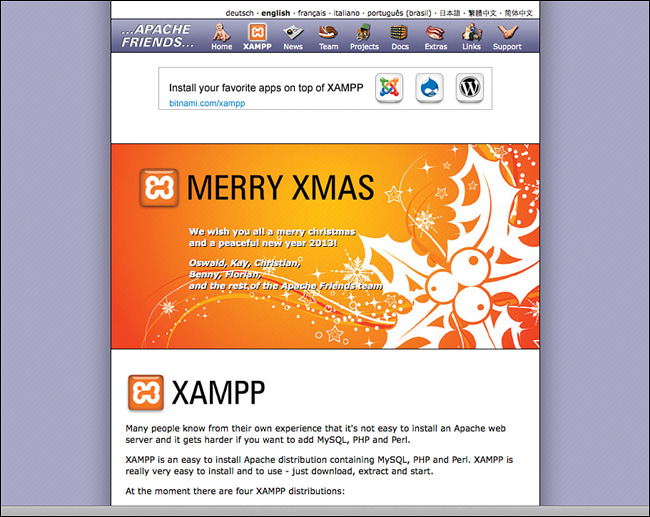
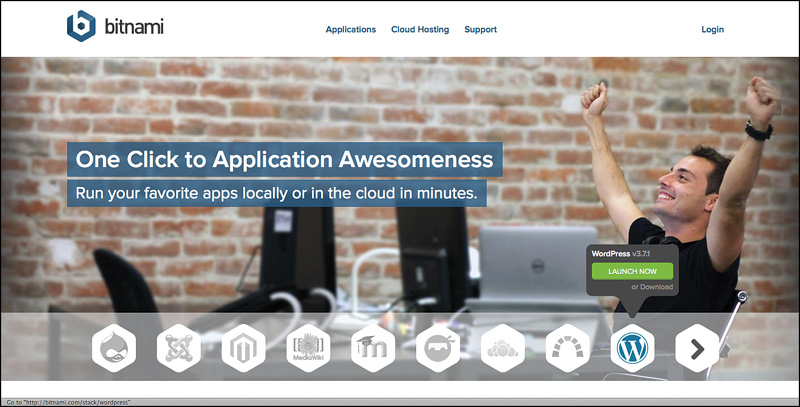
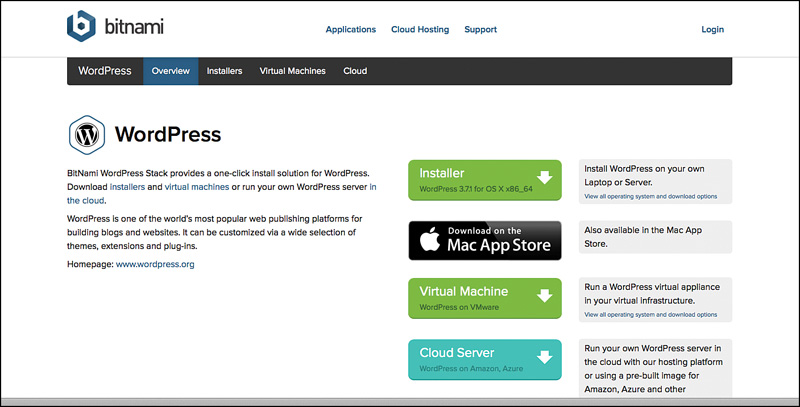
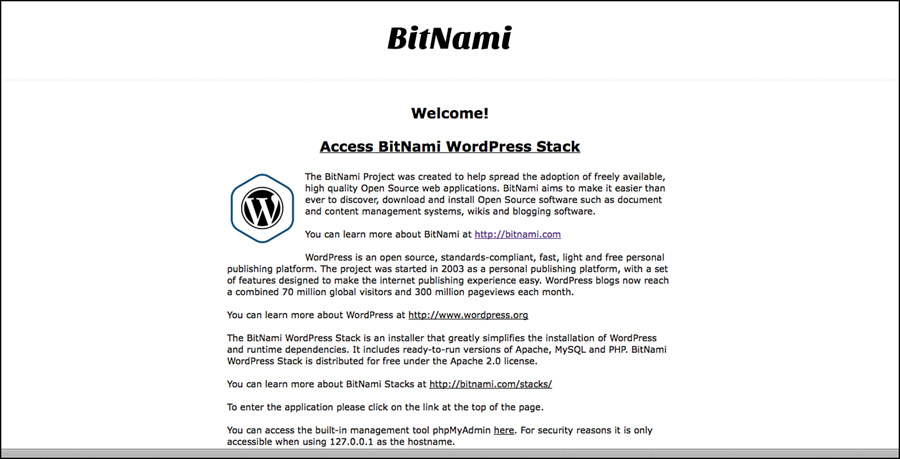
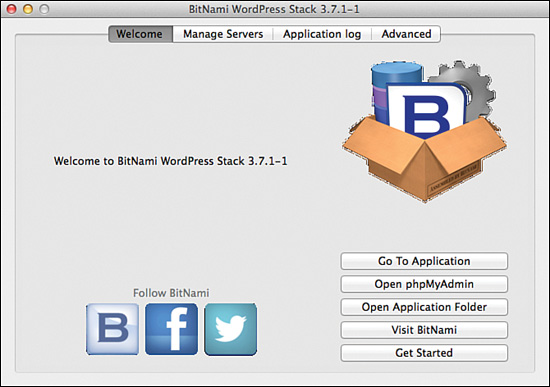
If you want to check out a generic MAMP stack, MAMP from MAMP.info (Figure 17.23) is the choice of every programmer and developer I know (on a Mac). For Windows, XAMPP (http://www.apachefriends.org/en/xampp.html) (Figure 17.24) is the leading choice. Those aren’t the only choices out there, just the most flexible ones. For something prepackaged to just run apps WordPress (and many others), I love BitNami and its stack bundles (Figure 17.25), and the one for WordPress is especially awesome (Figure 17.26). After you download the application, just run the installer and go through the steps. The installer will ask you for your name, email, username, password, and what you’d like to call your site. Remember, these are standard things WordPress needs regardless of where it’s installed, so don’t worry. The rest of the install process takes just a couple minutes more, and when it’s done you can click to visit your new site and log in (Figure 17.27), and there will be a little controller program running that lets you relaunch your new WordPress site (and shut it down) when you need to work on it again (Figure 17.28). Beyond that, WordPress works just the same. There might be a few plugins (like Jetpack) that don’t behave quite right because your local install of WordPress isn’t accessible on the Internet, but that’s about it. Remember, because this local install isn’t available on the Internet, you can’t send someone the link that you see in your browser (http://127.0.0.1:8080) and have them arrive at your computer. That URL is also referred to as localhost and references the machine you’re on. Your localhost is your computer, your friend’s localhost is your friend’s computer. Adding more WordPress instances requires downloading an additional WordPress module and running the installer for it. The module assumes that you already have a stack installed on your machine. I use BitNami over MAMP because I can install WordPress quickly and just as quickly uninstall it if I don’t need the demo server around anymore.
So what if you have made an awesome site locally and you want to move it to a host (or WordPress.com if you’re just making content)? Possible or problematic? Possible—in fact, with the right tools, it’s pretty easy.
Moving a WordPress Site
There are a few ways to move a site from one host to another or from your machine up to a host. Before we get into the mechanics of it, let’s talk about what actually needs to be moved. First, is your content. If you’ve written content you want to keep, you’ll want to move that. Next are the images with that content and with your theme (headers, backgrounds, and the like). Next is the theme if you’ve customized it. If you haven’t done anything special to it, you don’t actually need to move the theme, you just need to install it. Plugins are a toss-up for moving. It’s handy to move them, but unless you’re moving the database, too, you’ll just have to reenter the settings anyway. WordPress itself? You also don’t need to move it. You can just do a nice, clean install of that on your new host.
Here’s the easy way to move a WordPress site. Set up your new WordPress site on the new host. If you are going to be switching your domain to that host, too, ask them for help to make the switch and moving as painless as possible:
• Export the content from your local install or old host.
• Import into your new site (we covered this in Chapter 11) with the images.
• Install the plugins and theme you need.
• Reconfigure everything.
Yes, this involves redoing settings and widgets and all the rest. However, all your content should be there, and by reinstalling plugins and themes, you make sure that the settings are correct and not pointing to the wrong places. This method doesn’t, however, also involve exporting your database, importing your database, and making sure all the references to the old site are removed from the database. Messing around with databases is not something to be taken lightly. If you mess up your database, you’re in a world of hurt—a world where I hope you took the backup advice from Chapter 15, “Maintaining WordPress Sites,” seriously. Still, if you’re a little braver, I suggest the Duplicator plugin I mentioned in Chapter 15, which makes the process of moving your site, all the files, and the database about as painless as I can imagine.
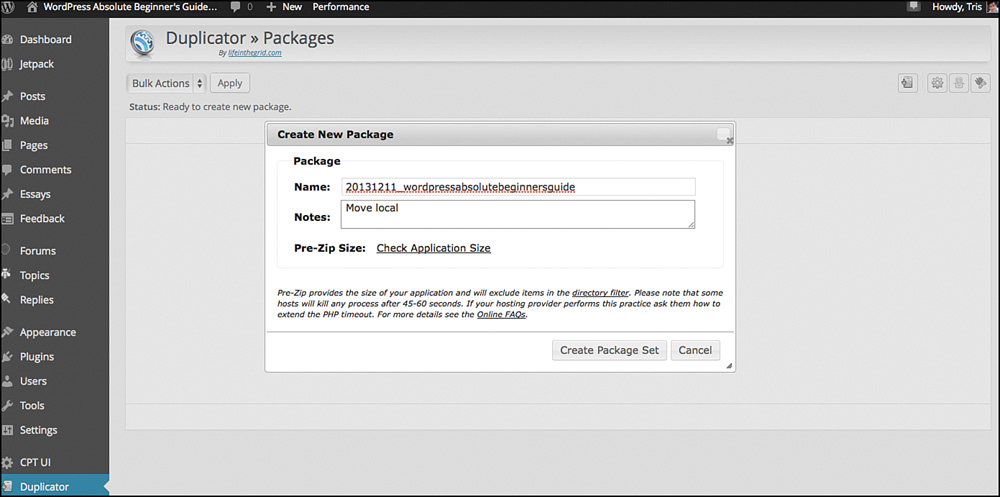
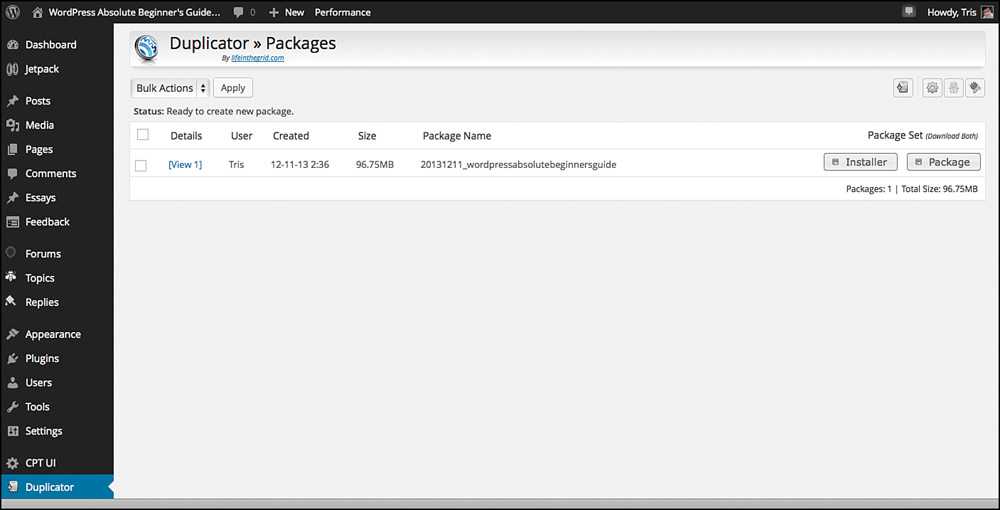
Duplicator doesn’t just package up and make a copy of your site, it also creates an installer script to put everything right where you expect it to be. After downloading and installing the plugin, you open the Duplicator page to create a package. There is a link to make sure your server where the site is can handle the plugin. Click that to be sure everything will work, then create your package (Figure 17.29). When it’s done, you’ll download two files: the installer and the package (Figure 17.30). The installer is just a little PHP file, and the package is a compressed copy of your site (with everything in it). So a giant site will be a giant download. The demo site isn’t too big, but still a few megabytes.
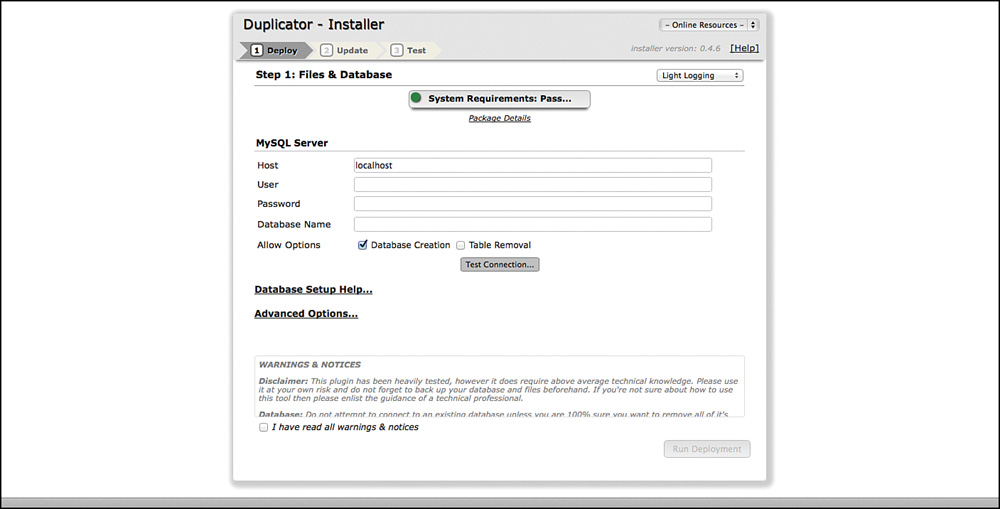
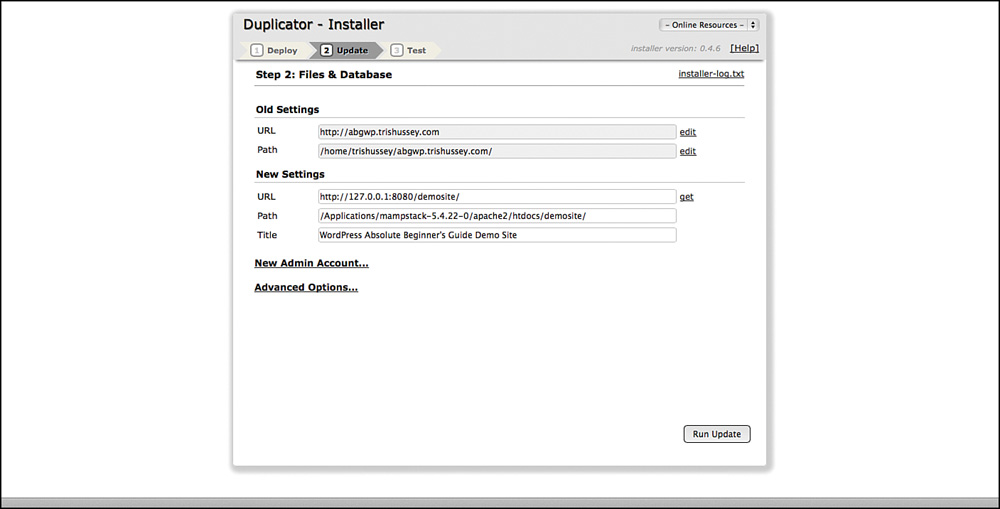
To use the installer and package, you need to drop them into an empty directory on your host (or local MAMP or WAMP install), create an empty database, and go to installer.php in your browser (Figure 17.31). Yes, the wording is dire and it needs to be. If you don’t pay attention, you can very easily take out a live site. When it’s all said and done, you should have a perfect mirror of your site, but in a new home. So what is Duplicator doing? The big thing it’s doing is moving your database and changing all the references from the old location to the new one (Figure 17.32). This is no mean feat. If you manually export your database using a tool like phpMyAdmin and then import the database to the new location (also using phpMyAdmin), you’re not even close to done yet. Before you kick off the new WordPress site, you have to make sure the database is pointing to the new home or you might accidentally change something on the original site, not the new one (believe me, I’ve done it more than once).
After Duplicator is finished, you can log in to your site with the same username and password you had before. It’s pretty amazing how well it works. Sure, some plugins might not take kindly to the move; however, in my tests, I’ve been very pleased with the results of the moves and haven’t had any show-stopper issues. After years of moving sites either the “easy” way (which might be easy, but is also time consuming to reset everything) and the hard way before finding Duplicator (which has led to a lot of swearing and finding the right database queries to run to fix things), I’m glad I’m using Duplicator now. I have found hosts where it doesn’t work, where it looks like it runs out of memory or something before it finishes. However, if you are moving a site, you might think about not just using Duplicator, but also having a geek friend in your back pocket to call in for help.
Conclusion
This chapter has, I hope, opened your eyes to lots of possibilities for using WordPress. Not long ago, building a website with WordPress was a chore; now it’s an accepted best practice in web development (because of the time it saves and the results you can get). So a website now might be old hat, but forums, collaboration platforms, and private sites are pretty cool options that are only getting more sophisticated.
I have one last piece of advice for you when trying things in this chapter: read up on the latest updates and be patient. Lots of these tasks (like moving your WordPress site to a new host) have steps that you need to follow closely. Forums, even bbPress, can still be complicated if you don’t take some time and read a bit more on their ins and outs. Patience. Reading. More patience. Those are the keys to these advanced topics.